
Picture this, for every inch of rain that falls on a 500 square feet area of your roof; you can collect up to 300 gallons of it to use around your property.
If you live in an area that doesn’t restrict the use of rain barrels, you could be saving money every month on water. Rainwater can be used for a variety of tasks including:
- Rinsing off your garage floor
- Watering your indoor plants
- Watering your outdoor plants
- Flushing your toilet
- Creating an outdoor shower
- And more
I know a potter who has a studio in her garage. If you are at all familiar with pottery making, it required quite a bit of water to keep the clay at a usable moisture level, to rinse and clean after working, and to recycle the clay itself.
Thanks to her ability to collect water every time it rains, she can exclusively use rainwater for everything she does in her clay studio. Can we say WOW!
Here’s what you need to do to make your own DIY Rain Barrel and tap into the otherwise free natural resource.
Supplies Needed
- Bulkhead Fittings:
- ¾ inch Ball Valve Faucet
- ¾ inch Fitting
- 1 ½ inch Fitting
- Downspout Attachment
- Mosquito Screening (8 inches by 8 inches)
- Overflow Hose with Valve and Fittings
- Teflon Tape
- Drill
- Flathead Screwdriver
- Felt Pen or Marker
- Tape Measure
- Rasp or Round File
- Hole Saws:
- 1 ½ inch Hole Saw
- 3 inch Hole Saw
- 5 ¼ inch Hole Saw or a Jig Saw
- One 55-gallon Food Barrel
- Two 6-inch plastic flower pots

Here We Go!
- Clean and dry your food barrel inside and out.
- Measure 4 inches up from the bottom of the barrel and mark with your felt pen. This is where your ¾ inch bulkhead fitting and faucet will go.
- Cut a hole using the 1 ½ inch hole saw. You may want to place the barrel on its side for easier access to the drill site and better stability.
- Measure 4 ½ inches from the top of the barrel and mark.
- Switch to your 3-inch hole saw and make the hole for the overflow.
- Clean loose pieces of barrel material from around the holes’ cuts using the rasp or sandpaper.
- Use a 5 ¼ inch hole saw, or a jigsaw to cut out a circular hole out of the top of the barrel. This opening is where your DIY filter will fit inside and where the water will enter the barrel.
- Depending on the flexibility your downspout, you’ll probably want to place this hole toward the opposite side of the barrel from the location of your faucet hole.
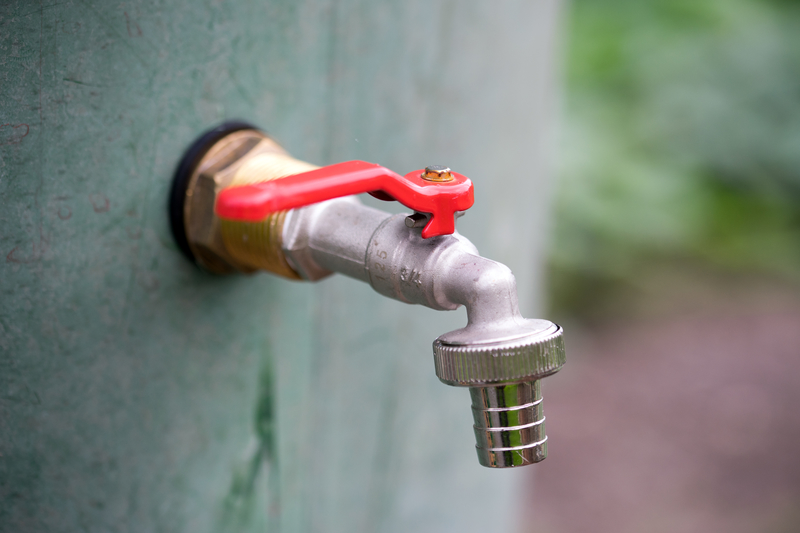
- Install the ¾ inch Faucet Fitting.
- Install the ¾ inch Ball Valve Faucet using the Teflon tape to prevent leaks.
- Install the 1 ½ inch Bulkhead Fitting Into The Overflow hole (the second hole cut).
- Create the filtration system, using the 6-inch flower pots and the mosquito screen.
- Attach the screen to the bottom of one flower pot then put that pot inside the second one. Basically, you are sandwiching the screen between the 2 flower pot when they are stacked together.
- Place your new “filter” into the hole on the top of the barrel.
- Place your new rain barrel on the site you want to use it and insert the downspout into the filter.
- Attach the overflow hose to the upper side hole. This hose can either be placed away from the barrel to disperse excess water when the barrel fills or can be used as a link to another barrel, where it becomes the supply line instead of a downspout.
Voila! You are now able to save water (and money) with your new supply line that comes straight from nature.