
Despite some claims from animal rights groups, shearing is necessary to maintain the health and comfort of your sheep.
There are 2 main reasons you need to have your sheep sheared once a year.
- If the sheep’s thick wooly coats are not removed before the summer months, they can become very uncomfortable. Additionally, the amount of dirt that can amass and become matted to their bodies could develop into a health risk.
- The wool from certain breeds is a valuable commodity and a good source of annual income. When raised correctly with a proper diet, a single sheep can grow up to 10 pounds of wool.
Whether or not you are keeping them as a source of income or food, your sheep will need you to get them ready for the summer months to maintain a happy and healthy lifestyle on the farm, ranch, or homestead.
Note: To make this process go a lot faster, take a look at these awesome shears I found on Amazon at a 65% discount right now <PanelTech Sheep Shears>
There are a number of techniques out there, and like a person’s handwriting, each individual will develop a style of their own as they practice and get better. Go get started, here are some basic steps, and tips to follow.
Starting Position
Some experts say start by laying the sheep on one side, others recommend starting on their backs with their feet in the air. Depending on the size of the sheep, you can decide what will work best for you.
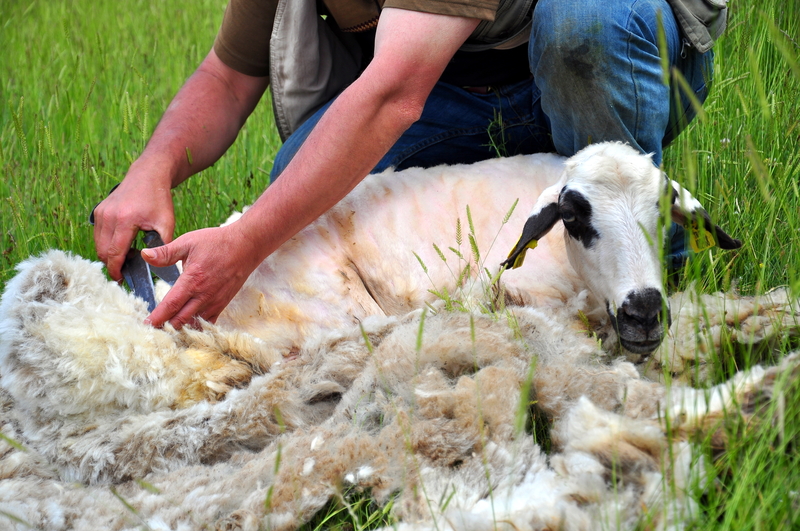
Shearing the Brisket
No matter the technique or starting position you use, most experts say to start shearing on the brisket, or belly area. If you are planning to sell your wool, the belly area is often too dirty to sell, so starting there will allow you to tackle the worst areas around the belly and crotch areas and get rid of them before you move on to the more valuable areas.
When you start shearing, make sure your blows (strokes) are long and confident.
Move down the belly area, around the crotch and the tail. Separate the wool removed from these areas and discard.
Start on One Side and Work Toward the Middle
The removal of the brisket wool will leave a nice starting place to move onto the sides.
To continue, start on the back leg, shear around it, and then shear up to the shoulder in a long clean blow. Trim the head and neck then work your way back down and around.
Repeat this on the other side then finish with the back.
When finished the ultimate goal is to have a single layer of wool that can be rolled or folded up for transport.
Tips for Maneuvering Your Sheep
To get your sheep into the positions needed to access each area, you can apply the following techniques.
To control the head
Place your thumb in the sheep’s mouth behind the incisor and wrapping your fingers under its chin.
Take a firm but gentle hold of one of the ears and use to guide the head and body.
To hold in place while shearing
Rest the sheep’s body against your legs or between your knees.
Lay the sheep on its side and straddle with your legs.
Keep in mind, the calmer and more comfortable the sheep is, the less they will want to wriggle out of your control to get away. This is especially important for larger sheep breeds to ensure a successful shearing experience.
Sheep shearing is not an easy task, but the rewards are worth the effort, both for you and your sheep. Professional shearers make it look easy but remember, they’ve had years and years of experience. Like most things worth doing, practice makes perfect.


