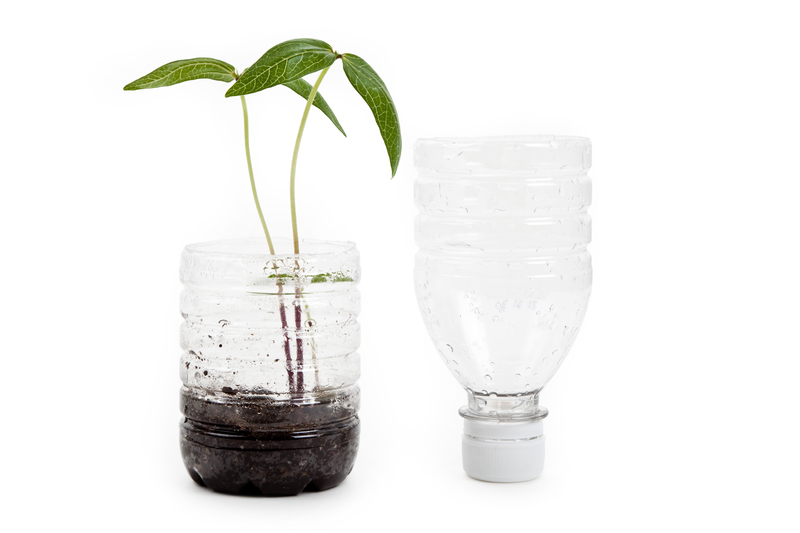
When you are getting ready to start seeds for spring planting, you may find yourself with more seeds than starter containers.
Instead of running right out and buying some at your local garden center, try digging through your plastic recycling bin instead. Empty plastic soda and water bottles are durable enough to handle taking on plants but easy to cut down, trim and otherwise alter to create a handy little planter to suit your needs. Here are two options to create plastic planters.
Standard Planter
Cut or punch drain holes around the bottom of the bottle. Any easy way to accomplish this is to turn the bottle upside down and use an awl, drill or screw and screwdriver to punch through the plastic.
Most bottles have a built-in pattern you can follow. Just place a hole in the center of each raised area of the bottom, so when its flipped back over, the holes will be evenly spaced at the very bottom of the bottle.
If you need to make the initial holes wider, a large screw will force the holes open more.
Remove the top of the bottle. In case you were wondering why we didn’t do this first, leaving the top on makes the bottle more stable and easier to work with when punching the holes in the bottom.
A good guide to measure how far down to cut is to remove the part above the top of the label on the bottle. If that has worn off or been removed already, your best guess will be fine.
A sharp pair of utility scissors, or a utility knife or box cutter are good options to make a clean cut all the way around the bottle.
And, there you have it, a basic round planter that will provide good drainage for your fledgling plants.
Self-Watering Seed Starters
This method not only lets you keep the moisture level of your soil easier to control, but it also uses the entire bottle, even the cap, so there is no waste material going back into the recycling bin.
- Cut your plastic bottle in half, separating the top from the bottom.
- Punch a hole into the middle of the bottle cap.
- Take 12-18 inches of yarn or string, fold it in half and tie a loop at the end of the folded side.
- Thread the loop through the hole in the cap so that the knotted loop will be located on the inside of the bottle cap with the two ends hanging out the other side.
- Screw the cap back onto the top of the bottle, making sure the loop sits loosely inside the top of the bottle.
- Fill the bottom part of the bottle with a few inches of water and the place the top upside down in the bottom so that the two ends hang from the cap and get submerged in the water.
Once everything is in place, the string/yarn will draw water up into the soil that surrounds the loop in the top. To add water, you’ll only need to lift the top part out, fill the bottom area and replace the top.
You’ll be able to see exactly how much water is there and know precisely when its time to top it off.
Suggested Article: DIY Plant Propagating
Now You Can Get Planting
Once completed, you can use these upcycled planters like you would any other to get your seeds started. Place them all together on a shelf in your kitchen or back porch for a delightful display that is also practical and useful.
Take a look at this “Medicine Chest” — how to deal with a disaster using alternative medicine. Check it out here>>>


