Page 6 of 81
1 4 5 6 7 8 81
Ethan Archer – Page 6 – Homesteader Depot

Author: Ethan Archer

  • How They Feed a Family of 9 for $250 a Month (Video)

    How They Feed a Family of 9 for $250 a Month (Video)

    I’ve heard of low grocery bills, but this one takes the cake! One of my favorite homestead YouTubers, Big Family Homestead, share how they feed their family of 9 for a mere $250 a month.

    What I love about this is that so much of their diet is supplemented by their chickens. They don’t live somewhere that they can raise dairy or meat cows or pigs, but they’re able to eat lots of free chicken and eggs and it clearly has a great impact on their grocery bill!

    Also, they are smart with their meal planning. They plan out a whole month’s menu at the beginning of the month and resolve to stick with that. They say this is the secret behind saving money at the grocery store, and after seeing how they manage to save money, I tend to agree!

    Enjoy:

    If you want to learn more about slashing your grocery bill, Click Here to see how You Can Save Thousands per year on your Food Bill.

  • 13 Useful Ways to Reuse Eggshells

    13 Useful Ways to Reuse Eggshells

    If you raise chickens or simply eat a lot of eggs, you probably produce a lot of egg shells! And simply throwing them in the trash is a huge waste. Egg shells are loaded with beneficial nutrients and properties, and there are lots of ways to reuse them and make the most out of your chickens or grocery budget!

    First off, you need to make sure you store them properly. You might be able to get away with tossing them all in a 5-gallon bucket on your back porch, or, if that attracts pests or mold, you might want to take more precaution. Depending on how you reuse them, you also might want to sanitize them before storing.

    The easiest way to sanitize the egg shells is to rinse them off, the spread them out on a cookie sheet and bake at 350 degrees for about 15 minutes. This will kill any harmful bacteria that might otherwise fester in your eggshell stash.

    Then, simply store in any container of choice, and use as needed!

    Here are some of the many ways you can reuse eggshells around the house:

    Compost
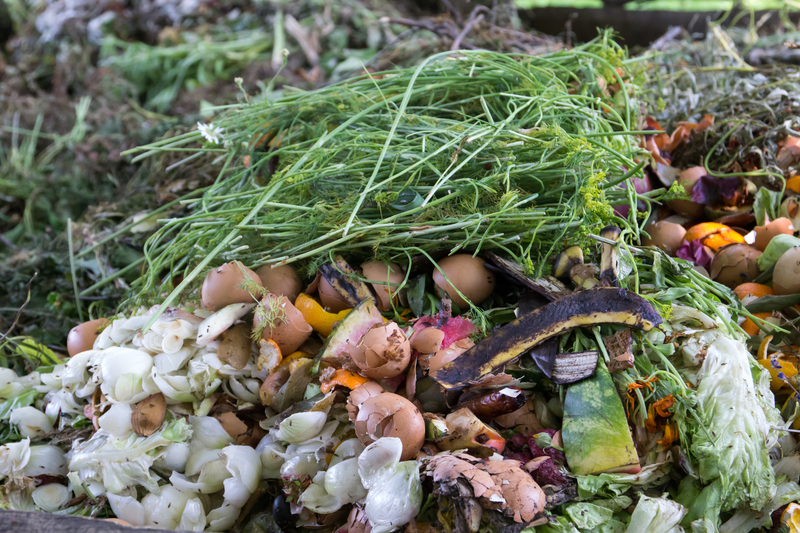
    The easiest way to put your egg shells to good use is to add them to your compost pile! They’re a great addition to any compost operation, and one of the most highly recommended organic materials to start a pile. You can save up a lot to get your pile started, and just toss freshly used shells on your pile as time goes on. If you’ve got a compost pile, you’ve always got something to do with leftover egg shells!

    Garden Fertilizer

    Eggshells are a fantastic garden fertilizer, as they contain up to 97% calcium carbonite, as well as phosphoric acid, nitrogen, and calcium. You can grind them up in a food processor and sprinkle around your plants, or work into the soil of a new garden bed.

    Pest Control
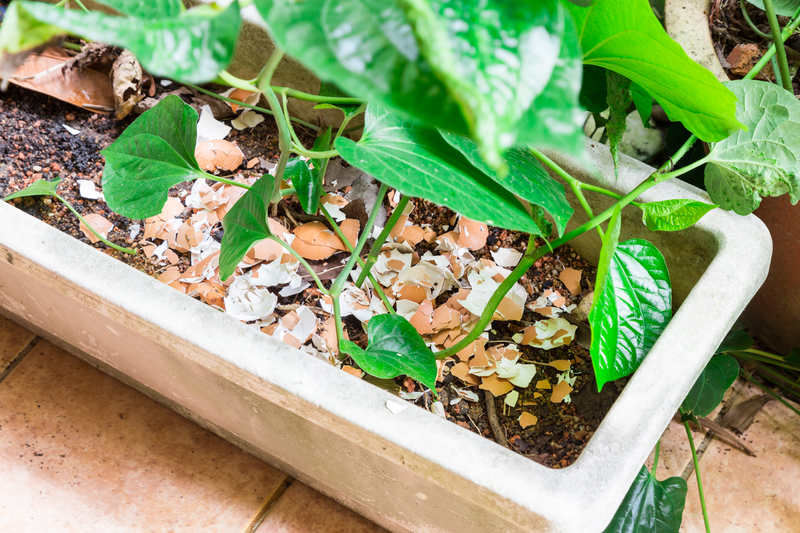
    Eggshells also work as an excellent pest control! Use ground eggshells and sprinkle in a circle around any plants that have been attracting slugs or snails. The sharp fragments of eggshells will be very uninviting to these little pests, and have the added bonus of fertilizing your plants too!

    You can also deter cats (of all things) from using your garden as their own personal litter box by spreading roughly broken up egg shells around the edges. They won’t want to step on those with their delicate paws, trust me!

    Dietary Supplement

    You’ll want to make sure to use properly sanitized egg shells for this, and grind them up very finely. You can use a powerful food processor or a coffee grinder, and then add to gel caps or simply mix into food. This is an excellent source of calcium and other nutrients, and about as whole as it gets.
    Chicken Dietary Supplement

    Your chickens can benefit from those healthy nutrients too! Simply add to their feed for an added calcium boost. Their eggs will be very healthy, because they’ll be supplemented by, well, the exact nutrients they need for healthy shells!

    Seed Starts

    A very fun and clever way to use egg shells is to start seeds in them! Simply fill the shells with potting soil and plant seeds. Once they’re sprouted, all you’ll need to do is to gently crush the egg shell and plant directly in the ground! It will slowly break down as the plant grows, and fertilize the soil as it goes!

    Bird Seed
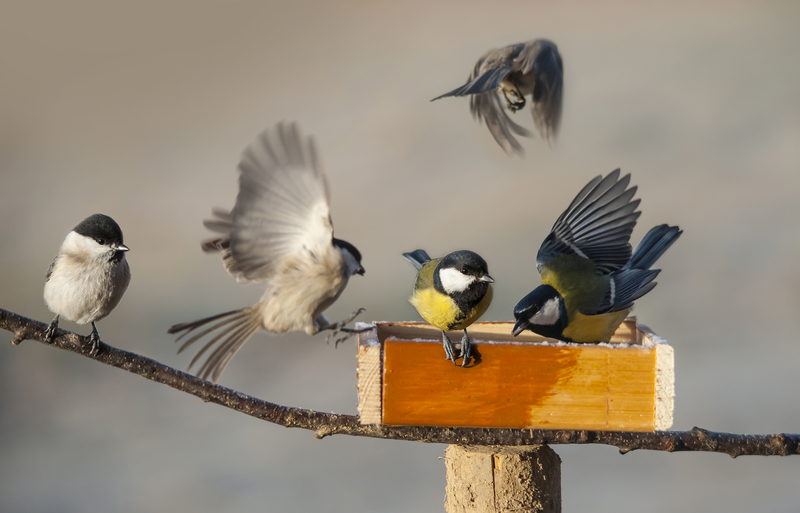
    Chickens aren’t the only birds who will enjoy your egg shells! If you crush them up and sprinkle them on the ground, you just might attract a few wild birds who will enjoy the nutritious treat.

    Household abrasive

    You can actually use finely ground eggshells as a handy, and totally natural, household abrasive. Add 1 cup finely ground egg shells to baking soda and use as you would Bon Ami for stubborn stains or grime. It’s excellent for cooked on grease and grime.

    Smoother Coffee

    You can actually add egg shells directly to your coffee to help reduce the acidity. Since egg shells are basic, they counteract the otherwise highly acidic coffee. Add a few egg shells in the machine with the ground coffee, or simply toss into your freshly brewed cup (although the former is probably preferable, I’m sure gritty coffee isn’t too appetizing to many people!)

    Natural Remedy
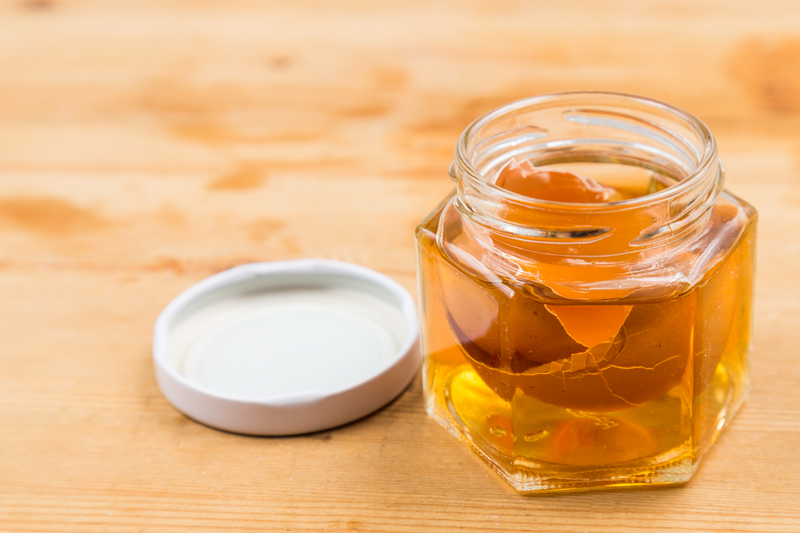
    Ground up eggshells can actually make a wonderful natural remedy for skin irritants. Let soak in some apple cider vinegar for a few days, and apply to minor rashes, hives, or bug bites.

    Face Mask

    You can even use eggshells in an all-natural, skin-firming face mask! Wisk up finely ground eggshells with 1 egg white, and spread on your face. Let dry, and rinse, following with toner and moisturizer.

    Suggested Article: “Apple Cider Vinegar for Beautiful Skin”

    Laundry Whitener

    This might be in the realm of old wives’ tale, but some say that if you toss some egg shells in with your whites, they’ll come out brighter!

    Candle Craft

    You can make adorable votive candles by pouring wax into an eggshell. Get creative with egg dying or colored wax! Very fun and frugal gift.

    Eggs are a fantastic food, and their shells are almost as versatile! Have you tried any of these eggshell hacks before? Let us know in the comments below.

    If you enjoyed this, you might also like….

    Long-Term Survival for Homesteaders…

    Natural Healing Secrets You Need to Know…

    Effective Primal Diet Hacks…


  • 6 Tips for Successful Deck Gardening

    6 Tips for Successful Deck Gardening

    Not everyone owns a sprawling homestead or has a large yard in which to garden, but that doesn’t mean there aren’t plenty of options for you to grow your own!

    Deck gardening is a great option for folks with limited gardening space, and you’d be surprised just how much you can grow on a deck.

    However, since a deck garden is first and foremost a container garden, there are some important tips to keep in mind to make your garden a success. Container gardening is a great option for anyone who can’t plant in the ground, for whatever reason, and if you follow this advice, you’ll avoid a lot of the potential downfalls.

    Water, water, water

    Watering plants is always important, but on a deck garden, it’s even more important. Not only do you need to make sure you water frequently and keep track of the moisture level of your soil, but you also need to make sure your deck will be able to handle all the water! Drainage will spill down below, for example, so if you happen to have neighbors with a porch below yours, you might want to make sure you’re not drenching them before you commit to a deck garden. Also, you will want to make sure all the containers you use have good drainage. And finally, you’ll want to make sure you have a good hose or reliable watering can, so you can access all your plants easily with your water source.

    Keep Size in Mind

    When choosing your containers, be realistic about what you’re trying to grow and how much space it will need. You might want to measure your deck and plot out a to-scale model of how much space you have and plan your plants and containers accordingly.

    When it comes to containers, bigger is always better. It’s always better to have too much space for plants than too little, trust us!

    Also, if you’re planning on growing anything that crawls, make sure you have room for a trellis or something else your plants can climb on.

    Finally, you will also need space to tend to the plants! When you’re planning out your deck garden spread, keep in mind the space you’ll need to water, weed, prune, fertilize, and harvest. Also, keep in mind the height of your container for this reason as well.


    Working Space

    You will also need somewhere to organize your gardening paraphernalia. A simple folding table in the corner works great, or anywhere you can store and use your pots, potting soil, pest control, gardening tools, etc. A lot of work happens on the sideline, so make sure you’ve got somewhere to do this.

    There are a lot of creative ideas online for small gardening “shed” ideas, so check out Pinterest or YouTube to see what experienced deck or container gardeners use. You will most likely want to make sure this is a space you can keep relatively dry. Potting soil can be kept under a folding table, for instance, and you could keep your tools in a toolbox or plastic bin to prevent rust. You will probably want to keep seeds inside, however, as they’ll need to stay totally dry and cool so they don’t spoil.

    The Right Soil

    When choosing soil for your containers, make sure you go with something that has been mixed especially for potted plants. This will ensure proper drainage and nutrients. You will also want to amend the soil according to the needs of each plant. Potted plants in particular really need their nutrients, and if you want your veggies to nourish you, you need to make sure they’re well-fed as they grow!

    Good Tools

    It can be tempting to go out and buy lots of fancy looking tools when you first get gardening, especially if you’re a novice and have no idea what you will need. For container gardening in particular though, you won’t need much, and what you do need, it’s important to choose quality items.

    You will most likely need a good pair of clippers, a quality spray bottle (or several) for pest repellant or disease treatment, and a small spade for transplanting, weeding or turning the soil. You also might find your needs arise as your gardening season progresses, so don’t run out and buy everything all at once. Start small, and see what you need as you go. Better to make a few small purchases at once than buy a bunch of tools you never use!

    Start From Seed

    Finally, you will probably want to begin your container garden in starting trays before planting into your larger containers. This will ensure you can plant the most healthy seedlings in your container, and make the most of each square inch of space. This also means you can start indoors in late winter, and be all ready to plant by the time the weather gets warm!

    Make the most of any space with a flourishing deck garden. As we always say on this site, you don’t have to actually have a homestead to be a homesteader!

    [Bonus] Did you know there is a way to boost your production by as much as 10 times, with half as much work? LEARN MORE HERE>>>

  • Keeping Your Harvest Year-Round (Infographic)

    Keeping Your Harvest Year-Round (Infographic)

    Whether you’re gardening or carefully shopping local and in season, the healthiest way to consume what you reap is to preserve it well so you can make the most of it!

    Produce turns quickly, but you can prolong the benefits of a fresh harvest with some smart planning and thinking ahead. There are so many great ways to preserve food, and this amazing infographic from Fix.com shows you how.

    We write a lot about food preservation here on Homestead Depot, but this infographic is a great guide to the overall concept of food preservation, and it gave me some great ideas! Hope you enjoy:

    If you enjoyed this, you might also like….
    Long-Term Survival for Homesteaders…

    Natural Healing Secrets You Need to Know…

    Effective Primal Diet Hacks…

  • Homemade Non-Toxic Daily Shower Spray

    Homemade Non-Toxic Daily Shower Spray


    When it comes to the products you clean your shower with, it’s just as important to consider possible environmental toxins. While you might only think of dish soap or laundry detergent as coming into direct contact with your skin, hot showers can expose you to plenty of toxins if you’re cleaning with conventional products.

    Your epidermis, or skin, is the largest organ in your body, and in hot showers, your pores open up. If you’ve been cleaning with harsh toxins, they could be dissipating through the air and being absorbed directly into your skin. And you thought you were getting clean in the shower!

    The downside of not using toxic products is that mold, mildew, and soap scum can build up in your shower or bath fast. Harmful bleach and other chemicals can certainly keep this grime under control, but that doesn’t mean you can’t have the same ease and cleanliness with natural, homemade solutions!

    This incredibly simple and totally non-toxic daily shower spray is ideal for keeping your shower fresh, clean, and totally green.

    Ingredients:

    • 1 cup water
    • 1/2 cup hydrogen peroxide
    • 1/2 cup vinegar
    • 1 teaspoon dish soap
    • 20 drops essential oil of choice (optional)

    Directions: 

    1. Combine the water and dish soap in a large, non-metal bowl, until the soap is completely dissolved.
    2. Add the remaining ingredients and stir until completely blended.
    3. Pour into a clean spray bottle, and keep in your shower.

    To use, simply spray down your shower after each use. Try to coat all the walls and the corners evenly.

    That’s it! This will prevent soap scum build-up, mold, and mildew, and make weekly shower scrubbing a breeze.

    The world is full of harmful, toxic solutions to everyday problems, and it can be so easy to get enticed by products with promises like never having to clean your shower! Fortunately, there’s always a natural solution, and this easy, painless shower spray works just as well as the commercial alternatives. Enjoy!

    If you enjoyed this, you might also like….

    Long-Term Survival for Homesteaders…

    Natural Healing Secrets You Need to Know…

    Effective Primal Diet Hacks…


  • How to Make Sour Cream (Video)

    How to Make Sour Cream (Video)

    Like so many food products we take for granted, sour cream can be naturally fermented at home! Most of us think of sour cream as a slightly decadent topping for baked potatoes or beef stroganoff, but it doesn’t have to come in a plastic tub from the supermarket.

    With some good quality cream, some time, and an adventurous spirit, you too can make delicious, homemade, naturally fermented sour cream right at home! Culturing experts Cultures for Health share in this short and easy-to-follow video how:

    If you enjoyed this, you might also like….

    Long-Term Survival for Homesteaders…

    Natural Healing Secrets You Need to Know…

    Effective Primal Diet Hacks…

  • Gardening Tips From Seasoned Gardeners

    Gardening Tips From Seasoned Gardeners


    When you just get started with gardening, it can be easy to feel very overwhelmed! As a beginner, there’s so much to learn, and so many ways things can go wrong. But never fear–you can learn from those who have gone before you.

    We’ve got some great tips for beginner gardeners to help you beat the stress and have a flourishing, healthy garden in no time.

    Let’s begin!

    Ask for help

    Don’t be shy! Usually, seasoned gardeners love to talk gardening, so reach out and ask for help! People at your local nursery, in local gardening FB groups, or even community gardens would probably be happy to help out and help you troubleshoot any issues you’re having or give you a good idea of where to start out.

    Keep records

    As soon as you get started, start logging what works. This might not seem very helpful if you have no idea what you’re doing, but it will be invaluable next year! Gardening involves a lot of trial and error, so tracking what works, and what doesn’t, this year, will be an amazing resource next year. Write down everything you plant, when, and track the time it took to sprout, grow, come to fruition, etc. Also, record any issues with pest or disease, and what you did to combat it.

    Know your zone

    This is why it’s so important to seek advice from locals! Know what zone you live in, what’s grown there, does well there, the nuances of the climate, seasons, and weather patterns, etc. Then plant accordingly! Seed packets always have instructions based on zones on the back, so it’s very important to know yours.

    Test your soil

    Before you get started, know what kind of soil you have, and how to amend it. If you are starting with a container garden, you will most likely be purchasing your soil, but if you’re planting in the ground, you need to understand that not all soil is equal. You might have amazing soil to plant directly in, but most likely, you’ll need to amend it. You can buy simple soil test kits at any gardening supply store, and these will give you an idea of what you need to add to your soil to make it healthy and fertile.

    Start simple

    You might be really excited to start growing your own food right away, but take it slow. Your first year, you’ll probably want to plant a handful of easy, reliable crops so you can focus your efforts on these while you learn the ropes. As you get the hang of gardening (you’ll be amazed how much you can learn in one season), you’ll gain the confidence and experience to experiment.

    Choose your plot wisely

    When deciding where to plant your garden, keep in mind it will have to be somewhere with lots of sun. If you have only partial shade in your yard, there are still some things you can plant, but most plants need a decent amount of light. Watch your yard for a few days and track how much sun it gets. Also, bear in mind that the sun’s position changes throughout the year.

    Also, make sure the place you choose to plant your garden is easily accessible to you, and to your garden hose!

    Plan, plan, plan

    Before you start planting your garden, make sure you have a good plan. There are lots of free resources online to look at example garden plans. You can look into companion planting to learn which plants go well together, and which ones don’t. Draw out a map of your garden space, and assign each plant its own plot. Take into account weeding, harvesting, pruning, etc., as you will need to ensure proper accessibility.

    Don’t do it alone

    Involve your friends or family members in your first garden so you have some accountability–and help! You can learn together, and you know what they say, two heads are better than one.

    Get organized

    You’d be amazed how quickly you can accumulate various tools and supplies for gardening, so make sure to keep it all in one place. A basket or bucket that you can take out to the garden with you is very handy, as well as a simple gardening apron or a pair of overalls. Your gardening supplies probably won’t stay clean very long, but they can stay neat and organized, and this will contribute to the overall success of your garden very well.

    Beginner gardening can be intimidating, but don’t fret. It’s a learning experience and you’ll gain so much knowledge in such a short time, it’s worth it for a few bumps along the road. These tips are designed to make your transition from novice to expert smooth and painless, so make sure to keep them in mind as you get started with your garden!

    If you enjoyed this, you might also like….

    A Revolutionary, Double Patented-Technology That Allows You To Wash Your Clothes Without Using A Single Drop Of Toxic Chemical Detergent


  • Natural Remedies for Ear Infection (Infographic)

    Natural Remedies for Ear Infection (Infographic)

    When springtime comes it brings many wonderful benefits, but one of the downsides of this season is it’s cold and flu season. And with colds and flus can unfortunately also come the dreaded ear infection.

    Small children are particularly vulnerable to ear infections, and most doctors will opt immediately for antibiotics. In many cases, this is definitely the best option, but it’s always worth it to try some natural remedies first. Antibiotics can wreak havoc on small children’s digestive system and immune system, so while they can be life-saving in many cases, it’s best to use them as a last resort.

    Fortunately, nature is full of wonderful and highly effective remedies for ear infections, and this great infographic from Ritely.com shares some of the best, and how to use them.

    If you enjoyed this, you might also like….

    Long-Term Survival for Homesteaders…

    Natural Healing Secrets You Need to Know…

    Effective Primal Diet Hacks…