Page 68 of 81
1 66 67 68 69 70 81
Ethan Archer – Page 68 – Homesteader Depot

Author: Ethan Archer

  • Get Healthy with the Right Spices

    Get Healthy with the Right Spices

    Part of homesteading has to be about living a healthy lifestyle. You know the importance of having fresh and healthy food, so you can stave off common avoidable illnesses that are plaguing so many people in the country today. However, you might not have thought about all of the benefits that can come from using certain spaces in your food.

    Different herbs, plants, and roots can help to increase your health and make all that healthy food taste even better. Let’s look at some of the best options when it comes to spicing up your food.

    Cinnamon

    Most people like cinnamon quite a bit. However, they probably are not eating it in the healthiest manner possible. After all, a cinnamon roll isn’t exactly good for you. However, there are some ways we can eat and remain healthy and enjoy the benefits that cinnamon offers. For example, sprinkle some of it on oatmeal or into peanut butter. You can put some on sweet potatoes as well. In fact, it works well for quite a few different types of food.

    Why is cinnamon such a good option? It has the potential to help manage your blood sugar levels and lower your cholesterol while keeping your arteries healthy.

    Chili Peppers

    If you want a little bit of a spicy life, chili peppers are the way to go. These peppers include an ingredient called capsaicin. This is what provides the plants their heat, and it’s also what provides the health benefits. Some of the benefits you can get from capsaicin include pain relief, improve the health of your heart, and it can reduce inflammation.

    Turmeric

    Another fantastic spice to consider using is turmeric. You will often find this used in different types of curry, you can add it to other things as well. Many have found that it can reduce inflammation, and this has been a benefit for people who suffer from arthritis.

    Oregano

    Oregano is a popular and flavorful herb. However, many don’t know that it also happens to include two antibacterial agents. This can help to fight off infection. In addition, those who have been looking to add more antioxidants to their life will enjoy knowing that oregano has about four times the number of antioxidants as blueberries. It happens to be very easy to grow at home, as well. You should definitely add this to your garden if you haven’t already.

    Garlic

    Garlic is a good option as well, and it has a number of health benefits. For centuries, it has been a part of natural medicine, and with good reason. It has antiviral properties, as well as antibacterial and antifungal properties. There have also been studies that show you can stop blood clots from forming in the arteries. It works quite well on a number of different types of food.

    As you can see, spices can do quite a bit for health and should be a part of every homesteader’s diet. Of course, these are certainly not the only options when it comes healthy spices. Do yourself a favor and start looking for other spices that you can start using and growing.

    If you liked this, you might also enjoy…

    Natural Healing Techniques Doctors Don’t Want You to Know…

    The Weight-Reducing Magic of Yoga…

    The Ultimate Woodworking Course..


  • 3 Easy Ways to Keep Your Chickens Healthy

    3 Easy Ways to Keep Your Chickens Healthy

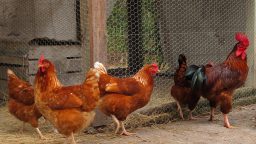
    Chickens are some of the most common animals to see on a homestead or farm.  One reason is that they are some of the easiest animals to care for.  But even chickens can develop health issues like tape worms, mites, and various intestinal infections.  As with everything else, taking care to prevent these issues will be easier than treating them retroactively and will ensure that you have a healthy supply of eggs and meat without interruption.  These are 3 easy ways to help your chickens stay healthy.


    Pasture

    Just like you, chickens are healthiest when they are eating well.  One of the easiest and cheapest ways of ensuring your chicken’s health is to provide them with access to pasture.  It’s not the bugs that the chickens are after when they are pecking at your lawn.  Pastured chickens will eat as much as 30% of their calories in grass alone.  This will dramatically cut down on the feed and supplements that you would need to provide your chickens if they were not given the opportunity to graze.

    Dust

    Chickens do not bath with water, but with dust.  Providing them with an area that remains dry even in wet weather, and has a thick layer of fine dust will help them keep off skin parasites like mites.  If the area your chickens are in doesn’t have fine dust, or if it doesn’t seem to be enough for them, you can supplement this with diatomaceous earth.  Diatomaceous earth can also be sprinkled over their feed to help treat intestinal parasites like worms.

    Water

    Clean water is a must for chickens, especially if you want to keep a constant supply of eggs.  If your chickens are allowed free range this might be harder than you think since your chickens will not be selective about the water that they drink.  They will just as soon drink out of a contaminated puddle as a clean water dish.  For this reason, you might want to add a small amount of chlorine bleach to the water dish that is in the coop they go in for the night, and make sure to change out their water dishes at least once a day, more if they show signs of illness.


    Chickens are fun animals to have around and are typically robust.  If you give them what they need, they will thrive, and in return you will high quality eggs and meat.


    If you liked this, you might also enjoy…

    Natural Healing Techniques Doctors Don’t Want You to Know…

    The Weight-Reducing Magic of Yoga…

    The Ultimate Woodworking Course..
  • Everyday Laundry Hacks for Off-Grid Living

    Everyday Laundry Hacks for Off-Grid Living

    Your clothes are not only going to get dirtier faster when living off-grid, but you will quickly find out how much more difficult it is to get them clean again, and how drying them can be even harder.  Washing an average sized load of clothes by hand will take you close to an hour, then there is hanging them.  And of course, while you are occupied with your laundry, you aren’t taking care of any of your other projects that all need your attention.  Laundry is definitely a big chore without a machine! These are a few simple and practical ways to cut down on the time and energy you spend doing laundry while living off-grid.

    Designate clothes

    Clothes that you wear to sleep in, then go garden in, will be too dirty to sleep in again on a single use.  But you can sleep in the same clothes for a week (your standards may need to adjust a little from having a washer and dryer) if all you do is sleep in them.  Designating clothes for sleeping, working in, lounging after work and re-entering civilization in will keep these clothes clean enough for their individual purposes longer, and make your laundry loads smaller.

    Air ‘em out

    Not everything is going to need to be washed with soap and dried on a regular basis.  Items such as sheets and towels can go longer between washes if you take the time to hang them out in the sun on a nice day.  Depending on your situation, this could make a huge difference in conserving time and resources since you will not need to use water that might need to be hauled. The sun naturally kills bacteria, so an hour or so in the hot noon sun can make all the difference.

    Indoor clothesline

    Especially during bad weather, it can save you time and resources to set up an indoor clothesline near a fireplace or wood burning stove.  You can’t always count on the sun to do your work for you, and if you are already burning wood, then you might as well get the most out of it.


    Off-grid living will come with its difficulties, but laundry doesn’t have to be one of them if you have a plan.


    If you liked this, you might also enjoy…

    The Ultimate Guide to Natural Healing…

    Does Yoga Help You Lose Weight? 

    Become A Woodworking Master…

  • 3 Things to Consider When Felling a Tree

    3 Things to Consider When Felling a Tree

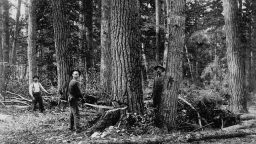
    Cutting a tree down can be dangerous, even deadly.  But it is something that, if you are homesteading, you will probably be faced with sooner or later, if not regularly.  Felling a tree is not something that should be rushed into or taken lightly, especially if the tree is particularly large, or close to a structure.  Before felling any tree, give it some thought, and be careful.


    Limb pattern

    Trees are not 100% symmetrical.  If a tree has anything obstructing its access to light on one side, it will grow more limbs in the other direction.  Limbs can also die and fall off, and when they do it is unlikely that they will do so symmetrically.  These factors will affect the direction the tree falls in.  This can be controlled by selectively removing limbs on the side that you do not want the tree to fall it.  This will make the tree unevenly weighted and help control its direction of fall.

    Trunk shape

    The shape of the tree’s truck will also affect the direction it is likely to fall in.  If the tree has an oblong truck, it is highly unlikely to fall in the direction the truck is wider in.  It will take quite a lot to change the direction of fall from the thin side to the wide side.

    Making your cuts

    Once you have determined the direction the tree will fall in is safe, you will have to start making the cuts that will bring the tree down.  This should be done with three cuts.  The first should be placed on the side that you want the tree to fall to, it should be nearly parallel to the ground but slightly higher as you get deeper, and should be about 50% the depth of the trunk.  The second cut should be placed on the same side, and should be at an angle, between 30 to 40 degrees, and it should connect to the first cut so that a wedge of wood can be removed.  The third cut should be placed on the side of the tree opposite from the direction that you want to tree to fall in.  It should be just higher than the first cut made, lower than the angled cut, and also nearly parallel to the ground but slightly lower as the cut gets deeper.  Try to make the third cut exactly opposite the first cut, for instance, if the first cut is from 2 o’clock to 5 o’clock on the trunk, then the third should be made at 11 o’clock to 7 o’clock.


    Felling a tree is not something to take lightly.  Plan it out and be safe.


    If you liked this, you might also enjoy…

    Natural Healing Techniques Doctors Don’t Want You to Know…

    The Weight-Reducing Magic of Yoga…

    The Ultimate Woodworking Course..


  • 3 Dog Breeds to Consider for Homesteading

    3 Dog Breeds to Consider for Homesteading

    Dogs have the reputation of being man’s best friend for good reason.  The possible benefits of having a dog on your homestead, whether it be urban or country, are virtually endless.  But domestication of dogs has led to a wide array of physical and behavioral traits.  Over breeding for desired traits has also led to genetic issues, for this reason a “mutt” is always preferable since it will have less health issues.  For this reason, when selecting a dog that is right for you, you should consider what breed you are looking for, and search for a mutt that has that breed’s characteristics displayed.  This will allow you to have a dog that has the traits you desire, and a healthy genetic code, saving you vet bills, and promoting “rescue” over “financially motivated breeding”.  These are 3 breeds that have excellent traits for a homestead dog:

    Pitbull

    Probably the breed with the most undeserved bad reputation is the Pitbull.  But the reality is that Pitbull owners deserve the bad reputation.  A well cared for and loved Pitbull has no greater tendency to attack its owner than a Golden Retriever.  That being said, when a Pitbull feels threatened, or feels that it’s owner and family are threatened, it is much more capable of offering physical protection than other breeds.  With a ridiculous bit strength, high pain tolerance, and intimidating appearance a Pitbull is one of the best breeds for physical protection, which should be a consideration for a homestead in any setting.

    Heeler

    Heelers, or Australian Cattle Dogs, are a great option for a working dog on a homestead.  Heeler’s a robust breed, with high levels of intelligence and trainability.  Guarding and herding come naturally to a Heeler, but with high intelligence and high energy Heelers can be trained to do whatever task you have for them.  For those who want only one dog, a Heeler is a great option, they do not always get along with other dogs, but bond well with their owners.

    Terriers

    Terriers have become a popular breed for people with small spaces, but the reality is that Terriers will do better in an open environment with room to roam.  With a Terrier on your homestead, you are unlikely to have a rat problem or strangers approach without a load warning.  Being a smaller breed, Terriers require less food and will have less joint issues as they age.


    This is not at all the only dogs that could offer benefits on a homestead, but only a short list of some common favorites.  Remember, not only are you helping out a creature that can’t help itself when you get a dog that would otherwise end up at the pound only to be euthanized, but by avoiding a dog that has been breed for sale, you are avoiding a dog that will likely have genetic issues that will lead to high vet bills and shorter life span.


    If you liked this, you might also enjoy…

    Natural Healing Techniques Doctors Don’t Want You to Know…

    The Weight-Reducing Magic of Yoga…

    The Ultimate Woodworking Course..
  • One Way to Clean a Chicken

    One Way to Clean a Chicken

    As with the proverbial cat, I’m sure there is more than one way to clean a chicken.  This is just one way, you can tweak it however you feel the need to for your situation.

    Kill it first

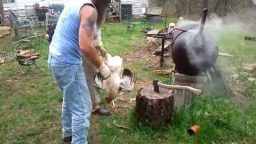
    Starting with a live chicken that you have a hold of, grab its neck with your strong hand down, so that your thumb is closer to its wings and your pinky is closer to its head.  Now spin your hand in a tight circle fast so that the chicken’s body spins in a larger circle.  This will kill the chicken for sure.

    Chop chop

    After you have wrung the chicken’s neck it will still probably move a little.  That’s ok, just hold it down with its wings in tight with your weak hand, and lay its neck on a piece of wood that you can drive a sharp edge (like a machete) into.  Chop off the head.  Then hold it up by the feet letting the blood drip out until it has stopped.  Then lay the chicken down again and chop off its feet just below the feathers.

    Pluck it

    At this point, most people would dunk it hot water.  But wet chickens smell worse than wet dogs and you really don’t need to do this to get the feathers out, though it will speed up the process.  Just hold the chicken down with your weak hand, and close to your weak hand, so as not to allow the skin to stretch and tear, grab some feathers and pull.  Repeat until the chicken is bare.  You shouldn’t have much trouble except with the tips of the wings, where you might want to use the hot water.

    Gut it

    Make a cut around the neck, going low towards the collar bones, but trying not to go too deep so that you don’t hit the gizzard.  Reach in and remove the neck innards and the gizzard (which can be eaten if desired, just make sure to separate from the intestines).  Then flip it over and cut around the anus while keeping in mind that you do not want to puncture the intestines. However, if you do puncture them, there is no reason to throw out the chicken, just wash it well afterwards).  Once you have a complete circle around the anus, remove it, with the intestines attached, then pull out the rest of the guts.  If the chicken is a smaller breed you may need to enlarge the hole, but get the intestines out first.

    Wash it

    Wash it off, and wash it out.  Just water and vinegar should do the trick.  This is more important if you are going to freeze it or marinate it instead of cooking it right away, but might as well play it safe, it will only take a second.


    Now it’s ready to cook and eat.  If you have not cleaned an animal before and are considering raising other animals like rabbits or pigs for meat, chickens are a great animal to train on.  They aren’t as large as a pig or as cute as a rabbit, but they taste just as good. Who doesn’t love chicken?

    If you liked this, you might also enjoy…

    What is ‘The Final Bubble’, and Are You Ready for It?

    Understanding the End Times

    Natural Healing Secrets Doctors Don’t Want You to Know

  • How to Build a Fire Pit (Infographic)

    How to Build a Fire Pit (Infographic)

    Fire pits are great for summer or fall nights when you want to be outside but want or need some extra warmth. It’s a great thing to have on a homestead not just for outdoor evenings, however, but also for burning small bits of waste or even cooking (with the right set-up, but that’s another article for another day).

    This handy fire pit infographic from fix.com breaks down the process of building a firepit and makes it easy-to-understand and manageable.

    To start, it’s important to think about what you’d like to use your fire pit for, and where to place it. If you’d like to use it to burn garden waste or heat up water for butchering chickens, you might want to put it closer to where you keep your garden tools or butchering area. If you’d like to add a spit and cook, maybe closer to the house.

    Whatever you do, make sure to check your local fire ordinances so that it will meet regulations. You don’t want to put all this work into a fire pit just to have the fire department called when you light it up for the first time!

    According to the original article, the materials you will need are:

    • Shovel
    • Measuring tape
    • Spray paint to outline the shape/size
    • Wood stake
    • Concrete blocks, fire bricks, landscaping stones
    • Sand
    • Level
    • Rubber mallet
    • Masonry adhesive
    • Gravel

    The infographic is about both above ground or in-ground pits, and you can read the original article to read a more detailed discussion of how to pick which one you might like.

    Here’s the infographic, enjoy!

    fire-pit-embed-small

    If you liked this, you might also enjoy…

    Natural Healing Techniques Doctors Don’t Want You to Know…

    The Weight-Reducing Magic of Yoga…

    The Ultimate Woodworking Course..

  • Tips for Creating the Best Garden for Your Homestead

    Homesteading and gardening tend to go hand in hand. However, as gung ho as you might be about being more independent, it can still be tricky to find the perfect place to put your garden. You have to think about a lot of things before you choose the location. Let’s look at some of those things you have to consider so you can find the top spot for your vegetable garden.

    First, you have to think about just how you’re going to be using the garden. Are you going to be using a garden as a supplement to food supplies and then continue to buy in the grocery store? Are you going to try to create a garden that will be able to satisfy all of your vegetable requirements for the family for as much of the year as possible? If it is the latter, then you will naturally need to have more space for the garden.

    You also have to consider the type of plants that you plan to grow. Perennial vegetables tend to work well, but there are plenty of other options as well. You need to research your area first and determine what types of vegetables will grow well in your soil and climate though.

    When you are choosing a site for the garden, you want it to be an area that will get at least six hours of sunlight each day. In addition, it needs to have air circulation as well as good drainage. Ideally the location will be level and the soil will be loose and rich.

    It is generally a good idea to stay away from the house with your garden, as the house has the potential to cast shadows. This could mean your vegetables are not getting enough sunlight throughout the day and they will not thrive.

    Hopefully these tips can help you create the perfect garden.

    If you liked this, you might also enjoy…

    Natural Healing Techniques Doctors Don’t Want You to Know…

    The Weight-Reducing Magic of Yoga…

    The Ultimate Woodworking Course..