Page 74 of 81
1 72 73 74 75 76 81
Ethan Archer – Page 74 – Homesteader Depot

Author: Ethan Archer

  • Natural Relief for Insect Bites

    Natural Relief for Insect Bites

    Insect bites or stings can be a very unpleasant experience. It is crazy how much pain and discomfort a tiny creature like a wasp or hornet can cause! Even minuscule mosquitoes can completely ruin a good night’s sleep with just a few bites that will drive you crazy with itchiness.

    Fortunately, good old mother nature has several very effective remedies for reducing the pain, swelling and itching of standard insect bites. These will help you with most insect bites, however, make sure to keep an eye out for signs of allergy in the case of wasps or bees, it’s always good to keep Benadryl on hand too just in case.

    1. Vinegar

    Vinegar is a wonderful neutralizer for insect stings. If you make a simple compress soaked in vinegar and apply moderate pressure to the sting, it will relieve any pain and greatly reduce itching. Make sure to leave it on there for a good while, re-wetting with vinegar if needed.

    2. Baking Soda

    Baking soda has long been used to draw out the irritant in insect bites. Just apply it directly to the sting, cover with a rag or towel to keep it all concentrated on the problem area, and leave on for about twenty minutes, or as you’re able to.

    3. Activated Charcoal

    Activated charcoal works much like baking soda, to draw out the irritant and neutralize the sting site. It can be a bit easier to apply, too, you can just mix a little up with some coconut oil and smear on the wound site. Just be careful to avoid contact with your clothes-activated charcoal will get over everything!

    4. Aloe

    Aloe is wonderful for soothing itching. You can use a fresh aloe leaf or store-bought aloe gel (the less ingredients, the better, food-grade pure aloe vera gel is very reasonably priced and can be found at many health food stores or online). Aloe is a great follow-up treatment to the above remedies, it will help with the second and third day itching and discomfort from an insect sting and has a lovely, cooling sensation.

    Do you have any tried-and-true remedies for insect stings?

    If you like this, you might also like:

    >> Advanced Gardening Course To Accelerate Your Food Production

    >> Survival Medicine & Wilderness Survival

    >> Survival Techniques From Long Ago, Re-purposed For The Modern Era

  • From Fleece to Yarn (Video Series)

    From Fleece to Yarn (Video Series)

    Some homesteading projects are so much better explained visually, when you can see the whole process, start-to-finish. Shearing sheep, processing the wool and spinning it into yarn is such a classic self-sufficiency skill that, even if you don’t have sheep, you’ll love learning how to do. Just seeing how a brilliantly versatile natural fiber is made using traditional methods will take you back to bygone days. Is there anything more idyllic than spinning wool on a homestead?

    I loved watching this series from the YouTube channel, Keeper of the Homestead, on how to shear, clean, process and spin wool. It’s part of a bigger series on homesteading, check out all their videos, there’s lots of great homesteading knowledge and tutorials.

    This first video covers shearing the sheep and how to store the wool.

    This second video covers washing the wool-a very important part of the process as sheep fleece can be quite dirty!

    This video covers “carding” the wool, which is basically combing out the wool to make it smoother and more manageable:

    This next video shows “roving” the wool, which is the next step towards spinning:

    And finally, this video covers the fun part-spinning!

    I just think it is so cool to learn these traditional methods for taking resources from our homestead and turning them into tools and material to use. Because after all, isn’t that the point of homesteading?

    If you like†this, you might also like:

    Advanced Gardening Course To Accelerate Your Food Production

    Survival Medicine & Wilderness Survival

    Survival Techniques From Long Ago, Re-purposed For The Modern Era

  • 3 Ways to Save Money on Your Garden

    3 Ways to Save Money on Your Garden

    Growing your own fruits, vegetables, and herbs can save you a lot of money over the long run. When you invest in your garden, you’re basically completely negating the need to buy produce at a grocery store, which can add up to a lot of savings very quickly.

    Of course, even knowing that your garden is going to save you cash, it’s easy to overspend on that investment if you’re not careful. However, with a few simple tips, you can avoid this problem and save a lot of money from the very beginning.

    Buy in Bulk and Share Costs

    Do you know other homesteaders who are getting their gardens started? In general, seeds, plants, and other garden necessities are cheaper when you buy them in bulk, and if you have others to share the cost with you, you can get a really great deal. Even if you’re not sharing the cost with others, if you’re buying items that will last for years (like heirloom seeds), you can save money on future gardening needs.

    Don’t Overplant Your Garden

    As you plan your garden, don’t plant seeds and young plants right on top of each other. Plant with the future – and your full-grown plants – in mind, and you’ll avoid a lot of waste.

    Maintain Your Garden

    Weeds can choke out fruit and vegetable plants, and parasites can kill them. Spend time in your garden regularly, weeding, watching for parasites, and keeping everything in good shape. This will avoid wasted money on plants that fall victim to outside forces, and you’ll get much more produce each season.

    Use all three of these tips to save money on your garden now, and it will pay you back with even more produce and a great deal of satisfaction later. Good luck!
    If you like this, you might also like:
    Advanced Gardening Course To Accelerate Your Food Production…

    Survival Medicine & Wilderness Survival…

    Survival Techniques From Long Ago, Re-purposed For The Modern Era…


  • How to Safely Let Chickens in the Garden

    How to Safely Let Chickens in the Garden

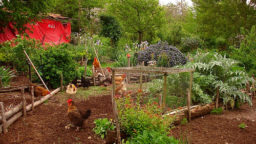
    One of the most serious drawbacks to having truly free-range chickens is that they can go anywhere they want to and they tend to want to go to your garden.  This makes sense since, hopefully, your garden is a healthfully functional natural environment filled with potential prey (many of which you would be happy to see eaten) for your chickens.

    Keeping Chickens Out

    The downside of chickens in the garden when your chickens do what chickens do, and  start kicking and scratching until they have unearthed the roots of your plants or even kicked your plants clean of the garden.

    One way to combat this is to put chicken wire around the garden.  This can be costly, even if you opt for the cheaper “bird netting” made from plastic.

    And this solution still doesn’t allow your chickens to be much benefit to your garden, it just keeps them from being a pest. Preferably your chickens will eat potential pests and fertilize your garden while leaving it undamaged.

    Letting Chickens In

    One of the best ways to get the benefits of chickens in the garden without damaging your plants is to take the plastic bird netting and lay it on the ground, over your mulch, and between your plants.  This will work whether you are growing in wooden raised beds or directly in the ground.

    Areas like paths or fallow plots and beds are not necessary to cover.  Concentrate on active beds, especially those with young vulnerable plants.  The bird net can be stretched out to the size of the bed and cut to fit, one wide strips
    are most versatile, “holes” can be made to accommodate the plants by using twist ties or landscaping stakes (or even sticks) to pull the net away from the plants and keep it secure.  Stakes or twist ties can also be used to combine multiple pieces of netting.  While holes could be cut in the net, that will make it more difficult to reuse in the
    future.

    This will allow for your flock to roam and feed to their heart’s content while cleaning out potential pests from your garden like caterpillars and slugs-and holding your mulch and your plants in place.  They will even help fertilize as nature takes its course, and with chickens, that’s pretty often.

    Click Here To Get The Best Survival Medical Course…

    Check Out These Mind Blowing Survival Skills…

    See what is happening in this country and what you can do to protect yourself…

  • Prolonging Your Tomato Harvest Through the Winter

    Prolonging Your Tomato Harvest Through the Winter

    Surely by now you have noticed that your tomatoes are not producing like they were in July, and what they are producing is not ripening as fast.  No matter what you do, shorter days and cooler temperatures are going to stop your tomato production almost everywhere but the tropics.  But you can still prolong your access to ripe homegrown tomatoes pretty easily by taking advantage of an easy technique that allows you to eat more of the tomatoes you have already grown, which might otherwise never ripen.

    Step One: Uproot Plants

    Pull your tomato plants up and shake as much dirt off the roots as you can.  Spray the roots with a hose to get off all the excess dirt on at least a few of your plants.  The rest of them can stay dirty.

    Step Two: Hang the Plants

    Hang the clean tomatoes indoors, upside down.  The warmer the room you place them in the quicker they will ripen.  So unless you want all of them to ripen at once, it would be wise to place some of them in a cooler room so they can ripen a little slower.

    Hang the dirty tomato plants in the garage or other unheated outbuilding, upside down, just like the clean ones.  These tomatoes will ripen slower than those that are hanging inside in the warmth. If you run out of ripe tomatoes from both your “warm” and “not so warm” indoor supplies, you can bring in some of your outdoor plants.

    Step Three: Harvest

    Check the plants daily, the ripe tomatoes will fall faster when hanging upside down than they would have when growing upright.

    While this might not give you a surplus of tomatoes all the way through the winter and into the next spring, it will allow you to eat more of what you have already grown, and will extend how long you do have access to homegrown tomatoes.  It will all depend on how many plants you have and how cold it is where you live.

    Click Here To Get The Best Survival Medical Course…

    Check Out These Mind Blowing Survival Skills…

    See what is happening in this country and what you can do to protect yourself…

  • The Simplest, Safest Pesticide On Earth

    The Simplest, Safest Pesticide On Earth

    Long before war profiteering corporations began flooding the civilian market with their chemical products, people had been killing insects without blanketing their homes and gardens with carcinogenic and costly poisons.  You don’t have to be a chemist to prepare the age-old insecticide either, and you most likely already have what you need in
    your home.  It’s so simple that if you haven’t tried it already you probably won’t believe it until you do.

    It’s soap and water.

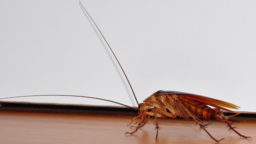
    That’s it, soap and water.  It kills nearly every insect, and even spiders and centipedes.  Some take a little more than others, but even some of the toughest, like the dreaded palmetto or the German cockroach will go down to this perfectly safe and cheap insecticide.

    How does it work?  Whether it’s Dawn dish-soap (still pretty toxic in its own right), organic dish soap, or agricultural insecticide soap, it all works by clogging the spiracles that bugs breath through.

    To use this miracle pesticide, just fill a squirt bottle with water and add a few ounces of the soap of your choice, shake it up a little to mix it, and spray the filthy little critters.  If you are using it in the garden you will probably want to use a mist in order to cover the leaf surface or the fruit that your pests are attacking.  This will also work well for use inside the home for smaller pests like ants on the kitchen counter.  But if you are trying to take down big game like Palmettos or German roaches, then you will want to hit them with a solid jet of soapy water.  It will be most effective on large and fast-moving pests like roaches if it hits them in a way that makes it hard for them to run, if they run away and the soapy water dries before they choke to death, then it will not be effective.  You might even want to have a paper towel ready to smash the really tough ones with after you hit them with the soapy water.

    You don’t need to put your life or the life of your loved ones on the line in order to kill pests, it can be done with safe, clean, household items.

    If you enjoyed this you might also like:

    How to get started with Aquaponics.

    Grow your own food, better, faster, stronger….

    DIY Home Energy System…

  • How to Breed More Self-Reliant Chickens

    How to Breed More Self-Reliant Chickens

    Any parent can tell you that taking care of a baby is a full-time job in and of itself.  And anyone experienced in animal husbandry will know that raising baby animals can be nearly as difficult.  So with everything you have to do in your daily life, taking care of twelve baby chicks, for example, can seem like quite a chore.

    The Problem 

    Unfortunately, since chickens have been highly domesticated for specialized purposes like egg laying or meat production, they have lost the genetic drive to raise their own young.  This means that people who choose to raise these birds are stuck buying new chicks year after year or incubating eggs, then having to set up a separate (sometimes indoor) pin for them, with a heat lamp and other supplies not necessary for adult chickens.  And there is still always the chance that some of those chicks will die.  How can this be avoided?

    Breeding Better Mothers

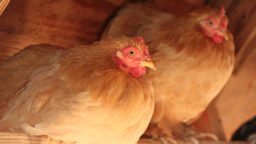
    One possible solution is to raise multipurpose chickens like Rockbarred chickens. This breed is good for both egg laying and meat production.  But since they still rarely “go broody” and care for their chicks, you can also get two or three Bantam hens (depending on how large of a flock you are going for).  Bantams are much smaller chickens so they are not raised for their meat or eggs, but they are closer to a wild chicken and will go broody and raise their own chicks.   This will make multiplying your number of chickens near effortless.

    A downside to this is that over time your flock may be made up of smaller chickens since they will be part Bantam.  But since you would have to buy new chicks anyway that’s not really much of an inconvenience, and it will take several generations before much of a difference is noticeable.  On the other hand, your chickens may also start to show an interest in raising their babies. While this solution would not work for someone that is looking for high egg or meat production for commercial sale, it may be just the trick for those that want to establish a less needy flock of backyard birds that still provide plenty of eggs and meat for personal consumption.

    If you liked that, you might also like:

    Maximizing Production in the Garden…

    Essential Medical Course for Survival and Self-Reliance…

    Utilizing the Homestead Skills of Our Forefathers…

  • Things to Consider Before Building an Outhouse

    Things to Consider Before Building an Outhouse

    When living off-grid long-term, one factor that everyone must face is waste management.  Going about it improperly will have a serious effect on your comfort, and could have a serious effect on your health.  The most traditional way to handle the issue is the age-old outhouse.  If placed and maintained properly, an outhouse will not present a health hazard and will not even stink (at least not more than an active compost pile).

    Here are the factors you need to consider before building an outhouse:

    Placement

    First, when planning your outhouse make sure that you consider the fact that improper placement of your outhouse may not only leave you holding your nose, but could leave you with seriously ill health.  Be sure not to place your outhouse near a water source, especially uphill, used for anything (this would include your neighbors who might
    use water that you are not using).

    Construction

    The principle is simple enough, dig a hole deep enough to accommodate the waste of all that will be using the outhouse for a long enough time that the waste can break down and not pile up to the top.  For most people a hole approximately 3 feet wide, 6 feet deep (at the low point with a slight grade), and 10 feet long will safely fit all that you can put in it.  Cover the hole with what you have available, corrugated metal or ¾ board will be enough if the hole
    is not too wide.  Mark the portion of the hole that your outhouse will not cover, so that no one walks or drives on it.

    Erect whatever covering you need for privacy and to keep you out of the elements while you are using the outhouse.  And finally, leave a hole for your waste to go down through, keeping in mind that you may be able to later add a toilet.  Even off -grid, a toilet can be filled by a bucket of water and flushed without running water. You could even use grey water that you collected from washing dishes or showering.  Keeping in mind that you do not want to have too much soap in your hole as it could kill the bacteria that are breaking down your waste, which could
    cause a build up.

    Maintenance 

    You could always purchase lye at your hardware store to add to your hole every time waste is added, but the cheaper, and perhaps the better option is to simply add grass clippings and kitchen waste (not meat or animal products) after each use.  This can even be combined with lye.  This will keep a healthy environment for the organisms that break down the waste, preventing build up, and greatly reducing odor.

    Everyone does it, so you have to have a plan on what to do with it.