Page 1 of 20
1 2 3 20
Health – Homesteader Depot

Category: Health

  • How to Bring an Old Bathtub Back to Life

    How to Bring an Old Bathtub Back to Life

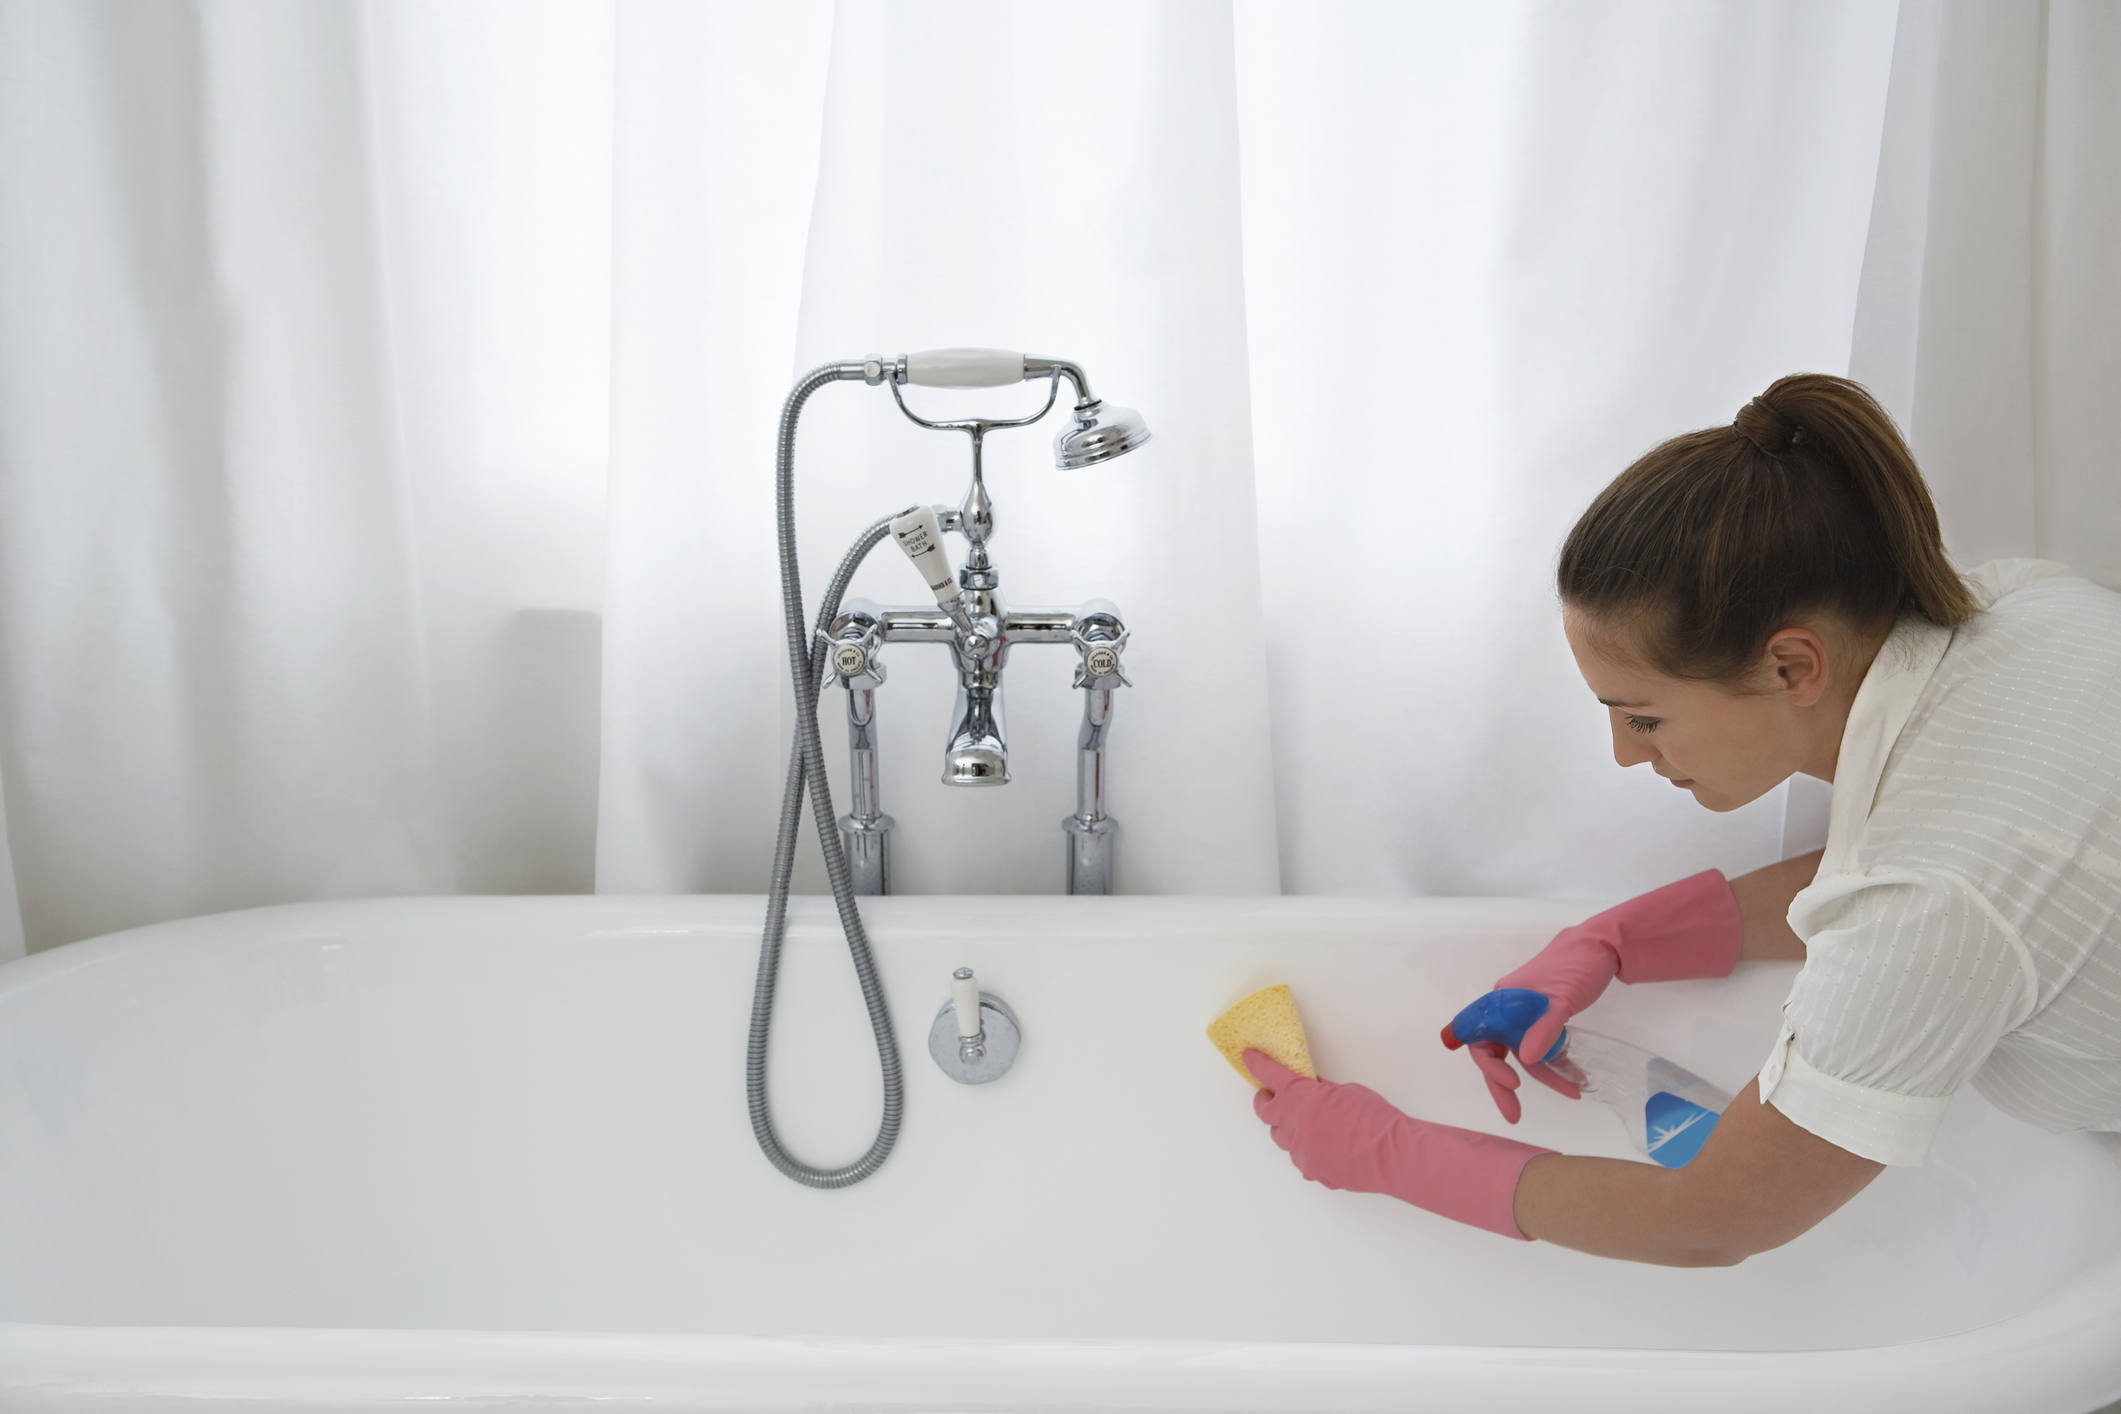
    Do you have an old porcelain bathtub in your bathroom that’s in need of some TLC? Rather than replace it with a modern tub, which is more than likely made of cheaper materials and smaller to boot, you can refinish that old tub. The process does require some elbow work, and you may need to use another bathroom (or another tub, at least) while the restoration job is in process, but it is entirely possible to do this yourself. Think of how much less work this entails when compared to a full bathroom remodel. You won’t even damage the tile surrounding the tub if you follow these instructions properly.

    Start By Cleaning the Tub Thoroughly

    This is the worst of it. The process is all downhill from here. You’ll need to clean that tub thoroughly before you can repair it and reglaze it. This is where the “elbow grease” comment from above comes into play because it needs to be sparkling clean before you can move on to the next step. Open the window and turn on your bathroom fan. Put on your eye protection and don your gloves. Then, start by removing the caulk from around the tub. A putty knife should do the job properly. Then, chip out all of the soap scum, mold, and whatever else is lurking around and in the tub. Finish off the cleaning job with some heavy-duty cleaning solution (Barkeeps Friend works nicely) and a scouring brush or pad. Coat the entire tub with the cleaning solution and then scrub it thoroughly before rinsing. Let it dry completely before moving on to the next step.

    Experts Can’t Explain This Miraculous Device>>>

    Repair Your Tub

    Once your bathtub is clean and dry, it’s time to repair it. You can use Bondo (yes, the stuff that they use on cars), as well as a glaze designed for repairing porcelain. Place some sheets of paper in the bottom of the tub in order to catch any debris. You don’t want any dried bits of glaze or Bondo going down the drain. Take your putty knife and carefully layer your repair material into any chips, cracks, or weakened sections of the porcelain. Allow it to dry thoroughly, and then go over it with a fine-grit sandpaper. This will smooth all of the repaired sections, leaving you with a comfortable tub once again. You may need to repeat these steps if necessary until your tub is full of smooth surfaces. Remove the paper from the bottom of the tub and then coat the tub with a lacquer thinner. This will prevent the final glaze from going on too thickly. Wait until the thinner dries completely before moving on to the next step.

    Reglaze Your Tub

    Now the fun begins. Start by reading the directions of your reglazing product and mixing it up accordingly. There are several different products on the market that are designed specifically for this purpose, so choose whichever one that you think will work best, or what’s available to you. Use masking tape to cover the edges of the tub where it meets the floor and the tile on the walls. Cover your faucet and any metal bits (like the drain) in order to protect them. Then, out on your protective equipment, including a respirator, and start applying your new glaze. Use a foam roller in order to leave thin, light coats over the entire tub. Once the tub is covered, wait several days for the glaze to dry thoroughly, and then recaulk your restored bathtub. It’s ready for use once again, and all that it took was a little bit of work and some handy products.

    Bring Old Batteries Back to Life>>>

  • Preventing Tomato Worms

    Preventing Tomato Worms

    Is your garden plagued with hornworms or tobacco worms? Also known as tomato worms, these pests can destroy your plants, as they’ll eat the leaves, stems, and even the fruit, leaving pretty much nothing behind. If you enjoy fresh tomatoes – as well as the pleasant experience of growing them – this is a problem. You need to take care of these pests as soon as possible.

    Till Your Soil Well

    Since tomato worms are the progeny of moths (and they turn into moths over the course of a few months), they appear at the same time every single year. Moths lay their eggs on the ground, those eggs hatch in the spring, and before you know it, you have tomato worms eating your crops. The best thing to do is to till your soil up extremely well before planting season begins. This kills the eggs, either burying them deep underground or destroying them before they ever have a chance to hatch. Plus, well-tilled soil leads to some great tomato plants, as it brings all of the nutrients up to the surface. Your plants will thank you.

    Know the Signs

    If you’ve tilled your soil, but are still worried about a tomato worm infestation, then you need to keep an eye on your plants. The main signs to look for include giant holes in the leaves, as well as plants that have leaves one day and very few the next. These worms grow to be about four inches long, and have small horns on their heads (hence their official name – hornworms.) They are the same green shade as the leaves, making them tough to see. With that said, they do become active at night, so you’ll see them crawling around.

    Pick Them Off of Your Plants

    Although it’s not ideal, you can pick hornworms off of your plants. Just put on some gloves, head out to your garden at dusk, nighttime, or during the waking hours, and individually remove them from the plant. You might want to put on some magnifying glasses to help you see them, and you’ll need some sort of portable light. Although it will take some time to remove all of these little guys off of your plants, doing so doesn’t really harm the worms – that is, unless you squish them. Feel free to rehome them to the other side of your house, away from your tomato plants.

    Spray Them with a Hose

    If picking the hornworms off doesn’t sound like your idea of a good time, then spray them off with a hose. Many of them cling to the undersides of the leaves or on the stems. Although they are somewhat stubborn and will hang on tight, you can indeed remove them by spraying their hiding spots with a hose. Just don’t use too strong a spray, or your plants may become damaged. If you do this right, then you won’t have to go with the non-organic “nuclear” option: a non-systemic insecticide.

    Use Insecticide

    Although this should be your last resort, insecticides do work well. There are types made to deal with hornworms that won’t harm any other insects. Make sure to read the label to ensure that you’re purchasing the right kind. In addition, choose a non-systemic insecticide. This type stays on the leaves of the plants and doesn’t soak into the fruit or stems. It only harms the insects that it intends to. Everything else stays safe. Insecticides aren’t ideal, but if you don’t want to spend hours upon hours picking tomato worms off of your plants, you may not have much of a choice. Sometimes you have to make do.

    Electric Companies Have Already Gathered An Army of Lawyers To Take This Down — Take Advantage Before it’s Gone>>>

  • 8 Ways Chickens Can Benefit Your Homestead

    8 Ways Chickens Can Benefit Your Homestead

    Do you have chickens on your homestead?

    Whether you’re wondering if you should get some, are already an experienced chicken owner, or are just wondering exactly why you chose to raise chickens in the first place, this is for you. Chickens provide several important benefits to your homestead. While their feed and coops may be a bit costly and their care sometimes intricate, what matters is that these feathered friends serve more than one purpose. They really do “earn their keep” as the saying goes.

    Here’s how:

    1) They Eat Insects

    You never have to worry about insects invading your garden and chewing on your crops when you have chickens around. Leave your chickens loose so that they have a good-sized fenced-in area to wander. Place your garden within that space, and your chickens will go after all of the insects that they can find. Your garden will be great, and you’ll have happy chickens, as they have space to wander and a little bit of freedom.

    2) They Produce Manure

    Did you know that you can compost chicken waste? Their droppings make great manure, but they are too acidic to place in the garden straight from the coop. Instead, mix up some compost, using the right amount of additional elements, and add some chicken poop to the mix. It provides the right ratio of nitrogen to everything else, making your manure and compost much more effective. Your garden will benefit from what chickens leave behind.

    Related Video:  Build this Chicken Coop for $1 and in an Hour

    3) You Can Eat Their Eggs

    Although you should allow some eggs to hatch and turn into other chickens, making your flock self-perpetuating, you can also eat the non-fertilized eggs. They are much fresher than the ones found in the grocery store, and since you know what kind of life those chickens have had, you’ll feel proud of what your birds have produced. There’s nothing quite like an egg from your own flock of chickens.

    The Only Book You Need to Become Self-Sufficient on a Quarter Acre

    4) Butchering Your Chickens Provides Meat

    Your chickens are also a source of meat. While you might feel bad about butchering your chickens once they’ve stopped laying eggs, you do need to keep your flock in good shape. This means that you shouldn’t have too many older birds and too few younger ones. Allow some fertilized eggs to hatch, and butcher those older hens.

    Related Article:  Why Raise Meat Chickens

    5) They’ll Till Up Your Garden

    Have you ever seen chickens out in the yard? They like to scratch at the ground with their feet. This actually tills up the soil. You won’t need a tiller when you have a batch of chickens who can do the work for you. Just keep them in the area where you’ll be planting your vegetables.

    6) They Are Quite Entertaining

    Anyone who claims that chickens are boring has obviously never been around them. These birds have some interesting personalities. You’ll be able to differentiate one chicken from another just by watching them.

    Suggested Article:  5 Mistakes First-Time Chicken Farmers Make

    7) They Teach Your Kids Responsibility

    Teach your children how to care for chickens and instill some responsibility in them at the same time with some backyard chickens. They can be in charge of gathering eggs, feeding and watering the birds and handling all of their general care.

    8) They’ll Eat Kitchen Scraps

    Although you will have to supplement their diets with chicken feed, they do eat plenty of kitchen scraps as well. Just make sure that what you’re feeding them is chicken friendly and that you have the right nutrient ratios represented. Those chickens will make do with what you give them and help you dispose of things that might have otherwise gone into the trash or the compost bin.

    This is Why I’ll NEVER have a Water Stockpile again >>

  • How to Grow the Perfect Cucumbers

    How to Grow the Perfect Cucumbers

    Cucumbers are the perfect vegetable even though scientifically, they’re considered to be a fruit. No matter what you classify them as what matters is that they are extremely tasty and rather versatile. They taste great on salad, can be eaten alone, and are used in dozens of recipes. In addition, there’s nothing quite like a cucumber that you grew yourself, in your backyard garden. Although the kind grown outdoors tend to have spines and bumps on them, making them not-so-pretty to look at, they taste good. In order to produce a garden full of tasty cucumbers, you need to know what to do.

    Start Them as Seeds

    Cucumbers survive the act of transplantation well, so they can be started as seeds in small pots or in larger seedling containers. You can either put them outdoors or in a greenhouse, depending on the overall air temperatures. If it’s too cold, the seeds won’t sprout. It has to be a consistent 68 degrees Fahrenheit in order for them to grow properly. If you have the luxury of growing your seedlings indoors, under a grow light, then this won’t be an issue. The best thing is that cucumber plants grow fairly quickly, so if you have a shorter growing season, they will still bear fruit.

    Related Article:  7 Tips to Grow the Perfect Tomatoes

    Thin Your Seedlings

    Once your seedlings start to grow, you’ll need to thin them. There should be only one per small pot or section of your seedling container. Choose whichever one looks the strongest and remove the others to give it plenty of space to grow.

    This Crazy 56-Year-Old Geography Teacher in Memphis, Tennessee Believed He Could Change the Energy World… And Somehow He Did It.  Don’t believe me, check it out here>>>

    Plant Them Outside

    Once the weather warms up for good, it’s time to move your cucumber plants outdoors. They do grow well in containers and grow bags, as long as those pots are large enough. Choose ones that hold at least seven gallons of soil, and note that you’ll need one of them for each plant. Fill the pots with potting soil (which has properties that promote drainage and prevent root rot) and then plant your cucumber seedlings in them. If you’re placing your cucumbers in the ground, choose a location that gets plenty of sunlight.

    Since cucumber plants turn into vines, they’ll need room to grow. Now is the time to put a trellis or cucumber frame behind them. As the plants start to vine out, encourage them to grow up the trellis or frame. However, if you’re growing them in pots on a porch, you won’t need these extra accessories, as the cucumbers can be “coerced” into growing over the porch rails.

    Suggested Article:  Why are my Vegetables Not Growing?

    Watering and Care

    Cucumber plants are prone to powdery leaf mildew, so keep an eye on those leaves. Make sure that the soil is kept moist, particularly once they start to grow fruit. Fertilize your cucumber plants at least once per season, or more often if you’re growing them in a pot or grow bag. The nutrients in that soil will vanish fairly quickly, so you’ll need to fertilize them at least once a month. If you see signs of powdery leaf mildew or other problems, make sure to deal with them quickly, as you don’t want your plants to get damaged. Other than this, cucumbers are fairly easy to care for. They’ll produce plenty of slightly spiny fruits throughout the growing season.

    Picking Your Cucumbers

    Remember to keep an eye on your cucumber plants. Once your cucumbers have reached a length of around five to six inches (or larger or smaller depending on the variety) and are nice and green, a clip from the plant. This will encourage the plant to keep growing, producing even more cucumbers for you to enjoy.

    “Earth’s Largest Database of Woodworking Projects”

  • How to Correct Nitrogen Deficiency in Your Soil

    How to Correct Nitrogen Deficiency in Your Soil

    Did you know that your plants need nitrogen? Obviously, they need four other things as well: soil, air, sunlight, and water, but they also need plenty of nitrogen. This element is found in the air, as well as the soil. The nitrogen in the air doesn’t really help plants at all. In order for them to absorb it, the element must be in their soil. It occurs there naturally, but over time, especially if you use containers or grow bags for your plants, the nitrogen will begin to get used up. The end results are plants that don’t really thrive. They’ll begin to turn yellow and wilt. Thankfully, you can correct this deficiency.

    Know The Signs

    When your plants need more nitrogen, they’ll let you know. They’ll stop growing. Their leaves will begin to wilt and turn yellow. They just won’t look healthy anymore. Although all of those could be signs of other problems, such as not watering, overwatering, or keeping them in containers that are too small, if the plant is otherwise healthy and being taken care of properly, then the main problem is a lack of nitrogen. The sooner you add this element to the soil, the faster your plant will spring back to health.

    Test Your Soil

    Another thing that you can – and should – do is test your soil. There are soil testing kits that are commercially available. Some just involve scooping some soil into a tester and following the instructions. They’ll tell you the results right away. However, if you want something a bit a more accurate, you can purchase a kit, scoop up some soil from around your plants, and then send it out to be tested. There’s usually a self-addressed stamped envelope in those kits. It will take a few weeks, but you’ll get the results either emailed to mailed to you. These types of tests are best done early in the growing season. If you wait until your plants are in danger to do them, then it might be too late by the time the results come in.

    This Backyard Miracle Farm Will Change Our World Forever>>>

    Add More Nitrogen Naturally

    There are several ways to add nitrogen to your soil without having to resort to the use of chemical fertilizers. For example, you could add some old coffee grounds to the soil. They contain plenty of nitrogen. Although it will take some time for them to produce as much nitrogen as your plants need, it will work. You just have to be patient. In some cases, these slow-release methods are preferred to the quick ones.

    Adding compost to the soil is another option. Compost contains plenty of nitrogen. Like coffee grounds, its effects take time, but it does work, especially if it contains manure. (Yes, it’s a bit smelly, but your plants will really like it.) In addition to those two methods, you can also plant crops like peas and beans that will add nitrogen to the soil. They just naturally provide this element as they grow.

    Use Fertilizer

    Standard (read: chemical) fertilizers tend to have some sort of nitrogen in them. Look for initials NPK on the package, and pay close attention to that first number. It’s the one that tells you just how much nitrogen is present. Balanced fertilizers will help the health of your plants, but those with a large amount of nitrogen in them will provide the right kind of benefits much faster. With that said, the nitrogen will leach away quickly and you’ll end up having to use more sooner rather than later. No matter what, your plants will improve.

  • How to be More Environmentally Friendly

    How to be More Environmentally Friendly

    Do you want to live a more environmentally friendly life? Making a few small changes is the best way to do so. You don’t have to drastically overhaul how you do everything in order to be kinder to Mother Earth. Instead, just follow the suggestions described here and pick a few that sound the best. It’s easier to make these changes a little at a time, so once your first few choices have become ingrained habits, it’s time to pick a few more. Before you know it, your lifestyle will be very environmentally friendly.

    Stop Wasting Water and Using Disposable Water Bottles

    Sit back and think about how much water you use every single day and then find easy solutions to the problem. Do you take baths? If so, gallons of excess water are going down the drain every single time. You can reduce your water usage and still maintain your expected cleanliness levels by switching to showers with a low flow showerhead. In addition to this, if you go through quite a few bottles of water each day, you can switch a much more environmentally friendly solution with a reusable water bottle and a water filter that’s attached to your faucet.

    Use CFL (Compact Fluorescent) Bulbs

    If you go into any home improvement store, you’ll find an entire aisle dedicated to light bulbs of all shapes and sizes. The one thing that you won’t find are those old fashioned “traditional” bulbs that use up a lot of electricity. Now is the best time to stock up, so when your last of those traditional bulbs finally burns out, you can replace it with a CFL bulb. These bulbs use less electricity and will last much longer, making them very environmentally friendly.

    Related Article: 15 Things That Will Help You Conserve Your Home Energy

    Skip the Paper Towels

    Paper towels are handy. They clean up messes of all sizes and are very absorbent. The problem is that they’re bad for the environment. Think of how many paper towels you go through on a regular basis and then imagine how many are ending up in landfills. (The answer here is almost all of them.) Rather than fill your trash with used paper towels, switch to standard cloth towels. Microfiber ones are absorbent, don’t leave fibers behind, and can be washed and reused. Stock up on a bunch of them so that you have enough for a full load in the washing machine when they’re all dirty.

    Purchase Secondhand Goods or Borrow Things When You Can

    Have you heard of fast fashion? This clothing is designed for short-term use because it’s trendy and not made extremely well. With that said, it will hold up for quite some time when you treat it right. Rather than contribute to the environmental catastrophe that is fast fashion (think of how much pollution the manufacturing process creates), buy secondhand clothing. You also have the choice of purchasing clothing made in an environmentally friendly manner.

    Now, for the second part of this – borrowing things. Think of what’s involved every time you place an order for a book. It needs to be packaged in cardboard and then shipped using trucks that run on fossil fuels. If you just borrow the book from the library, you’re not only money but also the planet.

    Carry Canvas Grocery Bags

    The states that have banned plastic grocery bags had the right idea. Those bags just end up in landfills, dumping grounds, or even waterways. They’re a hazard. Invest in a few good quality canvas grocery bags and use them instead when you go to the store. You can wash these bags and reuse them again and again.

    This Water Freedom System Will Completely Change Our World>>>

  • Why are my Vegetables not Growing?

    Why are my Vegetables not Growing?

    You’ve planted your vegetables, and have tended to them properly (you think, anyway), but they still aren’t growing. Instead, you have tomato plants without flowers, tiny zucchinis that wither on the plant, and cucumbers that just won’t grow. Something went wrong, and it’s time to find out what. There are a number of issues that can cause your vegetable plant plans to go awry. Here are some of the most common problems.

    Everything Is Planted too Close Together

    This happens to the best-intentioned gardeners. You start off with tiny seedlings that are transplanted into the ground or a series of grow bags (depending on the plant and how much space you’re working with.) It’s easy to place them close to one another because they’re so small. You didn’t even think to consider how large they’ll get as they grow. The problem here is that since they’re too close to one another, they don’t have any room to grow. They don’t develop properly and will choke one another out as they compete for the same sunlight, water, and root space.

    You Don’t Bother to Weed

    Your plant beds need to be taken care of, and this includes weeding them regularly. It’s easy to think that those weeds won’t cause any damage, but they will. Weeds take up space, hog the nutrients in the soil, and introduce pests to your plants. As a result, your vegetables simply won’t grow properly.

    Weird Energy Solution…Portable Solar Energy System>>>

    They Were Put Into the Ground Too Soon

    Cold weather can damage your plants. Some types of seeds, such as tomatoes, won’t even germinate in temperatures that are below 50 degrees. If you want your vegetables to grow, you need to pay attention to the weather. Starting your seeds too early or in the wrong conditions can leave you with sickly plants that don’t produce anything. On top of this, if you plant the seedlings before the last frost of the year, they could die or become damaged by the cold. The results will be plants that don’t really do anything because they just aren’t healthy enough.

    Suggested Article: Why Use a Plastic Sheet in Your Garden?

    You Didn’t Plan Your Garden Properly

    Gardens need to be planned. Certain crops pair well together, while others simply don’t like each other. For example, the three sisters – corn, beans, and squash – will thrive if they’re placed close together because they protect each other and provide the right growing conditions. In order for your garden to be the best that it possibly can, you’ll need to do some research on the vegetables that you want to plant, and then plan everything out accordingly.

    Fertilizer? What’s That?

    If you don’t fertilize your plants, they won’t have the nutrients that they need in order to grow. There are many different types of fertilizer, so you should have no issues finding the best organic or non-organic one for your needs. As we mentioned above, you need to do a bit of research in order to see which types of fertilizer work best for your vegetable plants, and then apply them using the instructions on the package.

    Related Article: 5 Common Fertilizer Mistakes

    There’s Not Enough Sunlight

    Anyone who’s ever tried to plant vegetables in the shade knows what will happen. Without plenty of sunlight, those crops just won’t grow properly. In order to determine the best place for your garden, spend some time looking around your yard at all hours of the day. The spaces that get the most sunlight will be the best place for your plants. Very few vegetable plants will actually survive and thrive in low light conditions. Your garden placement might be to blame for your lack of output.

  • 4 More Simple Ways to Improve Soil Quality

    4 More Simple Ways to Improve Soil Quality

    Growing your own fruits and vegetables is much easier when you have great soil. If yours is filled with too much clay, is infiltrated by tree and shrub roots, or has nutritional deficiencies, then you won’t be able to produce as many of them as you’d like. Or, you could end up with great quantities of fruits and vegetables, but they won’t be very large. Either way, your plants will struggle. The best thing that you can do in order to reverse this is by improving the overall quality of your soil. There are several useful (and fairly simple) methods to do this. Here they are.

    Use a Cover Crop That Adds Nutrients

    Some crops are called “cover crops” because they add nutrients to the soil when they are allowed to break down and cover it. (After they’re grown in that same soil, of course.) These cover crops, including buckwheat and clover, can be planted during the off seasons. They’ll stay alive through winter and early spring, and then, when you’re ready to till your garden, just plow the plants into it. Not only will they act as mulch, but they’ll help enrich your soil.

    Turn Your Perennials Into Mulch

    Adding mulch to your soil does much more than keep it warm, ensure that it stays moist, and prevent weeds from taking root. It also adds some nutrients to the soil. What you can do in order to make your own mulch (or at least, enhance the type that you buy) is chop up any trimmings from your perennials and add them to it. Things like shrub trimmings, bits of perennial plants, and even small branches pruned from your trees all can be added to your mulch. As they break down, they’ll help your soil’s nutritional content.

    Allow It to Dry Out Before Tilling

    Sure, it’s good to plant your crops after rain, because the soil is nice and moist. This doesn’t mean that you should till it at this point though. Instead, wait until your soil has dried out, and then till it up. Otherwise, you risk taking all of the oxygen out of the soil and damaging its overall structure. You won’t be able to grow as much in this damaged soil. It’s best to test your soil by grabbing some of it with your hand and squeezing before you bring out the rototiller. If it crumbles into dust in your hand, then it’s time.

    Related Article: 4 Critical Methods to Improve Your Garden Soil

    Test Your Soil and Then Add To It

    One of the best ways to improve your soil quality is by testing it, and then adding in what it appears to be missing. There are test kits on the market that can tell you what your soil is lacking. They are easy to use, as most involve placing a scoop of soil in a test tube and then adding some chemicals to it. If you want results that are more detailed than that, you can purchase the type of test kit that you need to send out to a lab. You’ll get your results in a few weeks.

    Suggested Article: How to Test Your Soil Using Only a Mason Jar

    After you find out what your soil is lacking, you can add that exact compound to it. For example, if it lacks nitrogen, just add some organic fertilizer that contains nitrogen to it. The test results might also include some suggestions for improvement, and give you the names of a few products that you can use. However, this depends on the exact test. No matter what, you’ll know exactly how to improve your soil in order to grow the best crops possible. That’s what every homesteader wants.

    Here are some other food options for your “Survival Farm”