Page 10 of 20
1 8 9 10 11 12 20
Health – Page 10 – Homesteader Depot

Category: Health

  • 5 Ways Pigs Are Valuable Beyond Just Meat

    5 Ways Pigs Are Valuable Beyond Just Meat


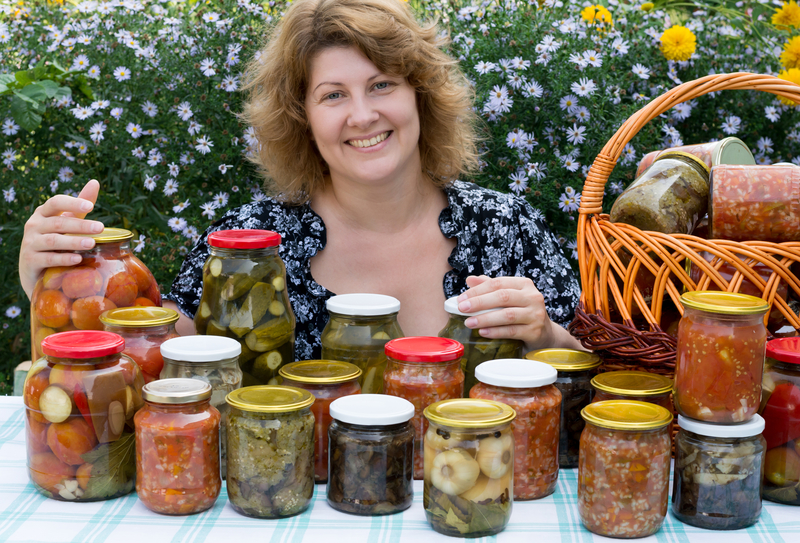
    When you are living off the land, owning animals that can provide you with food can be extremely beneficial. You may grow plenty of crops and fill your pantry with canned vegetables, but if you aren’t getting enough protein, you won’t have the energy to tend to your farm and home.

    While there are some homesteaders who don’t want to commit to raising a large farm or a herd of cattle, there are plenty of other animals such as chickens or turkeys that can ensure you have meat and eggs throughout the year. They are also low-maintenance so that you don’t have to waste a lot of your time caring for them.

    Pigs are another option that will provide you and your family with plenty of meat. While they do require plenty of food, they aren’t as difficult to raise as you may think.

    Here are a few good reasons why you should consider adding pigs to your homestead.

    1. They Will Eat Anything

    Yes, pigs eat a lot, which can be a disadvantage, but they will eat a lot of anything. Many homesteaders make their own dairy products such as cheese or butter. If you have excess whey left over from making cheese, you can feed it to the pigs. They will also eat excess milk from dairy animals, extra eggs from chickens, or any cooked leftovers that you have lying around. That means no more food thrown out the back door and nothing goes to waste.

    1. They are Excellent Tillers

    Pigs will till any area that you place them in. Many people think that the rooting that pigs do naturally is a bad habit and it should be stopped. But it’s only a terrible thing if you have them in an area where you don’t want to disturb the soil. The tilled land where pigs once lived is a suitable place to grow vegetables. That is because along with loosening up the soil, it is also well-fertilized.


    3. They Help Eliminate Parasites 

    Pigs are a dead-end for parasites that often become an issue with other farm animals such as cattle, goats, or sheep. Since pigs have internal parasites that are different from other animals, they help clean up the land when they follow other grazing animals. If you place your pigs in a field with grazing animals such as sheep or goats, the pigs will consume the eggs and larvae of the parasites on those animals. Their bodies are capable of digesting the parasites without harm. Goat parasites will not survive inside of pigs.


    1. You Receive an Abundance of Meat

    The best thing about raising pigs is the amount of meat that you can get from them. You can add more variety to your diet and create a wide range of meals for your family all while homesteading. And the best thing about it is that you know where the meat came from. You raised the pigs humanely and know exactly what type of diet they consumed.

    Suggested Article: “5 Keys to Choosing the Perfect Livestock”

    1. Extra Income

    If you end up with more meat than you need, you can always sell the additional meat for profit. Many people will raise pigs just to sell the meat and not keep it for themselves, while others may raise additional pigs to sell. You can choose to sell the pig itself or the meat after it is butchered. Either way, you end up with a substantial profit that can help with supplies during the winter.

    If you want to have enough pork for your entire family, you should get two to three piglets in the spring. Raise them throughout the summer and then butcher them that fall. Then you can do the same the following year. Raising a pig for that period of time will usually produce around 170 to 200 pounds of meat, which should be more than enough meat to keep any homesteader happy.

  • 4 Weird but Effective Ways to Avoid Deadly Bacteria

    4 Weird but Effective Ways to Avoid Deadly Bacteria

    The primary reason we need to stay clean is to maintain control over the harmful bacteria that can manifest itself in all the crevices of our body that make us smell bad and breed disease.

    The easiest way to accomplish this is to focus on the areas with the most potential for bacterial growth and go from there. What areas are those?  Just follow your nose.  It’s no coincidence that the areas that provide our embarrassing body odor are the areas we most need to target.  Just like a clogged kitchen drain or backed up sewer system, if the smell is there, the bacteria is there.

    The most common ways of battling the ongoing war of cleanliness are via large amounts of water in the form of a shower or bath.  But, what if you suffer from skin irritation issues, or you’re in the middle of a drought, are taking a 3-month journey into the wild, or just want to conserve water a little more?

    Not to worry!  Here are some carefully researched and compiled weird but wonderful ways you can clean and sanitize yourself without using excessive amounts of water.

    Smoking.  No, Really!

    Not to be confused with what you shouldn’t be doing with a pack of Camels Lights.  I’m talking about being away on an extended camping trip or living off the land, forget the waterhole, you can smoke yourself and your clothing by the fire. Smoke from firewood has antibacterial properties and should leave you feeling fresher than going without.  Yeah, you’ll smell like smoke, but that smell is better than deadly bacteria that could be on verge of damaging your body.


    Dirt Baths

    Similar to how those fancy mud and clay masks work at the local health spa.  If you have access to very fine and completely dry dirt with no extra additives like fertilizer or animal by-products, it will work wonders to absorb excess oil without over drying your skin.  Simply cover yourself in the dust, allow it to sit for a while, then scrape yourself clean and give yourself a final polish with clean fabric.  Additionally, if your hair is driving you crazy, you can create a mud “shampoo” by adding a little water, working it through your roots then letting it dry.  Afterwards, break up the caked areas and brush it out.  Your scalp will feel refreshed and ready to go.

    Use Baking Soda as A Cleanser and Dry Shampoo

    A great way to tackle the oily buildup in your hair while at the same time giving yourself a waterless body scrub is by using Baking Soda.  Sprinkle the soda onto your head and rub into the scalp.  Continue by sprinkling more soda into your hand or directly onto the other parts of your body for a clean and exfoliation that would put a loofah to shame.

    Related Article: “DIY Soap”

    If plain baking soda feels too abrasive, mix it with baby or talcum powder for a gentler cleanse. Afterwards, wipe off the excess and brush out your hair.

    Use Olive Oil to Avoid Clogged Pores and Stay Moisturized.

    If you have especially sensitive or dry skin, consider taking an olive oil sponge bath.

    Unlike standard cleansers, oils rich in vitamins and antioxidants balance the natural oils of our skin and helps dissolve the excess oil our body and face produce, which contributes to clogged pores.

    For best results, rub a small amount of it into your skin and then wrap yourself in warm, dampened towels or a robe, or a bed sheet covering your face and body for about a minute. Use the towels to wipe away the excess oil and then let yourself air dry.

    If you suffer from oily skin, try castor oil with a few drops of tea tree or peppermint oil to keep your skin from staying greasy.

    And there you have it! Four weird but effective alternatives to getting yourself soaking wet and sudsy.

  • 5 Step DIY Soap

    5 Step DIY Soap

    Making your own soap can be a fun and creative experience. You have the advantage to create a product that is safer than those available in stores and something that is free of perfumes or chemicals. You can also save money over time by making your own soap when compared to products in stores that contain the same natural ingredients. Need another good reason? You can sell it and make a reasonable profit to help you buy the things you need.

    If you are creative with making soap, you can use molds to make natural skin care products into tiny works of art. Or you can make basic soap that is just as nourishing for your skin. There are various recipes and methods that you can try for soap-making so that each batch you make can be different and unique.

    You can use milk or water to create your homemade soap, but using milk can sometimes be tricky, and the recipes that you may find in books or online may not mention that you can substitute milk for water. If you decide to use milk, keep in mind that it will cause the mixture to heat up faster, so you may want to wait until you are more experience with soap-making before you start using milk. However, once you do, the milk will give your soap a creamier color. Natural goat’s milk is a good source if you want to try it.

    Using colors in homemade soap is a fun way to make the process more creative. You can use natural colorants such as spirulina, cocoa, or paprika to create a rainbow of colors. A mixture of Spirulina and nettle creates green soap while paprika crates a nice orange tone. Cocoa can turn out either brown or purple, and annatto creates a bright yellow soap.

    How to Make Homemade Natural Soap

    The equipment that you will need for soap-making shouldn’t be used for anything else, and it should be very clean. For mixing bowls, you should use glass, stainless steel, tempered glass, or enamel. Do not use copper or aluminum since they can react to the lye. Use styrene plastic or silicone spoons for mixing. You can use silicone baking pans or purchase special molds designed especially for soap-making. You will also need a quart and a pint-sized canning jar, newspaper, stainless steel thermometer, and an old towel.

    Additives

    There are several additives that you can use when making soap including herbs like lavender and chamomile, essential oils, natural colors, oatmeal, ground coffee, salt, or aloe vera gel.

    Ingredients:

    • 2/3 cup coconut oil
    • 2/3 cup olive oil
    • 2/3 cup almond or grapeseed oil
    • ¼ cup of lye
    • ¾ cup of cool water

    Directions

    Cover your work area and put on protective gloves. Measure water into a quart jar. Measure lye, making sure you have the exact amount. Slowly pour lye into the water, stirring as you pour. Stand back to avoid any fumes. When the water clears, set aside.

    Add all three oils together in the pint jar. Heat up in microwave or place in a pan of water to heat up to 120 degrees. The lye should have come down to around 120 degrees by then. Wait for both to cool to between 105 and 95 degrees. You don’t want it to get any cooler than that or it will ruin the soap.

    Related Article:  “Homemade Citrus Cleaner”

    Once everything is at the right temperature, pour oils into a mixing bowl. Slowly add the lye, stirring until it’s mixed. You need to get the lye in contact with the soap as much as you can. After around 5 minutes of stirring, the soap mixture should lighten in color and thicken. Once it has a pudding texture, it is at “trace”.

    Add in herbs, essential oils, and any other additives. Stir thoroughly and pour the mixture into molds. Cover with plastic wrap. Set it in the old towel and wrap up. This will keep the heat inside and start the soap making process

    After 24 hours has passed, it’s time to check the soap. If it is still soft, allow it to sit for 12-24 more hours. Once it’s cold, place on parchment paper. Allow the soap to cure for 4 weeks and turn it once a week to expose all sides to air. Once it is fully cured, wrap the soap in wax paper or place in an airtight container.

  • 5 Natural Medicines You Need to Know

    5 Natural Medicines You Need to Know

    More and more people are turning to natural remedies, especially for day-to-day injuries and ailments.  The concept of antibiotics goes back well before the discovery of penicillin.  In fact, some of the natural medications used most have good antibiotic properties.

    Whether you are suffering from a cut or scrape, or a classic cold, flu, earache, or UTI there are remedies that can assist your body in getting rid of it and getting you back on your feet.

    Natural Aspirin

    The most commonly talked about Salicylic Acid, or natural aspirin, is Willow Bark.  Used for thousands of years, modern-day aspirin was originally produced using the herbs Meadowsweet and Willow Bark, then synthesized later. The problem is, when natural ingredients are copied and created in a lab then sold as a drug, they often create side-effects that natural sources won’t.

    But, before you start a collection of Willow Bark or Meadowsweet to use during your next headache, check out this surprising list of foods and other sources that naturally contain this amazing compound:

    Apples

    Avocados

    Blueberries

    Broccoli

    Cauliflower

    Cherries

    Chili peppers

    Cucumbers

    Eggplant

    Grapefruit

    Grapes

    Kiwi

    Licorice, the herb (Not the Twizzler)

    Paprika

    Peaches

    Plums

    Radishes

    Raspberries

    Spinach

    Strawberries

    Turmeric

    Zucchini

    Can I just say, WOW!

    Honey

    Every version of pure honey has natural antibiotics as well as a number of other healing benefits. Honey has also been used for several millennia worldwide to fight infections. We now know it is effective against over 200 strains of bacteria. You can use it internally to fight off many of these or use it topically in the place of store-bought antiseptic for small wounds and skin infections.

    Also, Read This:  “Honey Vinegar Cough Medicine”

    The best source of honey is raw, local honey, like the kind sold at your local farmer’s market.  Local honey will also aid in building up a resistance to local hay fever allergens as well.

    Ginger

    Fresh ginger has antibiotic properties.  It’s especially good against foodborne pathogens like Salmonella and Listeria, used as a tea with lemon and honey, it’s great for fighting again a cold or even the flu. Ginger is also an excellent anti-inflammatory that can aid in the relief of inflammation issues like arthritis and asthma.

    Raw Garlic

    Also a good defender and fighter against colds and the flu, garlic has been used for ages to remedy fungal infections, UTI’s, and intestinal parasites. The Allicin in garlic even has the ability to kill viruses that are prone to becoming immune to prescription antibiotics.

    Unfortunately, cooking garlic will kill Allicin, negating these healing properties, so you’ll have to use it raw.  Whether you choose to peel it and cut it into small pieces to swallow pill style or mash it up with some honey, raw garlic is a great way to stay healthy during cold and flu season.  Just keep some breath mints, or fresh mint, on hand.

    Related Article: Home Remedies Only Mother Nature Could Come Up With

    Turmeric

    Turmeric is not only tasty but it is good medicine. It will strengthen your immune system and destroys bacteria that leads to disease.  This spice is also great for the stomach in a number of ways that will cleanse and balance our systems. Turmeric is another multi-talented herb that is a good antibiotic as well as an antiseptic and anti-inflammatory agent.

    Buy it or Grow it

    Thanks to the rise of urban and suburban organic farms, these items are becoming more and more easily obtained.  If you’re into DIY, try growing some of these options your own in a garden or on your kitchen window sill in decorative pots.  You can even start your own Bee Colony for the “most local” honey possible.  This will almost guarantee you’ll have what you need when you need it.

  • Can Rabbits Contribute to a Homestead?

    Can Rabbits Contribute to a Homestead?

    Not just for pets, including rabbits on a homestead can be a great way to contribute to your food supplies, both as a food source and a natural fertilizer for your garden.  If you’re into fiber arts or want some extra money, angora rabbits give an additional benefit just by growing their fur.

    Rabbits for Manure

    A single rabbit can produce approximately a pound of dry manure each week.  That’s roughly 50 pounds a year. This high-quality soil conditioner is usually low in weed seeds thanks to the prepared foods typically used to feed them.  It also contains an excellent nutrient content that beats cows, horses and goats both when used fresh and when dried.

    The application can be done a few ways depending on what you need it for.  If you are feeding ornamental plants, top-dress them with fresh manure.  For produce gardens, mix it with your compost pile and let sit for at least 3 weeks before spreading on the garden areas.

    Need worms for your compost pile?  Start a worm farm under the rabbit hutch using red wigglers.  This will assist with odor control in the hutch, and provide you with a great source of worm castings, compost worms, and the manure.

    NOTE:  If your wigglers freeze to death during the winter, just replace them come spring. Learn more here: “Worm Farming”

    Rabbits for Meat

    Once you’ve gotten your “herd” started, rabbits are a really good way to add to your food sources with very little extra money.  We all know the old cliché “breeds like rabbits” and it’s true.  A well cared for trio will provide low-fat, low cholesterol, high-quality meat for years to come.

    Related Article:  “Simple Guide to Raising Meat Rabbits”

    Although some breeders consider some rabbit breeds too little to butcher, like the Mini Rex, any rabbit can provide meat when you need it.  If food is going to be your primary goal for adding rabbits to your property, some breeds developed especially to be a meat source include the Californian, the New Zealand and the Giant Chinchilla.

    Rabbits for Fiber

    Although not great for eating, angora wool rabbits will provide fertilizer and a little extra money for your trouble.  If you know someone into fiber art, this resource is amazing for fiber artists. It is excellent for spinning and weaving or can be sold raw.

    Of course, with added benefits comes added responsibility.  Angoras need regular grooming to keep them in immaculate condition, sometimes up to once a day.  Wool collections can be done quarterly by shearing.

    If fiber production sounds like a great idea, here are some breeds that will work.

    English Angora

    A smaller type of angora, English rabbits require more maintenance than other angoras.  But, at an average of 5-7 lbs., you can have a few more in the same space and still receive a good production of wool.

    French Angora

    A little larger at 7.5 to 9.5 lbs. the French rabbit’s wool is a litter rougher than the English but needs less maintenance.

    Giant Angora

    True to its name, the Giant Angora Rabbit averages about 10.5 lbs.  Giants are white with red eyes.

    Some Final Info that Could Become Veeery Helpful…

    To keep your rabbits healthy and reduce the possibility of stomach and tooth issues, avoid sweet foods like fruits and carrots and focus on grasses, and non-sweet veggies.  Sugary foods can lead to an imbalance of bacteria in their tummies and make them sick.

    And, finally, an important word on reproduction.  Rabbits are able to conceive again less than an hour after giving birth!  (Yikes!)

    So, if you’re long-term plans are to start slowly, keep a firm eye on the male at all times!  If they aren’t already, separate them and keep them separate before, during and immediately after the birthing.

    More Info:  “Comprehensive Guide Covering Everything You Need to Know About Raising Rabbits”

  • 7 Steps for Easy Canning

    7 Steps for Easy Canning

    If you decide to get into the wonderful world of canning, be prepared to experience some of the more flavorful food you’ve ever experienced at a fraction of the cost. Canning allows you to pick or buy produce when it’s at its peak maturity and preserve that flavor year-round. The simplest canning process is Water Bath Canning.

    To get started you’ll need a few inexpensive basics, many of which you may already have, or be able to find at your local thrift store or flea market. The absolute essential musts are:

    • A pot that holds enough water to cover any sized jar.
    • A Jar Lifter or Canning Rack, or at least something to help you remove the jars from boiling hot water.
    • A set of jars with the seals and rings intact.

    I found this inexpensive, complete set on Amazon “9 piece canning set”

    Getting to Work

    Step 1

    Fill your canning pot about one-third full of water and a secondary pot completely full.  Heat water until hot, not boiling.

    Step 2

    Wash your jars seals and lids, then keep warm until ready to be filled.

    Step 3

    Prepare food and fill jars according to the recipe you are using. Remove air bubbles by running a non-metallic utensil around the inside of the jar. Wipe the rim of the jar with a clean, damp dish towel or paper towel.

    Step 4

    Place the seal and ring on the jar and gently finger tighten.

    Canning is a great way to “stockpile food”, check out this “Complete System for Building a Delicious Food Stockpile”

    Step 5

    Place a small board or hand towel in the bottom of your canning pot to keep the jars from making contact with the bottom.  Place jars in your canning pot making sure the water can flow freely around the jars. Add hot water as needed until the jars are covered at least halfway up.

    Step 6

    Cover and bring to a full boil. Start timing according to your recipe.

    Step 7

    When your time is up, turn off the heat, carefully remove the jars and set upright to cool. As the jars cool, the seals pull down into the vacuum that is created and compress with a small pop.

    When They’re Cool

    After jars have cooled, press on the lid to check the seal.  It should be sucked down, not popped up.

    If you find a jar didn’t seal, just put it in the fridge and use the food within 2-3 days like you would leftovers.

    Caps will sometimes rust if left on during storage so it’s a good idea to remove the screw caps then wash the jars.  If one gets stuck, just leave it one and try to use that jar of food first.

    Label the jar with the food type and date and store them in a dark, dry and relatively cool area like a kitchen pantry.  Avoid storing them in direct sunlight, or in utility rooms with where they will be exposed to heat or high humidity.

    A Note on Jelly, Jam, and Preserves – What’s the Difference?

    They may all look the same in their jars, but there are differences, mostly in what form the fruit is in when it’s prepared for canning.

    Preserves

    Once upon a time, preserved fruit was just that. Whole or large chunks of fruit preserved in sugar for use out of season. Not designed to spread on toast, they were more often opened and served as a side dish in the absence of fresh produce.

    Jams

    These still contain pieces of fruit but they have been pulverized into pulp.  Lately, Jams and preserves have become almost interchangeable but at one time there was a considered difference between the two.

    Jelly

    Jellies are made using only the juice of the fruit that is then thickened so it can stand on its own.  Usually with pectin, sometimes with gelatin.

    Tip: How to Properly Store Your Food and Increase its Shelf Life

  • 3 Keys to Choosing the Perfect Livestock

    3 Keys to Choosing the Perfect Livestock

    A farm or homestead without livestock seems unusual, to say the least.  Whether you see yourself with a flock of cheerful chickens, a herd of graceful goats or a few calming cows, livestock are a valuable food source that should be planned for carefully, then cared for consistently.

    Are You Ready to Be Available Every Minute of Every Day?

    Are you prepared to be “on-call” for your animals 24 hours a day, 7 days a week, 365 days a year? When you enter the world of livestock, a few things to be aware of are:

    • Newborns usually come in the middle of the night.
    • Orphaned or abandoned babies will need you to feed them around the clock.
    • Escaped animals and flattened fencing will need attending to immediately, even in 110o F heat.

    Just like having kids, keeping livestock can tie you down in ways you can’t even imagine.  And, they won’t eventually grow up and learn how to take care of themselves like kids will.

    Basic Ownership Preparation and Considerations

    Before you add animals to your homestead, evaluate your situation and skills to see if you have what you need to support the new lives coming in. The following points will help you in your evaluation.

    Research, research, research-Knowledge is power!  Educate yourself on each of your options before you make any purchases.

    Talk to the Local Vet-Find out what animals the veterinarians in your area are qualified to treat.  This info alone can go a long way in helping you decide what livestock to get.

    Similar Article: “Are You Ready for Livestock?”

    Look for a Soul Mate-If you have a loud and abrupt personality, and so does your livestock, you could easily run into more issues than you want to deal with. Assess yourself and research compatible animals. In the same breath, many species require brute strength to safely interact with them, make sure you don’t take on more than you can handle.

    Enjoy the Animals-You must honestly take pleasure working with the kind of livestock you choose.

    Have Their New Home Ready and Waiting-Make sure you have ample land, structures, and resources before you finally bring them home.

    So, What Are Your Options?

    Here is some basic info on the most common livestock homesteaders consider when adding to their property.

    Beef Cattle

    Beef cattle are low maintenance and don’t need complex facilities. Most people are able to handle cattle with minimum issues and local vets can usually treat them. If you decide to go the milk cattle route, you will need to make sure you have the proper equipment to handle the milking process and storage.

    Goats

    According to a publication by Florida A&M University, 70% percent of the world population eats goat regularly. If that’s not to your fancy, dairy products like goat milk and cheese are another good protein source. Additionally, known to eat just about anything, you can picket them or corral them in a different area each day and never have to mow your lawn again.

    Rabbits

    Whether for meat, fiber, or just to have as a pet, rabbits can bring a lot to a homestead.  Just don’t go too far too fast.  Proceed carefully and know your limits.  And, keep the males away from the females unless you want your “herd” to expand exponentially.

    Related Article: “Beginners Guide to Buying Rabbits”

    So, whether you go small, medium, or large, make sure you are thoroughly prepared to take on the challenges adding livestock to your way of life can produce.

    Chickens

    Chickens need very little besides food, water, a safe place to sleep, and a few hours from you each week to gather eggs and clean the roosts.  For that relatively little amount of effort, you will be rewarded with fresh eggs and roast chicken on Sundays (or Mondays, or Tuesdays….)

    If chickens are your choice, I suggest taking a look at this guide to building the perfect chicken coops to protect your new friends and future food source <<<Click Here>>>

    Pigs

    Pigs are one of the easiest animals for your homestead because they will eat literally anything, they will be your living compost.  No need to throw away and waste anything edible, your pigs will take care of that.

    They are also great at killing parasites that may harm you other livestock, they have different internal parasites that can digest other animal parasites.  Let them graze with your other animals to help clean up the pasture and keep everyone healthy.

    The obvious reason would be the delicious meat such as ham, sausage, and bacon.

    In conclusion, livestock is a great source for food if a self-sustaining homestead is what you are looking for.  Even though it may take some time, research and hard work, the end result will be worth it.

    Here are some other food options for your “Survival Farm”


  • Healthy Sweet Tea (Video)

    Healthy Sweet Tea (Video)

    Well, Memorial Day has come and gone, and while it’s not officially summer until June 21st, the bar-b-ques have started, the pools are open, and you’ve probably already done some tanning in your front lawn.

    With summer often comes delicious sweet tea, which is a staple summer drink in the South (apparently, this is what “tea” means in the Southern states. There is no other kind of tea but sweet tea, so don’t ask, or at least this is what I’ve been told).

    The downside of many sweet teas, especially those purchased at the store as opposed to homemade, is they’ve got lots of sweeteners and even sometimes artificial coloring. It’s very easy to make sweet tea at home, and you can even make it healthy. While unrefined organic cane sugar is better than nothing, you can step it up a notch by using stevia instead, as used in this video. Enjoy, and happy summer!

    If you enjoyed this, you might also like….

    Long-Term Survival for Homesteaders…

    Natural Healing Secrets You Need to Know…

    Effective Primal Diet Hacks…