Page 11 of 20
1 9 10 11 12 13 20
Health – Page 11 – Homesteader Depot

Category: Health

  • Easy and Effective All-Natural Homemade Citrus Cleaner

    Easy and Effective All-Natural Homemade Citrus Cleaner

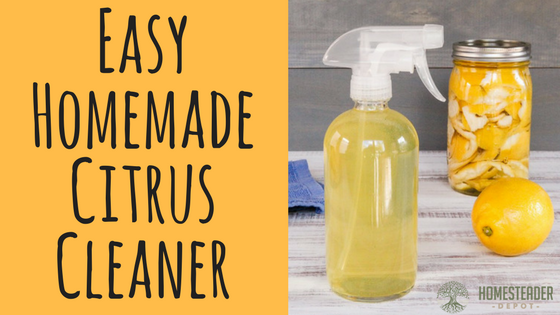
    There are so many reasons to make your own cleaning products at home. You can save money, avoid nasty, harmful chemicals, avoid keeping toxic products under the sink if you’ve got a small child, do less damage to the environment, the list goes on.

    However, one of the key features of pre-made, store-bought cleaning products is their strong smell. Sometimes it can be very unpleasant and overwhelming, of course, especially if you’re not used to them anymore, but if you’re not, you might associate that clean, sweet smell of a scented cleaning product with cleanliness itself.

    And it actually makes sense that a fresh aroma would be associated with cleanliness. While most store-bought products these days are artificially scented to enhance the sensation of cleanliness, many of the scents they use are derived from (or imitations of) plants that are naturally deodorizing, antibacterial, or antimicrobial.

    This is why I absolutely love making my own homemade citrus cleaner. It not only smells amazing, but the naturally occurring oils in citrus help to clean better, too! Not to mention, it costs literally pennies to make. You can use discarded citrus peels from oranges, lemon, or even grapefruit after you’ve already enjoyed the juicy goodness of the fruit, and just some vinegar and distilled water, and you’re good! How easy is that?

    Here’s how:

    Ingredients

    • Leftover citrus peels
    • Distilled white vinegar
    • Distilled water
    • Jar
    • Spray bottle
    • Time

    Instructions

    1. Take your citrus peels and stuff into your jar. Try to really stuff them in there so they will stay in place; you don’t want them all floating at the top. You will probably want to use a quart mason jar, but there’s no exact science here. Anything you can fit at least a few cups of liquid in will work.
    2. Next, cover with pure distilled white vinegar. And make sure you actually do cover the citrus. If you don’t manage to cover it all, it’s not the end of the world, but again, you don’t want all the peels floating at the top.
    3. Set aside for 1-3 weeks. The longer you let it sit, of course, the more potent the citrus scent will be.
    4. When you’re ready to use, simply strain out the peels, pour into a spray bottle, and dilute with distilled water (you can really use tap if you’re not too fussy). You want to go for about 2 parts citrus vinegar and 1 part water, so if you don’t have enough citrus vinegar, you can use some regular white vinegar. If you have too much, just pour back over the citrus with some more vinegar and start over! You can reuse the citrus peels at least one more time before they lose their potency.

    That’s it! Hope you enjoy this fresh, clean alternative to simple water and vinegar as much as I do.

    If you enjoyed this, you might also like….

    Discover How This “Magical” Towel Cleans With Only Water, Replaces Expensive Paper Towels and Toxic Cleaners, and Can Help You Save Hundreds Of Dollars Per Year While Saving Our Environment>>>

  • Homemade Suet Cakes for Chickens

    Homemade Suet Cakes for Chickens

    Suet cakes are a great treat for your chickens, especially as the summer heat creeps in and they have a hard time sticking to their normal activities.

    Chickens love to peck and scratch, it’s truly what they live for. If you have chickens in a coop who can’t freely forage this way, they might end up getting bored and unhappy. And bored and unhappy chickens means less eggs and less delicious meat! It is vital not just for the animal’s quality of life but also for the “services” they provide you to keep them occupied and entertained.

    Homemade suet cakes are a great way to do this! The tightly packed little cakes full of delicious treats (well, treats to a chicken) will keep them happily busy pecking away to get them.

    This recipe is a very easy and healthy way to provide your chickens with this diversion. It contains coconut oil, which is a great source of fat for your chickens, as well as naturally antifungal and antibacterial, which is super crucial for keeping their digestive systems, feathers, and feet clean and healthy.

    A note: this is just a treat for your chickens, and shouldn’t be used as a replacement for their regular feed or time spent outdoors if you’re able to let them roam at all. It’s just a fun way to supplement their regular diet and daily activities.

    Do Laundry With NO DETERGENT…Heres How>>>

    Ingredients and supplies 

    • coconut oil
    • mix of grains (pre-mixed chicken feed, or any combination of grain or seed your chickens enjoy)
    • Muffin tin
    • Room in your freezer for the muffin tin

    Directions 

    1. In a saucepan over low heat, melt your oil. How much you need will depend on the volume of the grain you use, but you can start with about 2-3 cups.
    2. Once the oil is liquid, stir in your grains.
    3. You will want to completely coat the grains with oil, so that there’s hardly any oil pooling around them. However, you don’t want there to be any dryness in the mixture. Try to think of the oil hardening; you’ll want a ratio that will allow for the oil to hold all the grains in place and form a cake.
    4. Spoon your mixture into the muffin tins. Flatten with a rubber spatula at the top.
    5. Freeze for about an hour, then remove.
    6. Tip your muffin pan upside down to remove the cakes. At this point, you can give one to your chickens and put the rest in a ziplock bag to keep in the freezer.

    In the summer heat, your bored chickens will love this healthy, fun, and not to mention cold, treat!

  • Tips For Raising Your Own Holiday Turkey

    Tips For Raising Your Own Holiday Turkey

    If you’ve considered how cool it would be to raise and cook your very own Thanksgiving turkey, then we at Homesteader Depot fully encourage you to do this. We are all about raising and growing your own, and this is a very fun way to get started raising poultry and save some money over the holidays!

    That being said, there are a couple things you should know. It’s not quite as simple as buying some baby turkeys, known as poults, and feeding them until November, then slaughtering and serving. If your goal is to have a freshly slaughtered turkey for your Thanksgiving meal, you need to be mindful of a few things. Also, there are a few other holidays you could raise a turkey for! But more on that later.


    To Start

    Turkey breeds that you’re used to seeing grace the family table during the holidays grow very fast. If you begin raising breeds like this in the spring, they will be huge by the time Thanksgiving rolls around, and possibly won’t even fit in your oven! These commercial breeds can reach sometimes higher than 20 lbs at 20 weeks of age. If this is the breed of poult you can get your hands on or would like to breed, and you buy them in the springtime, you’d probably be better off slaughtering them early and keeping them in the freezer. It might not be fresh, but it would still be your very own, organic turkey.

    Slaughtering these turkeys earlier than November can be more humane, as well. Really big breeds like this can suffer in intense summer heat, as their respiratory systems get taxed trying to cool their big bodies down.  For breeds like this, it’s best to start in late July, so they will reach a good size for serving by Thanksgiving.

    Of course, the great thing about raising your own livestock is you are not at all limited to these commercial breeds! If you’re interested in a more unique, natural kind of Thanksgiving turkey, and have an interest in raising turkeys in general for your homestead, you will want to consider a naturally-mating, heritage poult. These breeds will, as the classification implies, breed naturally and provide you with fresh poults in the springtime, to continue on growing and relying on your gang (actual name for a group of turkeys, not kidding!) for sustenance throughout the year.

    However, if you’re going with a non-commercial breed like this and you’d like to raise a prize Thanksgiving turkey, you need to buy your poults right away! You won’t want to start any later than May to have a turkey worthy of stuffing by the time the holiday arrives. These breeds can take between 24 and 28 weeks to reach the desired size to attend a large family feast.


    Other Holiday Turkeys

    But enough about Thanksgiving! Although this is the holiday we have grown to associate the most with turkey, this tasty poultry can also be served to celebrate Christmas or Easter! For Christmas, obviously, you will want to apply the same reasoning you would for Thanksgiving, simply shifted a couple of weeks later (although again, you can always simply slaughter and freeze your birds when they reach a large enough size, even if it’s before the holiday in question).

    While ham traditionally graces the Easter feast, it was not too long ago that turkey used to serve this purpose as well, and certainly still can! The thing is turkeys who have lived through the winter put on an extra layer of fat that can lend itself to some incredibly delicious flavoring, making it perfect for a festive occasion in the spring.

    To raise a bird that will be the right size and flavor for an Easter or other spring gatherings, choose June or July hatchlings to assign to the task. These will be ideal and can be slaughtered midwinter to be frozen through the spring if they get too large.

    So many people these days seem to associate a large, juicy turkey with Thanksgiving alone. In fact, you often only see whole turkeys in the supermarkets around Thanksgiving! However, these delicious birds reach such large sizes, they’re ideal for big family gatherings or festive occasions throughout the year.

    So when summertime approaches, consider buying some poults for your homestead this year and try your hand at raising your own holiday turkey!


  • 8 Health Benefits of Green Tea

    8 Health Benefits of Green Tea

    Green tea is much more than the complimentary beverage offered at Chinese food restaurants! Whether you love or hate the taste, it’s worth knowing about its amazing health benefits.

    Green tea has been used for centuries in China and throughout Asia to treat a number of maladies and diseases, everything from regulating blood pressure to killing cancer cells.

    It is a wonderful natural supplement to take because it’s list of benefits is long, but it’s also quite affordable. You can get a month’s worth of green tea for a few dollars! That sure beats a lot of other expensive herbal supplements.

    If you don’t like the taste of green tea, there are many ways you can take it. Its taste is certainly not sweet on its own, but it’s easy to mask by infusing with sweet fruit flavors or simply squeezing some lemon juice in it. Iced green tea has a considerably more muted flavor than hot green tea, so keeping a pitcher iced in your fridge with some lemons cut up in it can be a much more tasty drink that a hot cup of green tea.

    If you’re still not sold, consider these health benefits before dismissing the idea entirely:

    Increased Metabolism

    Green tea is a wonderful and natural weight loss supplement, and far better for you than the unnatural, unhealthy, synthetic products on the market. It contains valuable polyphenol, which intensifies levels of fat oxidation and can help boost the rate at which your body burns calories. Not to mention, it’s a zero-calorie drink, making it a great replacement for diet sodas or coffee.

    Regulate Blood Sugar

    Green tea has been shown to regulate glucose levels in your blood, which helps regulate overall blood sugar. This makes it a great option for diabetics and again,  assist with weight loss.

    Heart Health 

    Some scientists believe that green tea assists in the healthy function of blood vessels, keeping them relaxed and better prepared to handle changing blood pressure. This means a healthier heart. Green tea can also prevent the formation of blood clots, which are the main cause of sudden heart attack.

    The Lost Book of Remedies…In times of crisis, this book will probably end up saving many American lives>>>

    Lowered Cholesterol 

    You may be aware by now that there is “good” and “bad” cholesterol in the body, and that it is important to have a proper ratio between the two. Well, you guessed it, green tea can help with this! It helps reduce the bad stuff and keep good cholesterol in proper balance.

    Dental Health

    Some studies have shown that “catchin”, a property in green tea, actually kills the bacteria that contributes to tooth decay and poor gum health.

    Blood Pressure 

    Frequent consumption of green tea has long been linked to regulated, healthy blood pressure.

    Anti-Viral/Anti-Bacterial/Anti-Fungal

    On top of all these great benefits, green tea can also actually kill harmful viruses, bacteria, and fungi in your system. This mean it can help with everything from the common cold, to candida yeast overgrowth, to cancer. Many studies have shown it essentially stops cancer or disease dead in its tracks. If you’re not convinced that you should regularly consume green tea already, I don’t know what will!

    Beauty

    OK, so maybe your vanity is my last chance to convince you how great green tea is. If all the health benefits don’t phase you, perhaps green tea’s amazing ability to ease wrinkles and slow aging will. Green tea is incredibly antioxidant and anti-inflammatory, and studies consistently show it improves skin, reduces the effects of sun damage, and tones and clears complexion.


  • Cooking Skills Every Homesteader Should Cultivate

    Cooking Skills Every Homesteader Should Cultivate

    One of the primary reasons many people homestead is to have a closer relationship with the source of their food. You yearn to grow your own vegetables, raise your own meat and dairy, forage, and hunt; essentially, to be independent of the increasingly complicated globalized food system.

    These are certainly noble aspirations, and we share them here. Going back to a simpler time, to our roots, is something many of us are striving for in this modern world. Only a few generations ago, many people lived much more self-reliant and independent lives, and with the precarious situation our whole planet seems to be in so many ways, it’s very tempting, and quite prudent, to try to return to these traditions.

    There is, however, much more to going back to our roots than simply gardening and raising livestock. As we explained in a recent post on reading antique cookbooks, cooking was very different a century ago and much more centered around the kind of food systems many homesteaders desire to return to.

    If you want to be more independent, there are a number of cooking skills that can help. Whether you are homesteading out in the country or simply trying to live a more wholesome life in the suburbs or a city, these are skills that are invaluable to cultivate and can have a great positive influence on your cooking and health.

    1. Cooking over an open fire

    This is bare bones basic cooking, and everyone should (but most likely won’t) know how to do this. If you ever go camping or have bonfires, you should be working on cooking over an open fire. There are many methods of how to do this, and yes, bar-b-que (sort of) counts. The thing is, we just get so used to our gas or electric ranges we never learn the art of controlling the heat ourselves, other than turning a knob, and this takes a huge aspect of cooking out of the equation. If you work on only one basic cooking skill, this should be it.

    2. Cooking in a wood oven

    This is very similar to cooking over an open fire in that we have become spoiled by modern ranges and can greatly benefit from learning this art. Wood ovens are great staples to have on a homestead anyway, for many reasons, and odds are if you plan to go off-grid or are caught in a grid-down situation, you might need to rely on a wood stove and oven to prepare your food.

    3. Butcher whole animals

    This is a big one, especially if you want to raise your own meat. If you live in a community, you probably have a butcher you can bring your animals to once you’ve slaughtered them, and this is definitely a great resource to have. The thing is, as great as it is to support your local butcher and we’d highly encourage you to keep him in business, you should also be learning to do it yourself when you can. Because let’s be real: it’s not entirely self-reliant if you have to rely on someone else to do the really hard part.

    Try to find ways to integrate butchering into your cooking life. Even if you don’t raise animals, simply buying a whole chicken and learning to properly section it off not only saves money but is good experience. If you do raise animals, take some time to learn to butcher them yourself. It’s hard work and you don’t want to get stuck having to learn how to do it when your life depends on it.

    4. Curing Meat 

    Curing meat is a very underrated method of food preservation. We constantly advocate for learning to preserve your own food, such as canning or lacto-fermenting, or culturing of any kind, and these methods of food preservation is all the rage these days. Less popular but equally important is learning to cure meat. If you are raising your own meat, this is essential. Curing can help preserve meat for a very long time, and of course,  make it absolutely delicious as well. This age-old method of curing meat has been used for centuries, since long before refrigeration, and shouldn’t be underestimated.

    5. Cooking with cast iron 

    You may already be familiar with cooking with cast iron, but if you’re not, you should seriously consider investing in a skillet or dutch oven. No cookware lasts as long or endures as much wear and tear. There’s a reason it has been a staple in Western kitchens for years. It’s the original non-stick skillet, and you can easily clean and maintain it using some oil or lard (how old-fashioned is that?), making it a great option for off-grid kitchens without running water as well. Where all other pots or pans will eventually deteriorate or break, cast iron will last forever.

    It’s great to start homesteading and create a more empowering relationship with your food, but don’t forget to learn how to cook it in a more traditional way!

    If you enjoyed this, you might also like….

    Long-Term Survival for Homesteaders…

  • The Health Benefits of Flaxseeds

    The Health Benefits of Flaxseeds

    Flax seeds are a pretty popular health item as of late. They can be bought either ground, in seed form, or in a highly nutritious oil.

    As the healthy fat craze continues, flax seed has proved itself to be a desirable form of healthy omegas-3s. I have always enjoyed it ground on top of yogurt or in multigrain bread, while I enjoy the oil in salad dressings.

    However, what I did not learn until recently is that flax seed oil is also used as a natural remedy. While it’s great for day-to-day health maintenance, it’s also a great natural health first aid item too, and I’m always looking for ways to diversify my healthy medicine chest.

    Of course, health and diet are so interrelated, that it should come as no surprise that something that is amazingly healthy for you is also effective at alleviating and even curing many maladies. Here are some of the wonderful health benefits of flax seed and flax seed oil:

    Assist Healthy Digestion 

    First of all, besides the beneficial omega-3s, flax seed is also very high in fiber, which is an essential nutrient for many bodily functions. For this reason, it can promote digestive regularity, and help to detoxify the body. This is due to its high level of mucilage gum content. Mucilage is a type of fiber that forms as a gel, and because it is water soluble, it is incredibly beneficial to the intestinal tract. It helps regulate digestion as well as maximize nutrient absorption.

    If you are struggling with any digestive health issues, flax seed can be very helpful.

    Anti-Inflammatory 

    Flax seeds are also very anti-inflammatory and are often used as a natural remedy for arthritis. The beneficial omega-3s in flax seeds, which make up 50% of the fat content of flax seeds is a natural enemy of pro-inflammatory compounds. Ground flax seed is a great source for these healthy omega-3s, but flax seed oil is even better. Ground flax also contains lignans, a certain kind of plant chemical which can also combat inflammation of the joints.

    Cancer-Fighting

    Lignans are also well-known for fighting cancer. In tests, flax seed containing high amounts of lignans have shown to considerably reduce cancerous tumors on mice as well as significantly help men with prostate cancer see a reduction in symptoms.

    Ease Symptoms of Menopause 

    These amazing plant chemical lignans you now know so much about also help to ease the symptoms of menopause. Once absorbed, the lignans convert to plant estrogen in the body, which can help reduce hot flashes. For this reason, they are also linked to lower rates of breast cancer as well as reduction of breast cancer tumors.

    Lower Cholesterol 

    The high fiber content of flax seeds, along with the powerful flavonoids they contain, all contribute to lowering “bad” cholesterol in the body.

    How to “Use” Flax Seeds 

    At this point you’re probably wondering, well, how do you I use this amazing nutrient to gain these health benefits?

    If you’re not used to consuming flax seed as part of your regular diet, don’t worry! It’s very easy to integrate into a normal diet, and it’s relatively neutral, nutty flavor doesn’t need much getting used to, it’s quite subtle.

    First of all, it’s worth nothing that if you are struggling with any of these issues, from poor digestion to cancer, that simply introducing flax seed to your diet might not be enough. No matter what you’re dealing with, nothing is worth more than an all-around healthy diet, one that is balanced, full of plant-based nutrients, healthy fats, and lots of whole foods, preferably organic and antibiotic-free. Lots of naturally fermented foods and raw dairy are excellent as well. If you do have any health issues, you might be avoiding anything from dairy to meat to carbs, not everyone has the same dietary needs or desires, but anything that contains reasonable portions of whole foods with enough vegetables tends to work for almost everyone. Read our Ultimate Guide to Health Diets for more.

    Integrating flax seeds into your diet can be a great way to transition to healthier foods, though. Here are some ideas for how to eat it on a daily basis. Keep in mind that the best forms of flax seeds are either freshly ground or in oil form; pre-ground flax doesn’t have as many of the benefits as freshly ground.

    Ways to use flax oil: 

    For the most part, you can use flax oil as you would any other oil. But since it can be rather expensive and you are going to health benefits, you’ll probably want to eat it straight, added to dishes by the teaspoon or tablespoon. Here are some ideas:

    • in salad dressings
    • drizzled over toast or on sandwiches
    • in bulletproof coffee
    • stirred into or drizzled over yogurt
    • as a marinade or cooking oil for meat
    • stirred into hot cereal
    • by the spoonful

    Ways to use ground flax:

    If you are serious about regularly consuming ground flax, buying a small coffee grider and the whole seeds is the easiest way to do this. That way, you can grind them up as needed and reap all the benefits! Here are some ways to use them:

    • sprinkled over yogurt
    • in a smoothie
    • in muffins or breads
    • as a coating for lightly fried chicken
    • stirred into pancake batter
    • in meatloaf (in place of breadcrumbs)
    • in cold or hot cereal


    Hope this has given you some great ideas for how to use this amazing super food! Start boosting your health easily and naturally by incorporating flax seed into your diet today.

    If you enjoyed this, you might also like….

    Long-Term Survival for Homesteaders…

    Natural Healing Secrets You Need to Know…

    Effective Primal Diet Hacks…


  • How to Read Antique Cookbooks

    How to Read Antique Cookbooks

    Antique cookbooks are a wonderful relic of the past, and yet, if you’ve ever tried to make any of the recipes contained within, you might find yourself scratching your head.

    Just as lifestyles have changed drastically in the last half, even quarter century, so have the way we cook, talk about, and interact with food, and the cookbooks of yesteryear might be a bit cryptic to today’s modern cook.

    However, if you are a homesteader, these antique cookbooks might be very appealing to you. They are written for people who had access to the kinds of things homesteads produce, and deal with ingredients like whole animals, natural leavening agents, and tools wood fire stoves or ovens.

    To help you decipher the archaic language of antique cookbooks, we’ve put together a little guide.

    Leavening 

    The way we leaven our baked goods these days is very different from the way people did a century ago. While there is a big movement to return to natural leavening agents, you either might not be familiar with this technique yet, or simply don’t understand what the cookbook is calling for.

    You might find yeast being called for by the cup or “teacup” in your antique cookbook, and this means an active starter like sourdough or a homemade yeast. You can also use dry yeast here (a relatively recent invention), but use 1 tbs for less than 6 cups flour, 2 tbs for 6-11 cups, or 3 tbs for 11-26 cups.

    There have also been many changes in agents like baking soda and baking powder. If baking soda is called for, you’ll want to reduce the amount you use, as the baking soda we have today is double-acting, meaning it rises twice as fast. If the recipe calls for soda, 1/2 a tsp per cup of milk, sour milk, buttermilk, etc., or every teaspoon of vinegar or lemon juice.

    Temperature 

    Most old cookbooks assumed that the reader already knew how to operate their oven and range, so most of the time, ingredients, and steps for preparing the dish are given, but with only a few vague instructions for baking at best. Since gas ranges and ovens weren’t common until well into the 20th Century, anything written before that wouldn’t assume you were using one.

    In many cases, you’re simply going to have to use common sense. Odds are if you’re brave enough to dive into an antique cookbook, you are probably pretty comfortable in the kitchen, and know that, for the most part, certain baked goods tend to be baked around the same temperature. If you’re confident baking on a regular basis, you should be fine. If you’re confused, reference the temperature used in a contemporary version of a similar recipe, and just watch your dish carefully as it bakes.

    Measurements 

    Old-fashioned cookbooks have some odd standards of measurements. For instance, “teaspoons” are the same word, but the measurement has changed. It used to be 4 tsp per 1 tbs, while our present measurement is 3 tsp per 1 tbs. Also, when teaspoons or tablespoons are indicated in old cookbooks, they might have meant rounded, while today we typically refer to these measurements as the flattened-off version. These rounded, or “heaping” measurements, means that there could be nearly double the amount in one measurement!

    You also might find some unusual words you don’t recognize. A “dessertspoon” is half a tablespoon, meaning that, when a tsp equaled 1 tbs, a dessertspoon would be 2 tsp (today you might simply have a half-tablespoon measuring spoon on your personal set, I do).

    Other measurements that might be unfamiliar are a  “salt-spoon”, which is is 1/8 of a tsp, a “dash” (still used today in many cookbooks) is one shake of a shaker.

    A “cup” in an old-fashioned cookbook might mean about 1/5 less than our modern 8 oz cup. “Teacup”, a phrase you won’t see anymore, is simply half a cup. “Wineglass” is the equivalent of our current 1/4 a cup. Sometimes, you might see a recipe call for a “bowl”, use your best judgment using one of your own bowls, based on the other proportions in the recipe.


    While some old-fashioned recipes from antique cookbooks might be a bit daunting at first, never fear. While cooking language and techniques have changed, for the most part, it’s all still food. If you’re confident cooking on a daily basis, you can probably use your best judgment to make the recipe work for you. These old cookbooks can contain timeless wisdom when it comes to food, and since homesteading is all about getting back to our roots, its important to take advantage of these antique resources.


    If you enjoyed this, you might also like….

    Long-Term Survival for Homesteaders…

    Natural Healing Secrets You Need to Know…

    Effective Primal Diet Hacks…


  • Essential Items for Your Emergency Survival Kit (Infographic)

    Essential Items for Your Emergency Survival Kit (Infographic)

    Whether you’re a survivalist, prepper, homesteader, or simply someone who wants to create a culture of self-reliance in your home, you need to be prepared for emergencies.

    It can be overwhelming thinking about everything you might need to survive long-term, but it’s always prudent to simply start with the basics. Every family should have a basic emergency survival kit, and this infographic from SHTFPreparedness.com is a great guide for how to build this kit and what you should have in it.

    These simple items are essential for any kind of emergency, and even if you’re not set up with enough food and water to survive a total zombie apocalypse, having this stuff on hand will greatly impact your odds of survival if there is a disaster or emergency in your area.

    If you enjoyed this, you might also like….

    Is Your Home Secure?

    Natural Healing Solutions…

    Why Everyone is Switching to the Primal Diet…