Page 49 of 89
1 47 48 49 50 51 89
Homesteading – Page 49 – Homesteader Depot

Category: Homesteading

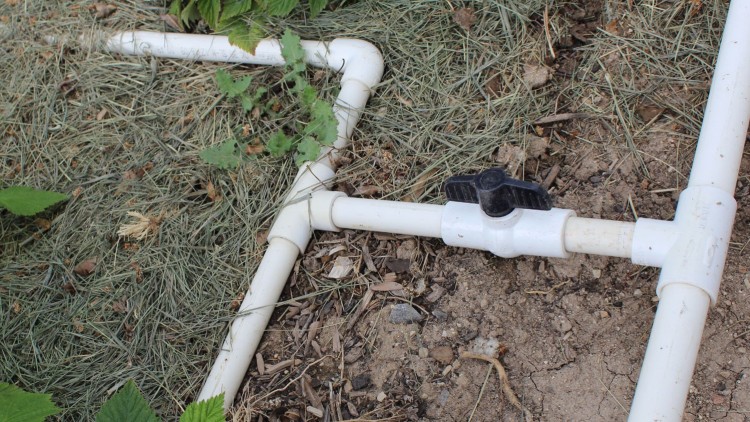
  • Tips for Installing PVC for Irrigation   

    Tips for Installing PVC for Irrigation  


    In ground irrigation can make a real difference for your lawn and garden, saving you time in water, and time and energy in failed crops due to your not watering.  But installing PVC doesn’t always come without headaches, and for those that have never done it, it can be intimidating.  It can also be expensive to hire someone to do.  Here are a few tips to keep in mind if you are thinking of installing PVC in your lawn or garden for irrigation.


    1. Spray paint, or otherwise mark out where you are going to lay your PVC so that you do not dig or trench off track, just to have to turn around do it again.
    2. Get a PVC cutter and don’t waste time and energy trying to saw through the pipes.
    3. You want to pipes to lay straight so that you can find them in case a repair is needed, but don’t stress out if they aren’t 100% straight. As long as they are close it’s good enough.
    4. Avoid 90 degree angles. If you have to make a 90 degree turn, use two 45 degree angels separated by 8 inches or so instead.
    5. Remove all rocks from the ground prior to laying the pipe in. Rocks in the ground, especially where vehicles or even foot traffic is heavy, could lead to damage of the pipe over time.
    6. Always use that horrible smelling purple primer before gluing.
    7. Make sure to firmly compact the ground beneath any sprinklers or other fixtures. If the ground is soft beneath them, the pipe will be under stress every time weight is applied near them, like when a mower drives around them.
    8. Always flush out the lines prior to installing any fixtures since dirt is sure to make its way in while you are putting the pipe together.
    9. When installing larger systems never do the calculations in your head, online resources are available to help you figure out what diameter of pipe you need for the desired water flow over the distance you are working with.
    10. When doing repairs, always excavate twice as much as you think you need to. This will help because the pipe will be more flexible if a longer piece is free from the ground, this is helpful when attempting to put two pieces back together.

    No amount of planning will ever make PVC installation easy, but a little foresight and keeping these tips in mind can make a big difference.

    Natural Healing Techniques Doctors Don’t Want You to Know…

    The Weight-Reducing Magic of Yoga…

    The Ultimate Woodworking Course..

  • Getting the Garden Ready for Spring Now   

    Getting the Garden Ready for Spring Now  

    Just because you don’t have a garden, or if yours is covered in snow and not producing, doesn’t mean there is nothing you can do now to get ready for next season.  Getting ready now will help you start early and thereby increase the length of your growing season and with it, the amount of food you are able to produce next year.  Here are a few things you can do now to be ready early for next spring.

    • Start shopping now for deals on spring crop seeds. The longer you wait, the more uniformity you will see in rising costs for spring crops.
    • Prepare the area that you are going to grow in. If you don’t have a garden now you can cover the area in cardboard before putting your raised bed frame and dirt on top.  This will be much easier this time of year than when the grass is growing.  If you have a garden already you can mulch it heavily to keep the soil as warm as possible and add organic matter.
    • Building a starter box will allow you to start spring crops earlier indoors where it is warmer.
    • Budget now for items that you will use during next growing season, items like bird net, stakes, irrigation supplies, material to build cold protection. Purchasing these items in the winter will help spread out the cost of gardening, making it easier to budget for.

    Getting done whatever you can now, even if it is small well help save time and energy later.  For most of us, those are the two most limiting factors in gardening, so anything you can do to get more of them in the growing season is a big head start.

    If you liked this, you might also enjoy…

    What Are the Signs of the End Times?

    Learn Natural Healing Secrets From the Masters

    Preparing for the Bubble to Burst 

  • How to Preserve Flour for Up to Five Years (Instructions and Video)

    How to Preserve Flour for Up to Five Years (Instructions and Video)

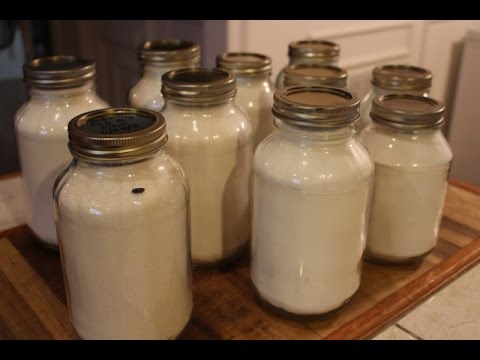
    Did you know there’s such a thing as canning flour? Neither did I, but I recently came across a video with instructions on how to do it. I’ve dealt with both weevils and pantry moths in the past, so I was pretty intrigued by this method, and it definitely seems like a surefire way to store flour for a long time.

    It’s not really as complicated as canning other types of food, but it follows the same principles. Here is what you need:

    Supplies: 

    Flour that you want to preserve

    Half-gallon canning jars and lids

    Canning funnel (very useful, but optional)

    Paper towels and dish towels

    Labels or marker

    Instructions: 

    1. Before you begin, start with properly sanitized jars. You can do this by washing, drying, and baking in the oven for about 20 minutes.
    2. When you’re ready to can your flour, preheat your oven to 215 degrees
    3. Using the canning funnel (if you’ve got one), fill your jars with flour. Make sure they’re packed in well, you can gently tap the car on the counter to let the flour settle in the jars.
    4. When your oven is preheated, move your oven racks so you will be able to fit the jars, and place them on a sheet in the oven, without the lids.
    5. Leave in the oven for 1-2 hours. This will dry out the flour and prepare the jars for the “canning” effect.
    6. After 1-2 hours has passed, take the jars out (carefully!) and place on a dish towel on your counter
    7. Wipe down the rims of the jars with a damp paper towel, then attach the lids as tightly as you can
    8. Leave the jars out overnight on the counter. In this time, they will cool and pop the lids out, completing the canning process.
    9. In the morning, label the jars with the date you canned them.
    10. Store in a cool, dark places, for up to five years.

    That’s it! Pretty cool huh? Check out the video if you’d like to see more:

    If you enjoyed this, you might also like….

    Home Defense in the End Times…

    Natural Healing Secrets You Need to Know…

    Eat Like Your Ancestors…

  • Canning Stone Fruits (Infographic)

    Canning Stone Fruits (Infographic)

    I have always been fascinated by canning, and I’d love to do more of it myself. It always seems kind of intimidating, but it’s really not too complicated, and this handy infographic from SurvivalLife.com breaks canning stone fruits down into simple steps.

    Stone fruits are some of the easiest items to can, and the steps taken in this guide can be followed with a $10 canning kit from Walmart or any grocery store. Cherries, plums, apricots, and peaches, make great preserves, from jams and jellies to easy pie fillings.

    I think my favorite thing about canning is how long preserves last, up to several years when stored properly, and how an afternoon of canning can produce months of delicious preserves. If you don’t have a local supply of seasonal stone fruits, you could always wait until they’re on sale at your grocery store, buy a bunch and try your hand at canning them!

    Canning Info


    Natural Healing Techniques Doctors Don’t Want You to Know…

    The Weight-Reducing Magic of Yoga…

    The Ultimate Woodworking Course..

  • Never Buy Fertilizer Again

    Never Buy Fertilizer Again

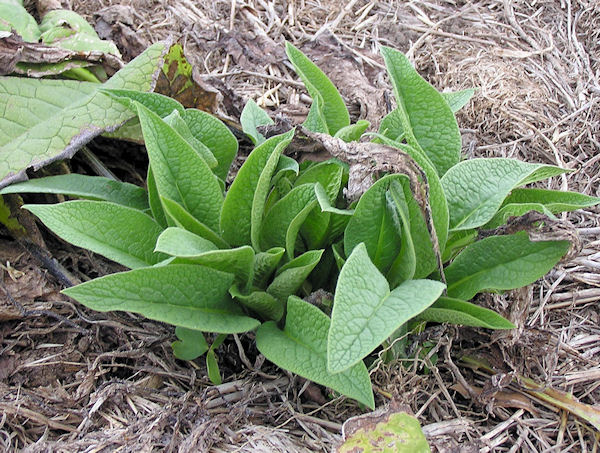
    It’s not just a clickbait title, with a few easy steps you can have nutrient rich soil forever, and never need to buy fertilizer again.  How?  Grow comfrey.  Comfrey is beneficial it is borderline supernatural.  As a dynamic accumulator comfrey gathers nutrients from where other plants cannot and transfers these nutrients to its leaves.  These leaves can then be used in the place of store bought fertilizers with amazing results.  Not only is comfrey an amazing alternative to expensive fertilizers, but it is also incredibly easy to grow, propagate, and use to enrich your soil, here’s how.


    1. Purchase some comfrey starts, or better yet make your own from a friend’s plants. To make starts from an existing plant all you need to do is to dig it up and split the larger portions of the roots.  Any root segment that is more than 1 ½ inch long should grow.  Although comfrey is very hardy once it is established it is prone to pest attack when it is just getting started because of how nutritious its leaves are, so place them on a table or inside to get them started.
    2. Comfrey is not a picky plant, it is able to grow in just about any reasonable soil and can tolerate shade. But if you want to get a lot of nutrient rich leaves to use as fertilizer it is best to plant it in the sun so that it will grow fast.  Comfrey grows very dense, and can be used as a border for your garden or around trees.
    3. Once your plants are established they will be virtually impossible to harm. You can take 90% of their leaves at a time and they will continue to bounce back.
    4. Though many people will tell you to make a compost tea with the leaves, a slow release process is much easier, and in reality, just as fast since the act of making the tea will not take any less time. Simply cut off the leaves, and mulch with them.  Worms love comfrey, and the leaves will quickly be part of your soil, releasing the nutrients that their roots have gathered from up to 30 feet into the subsoil where your vegetables will never be able to otherwise access.

    Gardening usually requires hard work with no shortcuts, so it can be difficult to believe that comfrey can so easily solve your soil nutrient problems, but it’s true.  Comfrey is a natural wonder and no garden is complete without a supply of it.

    If you liked this, you might also enjoy…

    Become A Master Healer With This Revolutionary Course…

    Traditional Hindu Yoga for Weight Loss

    Improve Your Carpentry Skills Quickly and Easily…

  • 3 Ways to Purify Water

    3 Ways to Purify Water

    If you are homesteading or in a survival situation, water will always be your primary need. If you have a source for fresh water on your homestead, that’s a huge advantage, but you also might need to purify the water.

    Whether you are collecting water from a stream, spring, rainwater, or what have you, it’s important to be able to make the water drinkable using one of many possible purification methods. Here are a few of the easiest and most popular purification methods for your consideration:

    Boiling

    By far the easiest way to purify water, it is not always the simplest, especially for large amounts of water. But in a pinch, this will be your go-to, given you have the energy and container to boil a large amount of water. By bringing the water to a boiling point and letting it simmer for five minutes, you will kill the vast majority of harmful bacteria and microorganisms.

    Chlorine treatment

    This is another common way to purify water, and typically what your municipal water provider will use. Chlorine isn’t ideal for many people, especially those who are health-minded, but when the choice is between contaminated water or no water at all, and drinking water with chlorine in it, having chlorine tablets or bleach around to purify water is prudent. It doesn’t take much, usually 2 drops of chlorine bleach per quart.

    Filtering 

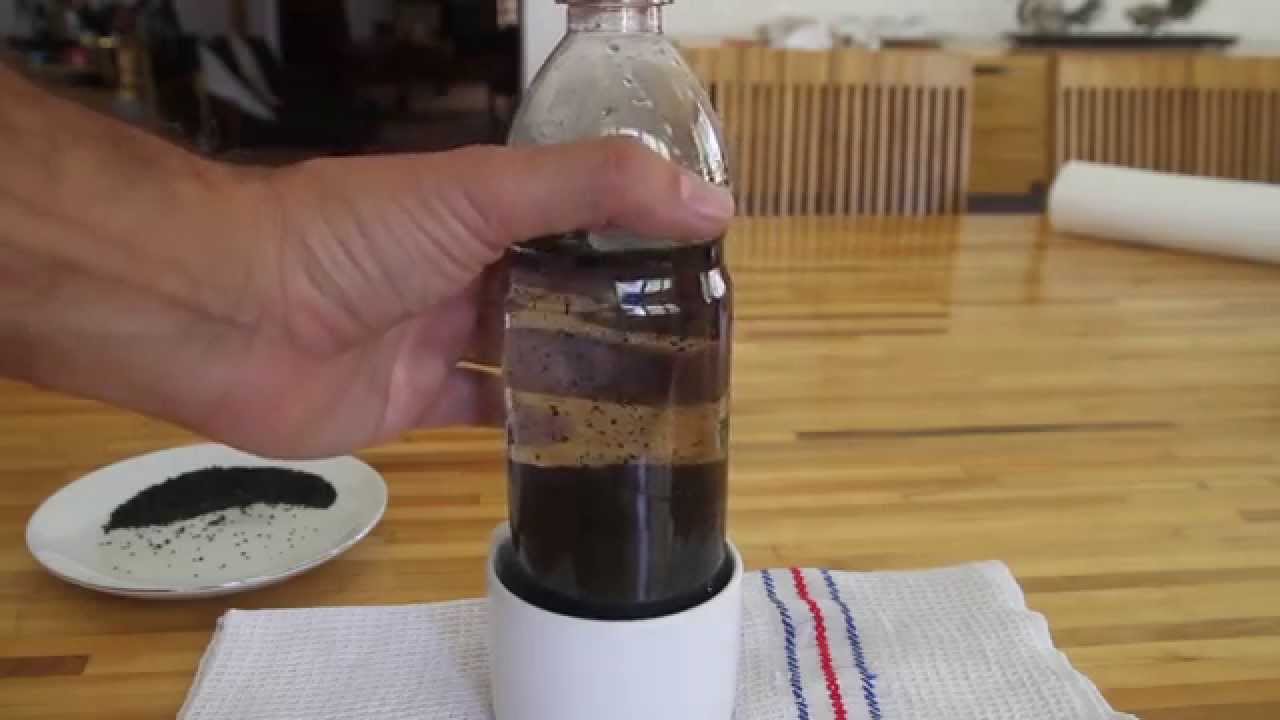
    It’s not too complicated to make a DIY water filter that will remove the majority of water impurities, and this might be a possible long-term solution for regular water consumption. What you do is find a container that can funnel the water, upside down plastic pop bottles are the popular choice, and fill 1/3 of the way with sand, 1/3 of the way with charcoal, and 1/3 of the way with pebbles. Cover the spout with cloth or screen mesh, then pour your water through.


    These are a few basic ways to filter water, but there are other, more complicated options out there like purification tablets, distillation, and higher-dollar filters that might suit your needs long-term. But in a pinch, if you have no money or find yourself cut off from modern water supply, these are great methods to know.

    If you liked this, you might also enjoy…

    Holistic Medicine Basics

    Ever Considered Taking Yoga? Read this

    The Ultimate Woodworking Course..

  • How to Freeze Lemons (Video)

    How to Freeze Lemons (Video)

    I saw this on Pinterest recently and I didn’t understand why it was such a big deal. Freeze lemons, OK, so what? Well, it turns out that lemons contain unique compounds called “lemonoids” which do serious battle against cancerous tumor, particularly from breast cancer.

    Lemon peels are packed with vitamins, way more than the actual lemon juice. Aside from being amazing cancer-fighting nutrient sources, they also help to detox the whole body from health issues like worms, parasites, fungi, and bacteria, which can be responsible for a multitude of overlying health issues and are not often addressed by modern medicine. Nature is so amazing!

    Since you probably don’t feel like chewing on some lemon peels, freezing lemons is a great way to ingest the vitamins. As this video shows, you can freeze the lemon to make it easy to grate, then use the grated lemon to add to all kinds of foods and drinks. I can’t wait to try this! Check it out:


    If you enjoyed this, you might also like….

    Home Defense in the End Times…

    Natural Healing Secrets You Need to Know…

    Eat Like Your Ancestors…

  • Crops to Get Kids Excited About Gardening

    Crops to Get Kids Excited About Gardening

    Gardening can be fun for kids, though it requires more patients than most kids can muster up.  Getting them started with an interest in gardening at a young age will increase their likelihood of eating healthy and continuing gardening as they grow older.  Gardening can get kids off the couch and outside where they belong, learning about the world around them, and how they can relate to it in a beneficial way, both for them and the natural environment.  Here are a few crops that are more likely than others to get kids excited about gardening.


    Stevia

    Stevia seeds are on the small side, so you will need to help young kids when handling them, or even get a few starts instead of seeds.  The excitement from stevia doesn’t come from growing it, but from eating it.  Kids are in for a pleasant surprise when they taste how sweet stevia leaves can be, which can increase their interest in other green foods and plants in general.

    Beans

    Beans are a great first crop for kids to grow.  The seeds are large enough for the kids to handle on their own, and the large size makes them great for learning since all the parts of the developing plant will be more clearly visible.  It’s more fun if you sprout the beans on the surface of the soil so the kids can see the root and leaves come out of the bean.  They can even let them go to seed and see the end result is the bean they first planted.

    Mint

    Mint is a great plant for kids because of its unique taste and its ability to root from nearly any cutting.  It’s a great plant to demonstrate rooting cuttings from.

    Meyer Lemon

    Kids love everything that seems to be sized just for them.  Kids can water the tree and watch the fruit grow at eye level.  Meyer lemons are also sweeter than larger varieties, so kids are more likely to enjoy them.


    Whether you want to teach your kids botany, health, and fitness, or the utilitarian skills of self-reliance, getting them started early with gardening will put them well on their way.

    Natural Healing Techniques Doctors Don’t Want You to Know…

    The Weight-Reducing Magic of Yoga…

    The Ultimate Woodworking Course..