Page 13 of 16
1 11 12 13 14 15 16
Outdoors – Page 13 – Homesteader Depot

Category: Outdoors

  • 5 Mistakes First-Time Chicken Farmers Make

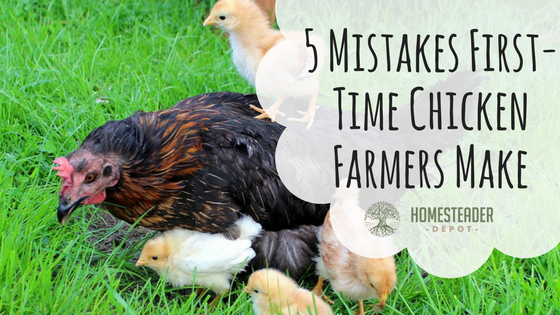
    5 Mistakes First-Time Chicken Farmers Make

    When it comes to homesteading of all kinds, trial and error is a great way to learn. However, when you’re raising animals like chickens, you probably want to reduce the possible mistakes you can make.

    If you’re considering starting your own chicken flock, you’ll want to do it right. We’ve got a list of five common mistakes people make when they first start keeping chickens to help you avoid making them yourself.

    1. Not protecting against predators

    Like a fox in a hen house, many predators out there, depending on your region, will see your chickens as a delicious, juicy, jackpot. When you set yourself up with a coop or enclosure, make sure you know which animals in your area would like to get their hands (or paws, or claws…you know what I mean) on your chickens, and research which kind of barricade will keep them out the best.

    And be prepared by a threat from land, sky, even underground, in some cases. Hawks, foxes, coyotes, skunks, raccoons, weasels, bobcats, hawks, and even rats and domesticated dogs and cats, will have their eyes on your chickens, so secure accordingly. Having a guard dog that is trained not to harm the chickens themselves can greatly reduce the threat to your chickens, but you’ll also have to be realistic about a bit of trial and error here, as sad as it is. You might have to learn the hard way at some point that a predator might still be able to penetrate your barriers, so when you first start a flock, mentally prepare yourself for the possibility of this. It might cost you a few chickens, but learning the hard way is still learning.

    2. Failing to check local laws 

    Predators aren’t the only creatures that pose a threat to your chicken-raising operation; bureaucrats do too! Before you even begin to think about planning to raise chickens, check your local ordinances first. Not just zoning laws, but local homeowner’s associations as well. This will mostly apply to urban and suburban homesteaders, particularly if you live in some kind of gated community or apartment or condo complex. But even if you own your own home and have a decent-sized yard, there still might be strict regulations regarding the raising of poultry. If you are a homesteader on your own property, this is unlikely to affect you much, but you should check anyway, just to be safe, particularly if you plan on selling your eggs, meat, chicks, or chickens at any point.

    NEVER Buy Laundry Detergent Again>>>

    3. Not preparing for injury or sickness 

    Chickens are creatures like any other and are subject to injury or illness. There are a number of conditions that can affect birds, such as skin conditions on their feet, mites or pocks, thrush, botulism, cholera, and one you’ve probably heard of quite a bit in the news: bird flu.

    Familiarize yourself with common bird conditions, join local forums for chicken farmers so you know what’s in your area, and get yourself a good chicken first aid kit. There are a lot of great natural remedies for less severe conditions, as well as more conventional remedies you can stock up on beforehand to be prepared. You’ll also have to prepare yourself, at least mentally, for the possibility of having to separate a sick or injured bird from the flock; a simple dog or rodent kennel can work great for this but keep in mind that chickens can sometimes attack a sick or injured bird, so you’ll have to read up on re-introducing them to the flock.

    4. Taking on too many chickens

    Just because you have an established flock and a good coop doesn’t necessarily mean you’re equipped to take on new hens a neighbor or friend might be giving away. The size of your coop absolutely has to be appropriate for the number of chickens you have, and two or three extra can create cramped, unpleasant living conditions for all the chickens.

    When you set up a coop, make sure you’ve got enough space for each chicken. 5 sq feet per bird is a standard recommendation, not to mention enough a roost and nesting box for each hen (they only sleep in their nesting boxes when they’re sitting on eggs, otherwise they like to perch). If you want to be equipped for extra hens further down the road, and this is quite prudent if you plan on raising more chickens, set yourself up with a coop that can easily be added to and expanded on.

    5. Starting with chicks

    It’s quite standard to start with chicks when you’re beginning a flock, and many farm supply stores sell freshly hatched chicks, along with feeders, water bottles, and heat lamps to keep them warm. While certainly millions of chickens have been raised just fine like this, if you want to go an easier, cheaper, and more sustainable route, just get hens and a rooster. This might cost more money up front than a few chicks, but you’ll need fewer supplies, and, well, if you get a rooster, your chickens will be making their own chicks, for free, in no times.

    The thing is, hens take care of baby chicks infinitely more efficiently than humans do. All the gadgets people buy to raise up chicks are just meant to imitate what a mama hen will do for them instinctively. For the price of some chicken feed, you’ll get something much better than a heat lamp that’s totally sustainable: a hen to sit on the chicks when they’re cold, and direct them to food and water, not to mention keep track of them all day while you tend to all your other homestead tasks.

    If you let your hens raise up their own chicks, keep in mind you’ll still need to make sure there’s feed small enough for the baby chicks, and a water container they’re able to access, but otherwise, the mama will do the work for you.

    Hope this helps you prepare for chickens and avoid some common mistakes!

    Power Efficiency…This Simple Device Will Change the World Forever>>>


  • The Right Way to Water Your Plants

    The Right Way to Water Your Plants

    You may not have realized it before, but there are proven best practices for watering your plants and garden. Determining just when and how to water for the healthiest, most productive crops is all about paying attention to a few key factors. It might seem a little silly; is there really a wrong way to water plants? Not necessarily, but there are certainly better ways!

    There are no rules written in stone that apply to water all plants in all situations. You can make your call depending on the type of plant, the soil, the weather, the time of year and other factors. Don’t worry, it doesn’t get too complicated–you can even teach your kids to help!

    When to water:

    For container plants, there’s a simple and accurate test to check their water levels. Slowly and evenly water the soil until it begins to drain from the vessel at the bottom. After the draining stops, lift the pot or basket to get a sense for how heavy it should feel. When it feels light, it’s time to water. Easy as that!

    Now, you obviously can’t use the “lift test” in your garden or landscape. The appropriate alternative is to push a spade into the soil near your plant (but at a safe distance from the roots) and pull it back to get a good look at the soil. If consistent moisture reaches a depth of 6 to 12 inches, you’re in good shape. If it’s bone dry, water!

    You may find that your watering needs become somewhat regular, but don’t rely on timing them too much. You need to account for rainy or dry weather and plan accordingly. On especially hot and dry days check the soil to see if you need to water a second time.

    Always water early in the day. This allows any water that lands on the foliage and stalks to dry in the sun and reduce the risk of disease. Never water after sundown! Not only does this promote fungal disease, but it also attracts unwanted pests like garden slugs.

    Suggested Article: How to Catch and Use Rainwater

    How to water:

    When it’s time to water, always focus on the root zone. After all, it’s the roots that need water, not the leaves! If you water too quickly and flood your plant, it runs straight down the soil avoiding the root ball, leaving the roots at the core of the plant thirsty. Whether you are nurturing seedlings, topping up houseplants, watering a row of tomatoes or soaking shrubs and trees, slow and steady watering is the key is to ensure that water soaks the root zone.

    Grasses and annual plants concentrate their roots in the first six inches of the soil. The roots of perennials, shrubs, and trees are found as deep as twelve inches into the soil. In dense, heavy soil, it can take hours for the water to percolate down through six to twelve inches. Check with a shovel or trowel to see just how deep water has traveled after you’ve finished being sure roots are sufficiently watered.

    Watering tips and tools:

    One word: MULCH! Mulch acts as insulation for your soil by reducing surface runoff and slowing evaporation from the soil.

    Use the right tools for the job. For efficient watering at the root zone, use a soaker hose or even a drip irrigation system instead of a regular sprinkler hose.

    A sprinkler is the best option for watering a larger garden or several containers, but it is not the most efficient. Roughly 40 percent of the water ever reaches the root zone. For more efficient watering in vegetable gardens and flower beds, install a soaker hose early in the season, before the plants become too big.

    While there is technically a science to properly watering the flora around your homestead, it doesn’t need to be difficult. Examine your watering habits if your plants are unhealthy or unproductive. You might be pleasantly surprised at how a couple of simple changes to your watering routine can positively affect your gardens!

    If you enjoyed this, you might also like….

    Top 7 Mistakes to Avoid When Harvesting Water [Video]

  • Frugal DIY Nesting Box Ideas

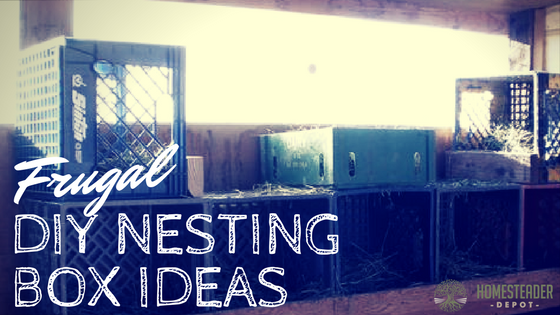
    Frugal DIY Nesting Box Ideas

    If you want your chickens to provide you with lots of wonderful, nutritious, farm-fresh eggs, they’re going to need some cozy nests to get the job done!

    You don’t need to spend an arm and a leg to trick your coop out with some nice, comfortable nesting boxes for your lovely egg-laying ladies.

    Here are some frugal nesting box ideas for you that can all be purchased cheaply, recycled, or even scavenged for, if you’re lucky!

    Dishpans

    Dishpans, the kind you can grab at Walmart or the Dollar Tree for very cheap, are great for nesting boxes, if you cut a shallow entry point for the chickens on one end, and stack them where they can easily access them. Simply fill with bedding, find a quiet, private place for them to go, and let your hens enjoy.

    Related Article: 5 Mistakes First-Time Chicken Farmers Make

    Bookshelves

    If you have any old bookshelves lying around, the little nooks would be perfect for some comfortable chicken privacy. Also, if you feel more confident that you could easily make a bookshelf than some fancy laying boxes, just use the same idea! Chickens like to “roost”, fly up into trees, so they’ll like something they can perch on and fly up and down from to lay their eggs.

    Milk crates

    Milk crates are one of the best kind of containers there are, especially for homesteaders! And you can probably find them for free, from friendly restaurants or businesses who discard them after deliveries. These are also great because they have holes all around, so they’re breathable and will dispose of some of the chicken droppings for you, without putting the eggs at risk. Fill with bedding and tuck away (maybe on your bookshelf?).

    Litter boxes

    If you’ve only got a few hens and some old litter boxes lying around or can find them cheaply or for free, they’re perfect for nesting boxes. They enclose the hen and are already designed for easy cleaning and bedding changes.

    NEVER Buy Laundry Detergent AgainLearn How>>>

  • Why Are My Plants Turning Yellow?

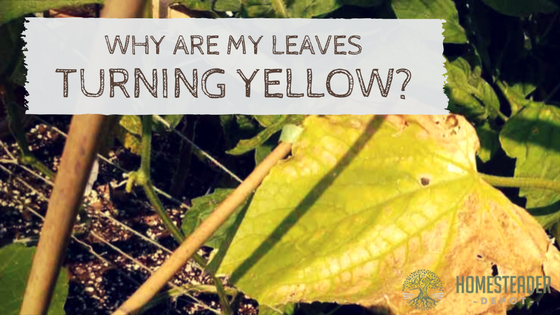
    Why Are My Plants Turning Yellow?

    Yellow leaves are never a happy sight to see on plants you’ve been caring for and watch grow. And they’re not a good sign. Yellow leaves on plants or entirely yellow plants can be indicative of a number of different issues. Here are some of them:

    Pests

    One possible cause of yellow leaves is pests that are living on the plant and leaves and taxing the plant’s energy and resources. To determine if this is the cause, inspect the plant carefully to see if you can find any pests. To treat this, you’ll need to eliminate the pests themselves. Neem oil or insect-killing soap are great organic options for a pesticide.

    Overwatering 

    Plants can become yellow if they get too much water, and poor drainage or too much clay content in the soil can be a common culprit of this. To combat this, try to mix some sand into the soil or waterless.

    Boost your plants growth by 10 TIMESin half the time…with the help of fish.  Learn More Here>>>

    Lack of sunlight

    Sunlight is what plants need to thrive, and if they’re not getting enough and aren’t shade-tolerant plants, this might be a cause of yellowed leaves. If this is the case, your leaves will be floppy and faded in color. If you have potted plants, try moving them somewhere they’ll get more sun, or, if your plants are in the ground, transplant if you can or simply choose a sunnier spot for these particular plants next year.

    Dehydration

    Not enough watering can also cause yellowed leaves, as plants require water to transport the essential nutrients of the soil to their foliage. If leaves feel crunchy and dry, dehydration is probably the culprit. Make sure your plants receive enough water and check daily for the moisture content of the soil. Soil should hardly ever be completely dried out if you stick your finger into it.

    Nutrient deficiency 

    If the leaves of your plants are yellowing, they could be deficient in any number of essential nutrients. If you haven’t been fertilizing or amending your soil, be sure to give them some compost tea or store-bought organic fertilizer for either growth or blossom, depending on what stage they are at, and buy some nutrient testing strips to test the nutrient content of your garden so you can amend appropriately.

    Plants are just like people, they need proper food, hydration, and care to thrive! Help respond to your plant’s needs by checking for these important issues and address them today.

     Check THIS OUTBreakthrough in Electric Car Technology Powers An Entire Home>>>


  • How to Test Your Soil Using Only a Mason Jar

    How to Test Your Soil Using Only a Mason Jar


    When starting a garden, it’s crucial to know what kind of soil you’re working with. It will help you determine what to plant and how to amend your soil. All soil is comprised of three basic components: sand, silt, and clay, and varying combinations of these three components determine what type of soil you have.

    Loamy soil is ideal, and it is typically more or less an even mix of sand, silt, and clay. It is slightly spongy and moist, but still light enough that it doesn’t get packed down too easily. In essence, it’s just right. To achieve this ideal soil, you would want to add whatever component your soil is lacking.

    To test your soil, all you need is a mason jar, some water, and a little bit of time.

    How to perform a mason jar soil test

    1. First, you need your soil sample. Don’t just grab a handful off the top though, dig a bit into some well-tilled soil, “stir” around a bit with your trowel, and get a good scoop from below the surface of your garden bed or the ground you are testing.
    2. Once you have a nice sized scoop of dirt, fill your mason jar about halfway with the dirt.
    3. Fill the rest of the way up to the lip of the mason jar with water, leaving about 1″ of air.
    4. Attach the lid to the jar securely, then shake vigorously. This will cause the dirt to settle once you’ve put the jar back down, as well as break up any sizable clumps of dirt.
    5. Set the jar back down and leave overnight. In the morning, you’ll have your results!

    On the bottom will be sand, then silt, and then clay. Here’s a quick and easy guide to how to read your results and what they mean for your soil type:

    If you enjoyed this, you might also like….

    Gardening…NO SOIL NEEDED…

    Bury a Shipping Container…WHY?

    4 Critical Methods to Improve Your Garden Soil


  • Ways to Recycle Sawdust

    Ways to Recycle Sawdust


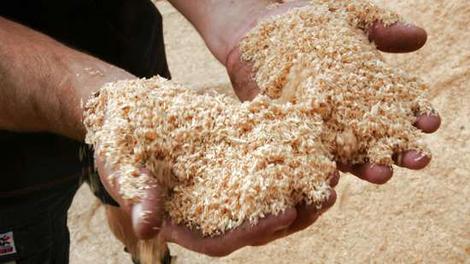
    Woodworking projects and home repairs top the to-do lists of many homesteaders, but they generate a copious amount of a largely unwanted byproduct: sawdust. Before dumping your next shovelful of sawdust into the trash, take a look at this list of creative ways to make good use of it:

    • Use for traction when you’re stuck in the snow. Sawdust is traditionally used by logging truck drivers to prevent slipping and getting stuck in harsh winter road conditions. Keep a sealed bag or two of it in your trunk to spread around your tires for extra traction if you get stuck.
    • Keep on hand as a spill kit must-have. Sawdust is a very absorbent material and can quickly contain any spills such as oil or paint. Once the spill is soaked up, the sawdust sweeps up easily and with minimal dust.
    • Decorate with fake snow. Mix with white paint (acrylic or whatever is on hand) and glue to use for seasonal arts and crafts.
    • DIY firestarter bricks. Melt candle wax in a nonstick pot, add sawdust to achieve a thick consistency, pour into an ice cube tray or egg carton, and cool, and store with your camping gear or fireplace items. Use just like storebought firestarters.

      Power Efficiency Guide Will Change Our World Forever>>>

    • Keep weeds under control. Walnut sawdust has natural weed-killing properties. Sweep into the cracks of your driveway or walkway to prevent weed growth.
    • Use as a cement additive. Sawdust mixed into mortar aids in bonding building materials together. It also makes for a good recipe for casting moisture-loving planters.
    • Create a decorative garden path. Spread and tamp sawdust into a dirt walkway to curb erosion and create a soft, fragrant path through your garden or wooded lot.
    • Compost and fertilizer. Mix a little bit of sawdust with manure or a nitrogen source like blood meal. This both fertilizes plants and aids in water retention.
    • Mix with wood glue to fill cracks and holes. Mixed into a putty consistency with wood glue, very fine sawdust is often used by flooring professionals as a cheap, stainable wood filler.
    • Clean concrete floors. Lightly wet a small pile of sawdust with water and use a push broom to spread it around the concrete floor of any workspace. The wet sawdust will bind and absorb grime and hazardous fine dust.

        Check out THESE Effective Primal Diet Hacks…

  • The Easiest Gardening Method You’ll Ever Try

    The Easiest Gardening Method You’ll Ever Try

    A thriving garden is the beating heart of the homestead.  For many people, though, keeping a garden can be a challenge. Traditional methods require heavy machinery for soil preparation, questionable chemical fertilizers, all adding up to a prohibitive upfront cost. A great and easy method of gardening that has a very low financial demand is the “lasagna garden”.

    It was given that name because the method involves developing arable soil by composting an existing plot with layers of organic matter. You create the layers in the fall, to be ready for planting in the spring. Here’s a quick guide to get you started:

    • Select your plot: With this method, you don’t need to prepare the soil at all. That’s right, no double-digging, no weeding! Just pick an area where your garden will get the sunshine it needs that isn’t too far from your water source.
    • The first layer: The base layer of your garden will be a single layer of corrugated cardboard that smothers out even the toughest weeds. You can source this from almost anywhere, just be sure to remove packing tape if you’re recycling boxes. To prevent weeds from growing through, be sure to cover up any gaps in the cardboard with more cardboard. If your plot doesn’t have any persistent or tenacious weeds, a minimum of three layers of newspaper will work fine instead. Just before applying the next layer, thoroughly saturate your base layer with water.

      Effective Primal Diet Hacks…

    • The compost layer: This layer will be the powerhouse of your garden. Your garden is literally a compost sheet (rather than a pile or heap). Put anything in this layer you’d put in the compost, including “browns” like fall leaves, shredded paper, pine needles, and “greens” like veggie scraps, grass clippings, garden trimmings, etc. Once you’ve piled on the compostable matter, finish this layer off with three to four inches of finished compost or topsoil to be ready to plant. 
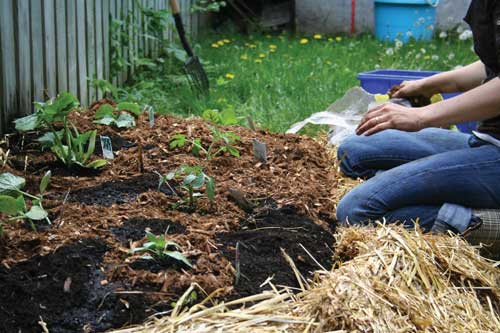
    • The mulch layer: Your lasagna garden will be topped off with the application of a couple of inches of mulch to retain the ideal moisture and temperature for your compost to break down. The best mulch materials are the ones you can source with minimal effort from neighbors, local businesses, or even your town’s Department of Works. Tried and true materials for this layer include wood chips (aged chips are best), straw, grass clippings, leaves, even tree bark! If it’s more convenient for you to purchase mulch, opt for undyed wood chips.

    Once you have your layers prepared, let them sit for a season. It’s common to start in the fall to be ready to plant in the spring, but you could do this in the spring for early fall planting, for example.

    To plant, brush back the mulch layer a bit and plot out the spots you’d like to plant your seeds. Cut holes in the cardboard for the roots to grow once the seeds begin to sprout, plant your seeds in the compost layer, and cover lightly with the mulch (as you would were you using potting soil).

    That’s it! The layers will retain moisture, so only water if the bottom layer is dry. Happy planting!

    Natural Healing Secrets You Need to Know…

  • Common Mistakes When Going Off-Grid

    Common Mistakes When Going Off-Grid

    Getting off-grid and energy independent is really appealing, but can also be pretty intimidating. It’s hard to know where to start when you’ve lived your whole life reliant upon a municipal grid, and as I wrote recently about homesteading in general, it’s OK to make mistakes.

    But, you can always learn from the mistakes of others! There are common mistakes a lot of people make when first getting off the grid, and here are some of those mistakes and how to avoid them.

    1. Aiming too high

    Now, don’t get me wrong, it’s great to have goals and aim for the sky. However, when you’re thinking about going off the grid, don’t expect to have satellite TV, a dishwasher, run a crock pot, a video game console, curling iron, etc. all at once. When you get off-grid, you will have to scale down your life…drastically.

    2. Wasting energy

    This is obviously a broad category of mistakes, and there are many ways in which you can waste energy. Running a gas generator to watch a movie might be a good example, or using solar power to use a light during the day when natural light would work fine. You’ll need to conserve and constantly think about the most efficient way to use your resources.


    Discover How This “Magical” Towel Cleans With Only Water, Replaces Expensive Paper Towels and Toxic Cleaners, and Can Help You Save Hundreds Of Dollars Per Year While Saving Our Environment>>>


    3. Buying gimmicky products

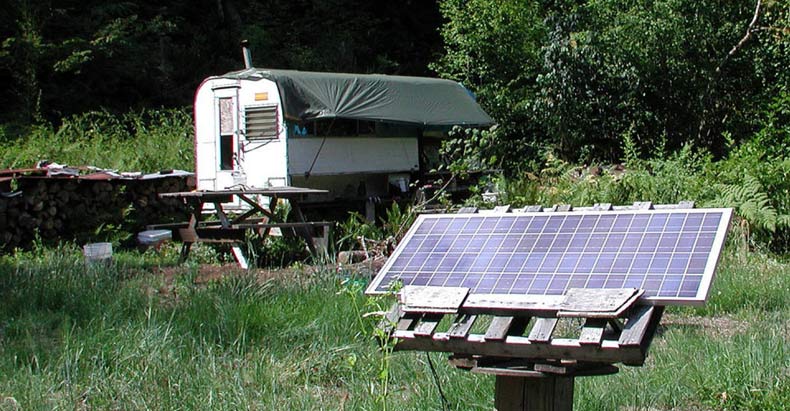
    There are a ton of products out there to generate electricity off-grid, and some are really great, while others are probably a waste of your money. A lot of small solar products to charge small devices, for example, just straight don’t work unless there is direct sunlight on them for several hours at a time, so they could fail frequently. Do your research, read reviews, and again…

    4. Failure to Prioritize

    As mentioned in #1, you will need to take a cold, hard look at what you really need electricity for. We are accustomed to so many gadgets and gizmos these days, we don’t even think about how much we require electricity for the simplest of tasks. You will have to seriously reassess how much you really need an electric coffee maker or if you can make it in a percolator, if you really need a food processor or if you can mix things by hand, if you really need lights in every room or if you can use a lantern, etc.

    If you liked this, you might also enjoy…

    Donald Trump’s Words of Warning…