Page 18 of 28
1 16 17 18 19 20 28
Self Reliance – Page 18 – Homesteader Depot

Category: Self Reliance

  • 18 Ways to Become Food Independent

    18 Ways to Become Food Independent

    The ultimate goal of homesteading for many is to be completely self-sufficient, and entirely food independent. There’s nothing as empowering as growing and making your own.

    While getting 100% of your food from your own land might be setting one’s sights pretty high, there’s nothing wrong with aiming for it! The thing is, while most people will always rely on at least some outside sources for their food (even homesteaders back in the day did, too!), any degree of self-sufficiency you can achieve is a step in the right direction.

    If you are wondering what would be involved in having a completely self-sufficient food source, we’ve put together a list of goals to aim for. Again, it will be very difficult to achieve all this, especially if you’re a new homesteader. However, getting an idea of what it would take can help you plan out your homesteading goals, what is realistic, and what some solid long-term plans for your homestead might be.

    Grow all your own vegetables

    _ Grow all your own fruit

    _ Grow all your own nuts, seeds, etc.

    _ Preserve and process your produce, nuts, seeds, etc.

    _ Plant crops from your own saved seeds

    _ Raise the animals all your dairy comes from (eggs, milk)

    _ Make all your own dairy products (cheese, butter, yogurt, etc.)

    _ Raise the animals all your meat comes from

    _ Breed your dairy and meat animals

    _ Slaughter and process your own meat

    _ Grow your own grains

    _ Process your own grains

    _ Have established food storage facilities (e.g. root cellar)

    _ Have extensive knowledge of, experience with, and equipment for canning, salt brining, drying, freezing, fermenting, etc.

    _ Preserve food to last you through the winter

    _ Preserve food to last through a bad growing season

    _ Hunt and fish in your region, skillfully and knowledgeable

    _ Know where to forage for wild food, on your property, and in your region

    Again, these are lofty goals, and there are few people living in the US today who could confidently check off everything on this list. Even very self-sufficient homesteaders still happily buy goods from neighbors or other farmers in their community, and there’s definitely nothing wrong with that! A community is very important, and you should definitely try to establish these kinds of relationships with the people in your community for the sake of long-term sufficiency and survival.

    But sitting down and thinking about what it would take to support yourself entirely is simply a smart practice and a good way to begin to think about how you can have a more sustainable relationship with your own food source. There are so many ways you can improve this relationship, and close the gaps that our modern, globalized world create, gaps that would quickly close if there were any kind of national or global mass crisis or disaster.

    Having control over your food sources, learning to plan for the long term, taking account for every morsel of food you consume and knowing where it comes from, how it was grown, processed, packaged, and preserved, is incredibly important for your health and well-being, as well as your independence.

    Use this list as a guideline for how you can start to be more conscious about what you consume, and how you can start to grow your own and do it yourself. You’d be surprised how much you can achieve, simply by thinking about your food sources!

    Related Article:  “Tips to Stockpile Food for the Winter Months”

    For example, when you start to raise chickens, you don’t have to buy eggs anymore. You can try to center more of your family’s meals around eggs, and save money, as well as eat healthier. Then, you can expand your flock enough to have a steady flow of fresh chicken to consume. Over time, you can begin to freeze it, or even can the meat, so you can stock up a nice supply of meat. Think of the money you’re not spending on feedlot-raised chicken shipped from across the country!

    This brings up another important point: self-sufficiency is not about growing all the food you currently eat on your own homestead. It’s about using what you’re able to grow yourself. Your diet, recipes, and lifestyle, will, and should, change according to what’s available. Just as it’s healthier and more affordable to eat produce in season from your local grocery store, it’s more sensible to eat whatever you’re able to grow on your own homestead. You might be eating a lot more chicken if you’re raising lots of chickens, or eating lots of venison in the winter if the hunting is good and you’re able to preserve the meat.

    Suggested Article: “5 Simple Methods to Preserve Food”

    This is exactly what self-sufficiency and food independence is all about! Our modern diets are centered entirely around what’s available to us, which is often overly-processed foods that have been grown in less-than-appealing conditions and shipped from all around the world. Whereas food that you’re growing, raising, and hunting yourself is much healthier and more natural to eat. You don’t have to process it like crazy so it will taste better, it’s fresh and local so it will already taste amazing!

    It’s always possible to become more food independent than you currently are, and we hope this checklist will inspire you to plan for a more self-sufficient future for your homestead and family.

  • Become a Better Homesteader Using These 4 Tips

    Become a Better Homesteader Using These 4 Tips

    When it comes to homesteading, there is no such thing as knowing too much or working too hard. Yet, many people want to get into this lifestyle without truly understanding what it means or by looking for shortcuts. Instead of trying to find the “easy” way to be a homesteader, you need to find ways that you can become a better homesteader. The life is not always easy, but it can be extremely rewarding. The following are a few tips that will help you to get into the right mindset and to make sure homesteading for the long haul is right for you.

    Learn to Live With Less

    This does not mean you need to give up all the things that you enjoy. It simply means that you need to learn to live within your means, which is something that so many people today have a problem doing. You do not need to have the latest phone and all the latest gadgets.

    You do not need to spend on all the fancy, shiny new equipment, and gear that you think you need for the homestead either. If you need a tractor, you do not have to buy one that is brand new. Buy a used one and learn how to do the repairs yourself. This leads us into the next thing you will want to do to become a better homesteader.

    Learn a New Skill Each Day

    You are never done learning when it comes to homesteading. There is always something new that you can learn, and you should make it a point to try to learn something each day. It might be something simple, such as how to cook a new meal or how to clean a fish. It might be something more complex, such as making repairs to that tractor we mentioned earlier. Strive to learn something new and find people who are willing to teach you things. You can also share the knowledge you have with them.

    Learn this simple step by step process to recondition old batteries and NEVER buy batteries again>>>

    Focus on the Task at Hand and Work Hard at It

    When it comes to homesteading, you can’t put things off until later in most cases. If you do, you will have too much work piling up and it will be overwhelming. You need to have a plan of action for each day and you need to focus on each of the tasks you need to get done. If there are others in the family, spread out the tasks and chores among everyone and work together to get things done.

    Consider New Ways to Boost Your Income

    Another way to improve as a homesteader is to find some ways to make some extra income that you can invest into the homestead or put into your savings. If you are doing woodworking or making soap or candles, for example, you could sell those goods online and at craft shows. There are plenty of ways that you can make money doing what you love.  Take a look at the following links to learn some super simple crafts:

     >> 5 Step DIY Soap

    >> 16,000 Woodworking Plans

    These are just some of the ways that you can become a better homesteader. Start implementing these tips now, and keep on learning.


  • 10 Powerful Plants That Repel Mosquitoes

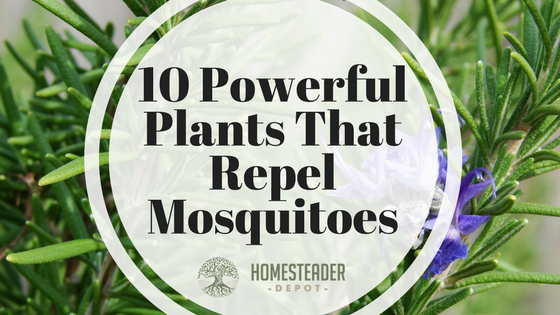
    10 Powerful Plants That Repel Mosquitoes

    While I’m thrilled for warm weather to finally return, I’m not as excited about the flying pests that come with it. As spring marches on and the land is replenished with rainfall, potential hotspots for mosquitoes are developing. In addition to checking your property for areas where water is allowed to pool (your mosquitoes will use these as their own personal birthing centers), you can take safe steps to prevent infestation with these naturally-repellent plants!

    • Citronella Grass/Lemongrass is the source of citronella oil that is used in many commercial insect repellent products like citronella candles and tiki torches. It can be grown just about anywhere in North America, but expect it to die off during the winter unless you live in USDA climate zones 10-12. Citronella grass grows best in full sun, requires lots of water and can grow 5-6 ft tall. 
    • African or French Marigolds have a very strong aroma that is pleasing to people but off-putting to bothersome bugs! They’re great for repelling garden pests, but you can also plant or pot them around your home or patio to keep mosquitoes at bay. The African marigold is the bigger of the two and can reach heights of 30 to 40 inches. Their gorgeous blooms feature different shades of yellow and orange. The French marigold only gets to be 6 to 24 inches tall but is much more colorful with the added shades of deep brown and crimson. All marigolds need full sun and do best in well-drained, moderately fertile soil. 
    • Basil, a member of the mint family, is a popular culinary herb in Italian cuisine. One small basil plant may not have the repellent power of an African Marigold, but planting several basil stalks for culinary use will have the added benefit of driving away mosquitoes. Basil’s many hardy varieties prefer full sun and can be grown in containers or in the ground. 
    • Lemon Thyme is quite promising in terms of its repellant potency. In a study done by the University of Guelph in Ontario, they found that the crushed leaves of lemon thyme had 62% of the repellency of DEET. Lemon thyme is very easy to grow, needing only partial or full sun, occasional pruning, and enough water to keep from dehydration in climate zones 5 and up. 
    • Catnip is a perennial herb and feline favorite. While it may attract your cats (or your neighbor’s!) researchers have found that it has the opposite effect on not one but two nasty little bugs: the mosquito and the cockroach. In fact, they found that one of catnip’s essential oil constituents, Nepetalactone, has roughly ten times more mosquito repellency than DEET. Catnip is a hardy herb, but it requires plenty of water, sun, and a bit of pruning to thrive.
    • Sage is yet another herb that offers its services as a multi-insect repellant. Mosquitoes, flies, cabbage moths, and black flea beetles all keep their distance from sage plants. This perennial likes full sun with well-drained soil does well in pots or gardens and grows to be about 18 inches tall. 
    • Pennyroyal is known mostly as an ancient culinary herb and herbal remedy, but it has a bit of a bad reputation because its essential oil is highly toxic. Consider whether you have pets or small children that may pick a leaf to nibble on while exploring outside. Pennyroyal really packs a punch when it comes to repelling insects–fleas, ticks, and mosquitoes, the terrors of outdoor living, all stay away from Pennyroyal. The plant grows to about 12 inches tall and is best grown in partial-to-full sun in zones 5-9. 
    • Rosemary is an aromatic evergreen sub-shrub that is used in culinary seasonings and herbal remedies. It is commonly known to repel fleas and mosquitoes. Rosemary grows best in hardiness zones 7 to 10 and prefers full sun and dry, rocky, well-drained soil. Rosemary starts off small, but can spread and grow to 6 feet tall or more over time! 
    • Geraniums (sometimes called citronella or mosquito plants) are often sold in garden centers as natural repellants. While lemongrass is the true source of citronella oil, geraniums still do a great job keeping mosquitoes, cabbage worms, and Japanese beetles out of your space. Geraniums thrive in climate zones 9 to 11 but can be grown in pots and moved inside in colder climates. Like pennyroyal, the geranium plant is poisonous, so exercise caution with pets and small children. 
    • Lavender is a beautiful plant with many uses in aromatherapy, herbal remedies and repelling spiders and unwanted insects such as ants and moths. As a herbal remedy, it can alleviate the pain and itching associated with all types of insect bites including mosquitoes. Lavender is typically used as an essential oil but can be used as fresh or dried cuttings. Lavender grows happily in climate zones 4 to 9 but can be kept indoors in extreme north or south locations.

    This year, be prepared! Don’t become a slave to sticky, toxic bug sprays and calamine lotion. Plant any (or all) of these natural repellants around your home, patio, and garden to enjoy your outdoor space freely all summer long.

    [Suggested Video] Discover almost all the edible and medicinal plants in North America <<< Watch Here >>>

  • 7 Simple Ways to Keep Your Homestead Safe

    7 Simple Ways to Keep Your Homestead Safe

    You love living on your homestead, and you cannot imagine living in anywhere but a rural area. One of the elements of having a homestead that deserves plenty of attention is keeping it safe. Whether it is wild animals that decide to get a little too close for comfort or people who are looking to steal from you or do you and your family harm, you need to have a method of keeping things secure.

    Since you might be far from local law enforcement and help, it is up to you to take measures to secure your property. You do not want to have to wait half an hour – or longer – for help to arrive. Here are some ways that you can improve your home’s security from threats.

    Use Fences, Gates, and Signs

    You should have fences around your property, as well as a gate at the start of your driveway. Keep the gate and the fences in good condition, and be sure that you are posting the appropriate signs warning people not to trespass. This will not keep out the most determined of intruders, but they can work to keep many people away.

    Do Not Leave Equipment Out

    You never want to make your home appear like a buffet for thieves. This means you need to put all the equipment that you have into the garage, shed, barn, or other secure areas. This includes the mowers, tractors, four-wheelers, snowmobiles, bikes, boats, and anything else you have that others might want for themselves.

    Related Article:  Stay Safe on the Homestead

    Make Sure You Have Good Locks

    Go through your house and make sure that you have good locks on all the windows and doors, including the basement, and those on the second floor. If they are shoddy or not working properly, replace them sooner rather than later. Make sure the locks on any other buildings on your property are in good condition, as well.

    Get to Know the Neighbors

    Make it a point to get out and talk with your neighbors. You will find that most people are friendly, and once you get to know them, they will keep an eye on your property and let you know of any suspicious activity, just as you would do for them. It is always a good idea to be neighborly, as you can help each other out in many ways, not just security.

    You Need Proper Lighting

    Good lighting on the outside of the property, including motion sensor lighting, can help to thwart people and animals that get too close. They do not want to be seen, and the lights can help to give you notice that someone or something is on your property. Of course, if you have livestock, cats, and other animals on the property, you will need to think carefully about where you put the motion lighting.

    Dogs

    Having a dog, or multiple dogs can be a great deterrent too. Dogs bark whenever there are intruders, whether they are human or animal, so you can be alerted to presences on your property. Even if you have the sweetest dogs on the planet, intruders would rather not have to deal with them.

    Weapons

    Weapons, whether firearms or bear spray, can be a great option. Most homesteaders are also hunters, so having a firearm and knowing how to use it should not be a problem.

    These quick tips are simple and can help you make your property as secure as possible.

    If you enjoyed this, you might also like….

    Long-Term Survival for Homesteaders…

  • Why You Should Keep a Homesteading Journal

    Why You Should Keep a Homesteading Journal

    As you embark on your homesteading journey, whether that is buying several acres of land and starting a full-fledged farm, or simply growing herbs on your windowsill and trying a few simple home ferments, it is incredibly beneficial to keep a journal.  Heres a few tips on why and how to journal.

    Why? 

    Journals are, literally, records of events. So as you begin gardening, raising animals, trying home cultures, and generally doing more things simpler, greener, and for yourself, you’ll want to keep track of your efforts, method, and progress.

    First of all, it’s fun! You can look back in a few months and remember how far you’ve come.

    But more importantly, it can be extremely helpful. As you work with inexact sciences like gardening or fermenting, you’ll probably want to remember what worked, and what didn’t. If you battled a serious bout of pests, it might be very helpful next year to look back and pinpoint the precise timing so you can take precautionary measures this year, for example. Or if you are selling eggs, keeping track of your chicken production and income can help calculate the cost and whether or not is productive for you.

    How to journal?

    The great thing is, there’s no exact science for homestead journaling!  You can find tons of great, free resources on the internet for worksheets, charts, and recordkeeping for gardening and homesteading, if you like that sort of thing, or you can simply keep a diary and record your day-to-day events.  What works for some folks may not work for you and vice versa, this is about you and recording what was successful for you.

    Bullet journals are very popular these days, and the simple method for a sort of DIY journal might be ideal for tracking planting records, daily tasks, and achievements, etc. The sky is the limit!

    However you choose to record your journey, you’ll learn as you go what’s helpful to record and track. The important part is to do it! This is how homesteaders and farmers learned and grew back in the day, so it’s just as beneficial today as always.

    If you enjoyed this, you might also like….

    Long-Term Survival for Homesteaders…

    Natural Healing Secrets You Need to Know…

    Effective Primal Diet Hacks…

  • 6 Creative Ways to Use Bone Broth

    6 Creative Ways to Use Bone Broth


    You’ve probably heard of the growing popularity of bone broth lately, and if you haven’t, you should definitely know about it.

    It’s not really anything new, but recent trendy diets have emphasized the regular consumption of hearty, super-nutritious bone broth as a way to get essential vitamins, minerals, and, most importantly, gelatin. 

    Gelatin is a wonderful addition to any healthy diet, but particularly beneficial for anyone concerned about bone or joint health.

    The great thing is it’s very cheap and easy to make, unfortunately, it’s not always so easy to find creative ways to consume it! Especially this time of year, sipping on a warm, frothy cup of broth might not sound so appealing to you.

    So we’ve come up with some clever ways to consume broth in your diet that you might not have thought of. Let’s begin:

    Soups and Stews

    Using bone broth as the base for hearty soups and stews is, of course, the most obvious way to get this hearty, healthy broth into your diet. You can use as you would chicken broth or even water. But, since the weather is warming up this time of year, if warm tomato soup or hot, spicy chili isn’t sounding too appealing to you, don’t forget there are great cold summer soups like gazpacho and vichyssoise that bone broth can be used for too.

    Related Article:  How to Cook Bone Broth in Your Slow Cooker

    Steaming Vegetables

    If you are one to enjoy some simple steamed vegetables in a quick weeknight dinner, you’ll be happy to know that you can use bone broth in place of water! Steaming vegetables with bone broth infuse the veggies with the health benefits of the broth and add a rich, deep, flavor as well.

    Cooking rice, pasta, beans, etc. 

    As with steaming vegetables, you can use your bone broth in place of water when cooking rice, pasta, beans, quinoa, lentils, or other legumes or grains. It will add a rich flavor as well as the nutrients and minerals of the broth.

    Sauteeing Vegetables

    You can always throw a little bone broth in when you are sauteeing vegetables or making a stir-fry. It will help the vegetables cook faster as well as lend it’s rich flavor to your dish.

    Related Article:  How to Make Bone Broth (Video)

    Sauces and Gravies 

    Many sauces require a fatty broth or milk to be reduced, and bone broth can almost always be used for that. It makes a wonderful base for a wide range of sauces and is always ideal for gravy.

    Egg Dishes

    Use bone broth in place of water or milk when cooking scrambled eggs, frittatas or quiches.

    Get Creative!

    Hopefully, this has given you an idea of just how many options there are for using bone broth! Try to see if there are other creative ways to incorporate bone broth into your daily life. Happy cooking!

    If you enjoyed this, you might also like….

    Cooking Skills Every Homesteader Should Cultivate

    Effective Primal Diet Hacks…


  • How to Make Kombucha Tea (Video)

    How to Make Kombucha Tea (Video)

    We’ve covered a lot about culturing in the past, and kombucha tea absolutely needs to be mentioned. It is one of the easiest home cultures to make and a great place to start if you’d like to get started with culturing.

    Kombucha is created using a fermentation process, it contains a large number of healthy bacteria known as probiotics.  These bacteria strengthen your digestive tract and support your immune system, as they absorb nutrients, fight infection, and illness.

    Your digestive system is the second largest part of your neurological system and with 80 percent of your immune system located in your gut, it’s no surprise that the gut is considered your second brain.

    Kombucha can help maintain peak immune health, which also has an impressive number of benefits for your overall health.

    Avoiding health issues on a homestead is imperative to survival, you may be miles and miles away from your nearest doctor.

    In this great video from Cultures for Health, you’ll see the very basic, bare bones process for making kombucha at home. Enjoy!

    If you enjoyed this, you might also like….

    Get Your Probiotics Quick and Easy With THIS…

    This Strange Method Will Make Your Food Last For 2 Years Without Refrigeration

    Effective Primal Diet Hacks…

  • How to Make Pickles at Home

    How to Make Pickles at Home

    Pickles are one of the most classic and widely recognized forms of brine preservation. While the term “pickled” can apply to various forms of preserving various kinds of vegetables, what most of us think of when we think of “pickles” is the classic, brine-preserved cucumber that has become a staple of delis and diners across America. It most famously made its way into the American diet through Jewish delis in New York City, and, like any classic food, it can be made easily at home.

    While the formula is simple, however, there can be a bit of trial and error involved, and anyone who’s successfully made pickles can probably attest to this. There have probably been hoards of gray-haired European grandmothers throughout the ages who have perfected the art of delicious, crunchy, perfectly-pickled cucumbers, but for those who didn’t grow up learning at their Bubbie’s knee, it take a bit of practice.

    Fortunately, we can still learn from the masters, even if they’re not in our own family. Sandor Ellix Katz, author of Wild Fermentation: The Flavor, Nutrition, and Craft of Live-Culture Foods is not only an expert in the field of home fermentation, he also grew up in a Jewish community in Brooklyn, so he knows a good pickle when he, well, makes one.

    One of the most common mistakes made by first-time pickle makers is by only using a brine. This will result in mushy, soft pickles. What Katz discovered the hard way is that by adding fresh grape leaves, you can naturally preserve the crunchiness of the cucumber, as it absorbs the brine and takes on the delicious, salty sweetness that can only be acheived through pickling.

    To find fresh grape leaves is another story, however, and you might have some trouble, depending on where you live. Of course, if you grow grapes, you won’t even be worrying about this, but if you don’t, you can see if any homestead neighbors do. You can also check or ask at Middle Eastern restaurants or markets, or simply order dried ones online, which are a good substitute. You can also use black tea leaves. While grape leaves are the classic, black tea will perform the same function.

    This Odd Therapy Will Revolutionize Your Well-Being…

    The other crucial component is your equipment. We’ve included Katz’ suggestions, but there’s still room for improvisation. The important thing is to have a cyllindrical container and some way of weighing down the pickles so they remain submerged in the brine. See what you can come up with!

    So without further ado, here is Sandor Ellix Katz’ recipe for classic kosher deli pickles!

    Ingredients 

    Yields 1 gallon 

    • Approximately 4 lbs cucumbers, pickling variety preferable
    • 3/4 cup salt (kosher or sea salt is best)
    • Dill, either fresh and flowering, or the dried leaves and/or seeds (whatever you can find)
    • Several cloves of garlic
    • Grape leaves (these help the pickles retain their crunchiness)
    • Black peppercorns

    Equipment

    • Ceramic fermentation crock, or food-grade bucket, both cylindrical
    • Fermenting weight or large plate that fits inside the bucket
    • Either: 1-gallon bottle filled with water OR a large rock that has been boiled
    • Clean cheesecloth or dish towel for covering

    Directions 

    1. Rinse the cucumbers carefully, to avoid bruising. If you are using cucumbers that haven’t been picked fresh that day, soak them for a few hours in chilled water.
    2. Bring half a gallon of water to a boil on the stove, then remove from heat and stir in the salt, making sure it dissolves completely. This creates the 5% brine solution.
    3. Let the brine mixture cool until you can leave your finger in it for at least 10 seconds without it burning.
    4. As you are waiting for the brine to cool, clean your crock or bucket thoroughly using hot water and non-antibacterial soap, as well as your weight or plate.
    5. Peel and crush your garlic cloves, and place those along with the dill, peppercorns, and grape leaves at the bottom of your crock or bucket.
    6. Next, place your cucumbers in the crock or bucket, and then follow with the brine.
    7. Place your weight or plate on top, and weigh that down with the jug filled with water or the boiled rock. If the brine doesn’t cover the plate or weight, add more brine with the ratio of 1 tbs salt to each additional cup of water.
    8. Cover your crock or bucket with the cheesecloth or dish towel. This will keep dust, bugs, and any other small debris out of the pickels.
    9. Store in a cool, dark place.
    10. Check daily. Scum may start to appear on the surface, so remove this.
    11. After a few days, taste your pickles to see if they’re ready. This part is largely up to your own taste, once they taste good to you, they’re done! There’s no rule here; as long as they’re fermenting well and you like the taste, you can remove them when you please.
    12. You can let them continue to sit for one to four weeks, taking some out to enjoy as you go. At some point they will become fully sour, at which point you’ll want to move them to the fridge to slow the fermentation process.
    13. To safely move them to the fridge, transfer to a jar if you don’t have room for your whole crock or bucket in the fridge, but DO NOT COVER for a few days, leaving the cheesecloth, dish towel, or a paper towel secured with a rubber band on the jar. After a few days, you can cover with the jar lid.
    14. These will keep for a long time in the fridge, so you’ll probably eat them all up before they ever go bad! Such is the beauty of fermented foods.

    Enjoy!

    The ONLY Reason You’re Failing the Paleo Diet...