Page 1 of 9
1 2 3 9
Survival – Homesteader Depot

Category: Survival

  • 7 Viable Solutions for off Grid Water Systems

    7 Viable Solutions for off Grid Water Systems

    Off-grid water systems tend to come with a few headaches. Yes, you have the option of not needing to pay for (or pay as much for, depending on your location) for city water. You also have more control over what the water contains. This last point is important to people who are concerned about added chemicals in their water. However, in order for your off-grid system to be successful, you need to find a few solutions. Seven good ones are listed here.

    1) Reclaim Your Rain

    Rain barrels are a very popular option. You just need the barrels, a good place to put them (usually around the perimeter of your house) and way to keep major contaminants out of the water. For example, what would happen if an animal were to fall in? While many of the people who collect and use rainwater give it to their livestock and other animals, you could drink it, as long as you filter it and treat it first, just to be on the safe side.

    DIY Rain Barrel System (Never Waste Water Again) Read Now >>

    2) Install a Back-up Hand Pump

    Although many wells these days have electric pumps installed, what happens when the power goes down or that pump breaks? You could be stuck without water for days. This is a very bad thing, especially if you don’t have any stored water that you can use for things like drinking, brushing your teeth, and cooking. This is where a backup hand pump comes into play. These pumps are just like the ones that you remember, although they might have a few modern touches, such as the fact that they’re easier to use. Having one installed on your well might literally save your life.

    3) Store Water in Jugs

    If you’re worried about water shortages and have access to city water, then feel free to store some. You don’t need fancy (and expensive) pre-filled water bottles when you have empty plastic jugs. Fill those jugs up with water from your tap, add in some purifying tablets (if this is something that worries you), and then find a cool, dry place to store them. In addition to this, you could always fill a bathtub with water in a pinch, as well as any bowls that you have lying around. While neither of those will last for long, they are valid options.

    4) Use Solar Power

    We already mentioned just how useful a hand pump could be, but a solar-powered pump is another great option. These pumps will definitely keep working when the grid goes down, and they’ll work just like the electrical pumps, as they supply some power to them. This is slightly more expensive than a hand pump, but sometimes you need to have a solid back up option in place.

    Solar Industry Secrets with Dan (You Need To Watch This) >>>

    5) Dig a Well

    Many of the options discussed here are for wells, so it seems necessary to mention that you can always have a well dug unless you’re in the city. If you are worried about not having enough water in case of an emergency, then hire a professional company and have them dig a second well on your property.

    6) Choose Wind Power

    If you live in a windy area and don’t want to go with solar power, then wind power is a very valid option. These setups cost around the same amount as the solar powered ones, and you’re left with a great back up should something go wrong with the power grid.

    7) Fill a Tank with Water

    Although this is not the cheapest option, since you’ll have to fill a tank with water, bury it properly, and then find a method of accessing it, it will provide you with water in a pinch.

  • Protecting Your Plants from Frost and Freeze

    Protecting Your Plants from Frost and Freeze

    Cold temperatures are not good for the plants in your garden. Many of them need air temperatures that are above 32 degrees Fahrenheit in order to survive unprotected. While others, such as pine trees and evergreen bushes, might be fine, you’ll have to take some steps to ensure that everything else in your garden (except for your annuals, of course) will survive the winter.

    Types of Plants

    The first step involves determining which types of plants that you have. This way, you’ll know whether you need to protect them or just let them go. For example, if you have annuals, then they won’t survive the winter. These plants will last for one growing season. Many of them will leave some seeds behind at the end of their life cycles, so they might reappear next year. It all depends on the plant. There are also tropical plants. While many of them will grow in a number of different climates as long as the weather is hot and humid, they won’t last through the first frost. The cold weather is more than they can bear, so they’ll die.

    In addition to this, there are perennials. There are two main types of them: root-hardy perennials and full hardy perennials. The first type of these plants has leaves and branches that seem to die in the winter, although their roots are still good. The roots will enter a dormant state and won’t come out of it until the temperatures improve. The other type of perennials – the full hardy ones – go dormant as well. Trees, various plants, and even some types of shrubs fall into this category. These plants will also stay dormant until the weather warms up, although they’ll spring back to life much more quickly.

    How to Stockpile for Free: By Growing Your Own Groceries>>>

    Protecting Your Plants

    Now that you understand the plants that are in your garden, the next step involves protecting them from the cold temperatures. It all starts with keeping an eye on the weather. As soon as fall hits and the mercury in your thermometer starts to slide downwards, you should move as many of your warm weather-loving and tropical plants indoors as you can. This means that plants like geraniums and petunias should be moved inside. It helps if you already have them housed in small pots in your yard. You’ll also need to dig up any bulbs that won’t survive the winter. For example, dahlia bulbs need to be kept warm and then replanted in the spring.

    Next, you need to take the necessary steps to protect the perennials that you can’t move into your home. The night before the first cold snap, give them plenty of water. You want to really soak the ground, as this gives their roots something to insulate them from the cold. Once this is done, get some old bedsheets and wrap them around the roots of the plants. Burlap works just as well. (Just make sure to never use plastic.) This will provide some additional insulation for the roots of the plants. You want to remove them as soon as the temperatures rise above freezing.

    Ideally, all of your plants will survive the freezing temperatures that are a major part of winter. However, you need to be prepared to replace some that won’t make it. Sometimes things are out of your control. In addition, if you purchase plants for your garden that are designed for your climate, then you’ll have fewer issues. These plants can either survive the frost and freezing weather, or their seeds will. Either way, you’ll have fewer headaches in the spring when you take a look at your garden.

    [Food Stockpile] Another “food system”? It’s better than a food system, it’s a complete food strategy>>>


  • 5 Simple (Yet Crucial) Guidelines of Winter Survival

    5 Simple (Yet Crucial) Guidelines of Winter Survival

    Spending some time in the woods in the wintertime, either voluntarily or because you wound up getting stuck out there, is no joke. You need to be able to take care of yourself, which means meeting all of your basic needs, lest you end up starving or freezing to death. Before the cold weather sets in for good, take the time to review these five guidelines of winter survival. Are you prepared?

    1) Stay in One Place

    If you’re waiting for a rescue after being stranded out in the cold for days, then you need to stay in one place. The temptation to go out to see if you can find your own way home may be tempting. You probably also think that the more you move around, the less likely you are to freeze to death. However, this just makes it tougher for any searchers to find you. Your footsteps will vanish as the snow continues to fall, leaving you unable to see where you’ve been, and for anyone to track you. Instead, stay put and set up a proper (or as proper as you can get, depending on your supplies) camp. This will give you the protection that you need, and allow others to find you.

    Suggested Article: How to Find Your Way When Lost in the Wilderness

    2) Be Prepared to Stay Warm without a Fire

    Ideally, you’ll have a fire to keep you warm when you’re out in the snow. This isn’t always possible, however. It might be snowing too hard for the fire to stay lit, finding dry wood to use as kindling may be tricky, and so on. Instead of relying on that fire, you need to be prepared to survive without one. Make sure that you’re dressed warmly, carry some extra blankets, and find whatever shelter that you can. It’s all about mind over matter at that point.

    How US Special Forces Start a Fire With LIQUID>>>

    3) Remain Confident

    Speaking of “mind over matter” – confidence goes a long way towards surviving the winter in the woods. You need to be as mentally prepared as you are physically. What do we mean by this? Well, you can pack all of the possible provisions that you can and be in great physical shape, but those will only take you so far, especially if you’re not mentally prepared to survive. Even if you have to repeat the words “I can do this” over and over again in your head as a kind of mantra, you need to remember that you can do this.

    4) Trap Prey In Order to Feed Yourself

    Getting trapped in the woods in the middle of a snowstorm is bad, but this situation is made even worse when you don’t have any food. You’ll need to trap prey and understand how to properly prepare it. Otherwise, you’ll end up starving to death out there if your rescuers are days or weeks away. Plus, solid food gives you the energy that you need in order to keep your body functioning and warm. Remember that you’ll need to cook your game properly, lest you end up with food poisoning. This can make a bad situation even more dangerous.

    Related Article: What’s Edible in Your Area?

    5) Be Able To Start a Fire without Matches

    It’s very easy to start a fire when you have matches and dry wood. But what happens if you don’t have these things? You’ll end up in trouble. You need to know how to start a fire without matches. This could involve using a bullet, or anything else that you have on hand. All that matters is that you can get that fire started. This is definitely something that you should practice, just in case.

    Related Article: 4 Ways to Start a Fire You’ve Never Heard of

  • Simple Pig Weighing Hack

    Simple Pig Weighing Hack

    Did you know that it’s entirely possible to figure out how much your pig weighs without putting it on a scale? Instead, you can use a number of things that you probably have lying around your house to figure out your pigs weight. A few quick measurements and calculations are all that it takes. This is much easier than trying to hoist your pig onto a scale. We’ll cover this useful pig weighing hack and some additional information here.

    Why Do You Need To Know How Much Your Pig Weighs?

    If you’ve been trying to determine when your pig is ready to be slaughtered, or your kids want to use him or her for a 4-H project, then you need to know how much it weighs. It’s good to measure and weigh your pig on a regular basis to ensure that it’s getting enough food and growing at the proper rate. You can then place these measurements in a chart and keep track of growth rates as they compare to the amounts of food provided.

    What You Need To Get Started

    Gathering your supplies constitutes the first step to determining your pig’s weight. You’ll need a tape measure, some twine, and the most important thing – a calculator. Obviously, you also need a pig. Without one, this entire endeavor is fruitless.

    Taking the Measurements

    The best time to take these measurements is while your pig is eating. This provides a good distraction, and you won’t have to deal with attempting to measure a moving animal. You also don’t want to have to dive into the mud in order to handle this task, so don’t do it while it’s wallowing either.

    Once you’ve located your pig at the trough, pull out your tape measure or piece of twine. Whichever is easier to use. You’ll measure the twine at some point anyway, so if you have a tape measure, cut out a step and just use it.

    The very first measurement is the length. This is the total length; from the base of the pig’s tail all of the way to its ears. It’s best to go from the top, measuring along you pig’s back. Hold the tape measure flush in order to get an accurate reading.

    The next measurement is the heart girth. Wrap the tape measure around the body of your pig, parallel to its legs. This is essentially the pig’s circumference as if it were a tree or something.

    Once you have those two measurements, you’ll need to apply them to the formula. This is the heart girth number squared multiplied by the length, which is then divided by 400. Here’s an example:

    A pig has a 60” length and a 54” heart girth. Your formula is 54 X 54 X 60 = 174,960. Then that last number is divided by 400: 174,960/400 = 437.4. The pig weighs 437.4 pounds. That weight includes every part of the pig, organs and all. Once the pig is butchered, you’ll lose about 100 pounds of that weight. This means that you’ll get around 330 pounds of meat from it.

    Conclusion

    Knowing how much your pig weighs is important. We already mentioned the ways in which you can track its growth over time, noting how much you feed it in order to see the ratios form. If your kids are using your pig as their 4-H or county fair project, then that data is very important. You also need to know when the pig will be ready to be butchered. This measurement formula is actually very accurate and will come in handy. It sure beats putting your pig on a scale!

    If you find THIS PLANT in your backyard, whatever you do, DO NOT touch it>>>

  • 5 Critical Tips for Proper Pet Care

    5 Critical Tips for Proper Pet Care


    Pets are awesome. There’s no other way to say it. As long as you care for them properly, they’ll show you nothing but love. This doesn’t mean that you need to spoil your pets, showering them with food, treats, and toys. Yes, you can do that, but your pets will appreciate you much more if you care for them in these five ways.


    1) Spend Some Time Exercising With Your Pets

    Your pets want to spend as much time with you as possible. This involves playing and exercising with them. Depending on the type of pet that you have, for example, a dog, you can take yours to the park and play fetch or even go jogging. Your dogs will appreciate going for walks, playing fetch, and burning off any extra energy. You’ll feel healthier as well since you get to exercise along with them. If your pets are of the indoor variety, then use toys that they enjoy. Your cats will get a kick out chasing a laser light on the floor or batting at some yarn. This is good for your pet’s mental and physical health.


    2) Feed Your Pets Properly

    You probably already know that your pet needs to be fed daily. The real question is: are you feeding him or her the right foods and in the correct amounts? If you aren’t sure which types of pet food are the best, ask your veterinarian or the employees at your local pet store for recommendations. Depending on the breed of your animal, one type of food may be much better than another. You also need to take your pet’s weight, age, and activity levels into consideration when determining how much and how often to feed him or her. You can look at the back of the pet food bag for guidelines or ask your vet.


    What Is The All-Natural Enzymatic Stain & Odour Eliminator?

    Instead of masking odors with chemical fragrances, the enzyme cleaner eliminates the source by consuming the organic matter that caused the odor.  Check it out here>>>


    3) Take Your Pets to the Vet

    Even the healthiest animals need to go in for regular checkups. Yours are no exception to this. Many conditions can be caught early thanks to standard vet appointments. This will help you save money in the long run since these early treatments will cost less than more extensive ones. On top of this, regular vet appointments can help your pet live a longer, healthier life. The more time you have with your pet, the better, right? We all know that pets don’t live as long as humans, but that doesn’t mean that you shouldn’t do everything you can to make your pet enjoy every moment of his lifespan.


    4) Grooming Is Important

    While not every pet needs to see a professional groomer, many will benefit from home grooming treatments. For example, if you have a cat, then you can brush him regularly. This will prevent dandruff and hairballs. It’s also a great way for you to bond with your cat. Dogs require a bit more maintenance. You’ll have to bathe them and clip their claws. Some types even need professional grooming in the form of haircuts. Your dog will look better and be much happier.


    5) Set up A Schedule and Stick with It

    Pets need schedules just as much as humans do. They need to know when they’ll be fed, as well as when it’s time to go outside (if you own a dog.) Every pet, no matter the type, will adjust to a schedule well and will begin to anticipate when things will happen. Feeding your pet at the same time every day, going for walks at a certain hour, and so on will only stabilize your pet’s life in a good way.

    [Side Note] My cat has been acting really funny lately — not sure why but she has decided to pee everywhere BUT the litterbox.  I found a simple solution created by Veterinarian Technician Sarah Richards called Cat Spray No More — Learn how it works here>>>

  • 9 Practical Emergency Foods And How to Store Them

    9 Practical Emergency Foods And How to Store Them


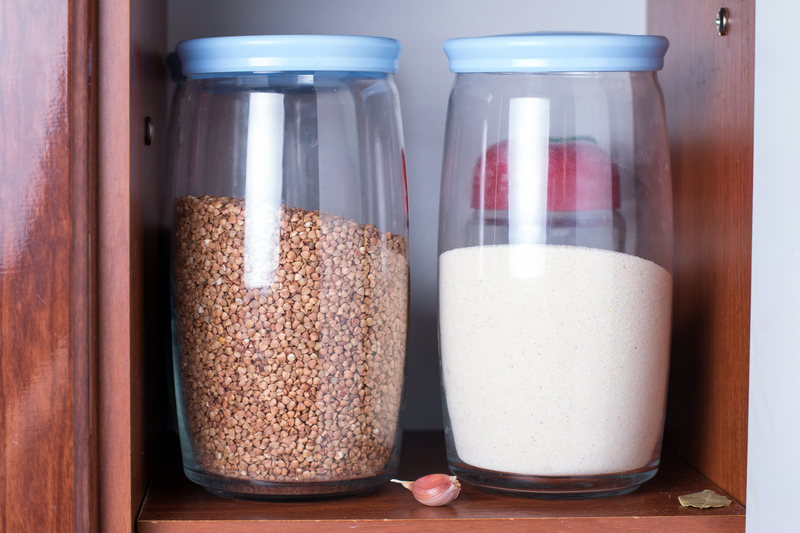
    Long term food storage is a good idea in many, many circumstances.  There are several basic food types that you should consider stocking up on that will last for years if needed.


    Beans

    Dried beans of every variety are super cheap and even easier to store.  Store them in a dark, dry and cool place for best results.


    Coffee and Tea

    Most of us consider ourselves in an emergency situation if we run out of coffee.  So, try to imagine going through an actual emergency without it…OH…THE HORROR!!!

    Just make sure you keep it in the right forms so it can last the longest.  Whole bean coffee stored in an air-tight container will last the longest.  This means you will also want to invest in a manual coffee grinder, in case the power goes out.  Of course, if all else fails, stick the beans you want to grind into a paper or plastic bag and start hammering.

    Tea is usually sold in sealed containers, so they store nicely until opened.  Then keep them in a cool, dark and dry place to avoid them becoming stale before you have the chance to brew them up.


    Fats

    The human body requires a certain level of fat intake to function properly.  We also use it to cook and bake, making it a staple of any person’s pantry.

    Butter, lard, olive oil, coconut oil and more can be stored for extended periods of time.  Butter can also be frozen if you have some in surplus.

    Additionally, coconut oil can also be used as a moisturizer and for a whole bunch of other functions including:

    • Body Moisturizer
    • Cuticle Softener
    • Face and Eye night cream
    • Facial Cleanser
    • Hair Conditioner
    • Lice Treatments
    • Shaving Cream
    • And soooooo much more.

    Store your all your non-animal fat sources at room temperature and away from heat and excessive light. Butter can also be stored at room temperature for easy spreading.

    Honey

    Honey never goes bad and is one of nature’s miracle foods.  Store honey out of direct sunlight.  Sometimes older honey may crystallize or harden.  If this happens, you just need to place the container its stored in, into hot water until it “melts” back into its thick syrup-like consistency.


    Oatmeal

    Oatmeal is inexpensive and can be used a number of ways including ground up to use as a flour substitute. Just keep it in a dry place.


    Rice

    When it comes to really long-term storage, white rice is the best option.  While not as nutritionally packed as brown rice, it contains less oil so it won’t become rancid.  Rice is a good item to have to make meals stretch a little further and then when paired with other foods, can add a variety of flavor and texture to your meal planning. Keep rice in an airtight container for freshness and to keep out the bugs.

    Suggested Article: 5 Simple Methods to Preserve Food


    Salt

    Salt can be used as a seasoning and a way to preserve food.  It’s also difficult to come by if the stores run out and it can’t exactly be grown in your garden. To keep salt safely stored and prevent its clumping together into one giant mass, store it in a sealed container, in a dry area.


    Sugar

    Essential for canning and baking, sugar is another one of those products that is hard to get if the stores run out.  Make sure it is stored in an airtight container to keep out pests, and placed in a cool, dry place.


    Wheat Berries

    Contrary to many other long-term storage food lists, flour isn’t the most idea.  While it can last for many months or even a year if stored perfectly, it can go rancid before you use it all, plus it can attract pests.

    Alternatively, wheat berries and other types of grain can be stored for several years.  Then, you can either grind them into flour or soak them to use as hot cereal. Two types to consider are hard white wheat and spelt. They should be stored in a cool, dry location.

    The Medicine Chest — how to deal with a disaster using alternative medicine. Check it out here>>>

  • 5 Fantastic Benefits of Living in a Yurt

    5 Fantastic Benefits of Living in a Yurt


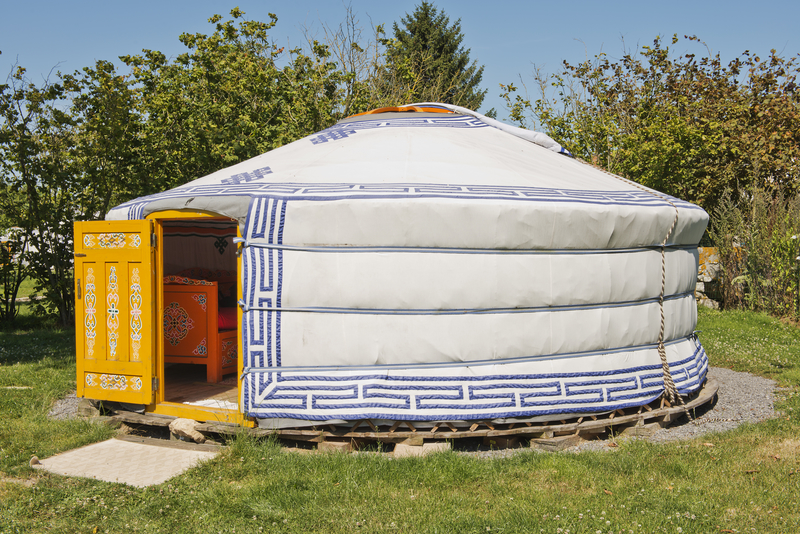
    Yurts are the ultimate example of efficiency in residential construction.  Their structural design, insulation and covering keep them cool in summer, warm in winter, and extremely wind resistant.  A yurt’s round walls allow for much less surface area for interior heat to escape while letting the wind move more organically around it instead of pushing against it.

    The framing of the support system is completely self-sufficient and a wonder of engineering.  The roof is supported by the use of a tension band and compression ring leaving the interior completely open and available to any interior design you could need.


    A Brief History of the Yurt

    Even though the practicality of yurt design and living didn’t reach the United States until after the second half of the 20th century, the design has been the primary traditional form of housing in Central Asia as far back as the 13th century.  Even today in many of the same regions, the Yurt is the only design used in most homes in Mongolia and other Central Asian areas.


    Yurts are Especially Friendly to the Environment

    Yurts are constructed on a raised platform supported by posts, versus a concrete slab directly on the ground.

    When properly anchored, these platforms create very little change to the area they are situated on.  Today’s structural beams and fabric coverings are often constructed through environmentally conscious methods and sustainable resources.

    The insulation fabrics used take up a very small footprint.  Additionally, it’s been reported that people who exhibit chemical sensitivities to other insulation materials used in modern building don’t react adversely to yurt insulation fabrics.

    Yurts are Especially Compatible with their Environment

    Yurts blend in nicely into whatever environment they are placed in. Their rounded form lends a more organic shape to the dwelling, versus the standard straight lines typical rectangular and square shapes do.  The overall appearance provides a much more attractive and serene feel to the residential space.


    Yurts Can be Moved and Lived in Just About Anywhere

    The construction makes a yurt extremely portable, allowing the owner to transition to just about any area a support platform can be contrasted.  This same construction also makes it incredibly strong and able to hold up to strong winds, heavy rain and snow and even earthquakes.

    With a yurt you can move from the desert to the beach to the mountaintops, taking your yurt along for the ride in each setting.

    Yurts Provide Incredible Flexibility of Use

    Since the design of the yurt doesn’t require any interior walls, you have an enormous open space to work with when you start planning the inside.  Whether you decide to put in permanent walls, movable dividers or build a loft for even more usable space, there is any number of ways you can use your yurt interior.  Smaller ones can be used as workout/yoga studios, guest homes, or even just temperature-controlled storage buildings.


    Suggested: Self Reliant Power Source For Your Yurt


    Yurts Encourage Inner Healing and Spiritual Enlightenment

    The aesthetics of a yurt’s construction, particularly its shape and openness, can be seen in other cultures throughout the globe. Round dwellings can be seen on just about every contentment throughout history, from traditional grass huts in Africa, igloos in the Arctic region, and the Teepees of many Native American tribes.

    Their very construction adapts not only to their physical surroundings but naturally allows a freer flow of energy inside and out.  These attributes aid in creating a more healing, creative and spiritual environment.


    Ready to Change Your Life?

    Or at least your home?  We’ve touched on just some of the benefits and fun Yurt living can bring to your life.  If you are looking for a more efficient and environmentally friendly living space, the yurt should be at the top of your list.


    [Did You Know]  What really happens when you bury a shipping container?  Learn Here>>>

  • 8 Extremely Natural Ways to Treat a Rash

    8 Extremely Natural Ways to Treat a Rash


    Rashes can be at the least, inconvenient, and at the worst incredibly painful.  There is any number of reasons a rash may appear.  Allergies, toxic plants, and illnesses are the main categories, but within those, especially allergies, it can sometimes be impossible to figure out why the rash is happening.

    Please note, if a rash progresses rapidly, appear for no external reason, or it accompanied by other symptoms like sinus or chest congestion or trouble breathing this may be a sign of a severe allergy.  In these cases, you should seek medical treatment and work with your doctor to identify the catalyst.

    For temporary issues, like heat rash or mild poison ivy, natural remedies can be used to relieve symptoms and help the skin heal more quickly.

    Related Article:  Identifying and Understanding Poison Ivy

    Aloe Vera

    This plant in the succulent family contains anti-fungal, anti-bacterial, and anti-inflammatory compounds that make it a great all-purpose skin ointment.  Use for rashes, burns and other skin irritations to relieve symptoms and accelerate the healing process.


    Apple Cider Vinegar

    Raw, organic apple cider vinegar like Braggs is a common home remedy for lots of ailments, including rashes.  Dap the diluted vinegar over the affected area with cotton or a soft, clean cloth.


    Baking Soda

    Add 1 Tablespoon baking soda to 3 tablespoons water or coconut oil to use as an ointment to help dry out a skin rash and relieve itching and inflammation.  To use, apply daily and let sit for a few minutes and then rinse off.  Avoid leaving the soda on the rash for an extended period.  This could lead to over-drying or other irritation.


    Chamomile

    Chamomile relieves the itching rashes cause and soothes the skin.  It also has anti-inflammatory, antiviral and antifungal compounds that help ward off complications during the healing process.

    Soak a paper towel or soft, clean cloth cooled, steeped chamomile tea and applied to the areas 2-3 times a day.

    Coriander aka Cilantro

    Also a good source of anti-inflammatory and antiseptic compounds, Coriander can be an effective treatment for rashes and other skin irritations.

    Make a paste from fresh coriander (cilantro) leaves.  Mix in a little olive or coconut oil to make it easier to apply.  Apply the mixture to the rash areas 1-2 times a day.


    Oatmeal

    Oatmeal is a great go-to for any type of skin irritation including rashes and burns.  If you only have “Old Fashioned Oats” put a cup of dry oatmeal through the blend cycle of your food processor or blender to get a finely ground consistency.  Add the ground oatmeal to a warm (not hot) bath and soak for 15-20 minutes.  Rinse with cool water in the shower and pat dry.  Apply a layer of coconut or olive oil to moisturize your skin without causing more irritation to the rash.

    For rashes in the facial area, mix equal amounts of the ground oatmeal with olive oil, coconut oil or honey and apply.


    Oil and Honey

    The vitamin E and antioxidants in olive oil and coconut oil assists in the healing process and aids in skin renewal.  Used by itself topically or combined with honey for extra soothing and anti-bacterial benefits, apply several times a day until the skin has healed.

    Suggest Article: 5 Wonderfully Natural Remedies to Treat Dry Skin

    Oil and Turmeric

    Out of honey?  Add a pinch of turmeric from your spice rack into oil or coconut oil.  Similar to honey, turmeric has anti-bacterial and anti-inflammatory compounds that will help soothe the rash and reduce itching as it heals.


    Keep Your Pantry Stocked, and You’re Good to Go

    Try each method to see which ones work best for you, then make sure you have the preferred items in stock for easy and natural relief treatment of your next rash.


    Would you like to learn more alternative medicines?  Click here>>>