Page 4 of 5
1 2 3 4 5
Uncategorized – Page 4 – Homesteader Depot

Category: Uncategorized

  • How to Fix Poor Soil

    How to Fix Poor Soil

    If you have purchased store bought bags of soil to fill your raised beds or to add to your rows then you know how costly it can be.  If you have thick clay soil and have bought a tiller, likely you have had to use it year after year.  Likewise, if you have sandy or hard soil you might have experienced only temporary improvements from soil amendments that you add each and every growing season.   Here are some tips on how to fix your soil problems for the long haul.


    Clay

    Tilling is the usual response to clay soil.  But if you have grown in clay soil repeatedly you probably found that you had to till over and over again.  This is because tilling breaks down the soil structure rather than improving upon it.  When it gets wet, or walked upon, it will simply compact down again.  Instead of tilling, (or if you must, in addition to tilling this time) add a thick layer of wood chips.   This will improve drainage, water retention, create air pockets, and add food for organisms that will naturally till the soil for you like earthworms.

    Sand

    Sandy soil can be low in nutrients and dry out quickly, but sandy soil is perhaps the easiest to fix and offers the best chance for quick results.  Composting and mulching with a thick layer of wood chips will increase nutrients, increase beneficial organisms, and increase water retention.

    Hard Dry Soil

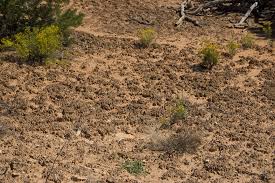
    Soil that is hard, dusty when dry, floods when wet, and is grey instead of black or brown lacks organic material.  With an absence of organic material the soil will not sustain the food web necessary for healthy soil.  Hard soil may not change quickly, but a sure fire way to fix it long term is add organic material.  Compost it heavily, and mulch it heavily with (can you guess) wood chips.  As life returns to the soil, the organisms will spread the nutrients through the compact soil underneath and soften it in the process.


    Did you notice a theme?  If you have problems with your soil it is because the organisms that participate in producing and maintaining healthy soil don’t want to live there.  Make it a desirable home for them by adding tons of organic material.  Anything other than repairing the food web or your soil will be a temporary fix at best.  Adding compost and wood chips will allow nature to do the rest of the work for you in almost every situation.

    If you liked this, you might also enjoy…

    Natural Healing Techniques Doctors Don’t Want You to Know…

    The Weight-Reducing Magic of Yoga…

    The Ultimate Woodworking Course..

  • Tips for Creating the Best Garden for Your Homestead

    Homesteading and gardening tend to go hand in hand. However, as gung ho as you might be about being more independent, it can still be tricky to find the perfect place to put your garden. You have to think about a lot of things before you choose the location. Let’s look at some of those things you have to consider so you can find the top spot for your vegetable garden.

    First, you have to think about just how you’re going to be using the garden. Are you going to be using a garden as a supplement to food supplies and then continue to buy in the grocery store? Are you going to try to create a garden that will be able to satisfy all of your vegetable requirements for the family for as much of the year as possible? If it is the latter, then you will naturally need to have more space for the garden.

    You also have to consider the type of plants that you plan to grow. Perennial vegetables tend to work well, but there are plenty of other options as well. You need to research your area first and determine what types of vegetables will grow well in your soil and climate though.

    When you are choosing a site for the garden, you want it to be an area that will get at least six hours of sunlight each day. In addition, it needs to have air circulation as well as good drainage. Ideally the location will be level and the soil will be loose and rich.

    It is generally a good idea to stay away from the house with your garden, as the house has the potential to cast shadows. This could mean your vegetables are not getting enough sunlight throughout the day and they will not thrive.

    Hopefully these tips can help you create the perfect garden.

    If you liked this, you might also enjoy…

    Natural Healing Techniques Doctors Don’t Want You to Know…

    The Weight-Reducing Magic of Yoga…

    The Ultimate Woodworking Course..


  • How to Make Sauerkraut

    How to Make Sauerkraut

    The nutrition you can grow on your homestead is not limited to your garden! Fermenting is great for gardeners not only because you can use the excess vegetables in your garden, but also because it is a way to preserve vegetables that increases the nutritional value of what you are preserving.

    Fermenting is basically growing beneficial bacteria, and it’s been done for thousands of years, all over the world.

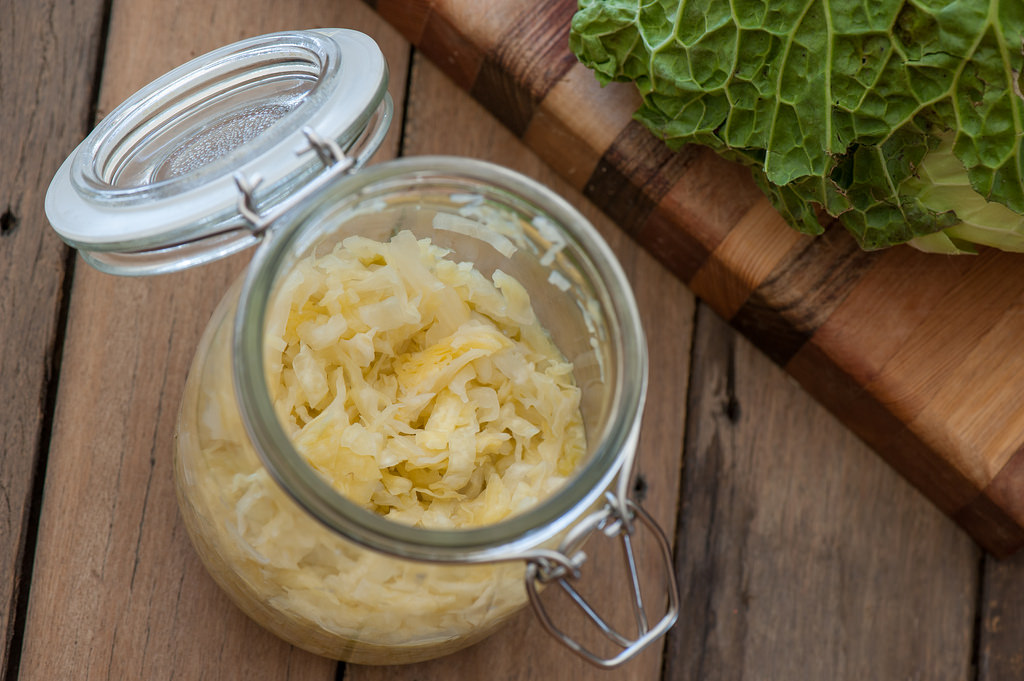
    Sauerkraut is a type of fermented vegetable that you’re probably familiar with already, it’s a popular condiment in Germany and much loved in the United States as well.

    It’s very easy to make at home on your countertop, either with cabbage from your garden or of course from the store. The important thing is to use organic cabbage; the pesticides in conventional cabbage can interfere with the fermenting process.

    What you need:

    • 1-2 large heads of organic cabbage
    • 1 quart mason jar
    • 1 1/2 tablespoon kosher salt
    • caraway seeds (optional)
    • fermenting weights or a small jelly car and clean rocks
    • Cheesecloth or paper towel
    • Rubber band or twine

    What you do:

    1. It’s always good to start with fully sanitized equipment. Wash your cutting board, knife, and jars with hot water and soap
    2. Slice up your cabbage, as thin or as thick as you prefer.
    3. Put the cabbage in a large mixing bowl, and sprinkle the salt over the top
    4. This is the most labor-intensive part. Begin to massage the salt into the cabbage leaves. You can use a potato masher or meat cleaver too to gently pound the cabbage leaves. Do this for about 5-10 minutes. The cabbage leaves will wilt considerably, this is what you want. The liquid from the cabbage will slowly become released through this process; this is the liquid you will use to preserve the cabbage. Once they are significantly and uniformly wilted, move on to the next step.
    5. If you are using the caraway seeds, mix them in while the leaves are still in the bowl.
    6. Stuff your cabbage leaves into the jar, punching them down to the bottom of the jar as you go, so that the liquid rises above the cabbage (it won’t stay that way, but just keep pushing it down as you add all your cabbage to the jar
    7. Weigh the kraut down. As you will notice at this point, no matter how much you stuff the cabbage in the jar, it will always try to slowly pop back up, so you will want to weigh it down so it remains submerged in the liquid. You can use either fermenting weights or a small jelly jar with a few rocks in it. Cover the kraut with a paper towel or cheesecloth and secure with a rubber band.
    8. Over the next 24 hours, check the kraut from time to time and press the cabbage down further if needed.
    9. Over the next 3-10 days, let your kraut ferment in a dark, cool place. After three days you can start to taste; it’s virtually done when the taste is to your liking.

    Enjoy!

    If you liked this, you might also enjoy…

    Natural Healing Techniques Doctors Don’t Want You to Know…

    The Weight-Reducing Magic of Yoga…

    The Ultimate Woodworking Course..

  • Water Conservation Tips

    Even though you might have plenty of access to clean and fresh water right now, it doesn’t mean that will always be the case. There may come a time when you have to conserve the water you have for survival. In addition, unless you have your own well already – which is a good idea if it is possible in your area – you are probably paying for water. As you can see, learning to conserve water now has the potential to pay off for you in a number of ways. Let’s look at some of the different ways that you can start conserving.

    First, you don’t always have to water your lawn. In fact, it might just be one of the biggest wastes of water. Let the grass become dormant during the summer months, and let the rain take care of the watering for you. Simply not watering the lawn is one of the simplest ways to conserve water.

    Another very good and very simple tip that you can use to help conserve water is simply reusing household water. This is also called using greywater. Consider reusing the water when you do dishes to water your garden. By reusing water in this manner, you will be able to help your garden to survive even in a drought without overspending on your water bill.

    Something else you might want to do is go through the house and look at all of the faucets. If there is even a small leak or a drip, it could mean wasting a substantial amount of water each month. Make repairs if you find the need. Even a single relatively small leak could be wasting up to 20 gallons of water each day.

    These are just some of the simplest and most effective methods of conserving water for your home.


    If you liked this, you might also enjoy…

    Natural Healing Techniques Doctors Don’t Want You to Know…

    The Weight-Reducing Magic of Yoga…

    The Ultimate Woodworking Course..

  • What Breed of Goat Should You Buy? (Infographic)

    Goats are such great animals for homesteaders. They can provide milk, meat, weed control, fiber, even company! But of course, not all breeds of goat are the same. Some are better for meat, others for dairy, etc.

    This very handy infographic from the excellent homesteading site, The Prairie Homesteader, covers what breed of goat is best for what purpose.

    Before buying goats, a very good first step to make is identifying what you want the goats for. This will help you determine the best breed for you. This infographic can serve as a starting point for you, to give you an idea of the most common breeds and their best purposes.

    You’ll want to take into account your area, the size of the space you have for the goats, a need for structure, their medical needs, etc. as well, so consider these factors as well when researching goat breeds.

    Goats are such lovely homestead animals, pick the right breeds for your needs and you’re sure to be very happy with these amazing creatures!

    goat-breeds-infographic-1

    If you like this, you might also like:

    Advanced Gardening Course To Accelerate Your Food Production…

    Survival Medicine & Wilderness Survival…

    Survival Techniques From Long Ago, Re-purposed For The Modern Era…

  • Prolonging Your Tomato Harvest Through the Winter

    Prolonging Your Tomato Harvest Through the Winter

    Surely by now you have noticed that your tomatoes are not producing like they were in July, and what they are producing is not ripening as fast.  No matter what you do, shorter days and cooler temperatures are going to stop your tomato production almost everywhere but the tropics.  But you can still prolong your access to ripe homegrown tomatoes pretty easily by taking advantage of an easy technique that allows you to eat more of the tomatoes you have already grown, which might otherwise never ripen.

    Step One: Uproot Plants

    Pull your tomato plants up and shake as much dirt off the roots as you can.  Spray the roots with a hose to get off all the excess dirt on at least a few of your plants.  The rest of them can stay dirty.

    Step Two: Hang the Plants

    Hang the clean tomatoes indoors, upside down.  The warmer the room you place them in the quicker they will ripen.  So unless you want all of them to ripen at once, it would be wise to place some of them in a cooler room so they can ripen a little slower.

    Hang the dirty tomato plants in the garage or other unheated outbuilding, upside down, just like the clean ones.  These tomatoes will ripen slower than those that are hanging inside in the warmth. If you run out of ripe tomatoes from both your “warm” and “not so warm” indoor supplies, you can bring in some of your outdoor plants.

    Step Three: Harvest

    Check the plants daily, the ripe tomatoes will fall faster when hanging upside down than they would have when growing upright.

    While this might not give you a surplus of tomatoes all the way through the winter and into the next spring, it will allow you to eat more of what you have already grown, and will extend how long you do have access to homegrown tomatoes.  It will all depend on how many plants you have and how cold it is where you live.

    Click Here To Get The Best Survival Medical Course…

    Check Out These Mind Blowing Survival Skills…

    See what is happening in this country and what you can do to protect yourself…

  • Monsanto or Organics: Who Should You Trust? (Infographic)

    The notorious ago-giant Monsanto has been genetically modifying foods, dominating the agricultural industry and putting small farmers out of business with ridiculous lawsuits over their crops being cross-pollinated with Monsanto GM seeds for decades. But they have a a frighteningly massive influence over the media and government (the USDA is a revolving door of Monsanto employees going in and out, but that’s another post), so if you are someone you know is a skeptic, here is a very informative infographic on who we should trust with our food source, originally published on Care2.com.

    dont-trust-monsanto

    *Superfund is a United States federal government program designed to fund the cleanup of sites contaminated with hazardous substances and pollutants. It was established by the Comprehensive Environmental Response, Compensation, and Liability Act of 1980 (CERCLA).

    If you like this, you might also like:

    Advanced Gardening Course To Accelerate Your Food Production…

    Survival Medicine & Wilderness Survival…

    Survival Techniques From Long Ago, Re-purposed For The Modern Era…


  • Easiest Herbs to Grow for Tea

    Easiest Herbs to Grow for Tea

    Herbal tea can be very calming, invigorating and of course, healing. These days, however, a lot of major herbal tea brands that have become staples in homes and health food stores unfortunately have added ingredients like natural flavors and soy lecithin. The good news is, there’s several easy and delicious options for homemade herbal tea!

    Mint

    Mint is the most obvious and a lovely option for tea. Tea made with mint leaves can help with upset stomachs and other digestive issues, and it is also very calming and refreshing. It grows best in well-drained soil and shade, and it crawls so it’s a great ground cover. It also repels bests so it’s perfect around your garden beds.

    Lemon Balm

    Lemon balm makes for a delicious tea with a lovely flavor, and it’s very medicinal too. Perfect for treating colds, it is a wonderful natural sedative for restless children or patients. It’s an easy and low-maintenance herb, that can get very big very quickly, so it’s perfect for tea as you’ll want to cut it back often.

    Dandelion

    Dandelion tea, either from the roots, leaves or flowers, is wonderfully medicinal and also quite flavorful. The root even can be used to make caffeine-free, liver-supporting coffee. Odds are you already have dandelion growing in your lawn or pasture, but it can be easily grown in gardens as well.

    Chamomile 

    Chamomile is a classic herb tea that’s a lovely bedtime treat. It is wonderfully medicinal, benefiting chest colds, inflammation, eczema and allergic reactions. Best grown outdoors in the ground, it can be a lovely option for mass planting and the pretty little flowers are a great landscaping choice as well.

    These are just a few options for herbal tea-there’s many more out there! Home-grown and home-brewed tea is the best you’ll get, for taste and for health, so consider some of these wonderful tea herbs today!

    If you liked that, you might also like:

    Advanced Gardening Course To Accelerate Your Food Production…

    Survival Medicine & Wilderness Survival…

    Survival Techniques From Long Ago, Re-purposed For The Modern Era…