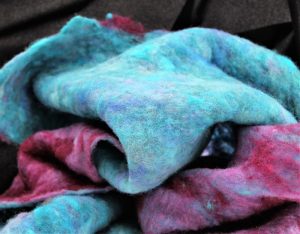
If you are into crafting with felt pieces, it’s actually possible to create your own felt material just by cleaning out your closet. Then, for the low cost of a few washer/dryer cycles and detergent, you can have some large pieces to use that will let you “think big” for your next project.
Felt itself is a non-woven textile. It is normally created by matting and compressing the fibers together until they connect to become a very sturdy fabric. Known as the oldest form of cloth, it has an extremely long historical record.
Felt has been used in numerous cultures as fabric for rugs, tents, clothes and even footwear.
When converting sweaters, the felting results when the wool fibers become agitated enough to bind to each other. As this happens, the fibers become fuzzy and stick so that fraying won’t take place. There are only two things that are important to sweater felting success, the fiber blend, and the knit stitch.
Suggested Video: “Learn how to purchase old batteries, recondition them, and sell them for a nice profit”
While 100% wool is optimal, it may be hard to find since wool blends have become more popular. For felting purposes, check the sweater’s tag and stick to those with 65% wool or more.
As far as the knit stitch, this can be difficult to establish sometimes. The easiest way to check is to see how stretchy the sweater is. As a rule, the stretchier the sweater, the less likely you’ll be able to felt it successfully. Of course, if you’re not sure but know you don’t want the sweater anymore, there’s nothing wrong with giving it a try.

Let the Felting Begin
Felting sweaters is one of the easiest processes you will ever do. To get started, you’ll need your washing machine to be free. Put the sweaters in with approximately half the usual amount of detergent, and an old pair of tennis shoes. Set the cycle for the longest, hottest option available on the machine.
When the wash cycle is complete, move the sweaters (but not the shoes) into your drier. For this, you’ll also want to select the longest and hottest option. Usually, this is the “cotton” cycle, but double check to see if a different option will be better.
Suggested Article: “13 Useful Ways to Reuse Eggshells”
The sweaters are fully felted when all the fibers have become completely matted. When this happens, there won’t be any fraying or unraveling when you cut them. If after the first round of washing and drying it doesn’t look like the felting is completed, repeat the process as many times as you need to. If you didn’t add the shoes the first time, find a pair for the subsequent times. They help agitate the fibers more in the washer and speed up the process.
Once completed, you should also notice that quite a bit of shrinking has occurred. This is normal (and why you don’t usually wash sweater this way). If you’ve reached a point where there is no fraying when you cut into the final product, you’re almost done!
To make the most of your “new” craft supplies, you’ll want to cut them apart in a way that will give you the largest, flattest pieces to work with. This will provide more options for the sizes of projects you can create later.
For best results, cut a line from the armpit area up to the end of the neck opening on each side. Then cut open each sleeve and up one side of the body portion. When you are finished, you will be left with three large pieces of homemade felt material.

