
I’ve been sharing a bit about canning meat lately, and I thought I’d share an actual recipe for how to do it.
Now, remember that you do need an actual pressure canner to can meat, but given the amount of foods you can preserve with a pressure canner, it’s definitely worth the investment.
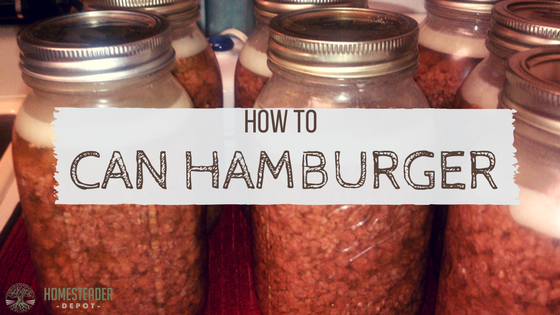
Any way in which you can preserve meat is great to be able to do, since it’s nutritious and caloric. When it comes to canning hamburger in general, this is a great option for meat canning as you can take advantage of sales (ground beef goes on sale often), buy and preserve in bulk, and then have a great little stash for cheap meals or even survival.
Here’s how:
What You Need:
- sterile canning jars and lids
- ground beef (1 lb of beef fits pretty well in one pint canning jar, to give you an idea of how much of both you will need)
- stovetop and skillet
- pressure canner
- beef or chicken stock or broth
- salt
Directions:
- To start, make sure your jars are properly sterile, your meat is ready to go, your kitchen is clean, and your pressure canner is ready.
- Preheat your skillet and brown your meat gently. It doesn’t have to be entirely cooked, just browned a bit.
- As your browning the meat, but your lids in very hot water and set aside.
- When the meat is done browning, pack it into the jars, leaving 1″ at the top. When you’re finished, drain the grease from the jars.
- Next, pour in your stock or broth, leaving 1″ at the top.
- Add a teaspoon of salt to each jar.
- Using a clean, warm cloth, gently wash the lids of your jars to prepare for sealing.
- Place the lids on the jars and tighten until finger tip tight.
The Canning Process
Now that you have your meat in jars and ready to be canned, it’s time to move on.
- Place your pressure canner on the stove, with the rack on the bottom.
- Fill with 3 quarts of hot water.
- Add as many jars as you can fit in the canner, so that they are not touching.
- Put the lid on according to your model’s instructions, and set the oven to high. Do not put the gasket on yet.
- Wait about 10-15 minutes, until there is steam coming out of the steam vent.
- Once you see steam, set your timer for 10 minutes. After 10 minutes of exhausting steam has passed, then put on your gasket.
- Keeping your oven on a high setting, wait until the “topper” pops up, which should take about 5-10 minutes. Once the pressure gauge shows designated pressure of 11 lbs, gently lower your stove to keep it there, and set your timer for 75 minutes. Check periodically to make sure the pressure is maintained.
- After 75 minutes, turn off the stove and carefully remove your canner from the burner.
- Once the pressure has dropped to zero and the topper has gone back down, you can carefully remove the jars and place them on the counter to “pop”/seal.
- Once your jars are cooled and sealed, label them and store them.
Your canned meat will last in a cool, dry pantry for 2-5 years.
If you enjoyed this, you might also like….