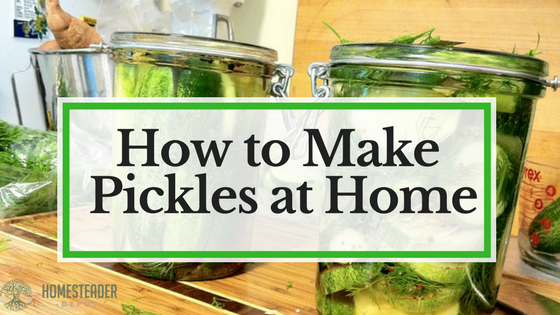

Pickles are one of the most classic and widely recognized forms of brine preservation. While the term “pickled” can apply to various forms of preserving various kinds of vegetables, what most of us think of when we think of “pickles” is the classic, brine-preserved cucumber that has become a staple of delis and diners across America. It most famously made its way into the American diet through Jewish delis in New York City, and, like any classic food, it can be made easily at home.
While the formula is simple, however, there can be a bit of trial and error involved, and anyone who’s successfully made pickles can probably attest to this. There have probably been hoards of gray-haired European grandmothers throughout the ages who have perfected the art of delicious, crunchy, perfectly-pickled cucumbers, but for those who didn’t grow up learning at their Bubbie’s knee, it take a bit of practice.
Fortunately, we can still learn from the masters, even if they’re not in our own family. Sandor Ellix Katz, author of Wild Fermentation: The Flavor, Nutrition, and Craft of Live-Culture Foods is not only an expert in the field of home fermentation, he also grew up in a Jewish community in Brooklyn, so he knows a good pickle when he, well, makes one.
One of the most common mistakes made by first-time pickle makers is by only using a brine. This will result in mushy, soft pickles. What Katz discovered the hard way is that by adding fresh grape leaves, you can naturally preserve the crunchiness of the cucumber, as it absorbs the brine and takes on the delicious, salty sweetness that can only be acheived through pickling.
To find fresh grape leaves is another story, however, and you might have some trouble, depending on where you live. Of course, if you grow grapes, you won’t even be worrying about this, but if you don’t, you can see if any homestead neighbors do. You can also check or ask at Middle Eastern restaurants or markets, or simply order dried ones online, which are a good substitute. You can also use black tea leaves. While grape leaves are the classic, black tea will perform the same function.
This Odd Therapy Will Revolutionize Your Well-Being…
The other crucial component is your equipment. We’ve included Katz’ suggestions, but there’s still room for improvisation. The important thing is to have a cyllindrical container and some way of weighing down the pickles so they remain submerged in the brine. See what you can come up with!
So without further ado, here is Sandor Ellix Katz’ recipe for classic kosher deli pickles!
Ingredients
Yields 1 gallon
- Approximately 4 lbs cucumbers, pickling variety preferable
- 3/4 cup salt (kosher or sea salt is best)
- Dill, either fresh and flowering, or the dried leaves and/or seeds (whatever you can find)
- Several cloves of garlic
- Grape leaves (these help the pickles retain their crunchiness)
- Black peppercorns
Equipment
- Ceramic fermentation crock, or food-grade bucket, both cylindrical
- Fermenting weight or large plate that fits inside the bucket
- Either: 1-gallon bottle filled with water OR a large rock that has been boiled
- Clean cheesecloth or dish towel for covering
Directions
- Rinse the cucumbers carefully, to avoid bruising. If you are using cucumbers that haven’t been picked fresh that day, soak them for a few hours in chilled water.
- Bring half a gallon of water to a boil on the stove, then remove from heat and stir in the salt, making sure it dissolves completely. This creates the 5% brine solution.
- Let the brine mixture cool until you can leave your finger in it for at least 10 seconds without it burning.
- As you are waiting for the brine to cool, clean your crock or bucket thoroughly using hot water and non-antibacterial soap, as well as your weight or plate.
- Peel and crush your garlic cloves, and place those along with the dill, peppercorns, and grape leaves at the bottom of your crock or bucket.
- Next, place your cucumbers in the crock or bucket, and then follow with the brine.
- Place your weight or plate on top, and weigh that down with the jug filled with water or the boiled rock. If the brine doesn’t cover the plate or weight, add more brine with the ratio of 1 tbs salt to each additional cup of water.
- Cover your crock or bucket with the cheesecloth or dish towel. This will keep dust, bugs, and any other small debris out of the pickels.
- Store in a cool, dark place.
- Check daily. Scum may start to appear on the surface, so remove this.
- After a few days, taste your pickles to see if they’re ready. This part is largely up to your own taste, once they taste good to you, they’re done! There’s no rule here; as long as they’re fermenting well and you like the taste, you can remove them when you please.
- You can let them continue to sit for one to four weeks, taking some out to enjoy as you go. At some point they will become fully sour, at which point you’ll want to move them to the fridge to slow the fermentation process.
- To safely move them to the fridge, transfer to a jar if you don’t have room for your whole crock or bucket in the fridge, but DO NOT COVER for a few days, leaving the cheesecloth, dish towel, or a paper towel secured with a rubber band on the jar. After a few days, you can cover with the jar lid.
- These will keep for a long time in the fridge, so you’ll probably eat them all up before they ever go bad! Such is the beauty of fermented foods.
Enjoy!
The ONLY Reason You’re Failing the Paleo Diet...