Blog

  • Clove and Orange Christmas Decorations

    Clove and Orange Christmas Decorations

    As a kid I used to make clove and orange Christmas decorations but I hadn’t thought about them in years. I saw this video the other day and it reminded me of how sweet-smelling these decorations can be, and what a fun and simple craft for kids they are.

    In the winter time, indoor air can become stale really easily, especially since colder temperatures make it uninviting to open windows, but these cute and festive decorations also double as natural air fresheners.

    Chemical candles or Glade plug-in style air fresheners can pollute your home with toxic fumes and overwhelming, artificial scents, so this is a great alternative for fresh, sweet, holiday scents.

    If you liked this, you might also enjoy…

    Learn to Heal and Treat Illnesses Naturally…

    An Ancient Secret to Slimmer Waists…

    Learn to be a Master Carpenter at Home...

  • Farm Chores for Children By Age

    Farm Chores for Children By Age

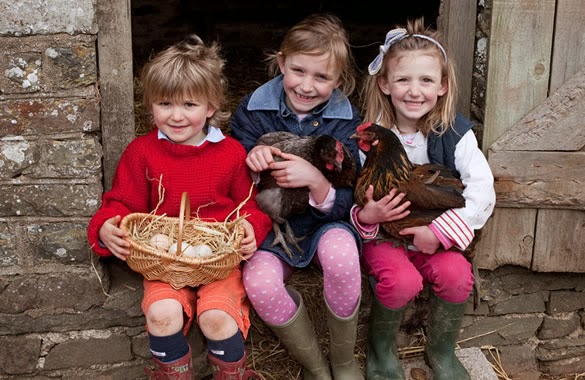
    It’s so wonderful for children to grow up on a homestead. Fresh air, animals, learning about nature and plants, and also, work ethic! Children are never too young to participate in homestead duties. Here’s a list of ideas for children, by age group, to get involved in farm chores. Hey, they’re another mouth to feed, why not put them to work?

    Toddlers

    Toddlers will most likely need to be closely supervised, but they’re often eager to help out and get involved. Some tasks they can do and be involved in are filling up feed buckets or water troughs, throwing scratch to chickens or scraps to pigs or goats, brushing animals, weeding, or harvesting from the garden.

    Ages 4-5

    This age group can probably do everything toddlers would do with more independence, as well as help plant seeds, let animals out in the morning or back in in the evening, collect eggs, help with food prep and food processing, hang laundry and care for chicks or other small animals that require constant attention.

    Ages 6-9

    This age group can again probably do everything younger children can do with more and maybe even complete independence, as well as learn how to milk animals, do basic landscaping and gardening such as digging, raking, and maybe even tilling, watering the garden and have regular chores that they earn allowance for and can be relied upon to do regularly.

    Ages 10-12

    By this age group children can be expected to have much more responsibility, including for the above tasks as well as regularly milking animals, bathing and grooming, helping with business aspects of the homestead like going to the farmer’s market or learning about keeping track of expenses and income, giving medication to animals and/or monitoring conditions of pregnant or sick animals.

    Ages 13+

    By this age, they’re pretty much official farmhands! They can handle all the above tasks and by this age should be held accountable for them. They can also learn to handle animals such as horses or cows, operate light machinery, help with more serious garden tasks like digging or pickaxing, begin to assist with live births of animals, and should be learning more and more about what adults handle as the years go on.


    These are guidelines, of course, you as a parent will know what your child can reasonably handle. But giving children responsibilities and independence where they can learn what it’s like to have people rely on them is a wonderful character builder, and will help them become assured, hard-working, reliable adults.

    If you liked this, you might also enjoy…

    Become A Master Healer With This Revolutionary Course…

    Traditional Hindu Yoga for Weight Loss

    Improve Your Carpentry Skills Quickly and Easily..

  • Act Now to Garden in the Spring

    Act Now to Garden in the Spring

    If you don’t already have a garden, then waiting until the spring isn’t going to help you at all.  Even if you pour your time and resources into gardening starting in the spring you won’t be seeing the result until summer, and then it will still be limited.  But, if you act now and prepare, you can hit the ground running as spring comes around.  Here are some steps that you can take now to get starting growing food next year.


    Building Beds

    Especially for those of us that aren’t carpenters and use salvaged material, getting your raised beds built now will give you a huge head start.  If you are working full time and only gardening on the weekend, then building beds, then getting them in place, filling them, and planting them, could, especially if things don’t go your way, take several weekends.  That’s weeks that you could be growing but aren’t.

    Composting

    If you live in a cold zone, then this isn’t going to be as effective, but at least saving the material and getting it in place will.  Turning waste into compost could take months, so don’t wait until you need it to start the process.

    Starter Box

    Getting a starter box, or even a room if you have the resources, put together now will allow you to start seeds up to a month before your last frost.  This is s huge advantage by lengthening your growing season and getting you started faster.

    Stock Piling

    There are a lot of materials that you will need to get a garden started, tools, soil, stakes, boards, fencing, seeds, containers for starts.  All of these cost money, and buying them all at once can be a real burden or even impossible.  Buying some now, before you need them, will keep you from breaking the bank come spring.


    The last thing that ever helped anyone in gardening was procrastination.  There is always something that can be done now to help later.

    If you liked this, you might also enjoy…

    Natural Healing Techniques for Regular People…

    Ever Wanted to Try Yoga?

    Learn Basic Carpentry at Home…

  • How to Make a Horseshoe (Video)

    Horseshoes have been around for centuries, and play an integral role in man’s relationship with horses. We still use horses for transportation, herding cattle and other livestock, farm labor, and even companionship, and our relationship with these incredible creatures has played a huge role in modern civilization.

    Blacksmithing is the ancient technology that has also played a huge role in civilization, and I think it’s very cool that a lot of horseshoes are still made using the very basic, age-old method. Here’s a very cool video of a blacksmith making a horseshoe which gives you an appreciation for the level of work required to fit a horse with well-made shoes, and what that means about how valuable horses are to the work that we do. Enjoy!

    If you liked this, you might also enjoy…

    Ancient Healing Secrets You Can Learn at Home…

    Yoga and Weight Loss: What You Need to Know

    How to Become a Master Woodworker...

  • Building a Natural First Aid Kit

    Building a Natural First Aid Kit

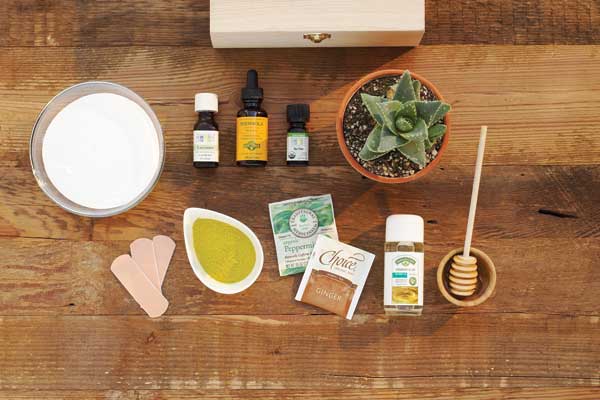
    On the homestead, one is subject to bumps, bruises, rashes, and other maladies and injuries. It’s very important to have a well-stocked first aid kit. But what about the homesteader who wants more natural, holistic options for home remedies, rather than simply OTC medicine that might be expensive and hard to stock up on for people who live in the country?

    Here is a simple list on how to get started restocking your first aid kit. There are so many wonderful DIY natural remedies available these days (thank you, Pinterest!) it can be almost overwhelming to know which natural remedies to stock up on. So this list will help you figure out what will work best for your needs.

    1. Take inventory

    If you already have a first aid kit or first aid items scattered around the house, gather them all together and see what you have. What have you used recently? Which items do you find particularly helpful? What items have you had since the first Bush presidency? What items are useful, but might have harmful parabens or petroleum products in them? Also, think about the herbs and plants you have on your property and in your garden that might have healing properties of their own.

    2. Reduce, reuse, and find replacements

    Throw away old, expired, and unused items. Keep what you like and see if anything needs replenishing. Items like band-aids, gauze, and medical tape are great to keep a healthy stock of, especially if you live far away from stores at which they can be purchased. If you have items you like but maybe would like to find natural alternatives, set them aside for emergencies and make a list of the injuries or issues they address and research healthy and safe alternatives. If you are a Pinterest user, make a board just for natural remedy ideas.

    3. Plan ahead

    Think about the first aid emergencies you’re most concerned about on the homestead. Issues like splinters, rashes, sunburns, cuts, scrapes, and common colds and flus are probably going to be at the top of your list. Then add to your list or Pinterest board possible natural remedies that will help with these. The simpler the better, and anything that works double-duty is great. For instance, coconut oil and aloe are great for anything skin-related, raw honey is a multi-purpose antibiotic and cold remedy, activated charcoal can help with stomach issues, skin issues and to pull out splinters, etc.

    4. Create

    Get started making some of the remedies for issues you’re already dealing with. You’d be surprised how long a jar of homemade herbal salve can last, for example. You don’t have to make everything all at once, just try to plan for some all-natural remedy ingredients that you can stock up on to make what you need when you need it.


  • DIY Clones   

    DIY Clones  


    Downtime in the garden can really kill your productivity and efficiency.  Cloning plants, such as tomatoes, will greatly reduce the time, space, and resources like potting soil.  It will also give you a more predictable result, since you are not starting seeds with unknown traits, but cloning only the best plants in your garden.  Here’s how to get started cloning your own plants.


    First, you will need a few supplies:

    1. Razor blade
    2. Clone plugs
    3. Clone tray with plastic cover
    4. Root tone


    Directions

    1. Most important is the selection of mother plants. You want to not only look for the most productive plants, but also plants that show no signs of disease or susceptibility to pests.
    2. Once you have selected your mother, find a branch that is still tender and young to make a cutting from. Starting from the tip, count back three branches or points of growth.  This is usually only a few inches on the branch.  This is where you want to make your cut.
    3. Using a clean razor blade, make a split in the bottom of the new cutting, about ½ of an inch long. This is to increase the amount of surface area that will be exposed to the root tone.
    4. Dip the split cutting into your root tone.
    5. Insert the cutting into a plug, set the plug in it an empty hole in a tray and repeat the process until you have enough clones or until you run out potential cuttings or room in the tray.
    6. Put some water in the bottom of the tray so that the plugs can wick water to your cuttings and cover the tray with the clear plastic dome.
    7. Place the covered tray of new clones in a location where it will not receive direct sunlight. The clones will be vulnerable to heat and welting until they have produced roots.
    8. Check on your clones every day to make sure they are not getting too hot and have enough water. If you notice any that are not looking healthy, remove them so that they do not spread illness to other clones.
    9. After a week or so, lift the tray up and look underneath to check for roots. Once you see some roots your clones are ready for transplant.

    Once you have completed the process you will realize how easy it is and how much time and resources can be saved by making your own clones.

    If you enjoyed this, you might also like….

    Home Defense in the End Times…

    Natural Healing Secrets You Need to Know…

    Eat Like Your Ancestors…

  • Harvesting Sugar Cane (Video)

    Harvesting Sugar Cane (Video)

    Sugar is a huge part of the American diet, and yet a lot of people don’t even think about how it grows or how it’s harvested. Entire nations and states have had their entire economies centered around sugar, a very valuable commodity that is pretty labor-intensive.

    These days, big agro sugar cane fields have plenty of industrial equipment to make this labor-intensive crop easier to plant, tend and harvest.

    I thought this video of harvesting sugar cane on a homestead was pretty cool. I love seeing how things are/were done without big industrial equipment, especially by small homesteaders. Check it out!

    If you enjoyed this, you might also like….

    Home Defense in the End Times…

    Natural Healing Secrets You Need to Know…

    Eat Like Your Ancestors…

  • Best Animals to Raise for a Homesteader

    Best Animals to Raise for a Homesteader

    You want to become truly self-sufficient. Even though you might have a beautiful garden with all the vegetables you need, if you are still buying meat and dairy from the grocery store, you aren’t very self-sufficient at all. In this post, we’ll be looking at some of the best animals for a small homesteader to raise that can do more than just provide meat.

    Goats

    Having goats on the property is always a good idea, as even just a single goat can provide you with between two and four quarts of milk each day. The milk can be used to drink, naturally. However, you could also use it for a host of other things, such as making butter and cheese. You could even put it in the soap you make. Those who have large herds of goats may also use them for meat if they choose.

    Sheep

    Like goats, sheep don’t take up a lot of space, and they can provide you with some great benefits, namely wool. With the wool, you can then make clothing, blankets, and much more, which makes you even more self-sufficient. Sheep’s milk might not be something that you commonly think about, but you can use it to make some great cheese. As with goats, you can use the sheep for meat if needed. However, the other benefits they offer tend to make them more valuable in other areas.

    Poultry

    Of course, you certainly want to consider raising poultry, and chickens are probably top on your list. It’s true that chickens are a great option. You can raise them for eggs or meat, and again, they don’t require too much space. Even the chicken feathers are useful. You can clean them, and then you can use them to stuff pillows, for example.

    You certainly have some other choices with poultry as well, including ducks and geese, as well as turkeys.

    Hogs

    If you raise hogs, you will have a substantial amount of quality meat on your homestead. You can make bacon and sausage, and you will have plenty of pork chops and roasts. Hogs will eat many different things, including some of the table scraps that you have and that you might otherwise throw away. Just make sure there isn’t too much protein in their diet. Also, you can use hog manure in your garden.

    Learn About Your Animals

    Regardless of which type of animals you choose to raise as a homesteader, you need to do your due diligence. This means learning about the different animals and the various breeds that are available. You want to choose the best animals for your lifestyle, and you need to know how to care for them properly. With a little bit of research, you will have no problem when it comes to raising and keeping these animals. Of course, these are just some of the good options for homesteaders out there. You can find plenty of other good animals that might work better for you, such as rabbits, or even fish.

    If you liked this, you might also enjoy…

    Are We In The End Times?

    Complete Health Transformation Without Drugs or Surgery…

    Having Trouble Sticking With Paleo?