Blog

  • Wood Ash for the Garden

    Wood Ash for the Garden


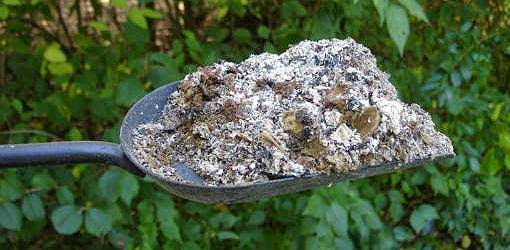
    Any way that costs can be cut while increasing productivity and health in the garden is a good thing.  One way to do just that is to use wood ash in your garden as a fertilizer.  Not only does wood ash contain calcium and potassium, along with other nutrients, but an easy-to-obtain byproduct of heating your home with a fireplace, wood stove, or a bonfire to get rid of dead branches and yard waste.  All that being said, don’t run out and smother your garden in a layer of ashes, it won’t have the desired result.

    Here are a few thing to keep in mind when using wood ash as a fertilizer:


    Keep it Dry

    Some of the nutrients that you are looking for in wood ash are in water-soluble forms.  This makes them great for adding to the top of soil since the nutrients will be brought down the root zone naturally by watering or the rain.  But, if you leave it out where it can get wet, like in an uncovered fire pit that got rained on, then likely much of what you want in your garden is already gone

    Check the pH

    Since wood ash is alkaline you won’t want to add it to soil that is already alkaline or on acid loving crops like blueberries.  If you chose to add it to your compost pile it should be added little by little and not in a thick layer, that being said it can counteract the acid in material like citrus peels, so if you are composting acidic material you may want to add extra wood ash.

    Dusting

    One of the best ways to use wood ash it to regularly dust your garden soil with it.  Allowing it all to go away naturally before applying more.


    Making use of the material that you already have on hand, and might otherwise through away is a great way to cut garden costs while also increasing health and productivity.

    If you liked this, you might also enjoy…

    Holistic and Natural Healing for Beginners

    The Weight-Reducing Magic of Yoga…

    The Ultimate Woodworking Course...

  • How to Make Moonshine (Humorous Infographic)

    How to Make Moonshine (Humorous Infographic)

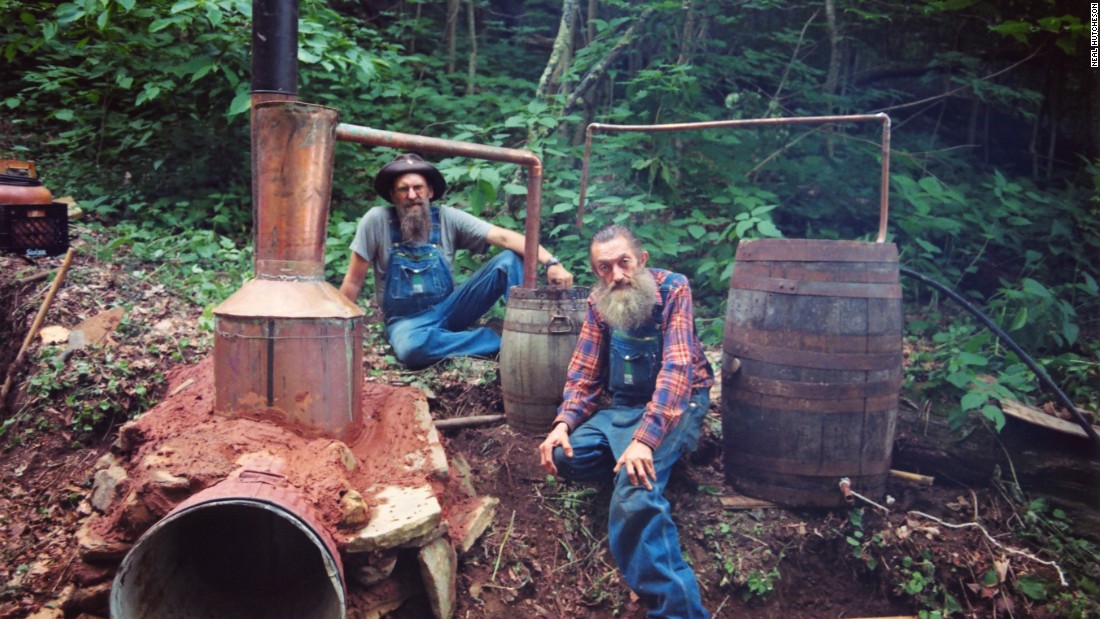
    I saw this infographic on Pinterest recently and couldn’t resist sharing here! Moonshine is such a humorous cultural icon of the South and of “country living”. I wouldn’t actually recommend making moonshine, and you’ll see the infographic has a warning, since it’s most likely illegal to do so where you live and can be quite dangerous.

    *But purely for entertainment purposes*, as a DIY, fermenting, make-everything-at-home enthusiast, I still think it’s super cool and fascinating to see a breakdown of how moonshine is made. I feel like it’s a big part of our cultural history as a nation in a way.

    Enjoy!

    enhanced-buzz-6848-1333119719-15

    If you liked this, you might also enjoy…

    Natural Healing Techniques Doctors Don’t Want You to Know…

    The Weight-Reducing Magic of Yoga…

    The Ultimate Woodworking Course..

  • No-Poo for Pets

    No-Poo for Pets

    No-poo for pets might not be what you are thinking it is.  It won’t keep you from cleaning out a litter box or picking up after your dog in the yard.  But it can help reduce the cost of keeping your pet healthy and reduce toxins in your environment.  No-poo (short for “no shampoo”) is basically a way of cleaning off your pets without using shampoo, and in some cases without using water.  Here are the supplies you will need and how to get started.


    Ingredients

    • Baking soda
    • Diatomaceous earth
    • Neem oil
    • Witch Hazel
    • Water

    Directions

    1. The amount you make will depend upon the number of, and the size of your pets. But Mixing the dry ingredients together at a ratio of 2 parts baking soda to 1 part diatomaceous earth will give you a dry rub.
    2. Rub the dry mix into your pet’s fur all over their body. But be careful around the face, it can cause irritation if you it gets in the eyes or the nose.
    3. Brush your pet with as fine of a brush as their fur allows for to remove the dry rub. This will be enough in between baths to keep them from smelling and to reduce the chances of fleas and ticks.
    4. To give them a bath, if your pet allows for this, mix 1 part baking soda with 1 part water. Rub your pet’s coat with this mixture.
    5. Rinse this off.
    6. Mix a few drops of neem oil in enough witch hazel to work into your pet’s coat all over their body.
    7. Rub this all over your pet’s coat and brush it in. The witch hazel will help with itchy skin and the neem oil will help reduce fleas and ticks.


    Keeping a pet healthy doesn’t have to be expensive, and it doesn’t have to involve covering them in toxins that could make you sick.  It can be done cheaply and easily with ingredients that you probably already have around the home.

    If you liked this, you might also enjoy…

    Learn to Heal and Treat Illnesses Naturally…

    An Ancient Secret to Slimmer Waists…

    Learn to be a Master Carpenter at Home...


  • Simple Homemade Paleo Mayonnaise (Video)

    Simple Homemade Paleo Mayonnaise (Video)

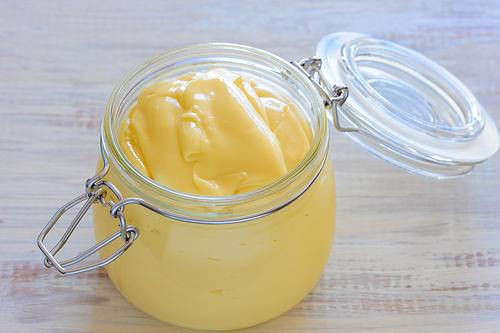
    Mayonnaise is a condiment staple that most houses stay well-stocked in. However, most store-bought mayonnaise, even the “natural” kind, is made from either unhealthy, caloric, “bad fat” oils, GMO soy ingredients, or both. Mayonnaise used to be something most homes made from scratch, and it is really quite simple to make your own, and requires ingredients you most likely already have!

    If the “paleo” part of this recipe sounds gross to you, don’t worry! “Paleo” mayonnaise is really no different than regular homemade mayonnaise. There are sometimes variations on this classic recipe, but it will taste no different than the mayonnaise you’re used to. Well, not necessarily: it might taste way better!

    Here’s a great video instructional on how to make this basic recipe. Enjoy!

    If you liked that, you might also like:

    Advanced Gardening Course To Accelerate Your Food Production…

    Survival Medicine & Wilderness Survival…

    Survival Techniques From Long Ago, Re-purposed For The Modern Era…

  • Easy Poison Ivy Remedy

    Easy Poison Ivy Remedy

    Poison ivy is such a drag to get. It can debilitate you almost as much as an actual injury. Depending on where you get it on your body, it can make it difficult and even painful to move and get work done, and especially for little ones, can make life very uncomfortable. The uncontrollable itchiness makes it hard to heal, also, as resisting the urge to scratch can be very difficult.

    There are a number of good poison ivy remedies out there, but I love this one because it is super simple, very cheap to make and will last you a long time. It’s the kind of thing you can make a big batch of and leave in your medicine cabinet for years, always ready to use.

    It is a remedy that is best made ahead of time, but there’s also a quick shortcut if you need it on the spot, which I’ll include at the bottom. Let’s begin:

    Ingredients: 

    1 quart raw organic apple cider vinegar (you probably won’t use all of this)

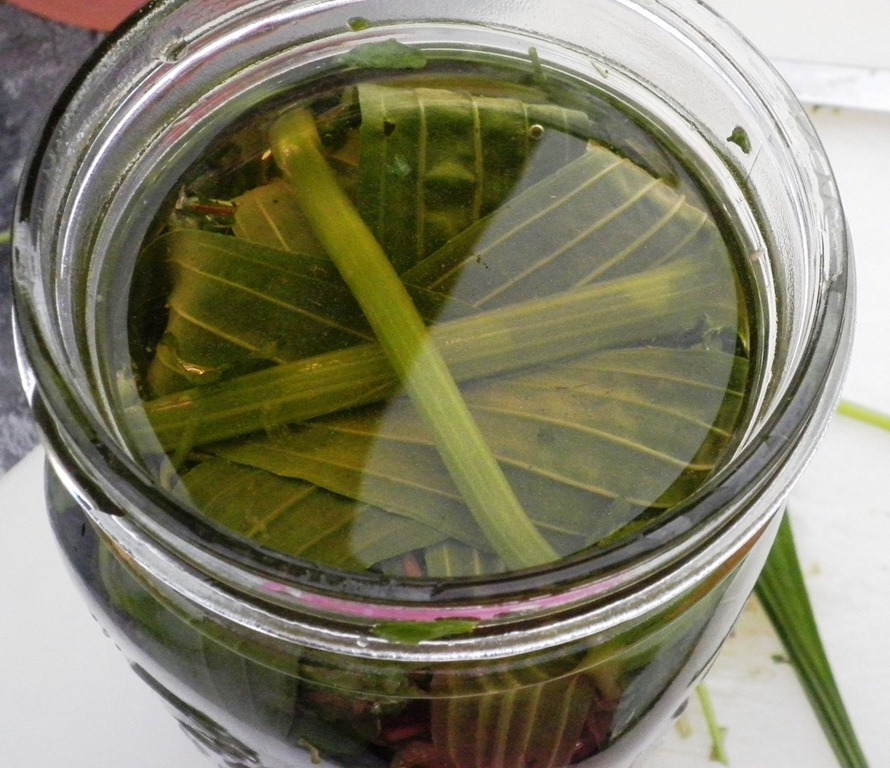
    1-2 bunches fresh organic sage

    1-2 bunches fresh organic plantain herb

    1 quart mason jar with lid

    *A quick note on plantain: this herb (not to be confused with plantain fruit) is most commonly found growing in your yard rather than in your herb garden or grocery store, so to ensure you do have “organic”, pick some that you know has not been sprayed with herbicides or pesticides. If you can’t find any plantain, it can easily be omitted or replaced with an equal amount of sage if desired. 

    Directions: 

    1. Wash and dry your herbs, the chop roughly. You want to make sure every leaf is cut at least once, but it doesn’t have to be diced. You can also put them in a blender with a little apple cider vinegar to make sure the essential oils in the herbs are properly released.
    2. Stuff your herbs into the mason jar.
    3. Cover the herbs with the apple cider vinegar, making sure there are no air bubbles in between the leaves. You can ensure this by pressing down on the herbs with a wooden spoon, releasing any air bubbles (here’s the cheat if you need this ready faster: heat up your apple cider vinegar and then steep the herbs in the hot vinegar as you would tea, then proceed to step 5)
    4. Cover and store in a cool, dark place for 2-3 weeks.
    5. After your waiting period (or when the mixture has cooled, if you are doing the quick version), strain out the herbs and return to the jar, or a smaller jar if needed, for storage.
    6. Dab the mixture gently onto the infected area as needed, using a cotton ball or soft cotton cloth. This will sting a bit when applied, but it is incredibly effective!

    If you liked this, you might also enjoy…

    Become A Master Healer With This Revolutionary Course…

    Traditional Hindu Yoga for Weight Loss

    Improve Your Carpentry Skills Quickly and Easily..


  • Tips to Help You Improve Your Soil

    Tips to Help You Improve Your Soil

    If you are going to be successful at homesteading, you need to have good soil. There are no two ways around it. However, this doesn’t mean that the soil on your land right now needs to be great. There are some simple things you can do to improve the quality of your soil so you can grow your food, and that’s what we’ll be covering over the course of this post.

    Composting

    Take the yard waste and your kitchen waste and create compost. Grass clippings, leaves, vegetable and fruit peels, coffee grounds, eggshells, and the like can make great compost. However, you don’t want to add leftover meat, human waste, or the waste of any animal that eats meat for that matter. Making your own compost pile is easy, and it can make a difference in your soil, as it adds so many nutrients to it.

    Manure

    Another good option to consider is manure, but you need to be careful. It should be added to the compost pile, or you should age the manure by letting it sit. Otherwise, it is going to get too hot. If you were to put this onto plants, it would burn them, which is not something you want to happen. If you have fresh manure, add it in the fall after the harvest. This way, it can sit through the winter.

    Many different types of animals’ waste can be used for your manure. Some of the best options include cow, horse, chicken, sheep, and goat. You can even use rabbit pellets, so if you also happen to raise rabbits, that should be a plentiful and free source of manure for you. One of the other benefits of rabbit pellets is the fact that they are a “cold” manure, so you can add them to plants immediately. You can just place the droppings onto the plants and leave them.

    Mulching

    Another fantastic way that you can start to improve the quality of your soil is through mulching. You can use hay or straw for the mulch, but make sure that it is organic and that it hasn’t been treated with any chemicals. You could also use a variety of other materials. Choose something that you have readily available.

    When you add mulch, you can hold moisture in the soil, which can help protect your plants. It can also ensure the plants stay safer during fluctuating temperatures. For example, it can help save some plants from a frost. Like compost, as it breaks down, it will add some more nutrition to the soil.

    Some simple items that you can use for mulch in addition to hay or straw include grass clippings, bark and wood chips, decaying leaves, peat moss, and some of your compost.

    As you can see, these are some very simple methods you can employ to improve your soil and therefore improve your garden no matter how large or small it might be.

    If you liked this, you might also enjoy…

    Natural Healing Secrets Everyone Needs to Know

    Yoga: There’s a Reason Everyone’s Doing It…

    Woodworking Made Simple...


  • Best Ways to Use a Pumpkin

    Best Ways to Use a Pumpkin

    Pumpkins are for far more than just carving into jack o’ lanterns on Halloween or holiday pumpkin pie! You can find tons of fantastic uses for pumpkins as a homesteader. Let’s look at a few of the different things you can do with pumpkins to make them even more useful.

    The Seeds

    With the seeds, you have a couple of options. First, you can collect the seeds and then use them the next time you plant pumpkins. It’s a way to keep the crop going so you have plenty of quality pumpkins each year.

    Of course, you do not have to collect and use all the seeds for planting by any means. You can also roast the seeds. Adding a little bit of salt – sea salt if you have it – makes them a fantastic snack. You could also add a bit of honey when you roast them if you would like, but it is certainly not needed.

    Puree the Pumpkins

    You can puree the pumpkin by cutting it down the middle, removing the seeds and the pulp and then baking it for about 90 minutes in a baking dish along with a cup of water. Remove the flesh, and then puree it. You can then store the puree by freezing it and use for a wealth of different recipes including pumpkin pancakes, pies, and more.

    Pumpkin Butter

    This is an easy to make and tasty butter that can add something extra to your meals. Put two cups of the puree into a saucepan, and then add a cup of apple cider and a cup of brown sugar. You can add some spices, such as cinnamon, if you have it available as well. Boil the ingredients and then let it simmer for about 20 to 25 minutes or so. After it cools, you can store it in the fridge in glass jars. Use it just like you would any other type of sweet butter.

    Make Soup

    Like butternut squash, pumpkin can make a fantastic soup. You can add some ginger, apples, and other ingredients to the soup, which is perfect for the autumn. Even a single large pumpkin can make a nice big batch of soup that could last you and your family a couple of days.

    Food for the Animals

    Pumpkins can also make a nice treat for some of the animals that you have at your homestead. Goats and hogs, for example, tend to like pumpkin quite a bit, and you can try it out with some of your other animals as well. You will also find that wild animals, including deer, enjoy pumpkins.

    This is just the start of some of the ways you can use pumpkins and some of the recipe ideas you can try. Plenty of other great options are available with pumpkins as well. It is a very versatile and tasty part of any homesteader’s life. If you have the room, you might want to start a pumpkin patch of your own.

    If you liked this, you might also enjoy…

    Ancient Healing Secrets You Can Learn at Home…

    Yoga and Weight Loss: What You Need to Know

    How to Become a Master Woodworker...


  • Avoid Homesteading Mistakes

    Avoid Homesteading Mistakes

    Whether you are new to homesteading, or you’ve been homesteading for years, you know there are always things you could do better and ways that you could improve. You also know that it is possible to make some costly mistakes if you aren’t careful. Let’s look at some of the biggest mistakes homesteaders make so you don’t fall victim to them.

    Not Having a Plan

    This is one of the biggest problems facing brand new homesteaders. They have the desire and they’ve started to acquire the skills, but they simply don’t take the time to put together an actual plan of how they are going from their current life into the homesteading life. They jump in with both feet and before they know it, they find that they’ve landed in quicksand because they didn’t plan for every eventuality. You have to slow down, think long-term, and have a plan.

    Start Slowly

    Along the same lines, many people try to start too big. They go from living in the suburbs with a flower garden to living on a farm with several acres to care for, chickens, goats, and a massive field of crops. You have to start small and work your way up as your skills and confidence increase.

    Overspending

    The goal of homesteading should be to save money. However, many new homesteaders are overspending when they are getting started. They think they need to have brand new equipment and the “best of the best”. You don’t. Have a budget and work within it.

    Not Learning and Acquiring Skills

    Before you become a homesteader, you need to research and learn different skills. If you are going to raise goats, you need to know all about goats. If you are going to make candles, you need to know everything it takes to make candles. You can build on your skills later, but you don’t want to start when you know absolutely nothing. Increase your knowledge and then start homesteading.

    If you liked this, you might also enjoy…

    Natural Healing Techniques Doctors Don’t Want You to Know…

    The Weight-Reducing Magic of Yoga…

    The Ultimate Woodworking Course..