Page 1 of 3
1 2 3
compost – Homesteader Depot

Tag: compost

  • 8 Items to NOT Include in Your Compost

    8 Items to NOT Include in Your Compost

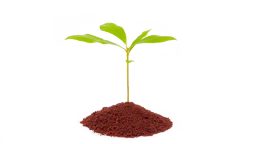
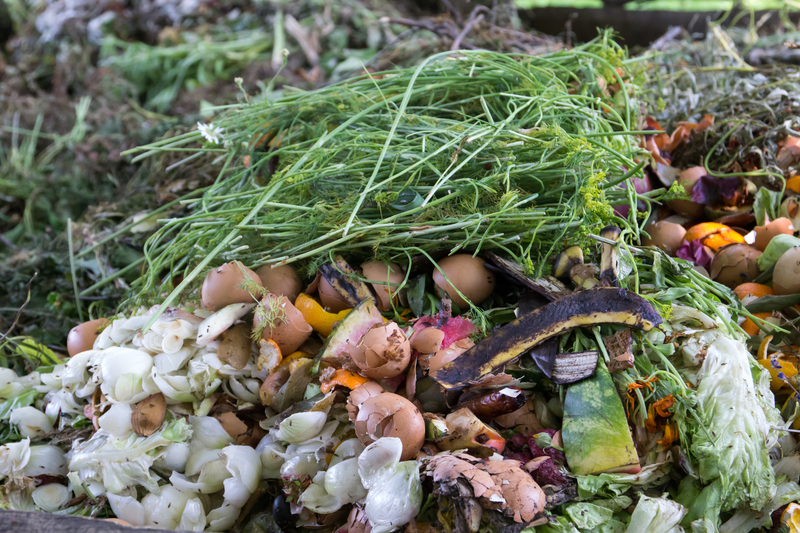
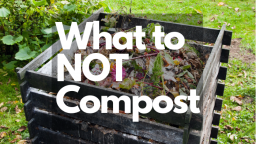
    Creating a compost pile is always a good idea. You’ll get to reuse food scraps that would otherwise end up in the trash, and then eventually in a landfill. On top of this, compost piles create new, fresh soil that contains plenty of nutrients. Your plants will love it. However, before it gets to that point, you need to understand the basics of composting, which involve knowing what you shouldn’t put into a compost bin. Many of these items are downright harmful to your compost and will cause a number of problems. Avoid adding them to the pile at all costs.

    Citrus Peels

    While fruit waste of all kinds can be added to a compost pile, you should avoid adding in those citrus peels. They take way too long to decompose and can affect the overall balance in your pile. Your goal is to make soil, and you won’t be able to use it for much when it contains whole chunks of orange, lemon, lime, and grapefruit peels in it.

    Animal Feces

    It’s understandable that you want to do something with your cat or dog feces besides putting it in the trash. However, if you add it to your compost pile, you risk contaminating it with parasites and microorganisms. You don’t want them getting anywhere near your plants, especially if you grow your own vegetables.
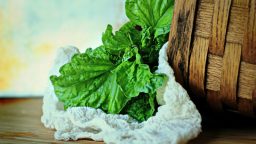
    Onion Peels

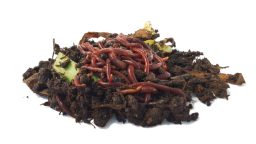
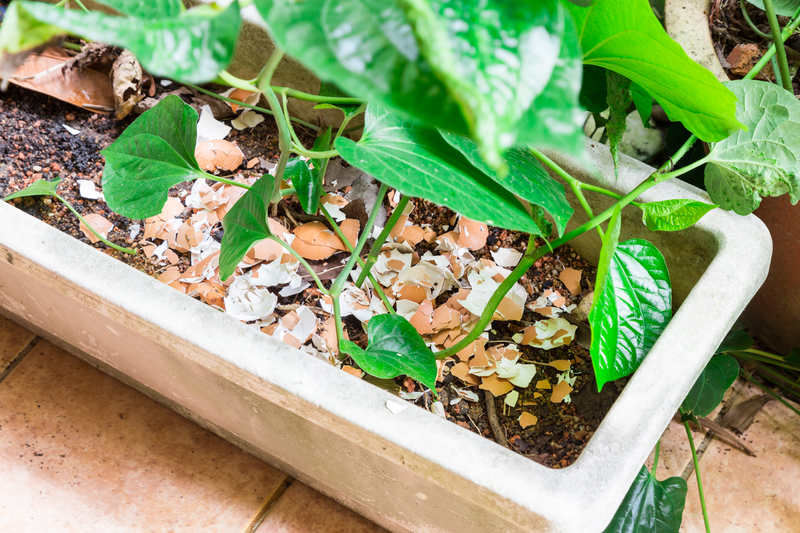
    A good compost pile contains a balanced combination of food scraps and other waste that break down slowly over time. In some cases, you might want to add some worms to your pile in order to help this process along. Onion peels will hurt, rather than help, here. Not only do they slow down the decomposition process, but they also hurt your worms.

    Save Money When Doing Laundry…Take a look at this new technology and never buy detergent again>>>

    Sticker Labels

    You’ve no doubt seen those annoying sticker labels that appear on fruits and vegetables. Yes, they serve a purpose – helping the cashier code in the right items during checkout – but they don’t do much else. You can’t even add them to your compost pile, because they won’t biodegrade. They’re actually made of plastic, not paper.

    Paper That’s Coated or Glossy

    When you’re adding items to your compost bin, you do need to balance out those fruit and vegetable scraps with some paper. However, it needs to be the right kind of paper. You can’t use glossy or coated paper. Those enhancements are made of plastic, which prevents the paper from breaking down properly.

    Tea Bags and Coffee Filters

    While used tea leaves and coffee grounds absolutely can be added to your compost, the items that you use to make that tea and coffee cannot. Your tea bags and coffee filters need to be placed in the trash unless you’ve determined that they’re made of natural materials. Many consist of synthetic polyester fibers that won’t break down properly, if at all.

    Meat Scraps of All Kinds

    The meat of any sort can’t be placed in a compost bin. This means that you can’t include any beef trimmings, leftover cooked chicken (or uncooked chicken), fish bones, or anything that came from an animal. The problem here lies not so much in getting those items to biodegrade (they will, along with everything else around them), but in the smell that they give off while doing so. All of the animals in your neighborhood will end up rooting through your compost bin looking for food.

    Used Charcoal

    It can be tempting to dump leftover charcoal in your compost bin, but you shouldn’t do it. This material actually contains a lot of sulfur, which can upset the overall balance of your compost. It’s even worse if your charcoal has been treated or soaked in fire starting liquid.

    The #1 problem with the “Plant-Based Diet”? (solved) — Learn More Here>>>

  • 5 Great Uses for Cheesecloth in Your Garden

    5 Great Uses for Cheesecloth in Your Garden

    Cheesecloth is a very useful material. While it has its obvious uses in the kitchen, including cheese making and filtering various products, this fabric can also be used in your garden. One of the reasons why you can use it outdoors is the fact that it’s such a natural material that it can be composted. On top of this, you can use it more than once, turning your small investment into something that will stick around for a while. Here are some additional uses for cheesecloth – and all of them take place outdoors in your garden.

    Protect Your Plans

    Your young plants need protection from the elements. This means that they need to be covered, especially when they’re still in the seedling stage. If you don’t have the space to start your seeds indoors and need to place them outside (as long as your climate allows for it, of course), then you can create a small covered “house” for your plants. Leave them in the large planter, place some stakes in the four corners, and then drape your cheesecloth over it. The cheesecloth will protect those seedlings, while still allowing plenty of air, light, and water in.

    Scare Away Pests

    Did you know that you can keep pests out of your garden with cheesecloth? This is another great use for this material. All that you need is a pair of scissors, some small stakes, and a liquid that will keep squirrels, rabbits, raccoons, and more at bay. Ammonia is a great example. You want to use something that won’t harm your plants. Just slice the cheesecloth into strips, dip them in the liquid, and then tie them to the stakes. Plant the stakes near the crops that you want to protect.  Check out: 5 Tricks for Keeping Animals Out of Your Garden

    Create Plant Food from Compost

    Cheesecloth can even help you create plant food from compost. How? All that you need is to grab a scoopful of compost from your bin. Place it in a square of cheesecloth and fold up the corners. Then, tie them closed with a piece of string. It’s like you’re making a tea bag – and that’s exactly what this is. Place your cheesecloth bag, with the compost in it, of course, into a watering can full of water. Let it steep for around half an hour, and then remove the bag. Pour the water, which is now mixed with nutrient-rich plant food, onto your plants. Voila! All-natural fertilizer.  Check out: Benefits of Compost Tea

    Tie Your Plants to Stakes

    If you have plants that waver in the wind, either because they’re too tall to support themselves or too young to stay up properly, you can use strips of cheesecloth to tie them into place. Some plants, especially those with thin, young stems, can droop over, causing damage. Thankfully, tying these plants to a support system, like a series of stakes or even a trellis, can give them the support that they need in order to remain healthy. Just make sure to not tie them to the stakes too tightly, as that can damage them as well.

    Start Your Seeds

    You can make a sprouter for beans or sprouts out of a simple canning jar and a piece of cheesecloth. Soak your bean seeds or sprouts overnight and then place them into the bottom of a canning jar. Take your canning jar and remove the metal lid, leaving behind only the band. Cut a small square of cheesecloth and fit it over the top of the jar, securing it into place with the band. Leave the jar in a sunny area, and keep removing and then adding more water every day, until you see the sprouts emerge.

    Check out this WEIRD fabric that has recently replaced paper towels in Americans kitchens>>>

  • 4 Critical Methods to Improve Your Garden Soil

    4 Critical Methods to Improve Your Garden Soil

    You have the perfect spot picked out for your new garden.  It gets just the right amount of sun, its easy to access and there is plenty of room to plant whatever your heart desires.  Just one problem.  The ground in your perfect spot is less than optimal for growing anything more than plastic plants.

    What do you do when your potential garden’s soil is more akin to just plain dirt that the rich compost you dream of getting your hands into?  Pick another site?  Probably now very practical.

    Fortunately, there are several natural ways you can inject your ground with what it needs to support a flourishing garden.  Here are a few you might want to consider.


    Composting

    Composting your kitchen and yards waste gives you a tremendous source of organic material that will add nutrients and extra material to your garden plot.

    If you haven’t had a chance to get a good compost heap going, your local DIY or garden center will be able to provide you enough to get started.

    Not sure you want to take on the job of maintaining compost?  Consider at least saving all your used coffee grounds and egg shells.  Adding these directly to the soil around each plant will go a long way to building up much-desired nutrients.

    Related Article:  The Undeniable Benefits of Coffee Grounds in Your Garden


    Natural Fertilizer a.k.a Manure

    Adding animal dung to your soil will give it a much-needed boost in organic material, nutrients, and beneficial microbes. If you go this route, make sure you follow a few precautions.

    First, most fresh manure is too “hot” to add directly to plants.  There are high levels of several compounds that can burn your plants chemically.  For best result, let manure compost or at least age for a while before adding it to soil and around existing plants.  This gives those chemical compounds time to break down to safe levels for planting.

    If you are preparing a new site, you can use a tiller to mix in fresh manure in the fall, and then let it set over the winter to be ready for spring planting.

    Also, if you are sourcing your manure from an outside source, say the farmer down the road, make sure the manure you receive is from animals that have not been allowed to graze on food sources that have been exposed to herbicides.

    Some herbicides can survive the digestive process and will exist in the animals waste, which will have unwanted side-effects on your new planting.

    Plant Cover Crops

    This relatively easy option lets you build up your soil quality with much less work than some other methods. Cover crops provide nutrients to the soil as well as improve drainage, attract beneficial insects and other organisms, strangle out weeds, and act as a mulch.

    One thing to note, however, using this method will take longer than others.  You won’t be able to use the site for other planting until the following year.

    If you are someone who really plans ahead, though, this would be a good option for you.


    Let the Worms do the Work

    Vermicomposting is basically the process of introducing worms to the environment and letting them add important nutrients as well as increase aeration and drainage just by being themselves.

    There are a few ways to accomplish this:

    • Add the worms to your compost pile. They will speed up the decomposition process and add vital nutrients to the material.
    • Add the worms to your garden soil and pile on some compost and mulch to give them a new home.

    Related Article:  Do-It-Yourself Worm Casting


    Let the Gardening Begin

    We’ve discussed four fairly simple ways you can turn a patch of dirt into a flourishing garden plot ready to nurture whatever you want to plant.  With just a little planning, you can turn your backyard into a viable food source in no time.


    [Break-Through] Organic Gardening Secret Grows You Up To 10 Times The Plants, In Half The Time”. Learn More Here>>>


  • The Undeniable Benefits of Coffee Grounds in Your Garden

    The Undeniable Benefits of Coffee Grounds in Your Garden


    Coffee grounds and gardening are naturally a good fit. Whether you are composting with them or applying them directly to your garden and around your yard, you’ll discover that coffee can affect your plants in much the same way it does you.

    If you think your garden is in need of a pick-me-up, get ready to be amazed at the effects it will produce.


    Used Coffee Grounds Make Great Fertilizer

    When added directly to the garden soil, the grounds add to the organic material makeup of the soil itself.  This addition aids in the retention of water, improves proper drainage and aerates the soil.

    The coffee also attracts earthworms and aids in the maintenance of microorganisms

    If you have acid-loving plants, fresh coffee grounds (not used) will help raise the acid levels of the soil.  Note: used grounds are a neutral PH and won’t affect either way.

    To get the full benefits of used coffee grounds as a fertilizer, work the grounds into the soil or your garden, versus just sprinkling them on top.


    General Benefits of Used Coffee Grounds

    In addition to a fertilizer, grounds can be used as a mulch for plants.  It can also be used to repel slugs and snails, thanks to the caffeine content.  In other words, don’t bother with decaf.

    If you are into vermicomposting, your grounds are an excellent worm food.  Apparently, worms are as addicted to coffee as we can be.

    Want to see what I call THE ULTIMATE SURVIVAL GARDEN?

    Composting with Used Coffee Grounds

    If you already have a compost pile, did you know your used coffee grounds would make a fantastic addition?  Tossing your used coffee grounds (along with the paper filter) is a great way to reduce your footprint in your local landfill and bring added benefits to your gardening at the same time.

    As used coffee grounds compost, they add nitrogen to your composting pile.  One thing to be aware of, however.  Used coffee grounds are classified as a green compost material so you will need to balance them with brown compost material to keep your levels optimal.


    Some Thoughts on Using Fresh Coffee Grounds in the Garden

    While fresh coffee grounds can sometimes cause more harm than good to your garden, there are a few circumstances where it could come in handy.

    As we mentioned earlier, fresh grounds can benefit acid-loving plant including:

    • Azaleas
    • Blueberries
    • Carrots
    • Hydrangeas
    • Lilies
    • Radishes

    Suggested Article:  5 Cheap Gardening Tricks to Help Your Budget

    In the case of root crops, like the carrots and radishes, you’ll get the best results if you mix in the fresh grounds at the time of planting. Tomatoes, however, don’t typically respond well, even though they like acid soil. Maybe they have a caffeine intolerance like some people I know?

    Some gardeners like to use fresh coffee grounds as an organic weed suppressor, keep in mind, though, that some beneficial fungal pathogens could be suppressed at the same time, creating a less than desirable environment for some plants.


    Time to Start Brewing – Well, Not Necessarily

    If you are a regular coffee drinker, you already have a supply readily on hand.  That doesn’t mean you need to take up the habit though.

    You don’t need to be a coffee lover, or even need to go out and buy a coffee pot just to brew it up for your plants.  Check around at your local coffee shops.  Many locations, both national chains, and local small businesses will save them to hand out to anyone who comes asking.  In fact, a lot of places hand it out for free just to avoid it being tossed in the trash at the end of the day.


  • Do-It-Yourself Worm Casting Methods for Compost

    Do-It-Yourself Worm Casting Methods for Compost

    If you’re a homesteader, you probably know all about composting. Composting kitchen scraps are one of the best ways to fertilize your garden without chemicals and pesticides.

    Some of the most effective composters use worms to break down food. If you have a worm composter, then you might not know that worm castings – the black waste that worms produce – is arguably the single best fertilizer known to man.

    The challenge is finding a way to harvest the worm castings – also known as black gold – without disturbing or harming your worms. You also want to make sure to preserve any eggs in the castings since those will hatch and provide you with a steady supply of worms.

    When Is It Time to Harvest?

    The first thing to cover is how to know when it’s time to harvest the castings. The best way to tell is to examine the food bedding in the vermicomposter. When most of it appears to be a rich, black soil, it’s time to harvest.

    The key is to wait until what you’ll be harvesting is mostly castings. That way, you’ll have the richest possible fertilizer to use.

    Method #1: Using Food to Move Worms

    The worms in your composter will migrate to new food sources when you provide them. One of the easiest ways to harvest their castings is to move their food source and wait until they’ve relocated.

    If you have a multi-tray worm composter, simply move the food to the tray above the one you want to harvest. You’ll have to be patient. The worms may take up to a month to relocate. Once they do, you can simply sift through the tray to find any remaining worms. Place them in the tray with the food.

    You’ll also want to be on the lookout for eggs in the soil. Worm eggs are small, round, and a yellowish color. You’ll want to place the eggs in the new food bed. That way, they’ll have a food source when they hatch.

    Method #2: Using Light to Relocate Worms

    Worms are subterranean creatures who prefer dark to light. In fact, they will naturally turn away from light and migrate to a new location when it’s present.

    For that reason, a simple way to move the worms out of the tray you want to harvest is to shine a light at one end of it. They’ll move to the other end and burrow in, leaving you free to sift through the castings, remove remaining worms and eggs, and replace the food bed.

    It’s important to note that exposure to direct light can dry out and even kill worms. An alternative method is to gently move the castings down to one end of the tray, creating a mound. The worms near the top will burrow down the bottom. Then, you can scoop castings from the top and sides.

    These first two methods are both for people who prefer not to handle their worms.

    Method #3: Hand Sorting

    The third and final method is to sort through the castings by hand, removing worms and eggs as you go. Some people don’t like this method. However, if you’re not squeamish, it’s arguably the quickest method because you won’t have to wait for the worms to move on their own.

    There are two methods you can use. The first is to empty the whole tray and sort through it, picking out worms and eggs and replacing them in the tray with a new food bed for the worms. The second is to sift a handful at a time.

    We’ve found that kids love to help with this method. Provided they’re old enough to know not to squeeze the worms, why not let them help?

    How do you harvest worm castings? Let us know in the comments!

  • Is Your Soil Good Quality?

    Is Your Soil Good Quality?

    If you are interested in homesteading, urban homesteading, or natural health, you probably care about what goes into your body. You try to buy organic and eat whole, healthy foods that are the best sources for the macronutrients, micronutrients, and minerals that our bodies need to thrive.

    But do you take so much care of the plants you grow? Plants need food as well, and not just bland, synthetic versions of the food they thrive on, but natural, pure, varied nutrients. The way plants get their “food” is through the soil. This is one reason it is so important to always make sure your plants are properly hydrated (just like your body!) because that is the best way for plants to absorb the nutrients in the soil.

    So, how do you determine if you have good quality soil? It can be a bit confusing at first, so we’ve got a handy guide for how to determine if you’ve got good quality soil, or if it might need some improvements.

    What is soil quality? 

    OK, so we know we need to have good, nutritious soil for our plants to thrive, but what exactly does this mean? Soil quality cannot be measured simply by the yield in a single bed, the quality of the water you use to water your garden, or by any other isolated outcome. There is also no one factor that will indicate you have good soil quality.

    Instead, there are a few key factors to look at. For instance, how well our plants are doing is certainly an indication. There are also different properties of the soil or plants that we can test for that can give some insight into how healthy the soil is.

    Here are some characteristics of useful indicators of quality:

    • they’re easy to measure
    • they’re accessible
    • they measure chemical, biological, or physical properties
    • they are sensitive to variations in climate

    Soil tests are one concrete example of a good indicator to test for. Once you collect several different soil quality indicators, you can put what you’ve learned together and look for patterns or compare results to measurements taken at a different time.

    Here are some examples of reliable soil quality indicators:

    Soil Organic Matter

    This is a familiar one to any seasoned organic farmers or gardeners. There are many ways to tell if your soil is rich in organic matter. Earthworms and earthworm castings are a good indicator, as is the rich color and texture of hummus. Also, soil with a healthy amount of organic matter won’t erode easily and will drain water properly. Also, if all your plants seem to have the right nutrients, i.e. no yellowing leaves, no wilting, healthy green color, few pest issues, and reasonable yields are all signs that you have a desirable amount of organic matter in your soil.

    Suggested Article: “Tips to Help You Improve Your Soil”

    If you suspect you do not have the right amount of organic matter in your soil, there are many ways to combat this (and if this is the case, you’re not alone! The great majority of the work involved in organic farming surrounds enriching soil naturally). Making sure to add lots of compost and organic materials to your soil such as coffee grounds, egg shells, comfrey, compost tea, etc. are all examples of easy and beneficial ways to add organic matter to your soil.

    Chemical Indications 

    Simple soil and pH tests are the most common way to measure these factors. Quality soil will have a properly balanced pH factor. If you are unsure what this is, pH testing strips are easy to find at gardening supply stores, as well as very easy to perform. If you have improper pH balance, there are a number of ways to combat either too high or too low pH using certain fertilizers, amendments, etc.

    Suggested Article: “Making Your Own Potting Soil”

    Soil tests can also give you a lot of information into the nutrients available in your plants. Again, if you find yourself lacking in any of these areas, there are different organic, natural treatments, depending on which nutrients you are lacking. Some example os nutrients you might need to amend for are calcium, magnesium, phosphorous, potassium, and sulfur; the macronutrients of a healthy plant diet.

    Biological Indications 

    Biological indications include microbial biomass, mineralizable nitrogen, and soil respiration. Nitrogen is essential to healthy soil and plant growth, and quality soil will be a good repository for nitrogen as well as the other basic nutrients that plants require. While soil tests might indicate the presence of these nutrients, the retention of these nutrients will be measured over time. If the soil is not of good quality, certain essential nutrients might deplete over time, so this is an example of some biological indicators that can be measured.

    Another biological indicator would be high soil productivity. Soil is a living being, and quality soil is thriving with organic material and microbacterial life.

    You need quality soil for a healthy, happy garden. It is important to take a look at these various factors to determine if you do have quality soil. However, just because your soil might be lacking in one area doesn’t mean all is lost, most soil will need to be amended and looked after to develop into a healthy habitat for your plants.

  • 13 Useful Ways to Reuse Eggshells

    13 Useful Ways to Reuse Eggshells

    If you raise chickens or simply eat a lot of eggs, you probably produce a lot of egg shells! And simply throwing them in the trash is a huge waste. Egg shells are loaded with beneficial nutrients and properties, and there are lots of ways to reuse them and make the most out of your chickens or grocery budget!

    First off, you need to make sure you store them properly. You might be able to get away with tossing them all in a 5-gallon bucket on your back porch, or, if that attracts pests or mold, you might want to take more precaution. Depending on how you reuse them, you also might want to sanitize them before storing.

    The easiest way to sanitize the egg shells is to rinse them off, the spread them out on a cookie sheet and bake at 350 degrees for about 15 minutes. This will kill any harmful bacteria that might otherwise fester in your eggshell stash.

    Then, simply store in any container of choice, and use as needed!

    Here are some of the many ways you can reuse eggshells around the house:

    Compost

    The easiest way to put your egg shells to good use is to add them to your compost pile! They’re a great addition to any compost operation, and one of the most highly recommended organic materials to start a pile. You can save up a lot to get your pile started, and just toss freshly used shells on your pile as time goes on. If you’ve got a compost pile, you’ve always got something to do with leftover egg shells!

    Garden Fertilizer

    Eggshells are a fantastic garden fertilizer, as they contain up to 97% calcium carbonite, as well as phosphoric acid, nitrogen, and calcium. You can grind them up in a food processor and sprinkle around your plants, or work into the soil of a new garden bed.

    Pest Control

    Eggshells also work as an excellent pest control! Use ground eggshells and sprinkle in a circle around any plants that have been attracting slugs or snails. The sharp fragments of eggshells will be very uninviting to these little pests, and have the added bonus of fertilizing your plants too!

    You can also deter cats (of all things) from using your garden as their own personal litter box by spreading roughly broken up egg shells around the edges. They won’t want to step on those with their delicate paws, trust me!

    Dietary Supplement

    You’ll want to make sure to use properly sanitized egg shells for this, and grind them up very finely. You can use a powerful food processor or a coffee grinder, and then add to gel caps or simply mix into food. This is an excellent source of calcium and other nutrients, and about as whole as it gets.

    Chicken Dietary Supplement

    Your chickens can benefit from those healthy nutrients too! Simply add to their feed for an added calcium boost. Their eggs will be very healthy, because they’ll be supplemented by, well, the exact nutrients they need for healthy shells!

    Seed Starts

    A very fun and clever way to use egg shells is to start seeds in them! Simply fill the shells with potting soil and plant seeds. Once they’re sprouted, all you’ll need to do is to gently crush the egg shell and plant directly in the ground! It will slowly break down as the plant grows, and fertilize the soil as it goes!

    Bird Seed

    Chickens aren’t the only birds who will enjoy your egg shells! If you crush them up and sprinkle them on the ground, you just might attract a few wild birds who will enjoy the nutritious treat.

    Household abrasive

    You can actually use finely ground eggshells as a handy, and totally natural, household abrasive. Add 1 cup finely ground egg shells to baking soda and use as you would Bon Ami for stubborn stains or grime. It’s excellent for cooked on grease and grime.

    Smoother Coffee

    You can actually add egg shells directly to your coffee to help reduce the acidity. Since egg shells are basic, they counteract the otherwise highly acidic coffee. Add a few egg shells in the machine with the ground coffee, or simply toss into your freshly brewed cup (although the former is probably preferable, I’m sure gritty coffee isn’t too appetizing to many people!)

    Natural Remedy

    Ground up eggshells can actually make a wonderful natural remedy for skin irritants. Let soak in some apple cider vinegar for a few days, and apply to minor rashes, hives, or bug bites.

    Face Mask

    You can even use eggshells in an all-natural, skin-firming face mask! Wisk up finely ground eggshells with 1 egg white, and spread on your face. Let dry, and rinse, following with toner and moisturizer.

    Suggested Article: “Apple Cider Vinegar for Beautiful Skin”

    Laundry Whitener

    This might be in the realm of old wives’ tale, but some say that if you toss some egg shells in with your whites, they’ll come out brighter!

    Candle Craft

    You can make adorable votive candles by pouring wax into an eggshell. Get creative with egg dying or colored wax! Very fun and frugal gift.

    Eggs are a fantastic food, and their shells are almost as versatile! Have you tried any of these eggshell hacks before? Let us know in the comments below.

    If you enjoyed this, you might also like….

    Long-Term Survival for Homesteaders…

    Natural Healing Secrets You Need to Know…

    Effective Primal Diet Hacks…


  • How to Make Compost the Easy Way (Video)

    How to Make Compost the Easy Way (Video)

    Everyone should be composting, especially if you’re gardening! It is so beneficial for your soil, environmentally responsible, and also an efficient way to cut down on waste in your home and garden.

    However, if you’ve tried and failed to build your own compost bins or piles, you might need a few shortcuts. John from GrowYourGreens.com and Learn Organic Gardening on YouTube was in that boat, and shares how he ended up settling on the easier way to compost.

    Check it out!

    If you enjoyed this, you might also like….

    Long-Term Survival for Homesteaders…

    Natural Healing Secrets You Need to Know…

    Effective Primal Diet Hacks…