Tag: cows

  • More Ways to Profit Off Your Land

    More Ways to Profit Off Your Land

    A few weeks ago, we wrote an article on ways to profit off your land as a homesteader, and we promised there’d be more, so here it is!

    This week’s post on how to profit off your land is all about livestock, dairy, and meat. Being able to raise, consume, and sell your own animal byproducts is one of the biggest appeals of homesteading, and, with the right set-up, experience, and a bit of time, you can conceivably pull quite a profit.

    We already covered eggs, which is a really good start and has relatively low overhead. It’s a great small-scale farming operation, that can bring at least some nice pocket change that will more than offset the cost of feeding and housing your chickens. Here are five ideas for ways to profit off your land by raising and selling animals and/or their byproducts.

    1. Sell Milk

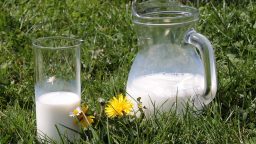
    Raw milk from farm-raised cows is all the rage these days, if you are legally allowed to sell it. A lot of farmers all over the country pull a very nice profit selling fresh raw milk, and it doesn’t take a whole lot to get set up to do it. You can milk by hand or get a commercial milker, just make sure you handle it safely. While in many states it is entirely up to the customer’s discretion if they want to take the “risk” of consuming raw milk, you’ll still want to ensure it is safe, healthy, and clean.

    2. Sell Chickens

    If you have a nice-sized flock of chickens, sell your chicks or extra hens for another source of side cash. A lot of people will be eager to buy hens who have already matured to egg-laying age, or large fryers to eat.

    3. Sell pigs

    Pigs are a very efficient way to raise meat, as they are cheap as piglets, don’t require a lot of space to live, and also mature very quickly. Due to these factors, they’re actually far more cost efficient to raise for meat than cows. You can sell piglets when your sow gives birth, but you’ll make far more money selling fully grown hogs for meat. You can get about $250-300 dollars for one mature hog!

    4. Sell goat cheese

    Goat cheese is a coveted artisan food product, and it’s not too complicated to make. Goats are easy to keep and feed, and can be pretty cost-effective. You can make delicious, fresh, homemade cheese to sell at farmer’s markets and charge a very decent price.

    5. Sell cows

    As opposed to piglets, calves can actually be sold at a very high price. Of course, you typically only get one per cow, you can sell them for $70-$150, and, if you want to keep your cow’s milk all to yourself, this might be a desirable option for you once the calf is big enough to leave her mother.


    These are a few more ideas for ways to profit off your homestead land. Let us know if you’ve got ideas and we’ll feature them on an upcoming post.

    If you enjoyed this, you might also like….
    Are We In The End Times?

    Complete Health Transformation Without Drugs or Surgery…

    Having Trouble Sticking With Paleo?

  • DIY Udder Balm for Goats or Cows

    DIY Udder Balm for Goats or Cows

    When you have a milk-producing goat or cow, their udders might get a lot of work. They can get sore or irritated, so it’s handy to be able to have a balm to soothe them on hand in case this happens.

    However, unfortunately, most storebought balms are petroleum-based and expensive, and, if you live in the country, might be far away!

    Today, we’ve got a very simple DIY udder balm recipe that can be used making the same ingredients we recommend for a lot of our homemade remedies.

    What you need: 

    • 1/2 ounce beeswax
    • 1 ounce shea butter
    • 1 ounce coconut oil
    • 3 ounces calendula infused oil (optional, see directions below)
    • 2 drops lavender essential oil (optional)
    • 2 drops tea tree essential oil (optional)

    Calendula infused oil

    If you do not have any on hand or would like to make your own, this is a great item to have for any skin-soothing remedy, and can be used straight on sore muscles and general aches and pains.

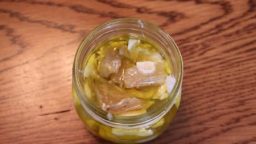
    To make it, you will need dried calendula flowers. Fill a small jar with almond or olive oil, and leave in the sun for a week or so, shaking daily. Alternately, you can heat up in a very low oven (around 200 degrees) for about 20 minutes, in a glass, oven-proof bowl or jar.

    How to Make Udder Balm

    1. Combine your beeswax, shea butter, coconut oil, and calendula oil in a jar and place in a small saucepan filled with water.
    2. Place the pan on the stove over very low heat.
    3. As the water in the pan warms up, everything will melt and blend together.
    4. Once fully melted, remove from heat, stir with a popsicle stick, and allow to cool for a few minutes.
    5. Add your essential oils, if using, and cover the jar.
    6. Store inside (keeping outside will make it too cold to use)

    You can use this by taking with you when you go to milk your goat or cow, and applying after each milking as needed.

    If you enjoyed this, you might also like….
    Home Defense in the End Times…

    Natural Healing Secrets You Need to Know…

    Eat Like Your Ancestors…

  • The Meat Makers (Infographic)

    The Meat Makers (Infographic)

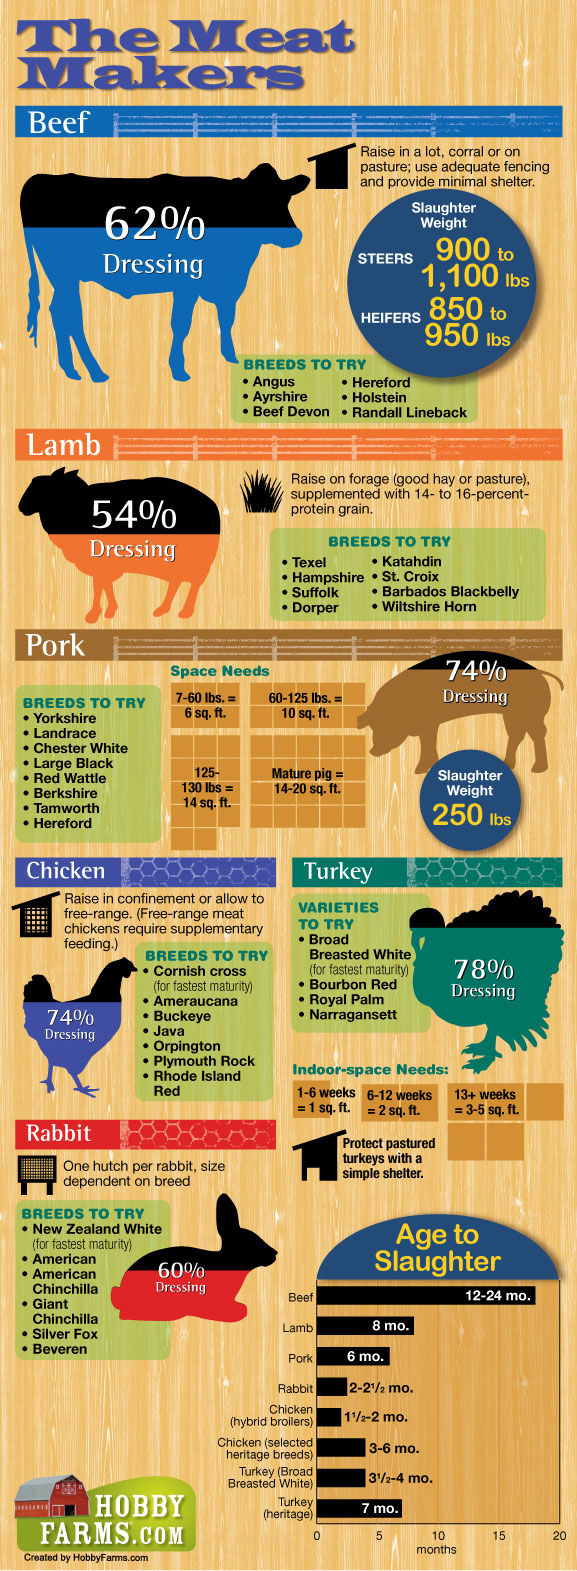
    I recently found this great infographic from HobbyFarms.com that breaks down each standard farm animal, recommended breeds, needs, and amount of dressing each typically provides.

    When you invest in livestock, it’s important that you are getting what you want out of the animal, if your intention is to get a return on your initial investment in sustenance. Obviously, there are plenty of other factors that might influence your choice of livestock, but if meat is your goal, this is a really handy at-a-glance breakdown of the needs and return from each animal. Enjoy!

    infographic-meat-makers

    If you liked this, you might also enjoy…

    Become a Master Healer at Home

    Anaerobic Weight Loss Fitness…

    The Ultimate Woodworking Course..

  • How to Safely Handle Raw Milk

    How to Safely Handle Raw Milk

    Probably the primary appeal of having a family cow is the delicious, nutritious and plentiful milk you can get from her. Raw milk, meaning fresh, unpasteurized milk, has many more beneficial enzymes and bacteria than store-bought milk.

    But it is important to handle it safely to maintain optimum freshness and sanitation. This is particularly important if you plan on selling your raw milk. If you want to sell your milk, make sure to check your local laws. In some states, it is highly illegal to sell raw milk. In other places, there may be certain restrictions. But even if you just want to share with friends and family or just keep it yourself, it’s always best to use safe, clean practices to maintain the quality, nutritional content, and longevity of the milk.

    Here is a simple guide to safe raw milk practices:

    1. Prepare your milking area

    You will want to have a proper set-up for milking. It doesn’t need to be anything fancy, but a dry, covered area, with a place to tie up your cow and feed her as well as space to comfortably sit by her, is probably all you need. You will also want a place that will either have a sink or be in close proximity to the area where you will clean your milking equipment.

    2. Have the right Equipment

    Again you won’t need anything fancy, but a good, stainless steel bucket for milking is ideal, especially with a top to keep the milk protected. Stainless steel is easier to clean than plastic and will withstand possible kicks from a grumpy or restless cow. You may also want some soft, cotton rags to wipe the teat while milking.

    3. Sanitize

    Before milking, you will want to make sure you have properly washed your bucket, hands, and cow’s teat thoroughly. Some people use a small amount of bleach, but hot water and soap should be sufficient.

    4. Practice

    When you first start milking, it might take some practice to keep the milk clean. You are ultimately trying to keep the milk from getting any debris like manure or dirt in it, so if that happens, you won’t want to drink that milk. You can give it to your other animals.

    5. Strain the milk

    You can use a coffee filter, fine mesh strainer, or strainer made specifically for milk, but the idea is to get out as much debris as you can.

    6. Cool the milk

    As soon as you are done milking, you will want to cool your milk as quickly as possible. Some people even keep reusable ice packs at the bottom of their bucket. When your milk is strained into the bottles or jars you want to use (which should be properly cleaned and sanitized first as well), put them in the freezer for an hour-set the timer so you don’t forget about them! And then transfer to the fridge. You can now use as you would any other milk, although because it is raw it might not last as long, but it’s so delicious that might not be a problem for your family!


    If you liked this, you might also enjoy…

    Natural Healing Techniques Doctors Don’t Want You to Know…

    The Ultimate Woodworking Course..