Tag: dairy

  • The Easy Way to Make Milk Kefir

    The Easy Way to Make Milk Kefir

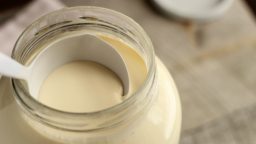
    Kefir is a cultured dairy product made from milk which turns out similar in flavor to yogurt but with a thinner, drinkable consistency. Because of the culturing process, kefir is packed with beneficial bacteria and yeasts. To make kefir, you will need the starter culture (called “grains), which can be purchased online.


    Directions:

    1. Add a heaping tablespoon of kefir grains to a quart-sized glass jar and fill it up with milk. You can almost any type of dairy milk- cow, goat, pasteurized, unpasteurized, full fat, skim. If you wish to make more or less than a quart at a time, simply add grains in a 1 tablespoon-to-1 quart ratio.
    2. Loosely cover the jar and let sit on your kitchen counter 2-3 days. Shake or stir once a day or more (not mandatory, but helpful). Use an untightened mason jar lid and band, plastic lid, or cheesecloth secured with a rubber band (preferred).
    3. After a day or two (depending on the temperature in your kitchen), you should notice the milk starting to pull away from the walls of the jar with an almost gel-like consistency. Your kefir is ready to strain!
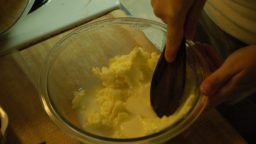
    4. With a slotted wooden spoon, sift the kefir grains from the top of the finished kefir. Once strained, your kefir is ready to use or refrigerate! Transfer the grains to a new jar, fill with fresh milk, and start a new batch! If you’re not re


    As you make more batches of kefir, your grains will reproduce and grow, much like any starter culture. If you find yourself overrun with grains, you can give some away to friends, feed them to livestock, or compost them!

    If you need a break from making kefir, just cover your sifted grains with milk, cover and label the jar, and place it in the fridge. Replace with fresh milk every week of “hibernation” to keep the grains alive, and use fresh milk again when you’re ready to make a new batch.


    Kefir is a delicious, healthful alternative to plain milk and can be enjoyed plain, blended into a smoothie, or in any recipe that calls for milk!

    If you enjoyed this, you might also like….
    Can You Defend Your Family When SHTF?

    Natural Healing Secrets You Need to Know…

    Effective Primal Diet Hacks…

  • The Easiest Way to Skim Raw Milk

    The Easiest Way to Skim Raw Milk

    A cold glass of fresh milk is a delicious, wholesome treat. If it’s non-homogenized, the higher-fat cream will naturally separate from the milk to be skimmed for butter, whipped cream, or to splash into a hot cup of coffee. The traditional skimming process, however, is a tedious repetition of scooping out the cream ladle after ladle (and sometimes spoonful after spoonful). If this setback has kept you from enjoying the bliss of fresh cream, here is an incredibly easy method to try using a siphon.


    Supplies:

    • A clothespin (the kind with the metal spring)
    • 1 Vinyl Tube, ¼” or more wide and at least 3 feet long (use afflink for this product)
    • A jar large enough to hold the skimmed milk


    Directions:

    • Put a jar of milk where the cream has risen to the top on a high surface, like a counter or table.
    • Use a chair or stepstool to hold the empty jar well below the level of the milk jar.
    • Insert one end of the tube down into the milk until it hits the bottom.
    • Create suction to start the milk flowing through the tube.
    • Place the dry end of the tube into the empty jar and allow the skimmed milk to flow.
    • Clip the tube to the rim of the milk jar so you don’t have to hold it. Now you can walk away and make lunch!

    For half a gallon of milk, the skimming process with this method should take about ten  minutes. When the milk is almost done draining, come back and keep an eye on it. You can see a thin line of cream start to get pulled down into the suction if you leave it in place. Just move the milk end of the tube around the bottom of the jar like a vacuum until all the skim milk is gone.

    To clean the tube, simply run hot water and antibacterial dish soap through it until it is clear of milk, and give it a good rinse.

    Now, with virtually no effort, you’ve skimmed yourself some delicious, healthy cream to use however you wish. Wasn’t that easy?

    If you enjoyed this, you might also like….
    Can You Defend Your Family When SHTF?

    Natural Healing Secrets You Need to Know…

    Effective Primal Diet Hacks…

  • How to Use Extra Whey

    How to Use Extra Whey

    Every aspiring or seasoned dairy farmer is familiar with whey, the byproduct of making yogurt, cheese, and other delicious dairy products. In the process of making many of these dairy products, the whey is often discarded, but it’s actually quite nutritious on its own, and can be reused in many different ways. 


    • Use in almost any recipe in place of water or even milk. Whey adds depth of flavor to bread, soups, sauces, marinades, and main dishes. If you are overrun with whey, you can even boil pasta or rice with it!
    • Soak grains and legumes The acid and cultures in whey won’t harm anything in this process, they’ll enhance phytic acid breakdown for easier nutrient absorption.

    • An acid rinse on your shampoo “skip days”. If you’re familiar with the ‘no-poo’ or ‘low-poo’ method of washing hair and its benefits, you’ll be glad to know that whey makes a great, affordable acid rinse hair cleanser.
    • Feed pets and livestock. Pour a little whey over dry pet food or animal feed for a delicious treat!
    • Lacto-ferment your own sauerkraut, veggies, and condiments Uncooked sweet whey is great for preserving probiotic-rich foods to add to your pantry or stockpile.
    • Make more cheese! Ricotta, to be specific, is made with acid whey. So, if you’re dissatisfied with how much whey you end up with after making cheese, simply use it to make more.
    • If all else fails, compost Raw whey is a live, active element that is super beneficial for a healthy compost pile. If you’d rather just toss your extra whey, this is the best option.


    Many of us have been surprised and even a little disappointed at how much whey results from the dairy-making process rather than the desired cheese or yogurt. With the right mindset, though, whey can be an added benefit rather than a waste product.

    If you enjoyed this, you might also like….
    Home Defense in the End Times…

    Natural Healing Secrets You Need to Know…

    Eat Like Your Ancestors…

  • How to Safely Handle Raw Milk

    How to Safely Handle Raw Milk

    Probably the primary appeal of having a family cow is the delicious, nutritious and plentiful milk you can get from her. Raw milk, meaning fresh, unpasteurized milk, has many more beneficial enzymes and bacteria than store-bought milk.

    But it is important to handle it safely to maintain optimum freshness and sanitation. This is particularly important if you plan on selling your raw milk. If you want to sell your milk, make sure to check your local laws. In some states, it is highly illegal to sell raw milk. In other places, there may be certain restrictions. But even if you just want to share with friends and family or just keep it yourself, it’s always best to use safe, clean practices to maintain the quality, nutritional content, and longevity of the milk.

    Here is a simple guide to safe raw milk practices:

    1. Prepare your milking area

    You will want to have a proper set-up for milking. It doesn’t need to be anything fancy, but a dry, covered area, with a place to tie up your cow and feed her as well as space to comfortably sit by her, is probably all you need. You will also want a place that will either have a sink or be in close proximity to the area where you will clean your milking equipment.

    2. Have the right Equipment

    Again you won’t need anything fancy, but a good, stainless steel bucket for milking is ideal, especially with a top to keep the milk protected. Stainless steel is easier to clean than plastic and will withstand possible kicks from a grumpy or restless cow. You may also want some soft, cotton rags to wipe the teat while milking.

    3. Sanitize

    Before milking, you will want to make sure you have properly washed your bucket, hands, and cow’s teat thoroughly. Some people use a small amount of bleach, but hot water and soap should be sufficient.

    4. Practice

    When you first start milking, it might take some practice to keep the milk clean. You are ultimately trying to keep the milk from getting any debris like manure or dirt in it, so if that happens, you won’t want to drink that milk. You can give it to your other animals.

    5. Strain the milk

    You can use a coffee filter, fine mesh strainer, or strainer made specifically for milk, but the idea is to get out as much debris as you can.

    6. Cool the milk

    As soon as you are done milking, you will want to cool your milk as quickly as possible. Some people even keep reusable ice packs at the bottom of their bucket. When your milk is strained into the bottles or jars you want to use (which should be properly cleaned and sanitized first as well), put them in the freezer for an hour-set the timer so you don’t forget about them! And then transfer to the fridge. You can now use as you would any other milk, although because it is raw it might not last as long, but it’s so delicious that might not be a problem for your family!


    If you liked this, you might also enjoy…

    Natural Healing Techniques Doctors Don’t Want You to Know…

    The Ultimate Woodworking Course..


  • How to Make Your Own Butter

    How to Make Your Own Butter

    You don’t have to have your own cow to make butter at home, although of course it helps. There’s nothing like fresh, homemade butter from your own dairy cow to make you feel like the ultimate self-reliant homesteader. But even urban homesteaders can easily whip (literally) up their own batch of delicious homemade butter with raw milk from a farmer or even cream from the store.

    The ingredients and process are simple: cream + agitation + time = butter. The process of making butter basically involves agitating the cream long enough to separate the fat from what will become buttermilk (so you’re really getting two dairy products out of this) into delicious creamy butter. You mostly just need patience and maybe a little practice, but with today’s modern kitchen gadgets, it’s pretty simple compared to spending hours in the barn with an old-fashioned butter churner!

    She doesn't look too happy!
    She doesn’t look too happy!

    What you need

    • Cream, either from the top of fresh, raw cow’s milk or purchased at the store. If it is store-bought, make sure it is organic, preferably grass-fed and never ultra-pasteurized
    • 1 tbs buttermilk, either from the store or left over from a previous batch of butter
    • A stand mixer, food processor or blender

    What you do

    1. If using fresh milk separate the cream from the milk. It will usually be right on the top if the milk has been resting and you can spoon it off. You’d ideally like to have a cup or so, but use what you can get!
    2. Combine the buttermilk with and cream in a container you can seal and leave on the counter for eight hours. This will culture the cream, which allows the bacteria to convert the sugars in the milk into lactic acid.
    3. After 8 hours, you’re ready to churn! Put the mixture in your blender, stand mixer or food processor, and mix on low.
    4. This will take some time, but the cream will slowly start to get lumpier until eventually, it’s completely separated from the buttermilk until it looks distinctly like clumps of butter floating in milk. You should be able to take the butter out and loosely pack into a form (which might not happen until after the next step). Strain the buttermilk off the butter and continue to try to gather it into a ball.
    5. Finally, rinse the butter in water, kneading and forming as you go. After a few minutes, you should have a nice, smooth ball of butter. You can now salt as desired or even add herbs or garlic!
    6. Keep the butter and buttermilk in the fridge for up to a week, or if you plan to keep either for longer, in the freezer.

    This is the most popular sous vide cooker on amazon

    Build ANY Shed with no woodworking experience!

    Check Out These Competition BBQ Secrets

  • Easy Milking Tips…

    Easy Milking Tips…

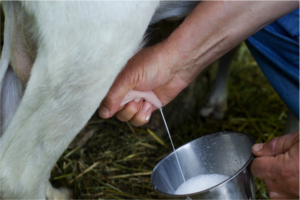
    One of the first big steps that many homesteaders take when becoming more self-reliant is to consider owning a dairy animal. Whether you go for a cow or a goat, having your own milk – that you can later turn into butter and cheese – is a great way to continue making your home milking a cowself-sustaining.

    If you’ve never had to milk an animal before, it can be a daunting task, but many first-time homesteaders have learned to milk their goats or cows successfully. If you are consistent with your milking routine, and you utilize a few key tips, you’ll have no trouble getting your first perfect bucket of fresh milk.

    Tip #1: Set up the ideal milking spot first.

    Animals can be easily spooked or just plain stubborn at times, and any kind of stress on their system will lower their milk production. Before you try to milk, be sure that you have a quiet, comfortable spot picked out. You want it to be clean, warm in the winter, cool in the summer, and away from any distracting activity. You should have extra supplies within reach, especially at first; it is inevitable that the cow or goat will put their foot into the bucket a few times.

    Tip #2: No matter what milking routine you use, always focus on cleanliness.

    Milking gets dirty fast, and mastitis and other bacteria can spread very quickly. To keep your animals and your family healthy, it’s imperative that you keep everything clean while you milk. The udder area should be shaved or trimmed as necessary, and always wiped down before you milk. The bucket should be sanitized after every use, and you may also want to tie up the animal’s tail.

    With these two tips, and a bit of patience, you’ll find that milking is no problem at all.


    The Looming Crisis Threatening America…

    Click Here To Get The Best Survival Medical Course…

    Check Out These Mind Blowing Survival Skills…