Page 7 of 15
1 5 6 7 8 9 15
diy – Page 7 – Homesteader Depot

Tag: diy

  • DIY Pressure Cooker Water Distiller (Video)

    DIY Pressure Cooker Water Distiller (Video)

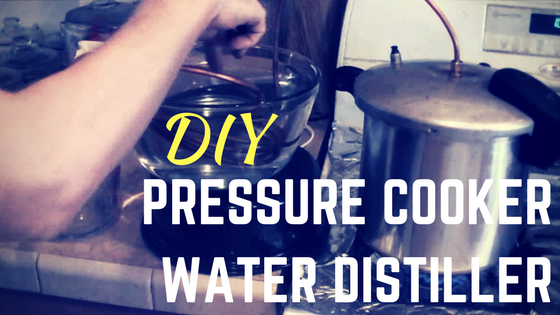
    If you’re a homesteader, you probably have been faced with the question of how to ensure your family is getting the best drinking water, or how to purify water in the event of possible contamination of your water source.

    There are a lot of different options out there for water purification, and distilling water is one of the best. Distilled water is actually rather controversial, as many claim it can deplete the body if essential  nutrients. While the minerals available in spring or well water can be quite beneficial, and clean, pure mineral water is great for your health, it is not actually true that distilled water will actually rob you of these minerals, it simply doesn’t contain them.

    Distilled water is nothing more than pure H20, and while fresh spring or well water is probably preferable for daily drinking, there are still many good reasons to be able to distil your water. If a well, spring, or public water supply might be contaminated, being able to distil water could be lifesaving, as it will remove bacteria, chemicals, and impurities. Or perhaps you only have access to treated water; in this case, distilled water would be far more preferable than water full of chemicals like chlorine and fluoride.

    There are a lot of DIY water distillers out there, and I thought this one was particularly clever. It uses just a few supplies, that you could find very inexpensively. It uses a pressure cooker, which I thought was really cool, especially since it can be very easy to find a dirt-cheap pressure cooker at a thrift store or flea market.

    Check out this simple, genius DIY distiller and see if it might be a good addition to your homestead or preparedness plan:

    If you enjoyed this, you might also like….

    Can You Defend Your Family When SHTF?

    Natural Healing Secrets You Need to Know…

    Effective Primal Diet Hacks…

  • How to Make Healthy Gummy Candy

    How to Make Healthy Gummy Candy

    Gummy candy is a great treat, but unfortunately, it’s usually loaded with dyes, preservatives and chemicals.

    Like many junk foods, there are healthy versions you can make at home, but DIY gummy candy has a unique quality among healthy alternatives to candy: it’s actually really good for you. 

    The base of homemade gummy candy is gelatin, which is an excellent source of protein, minerals, and vitamins that help improve skin, hair, nail, dental, and bone heath, ease the symptoms of arthritis, relieve tendonitis and other muscle and joint-related health issues.

    It’s amazingly good for you, but make sure you buy gelatin from grass-fed cows. Gelatin from feedlot cows is not anywhere near as healthy, as those animals are often unhealthy themselves and pumped full of antibiotics and hormones.

    Also, make sure you buy a gelatin that says it will dissolve in hot water and clump in cold water. If it says it will dissolve in cold water, it won’t work for gummies. Gummies have gotten very popular, so these days, most brands will probably indicate what you can use the gelatin for on the container.

    There are many different options for flavoring gummy candy, the sky is pretty much the limit! Just do a quick search on Pinterest and you’re bound to be overwhelmed by all the creative combinations foodie bloggers come up with.

    Here’s a very basic recipe to get you started:

    Ingredients and tools:

    • 3/4 cup fruit juice
    • 3 tbs raw honey or maple syrup
    • 3 tbs grassfed gelatin powder
    • Small saucepan
    • Candy molds or shallow glass pan

    Directions: 

    1. Get all your ingredients and your candy molds or glass pan together. If you are using a glass pan, gently grease it. Make sure you have everything measured and ready to go before you get started, as some steps are time-sensitive.
    2. Next, make sure you have room in your refrigerator for the gummies to cool once they’re in the molds or the pan. They will need to sit flat on a surface. I usually line my candy molds up on a baking sheet and make space for them before getting started. If your fridge is too full, you can also use the freezer.
    3. Gently heat the juice over low heat in a small saucepan on the stove.
    4. Stir in the honey or syrup until fully dissolved.
    5. Sprinkle in the gelatin, whisking to combine as you go. Continue to whisk until completely dissolved. You might have a few clumps, try to nudge these or press with a fork until they are broken up and dissolved, as best you can (a few small lumps won’t ruin it, if the rest of the gelatin is fully dissolved.
    6. Once your gelatin is fully dissolved, remove the liquid from heat and pour right away into your candy molds or pan.
    7. Refrigerate for 1-2 hours, or freeze for 10-20 minutes. Once they’re fully solid, either pop out of the candy molds or cut up into squares.
    8. Store in an airtight container in the refrigerator, and enjoy!

    If you enjoyed this, you might also like….

    Can You Defend Your Family When SHTF?

    Natural Healing Secrets You Need to Know…

    Effective Primal Diet Hacks…

  • Genius Ways to Use Lard

    Genius Ways to Use Lard

    Lard is something many of us have considered unhealthy for years, but it’s making a comeback as nutritionists reveal the healthy, complex fats in  lard are actually pretty good for you! It’s way better for you than vegetable or seed oils, and definitely better than margarine or imitation butter.

    If you fry bacon at all, you definitely want to collect the fat that builds up in the pan and keep it for cooking! I keep a small jar in my fridge and use it as I would oil or butter all the time.

    But did you know you can render it on your stove just like you would tallow? It can be used in so many different ways and, if you’re lucky enough to find a butcher that will give pork fat away, you can do it entirely for free!

    Here are just a few examples of the many ways in which you can use lard:

    Seasoning cast iron skillet

    This is my personal favorite. Nothing seasons my cast iron like lard, and it makes them truly non-stick. I don’t even have to use water to clean them out when they’re regularly seasoned with lard! Simply rub on the warm, dry pan after washing and the next time you use it, you’ll probably just have to wipe them out with a cloth and a little  more lard!

    Cooking

    Use lard as a base to fry in, as you would any other cooking oil. With enough lard, you can deep fry, and nothing is quite as crisp or perfectly fried as when it’s fried in lard, trust me.

    Baking

    Lard makes a great fat for things like biscuits, breads, or tortillas. Simply use in the place of butter or oil for a smooth, buttery texture that is to die for!

    Candle making

    Lard actually makes a great base for candles! There are many different recipes out there, and while they definitely don’t have a fatty smell like you’d expect, you can still scent them however you want using essential oils. These make a great gift or emergency candle stockpile.

    Soap making

    If you’ve seen ‘Fight Club’, you’ll remember that animal fat is used as a base for soap, and lard makes a great one. It’s wonderfully moisturizing, and again, if you can get your pork fat for free and render your own lard, it serves as a very frugal base for soaps.

    If you enjoyed this, you might also like….

    Can You Defend Your Family When SHTF?

    Natural Healing Secrets You Need to Know…

    Effective Primal Diet Hacks…


  • Dehydrating Food: A Beginner’s Guide

    Dehydrating Food: A Beginner’s Guide

    Dehydrating is a great option for preserving food for the long term, especially for gardeners or homesteaders. But even if you’re just an urban homesteader, it might be an excellent way to get started with food preservation. If you like to shop sales, frequent farmer’s markets, or grow veggies or herbs in your own little urban homestead, dehydrating is a great way to maximize your finds and easily store food for the long term.

    Here are some of the benefits to dehydrating vs. other food preservation methods:

    • it preserves the nutritional content of food
    • it condenses food and also makes it very lightweight, which is great for storage
    • it requires very little work to do
    • you can preserve a wide variety of foods with the same process

    Getting started 

    To get started, you will most likely want to purchase a dehydrator, but you can also dehydrate food using your oven. You simply put your oven on its lowest setting, crack the door, and let your food dehydrate for 6-24 hours, depending on what you are dehydrating.

    Effective Primal Diet Hacks…

    There are many dehydrators on the market, that range in size and efficiency. You will want to consider how much food you want to dehydrate at once, the storage space you have for it in your kitchen, how well-reviewed the model you’re looking at is, etc.

    What to dehydrate

    Once you have purchased a dehydrator, the sky is the limit on what you can dehydrate! You’d be surprised how much you can do with a dehydrator, from making jerky and pemmican to quickly rising dough and, of course, drying fruits, vegetables, and herbs. While there are many foods you can dry, here are some of the most popular and efficient foods to store by dehydration.

    • Apples
    • Oranges
    • Bananas
    • Berries
    • Fruit leather
    • Tomato sauce
    • Herbs
    • Peppers
    • Meat (for jerky)
    • Eggs (for powdered eggs)

    Most dehydrators will have a guide for what temperature to set for which type of food product you are drying, but you might need to adjust accordingly since not every food product will have the same level of moisture. Typically, you will dry stuff for a long period of time, from 6-24 and maybe even 48 hours.

    This long drying time doesn’t require much at all, all you need to do is process what you’re drying and lay it out in an even, thin layer on the trays of your dehydrator. You’ll want to check occasionally to see what kind of progress is being made. Most commonly, people will set their dehydrator up in the evening and dry overnight.

    Dehydrating is an age-old method of drying food that you might find becomes a staple method of food production and food preservation in your home. Just give it a try and see how you like it!

    Natural Healing Secrets You Need to Know…

  • The Easy Way to Make Milk Kefir

    The Easy Way to Make Milk Kefir

    Kefir is a cultured dairy product made from milk which turns out similar in flavor to yogurt but with a thinner, drinkable consistency. Because of the culturing process, kefir is packed with beneficial bacteria and yeasts. To make kefir, you will need the starter culture (called “grains), which can be purchased online.


    Directions:

    1. Add a heaping tablespoon of kefir grains to a quart-sized glass jar and fill it up with milk. You can almost any type of dairy milk- cow, goat, pasteurized, unpasteurized, full fat, skim. If you wish to make more or less than a quart at a time, simply add grains in a 1 tablespoon-to-1 quart ratio.
    2. Loosely cover the jar and let sit on your kitchen counter 2-3 days. Shake or stir once a day or more (not mandatory, but helpful). Use an untightened mason jar lid and band, plastic lid, or cheesecloth secured with a rubber band (preferred).
    3. After a day or two (depending on the temperature in your kitchen), you should notice the milk starting to pull away from the walls of the jar with an almost gel-like consistency. Your kefir is ready to strain!
    4. With a slotted wooden spoon, sift the kefir grains from the top of the finished kefir. Once strained, your kefir is ready to use or refrigerate! Transfer the grains to a new jar, fill with fresh milk, and start a new batch! If you’re not re


    As you make more batches of kefir, your grains will reproduce and grow, much like any starter culture. If you find yourself overrun with grains, you can give some away to friends, feed them to livestock, or compost them!

    If you need a break from making kefir, just cover your sifted grains with milk, cover and label the jar, and place it in the fridge. Replace with fresh milk every week of “hibernation” to keep the grains alive, and use fresh milk again when you’re ready to make a new batch.


    Kefir is a delicious, healthful alternative to plain milk and can be enjoyed plain, blended into a smoothie, or in any recipe that calls for milk!

    If you enjoyed this, you might also like….

    Can You Defend Your Family When SHTF?

    Natural Healing Secrets You Need to Know…

    Effective Primal Diet Hacks…

  • Beer Keg Portable Hot Shower (Video)

    Beer Keg Portable Hot Shower (Video)

    When I lived completely off-grid, with no running water or electricity, one of the biggest challenges was a hot shower. Paloma hot water heaters were coveted in the community I lived in, but most off-grid tent-dwelling hippies like myself couldn’t afford them.

    We tried everything. Sun showers, leaving long black hoses out in the sun, boiling water and pouring it with just the right mix of cold water into a water container with a spigot. But a lot of these options had us often feeling like Goldilocks-nothing was every quite right.

    I saw this video on YouTube recently from the Homestead Prepper and I thought it was brilliant! I’m a big fan of anything that doesn’t require on-grid energy, i.e. electricity or propane (because propane has to be mined so it’s not always going to be a reliable source of energy for preppers).

    Check out this ingenious hot shower from the Homestead Prepper:

    If you enjoyed this, you might also like….

    Can You Defend Your Family When SHTF?

    Natural Healing Secrets You Need to Know…

    Effective Primal Diet Hacks…

  • A Simple Guide to Starting a Beehive (Video)

    A Simple Guide to Starting a Beehive (Video)

    Last week, we shared the very cool idea to make a beehive using mason jars, so since it did not come with instructions as to how to actually start a hive, I thought I’d go ahead and follow up with that one.

    Bees are a wonderful thing to do on the homestead, or even in your backyard, if you’re able to. Raw honey is one of the most valuable and nutritious substances on the planet, so raising bees is a space and time efficient way to produce food on a small scale, and a wonderful addition to any homestead or self-sufficiency operation.

    It can a bit overwhelming getting started, though, from choosing your bees, setting up your hive, getting protective gear, etc. This video is a great introductory course for beekeeping, and will help demystify the process and get you well on your way to functional, thriving hive in no time.

    Be sure to let us know what else you’d like to learn about bees!

    If you enjoyed this, you might also like….

    Can You Defend Your Family When SHTF?

    Natural Healing Secrets You Need to Know…

    Effective Primal Diet Hacks…

  • How to Test Your Soil Using Only a Mason Jar

    How to Test Your Soil Using Only a Mason Jar


    When starting a garden, it’s crucial to know what kind of soil you’re working with. It will help you determine what to plant and how to amend your soil. All soil is comprised of three basic components: sand, silt, and clay, and varying combinations of these three components determine what type of soil you have.

    Loamy soil is ideal, and it is typically more or less an even mix of sand, silt, and clay. It is slightly spongy and moist, but still light enough that it doesn’t get packed down too easily. In essence, it’s just right. To achieve this ideal soil, you would want to add whatever component your soil is lacking.

    To test your soil, all you need is a mason jar, some water, and a little bit of time.

    How to perform a mason jar soil test

    1. First, you need your soil sample. Don’t just grab a handful off the top though, dig a bit into some well-tilled soil, “stir” around a bit with your trowel, and get a good scoop from below the surface of your garden bed or the ground you are testing.
    2. Once you have a nice sized scoop of dirt, fill your mason jar about halfway with the dirt.
    3. Fill the rest of the way up to the lip of the mason jar with water, leaving about 1″ of air.
    4. Attach the lid to the jar securely, then shake vigorously. This will cause the dirt to settle once you’ve put the jar back down, as well as break up any sizable clumps of dirt.
    5. Set the jar back down and leave overnight. In the morning, you’ll have your results!

    On the bottom will be sand, then silt, and then clay. Here’s a quick and easy guide to how to read your results and what they mean for your soil type:

    If you enjoyed this, you might also like….

    Gardening…NO SOIL NEEDED…

    Bury a Shipping Container…WHY?

    4 Critical Methods to Improve Your Garden Soil