Tag: flour

  • How to Preserve Flour for Up to Five Years (Instructions and Video)

    How to Preserve Flour for Up to Five Years (Instructions and Video)

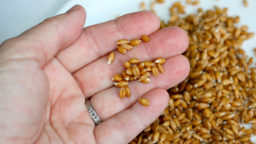
    Did you know there’s such a thing as canning flour? Neither did I, but I recently came across a video with instructions on how to do it. I’ve dealt with both weevils and pantry moths in the past, so I was pretty intrigued by this method, and it definitely seems like a surefire way to store flour for a long time.

    It’s not really as complicated as canning other types of food, but it follows the same principles. Here is what you need:

    Supplies: 

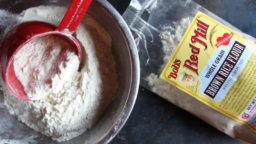
    Flour that you want to preserve

    Half-gallon canning jars and lids

    Canning funnel (very useful, but optional)

    Paper towels and dish towels

    Labels or marker

    Instructions: 

    1. Before you begin, start with properly sanitized jars. You can do this by washing, drying, and baking in the oven for about 20 minutes.
    2. When you’re ready to can your flour, preheat your oven to 215 degrees
    3. Using the canning funnel (if you’ve got one), fill your jars with flour. Make sure they’re packed in well, you can gently tap the car on the counter to let the flour settle in the jars.
    4. When your oven is preheated, move your oven racks so you will be able to fit the jars, and place them on a sheet in the oven, without the lids.
    5. Leave in the oven for 1-2 hours. This will dry out the flour and prepare the jars for the “canning” effect.
    6. After 1-2 hours has passed, take the jars out (carefully!) and place on a dish towel on your counter
    7. Wipe down the rims of the jars with a damp paper towel, then attach the lids as tightly as you can
    8. Leave the jars out overnight on the counter. In this time, they will cool and pop the lids out, completing the canning process.
    9. In the morning, label the jars with the date you canned them.
    10. Store in a cool, dark places, for up to five years.

    That’s it! Pretty cool huh? Check out the video if you’d like to see more:

    If you enjoyed this, you might also like….

    Home Defense in the End Times…

    Natural Healing Secrets You Need to Know…

    Eat Like Your Ancestors…

  • Making Your Own Sprouted Flour

    Making Your Own Sprouted Flour

    You may have heard that sprouted flour is healthier than regular flour, and this is definitely true. When wheat is allowed to sprout before it is ground into flour, it breaks down the antinutrients that are the plant’s natural defense system, which can be difficult for us to digest. This is one possible reason for so many people having gluten and wheat allergies in recent years.

    Before modern industrial harvesters and mills, wheat used to be cut and lay to dry in the field, allowing the wheat berries as they’re called to naturally sprout before grinding.

    Sprouted wheat flour can be quite pricey-but, with the right equipment, it’s very easy to make at home!

    What you need:

    • Wheat berries: you can usually find these in the bulk section of your health food store. You’ll definitely want organic, and if you can’t find them locally you can usually find them online.
    • A flour mill-you can buy a hand-powered mill, a special attachment for your Cuisinart, or an electric mill. You can also use a coffee grinder or a high-powered blender, but you’ll probably have to experiment to see how these work for you before trying to grind several pounds of flour at once.
    • A dehydrator-the sprouted berries will need the be thoroughly dehydrated before being ground into flour, so a dehydrator will accomplish this best, although if you can set your oven low enough this also might work.

    What to do: 

    1. Sprout the wheat: once you have your equipment and have bought some wheat berries, you will probably want to make a small batch first to see how it goes. But either way the process will be the same: take the amount of what you will want to sprout, and fill mason jars about halfway with the berries. The soak in water for 24 hours, covered. Then, drain the water, and cover with plastic or metal mesh if you can, and tilt upside down with the bottom resting on a towel. This will keep the excess moisture draining. If you can’t do this, regularly strain out what water  you can to avoid molding. It is sprouted when the wheat berries have cracked open and you can see green underneath, or a small tail is sprouting from them. They can be eaten fresh like this, or dehydrated to make the flour:
    2. Dehydrate the sprouted berries: check the manual of your dehydrator to see how long you should dry the berries for and at what temperature, but it will probably be at about 115 F for 12-24 hours. Check after about 8 to see if they’re dry, and then every few hours after that. You want them to be as dry as possible.
    3. Grind the flour: follow the directions for whatever mill or grinder you have, or, if you’re experimenting with a blender or coffee grinder, just start with a small amount to see how well they can be ground. The consistency of the flour is up to you, but you will probably want it to be very fine.
    4. Enjoy! Once you have the amount of flour you would like to use, you can use it as you would regular whole wheat flour. It’s probably best to keep the rest of your sprouted berries in a sealed container in the refrigerator, and grind the flour fresh each time you’d like to use it.

    If you like this, you might also like:

    Advanced Gardening Course To Accelerate Your Food Production…

    Survival Medicine & Wilderness Survival…

    Survival Techniques From Long Ago, Re-purposed For The Modern Era…

  • A Simple Guide to Alternative Flours

    A Simple Guide to Alternative Flours

    There are many reasons people are flocking to alternative flours today. Gluten intolerance is becoming very common, but there are also many diets that eliminate wheat or grains, such as the whole 30, primal or paleo diets. There are a few reasons gluten-free and grain-free diets can be beneficial for your health, but that’s another post for another today. Today we’d just like to discuss a few of the basic non-wheat flours. This is useful to know for homesteaders, in case you’re interested in growing and milling some of your own flours.

    A note: all grain-free flours are also gluten-free, but the distinction here is that the “gluten-free” flours are not grain-free. 

    Grain-Free Flours 

    Coconut flour: coconut flour is one of the more popular alternative flours on the market right now, and is highly nutritious (as is almost every coconut product). It is rich in fibers and vitamins. It’s texture is gritty and because it is grain-free, is most commonly used in grain-free diets. It can be rather expensive, but most recipes that call for it don’t require very much.

    Almond flour: definitely the simplest of these flours to make at home, you can just soak, grind up, dehydrate and re-grind almonds. Like coconut flour, this is expensive at the store, but you also won’t use very much per recipe. With a lovely flavor, this has all the nutrients of almonds: iron, protein and omega fatty-acids.

    Arrowroot powder: A very light flour, it has a consistency like corn starch and can be used in just the same way. Like coconut and almond flour, this is another grain-free option for paleo recipes, and when combined with egg and milk, imitates gluten very well.

    Tapioca flour: Very similar in consistency and usage to arrowroot powder, the two are virtually interchangeable. Another grain-free flour, this is a great item to have on hand for grain-free baking.

    Garbanzo flour: Almost always found in any pre-mixed all-purpose gluten-free flour, it is very effective in gluten-free recipes as far as imitating the binding effect of wheat. The one set-back is the distinct taste, so it’s best used in savory recipes.

    Gluten-Free Flours

    Corn flour: Distinct from corn starch and corn meal, all three have different textures from each other but are all great options for gluten-free baking. Corn flour is the most similar in texture to wheat flour and is typically used in dishes like masa harina or tamales.

    Rice flour: Known for its gritty flavor, rice flour definitely needs to be used with other flours, but will add a wonderful nutritious value and flavor to whatever it is used in.

    Sorghum: Sorghum imitates the consistency of wheat flour very nicely, so it is a great addition to any gluten-free flour blend. It has a lovely texture and flavor.

    Other flours worth mentioning: quinoa, fava bean, potato starch and potato flour, amaranth (grain-free), teff, millet, buckwheat, oat, millet (gluten-free)

    If you like this, you might also like:

    Survival Techniques From Long Ago, Re-purposed For The Modern Era…

    Advanced Gardening Course To Accelerate Your Food Production…

    Survival Medicine & Wilderness Survival…