Page 1 of 2
1 2
food stockpile – Homesteader Depot

Tag: food stockpile

  • Protecting Your Plants from Frost and Freeze

    Protecting Your Plants from Frost and Freeze

    Cold temperatures are not good for the plants in your garden. Many of them need air temperatures that are above 32 degrees Fahrenheit in order to survive unprotected. While others, such as pine trees and evergreen bushes, might be fine, you’ll have to take some steps to ensure that everything else in your garden (except for your annuals, of course) will survive the winter.

    Types of Plants

    The first step involves determining which types of plants that you have. This way, you’ll know whether you need to protect them or just let them go. For example, if you have annuals, then they won’t survive the winter. These plants will last for one growing season. Many of them will leave some seeds behind at the end of their life cycles, so they might reappear next year. It all depends on the plant. There are also tropical plants. While many of them will grow in a number of different climates as long as the weather is hot and humid, they won’t last through the first frost. The cold weather is more than they can bear, so they’ll die.

    In addition to this, there are perennials. There are two main types of them: root-hardy perennials and full hardy perennials. The first type of these plants has leaves and branches that seem to die in the winter, although their roots are still good. The roots will enter a dormant state and won’t come out of it until the temperatures improve. The other type of perennials – the full hardy ones – go dormant as well. Trees, various plants, and even some types of shrubs fall into this category. These plants will also stay dormant until the weather warms up, although they’ll spring back to life much more quickly.

    How to Stockpile for Free: By Growing Your Own Groceries>>>

    Protecting Your Plants

    Now that you understand the plants that are in your garden, the next step involves protecting them from the cold temperatures. It all starts with keeping an eye on the weather. As soon as fall hits and the mercury in your thermometer starts to slide downwards, you should move as many of your warm weather-loving and tropical plants indoors as you can. This means that plants like geraniums and petunias should be moved inside. It helps if you already have them housed in small pots in your yard. You’ll also need to dig up any bulbs that won’t survive the winter. For example, dahlia bulbs need to be kept warm and then replanted in the spring.

    Next, you need to take the necessary steps to protect the perennials that you can’t move into your home. The night before the first cold snap, give them plenty of water. You want to really soak the ground, as this gives their roots something to insulate them from the cold. Once this is done, get some old bedsheets and wrap them around the roots of the plants. Burlap works just as well. (Just make sure to never use plastic.) This will provide some additional insulation for the roots of the plants. You want to remove them as soon as the temperatures rise above freezing.

    Ideally, all of your plants will survive the freezing temperatures that are a major part of winter. However, you need to be prepared to replace some that won’t make it. Sometimes things are out of your control. In addition, if you purchase plants for your garden that are designed for your climate, then you’ll have fewer issues. These plants can either survive the frost and freezing weather, or their seeds will. Either way, you’ll have fewer headaches in the spring when you take a look at your garden.

    [Food Stockpile] Another “food system”? It’s better than a food system, it’s a complete food strategy>>>

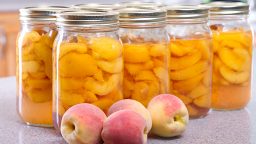
     

  • No Sugar Canned Peaches

    No Sugar Canned Peaches

    Canned peaches are an excellent treat – especially if you’ve canned them yourself and can control what goes into them. The downside to most canning recipes is the amount of sugar involved. Peaches are naturally sweet, so they don’t need a lot of additional refined white sugar, which is bad for you anyway. This recipe utilizes a more natural combination of honey and cinnamon to enhance the natural flavors of the peaches.

    Supplies

    • Water bath canner
    • Canning jars and lids
    • Saucepan
    • Peeler
    • Cutting board
    • Funnel
    • Measuring implements

    Ingredients

    • Peaches – a good measurement is between two and three pounds of them per quart-sized jar
    • One cup of honey
    • Nine cups of water
    • One cinnamon stick for each jar

    Instructions

    1) Prepare the peaches.

    • This includes peeling them and slicing them into quarters. Peeling is made easier by dunking the peaches in a pan full of boiling water.
    • Let them soak in there for two minutes, then place them immediately in a pan filled with cold water. The skins will come off on their own, although you might need to wield the peeler to remove any stubborn bits.
    • Once they’ve been peeled, slice them in half and remove the pit. Then slice them into quarters.

    2) Pour the nine cups of water into the saucepan. Add the one cup of honey. Then, slowly bring the temperature up until the mixture is boiling. Allow it to boil while you finish slicing the peaches and preparing the canning jars.

    3) Prepare your water bath canner.

    4) Place one cinnamon stick inside each canning jar. They’ll dissolve once the hot water has been added, infusing your peaches with a sweet, cinnamon flavor.

    5) Add the sliced peaches to each jar, making sure to leave an inch of space at the top.

    6) Pour the boiling honey water mixture into each jar over the peaches and cinnamon. Leave one-half inch of space at the top.

    7) Seal each jar carefully and place in the water bath canner. Process them according to the instructions on your canner.

    Notes

    Before you begin canning your peaches, there are some things that you need to do. For example, you should prepare the jars according to the instructions on the package. This usually involves washing them and allowing them to dry thoroughly before you go ahead and begin using them.

    Also, you should never reuse the lids and bands. You can reuse the jars all you want, they’ll last for many seasons (or rounds of canned peaches) as long as they aren’t cracked or chipped. However, the lids and bands must be new every time. If you reuse them, you run the risk of the jars not sealing properly, allowing in contaminants.

    Once you’ve processed your jars of peaches, store them in a cool, dark place, such as a pantry, basement shelf or root cellar. If any of the lids haven’t “popped” properly (and you’ll know when they do this), place the jar in your refrigerator and begin eating it right away. Those unpopped jars won’t last, as the seal didn’t set.

    Water bath canning is a great method for making things like jams, jellies, pickles, and even canned fruit. You shouldn’t attempt to use this canning method for vegetables and things like meat. The temperatures don’t get hot enough and are too unstable to process those items correctly. If you want to make canned vegetables and meat sauces, you’ll need a pressure canner. This is a completely different device that is much more stable. If you’re new to canning, stick with the water bath method for now. It’s a great gateway point for homesteaders.


    Discover How This “Magical” Towel Cleans With Only Water, Replaces Expensive Paper Towels and Toxic Cleaners, and Can Help You Save Hundreds Of Dollars Per Year While Saving Our Environment>>>


  • Building Your Very Own Smokehouse

    Building Your Very Own Smokehouse


    There are a number of DIY smoker methods, ranging all sizes and prices.  If you only need to smoke small items or one medium item at a time, like a Christmas turkey, all you need is a large terracotta pot or unused metal trash can.

    But, if you need a good-sized smokehouse to help you prepare for winter on a homestead or other rural area, this design based on pallet wood should provide what you need without breaking the bank.  Its also designed so that you only need the most basic of woodworking skills to complete it.

    An important note about using pallets, most are treated with industrial chemicals. You’ll need to make sure that any pallets you use for this project are food grade wood.

    If you can get your hands on enough leftover wood from friends or other projects you’ve done, you can still use this plan; you’ll just need to adjust a little when the word “pallet” is mentioned.

    Materials List

    • 20-30 Deconstructed Food Grade Pallets or other Food Grade Wood
    • 4’ x 3’ Raw Corrugated Tin (this metal must be raw, do not use galvanized)
    • 3 Hinges
    • Aluminum Flashing
    • Aluminum Screening
    • Handle (for the door)
    • Heavy Duty Tin Foil
    • Screws – 2 1/2 inch stainless steel or other weather resistant screws
    • Screws 1 1/4 inch stainless steel or other weather resistant screws


    Select Your Materials

    Whether you are using actual pallets or sourcing your wood another way, there can be some challenges if you are working with low-cost or free materials.

    The wood you get will probably have some issues such as warping and splitting. But, if its free (especially if its free) it can be worth the hunting and sorting to keep expenses down.  Just consider that time spent as sweat equity.  If you are using pallets, you will need at least 20-30 for this plan.

    If you are using pallets, you’ll want to get your length from the middle of the panels, so the ends are trimmed off.  Doing this will help avoid splitting and remove most of the nail pieces you’ve just cut through. If you are using other wood sources, use the wood cut list below to create your pieces.


    Wood Cut List

    Make the following Cuts from 2x4s unless otherwise noted.

    1. 2 each 33”
    2. 2 each 70”
    3. 2 each 29”
    4. 2 each 6’ (Front End of Side Wall)
    5. 2 each 5’ 6” (Back End of Side Wall)
    6. 8 each 33” 2 x 2 (Used 2x2s or cut 2x4s in half lengthwise
    7. 8 each 32 ¾”
    8. 8 each 30 ½“

    Cut this from a 1×1 sized piece

    1. 2 each 5’4” (part 6)

    Cut these from Pallet Panels:

    1. 36 ¼“ pieces, enough to cover the left and right sides (part 10 and 11)
    2. 35 ¾” pieces, enough to cover the front and back (part 12 and 13)
    3. 38” pieces for the roof (part 14)
    4. 2 each 18” to 24” vent (part 15)
    5. 1 each 36” (Part 16)

    As a precaution against your wood splitting as you work, it’s a good idea to pre-drill and countersink each screw.

    Smoking your food is a great way to preserve your meat.  Check out this other method that will allow your food to last for up to 2 years.  Learn More Here>>>

    Getting Started

    Begin by putting together the 2 sides wall frames of the house that include the rack supports.

    Take one piece from the cut pieces listed above for the first side unless otherwise noted:

    #4 – 6’ Wall frame front

    #5 – 5’6” Wall back

    #6 – 4 pieces of 33”

    Make sure the bottom of your #4 and #5 pieces are squared at the bottom then attach the 33” pieces across at 24” from the bottom, 36” from the bottom, 44” from the bottom, and 52” from the bottom.

    NOTE:  Secure the cross pieces to the 6’ upright flush to the end, BUT secure the cross pieces on the 5’6” upright 1.5” in from the end.  This is to leave room for the #9 pieces later.

    Create the first side with the 6’ (front) board on the right and the 5’6” (back) board on the left.

    Create the other side with the 6’ (front) board on the left and the 5’6” (back) board on the right.

    When you’ve completed the 2 sides, you’ll have mirror image sections that resemble ladders with one side higher than the other.  The Difference in heights from front to back provides support for a slatted roof.

    The cross pieces become the rack (shelf) supports on the inside of the smokehouse.


    Making the Door Frame

    Next, you’ll need the two pieces each from #2 – 70” and #3 – 29”.  Simply connect them to make a 37” x 70” rectangle.


    Attach the 3 Sides Together

    To make the next steps easier, screw the door frame to the face of the walls for better stability. There will be a 2-inch difference at the top between the highest point of the side walls and the top of the door frame

    Related Article:  “Cooking Skills Every Homesteader Should Cultivate”

    Cut the Roof Angle

    Using a spare panel or another straight edge, draw a line from the back of the side panel to the front to create the slat line for the roof and cut off the excess.  Do this on both sides.

    Use the pieces from #1 to (33”) to span the width of the smokehouse at the front and back ends of each wall.


    Add the Rear Support Frames

    Attached both #9 pieces 5’4” to the backs of the side walls, under the roof supports.


    Adding the Paneling

    Starting with the Back, fill in your walls with paneling from the ground up, then move on to the left and right sides.


    Finishing the Door

    1. Unscrew the door from the smokehouse after the side and back paneling is in place.
    2. Add the hinges to one side
    3. Install the door frame to the house.
    4. Add paneling to the door in such a way that the door has clearance to swing open.
    5. Add the handle to the side opposite the hinges.


    Put on the Roof

    Attach paneling from the front to the back of the house, across the pieces that span the width.

    Screw on the corrugated tin.


    Building Your Smoke Rack Shelves

    Create wooden frames that fit inside your smokehouse and can slide on and off the supports constructed on the interior.

    Stretch your metal screening across and around the wooden frame to complete your “shelf.”


    In Conclusion

    With the most basic woodworking skills, scrap pallets and some determination, you could have your own smokehouse build by none other than yourself.

  • 4 Nifty Alternatives to the Standard Root Cellar

    4 Nifty Alternatives to the Standard Root Cellar

    If you have your own garden and:

    • You’ve used all your canning supplies
    • Your freezer is full
    • Your friends refuse to take any fresher produce off your hands

    Chances are you may need to consider an alternative method of storing your crops rather than just letting them all rot in their earthy homes.

    In cases like these, a good root cellar is an excellent alternative to mass vegetable homicide.

    However, unless you already have a handy hole dug in the ground complete with a door to keep out foraging animals.  You may need a viable alternative.  Fear not!  Alternatives do live among us and for your convenience, we’ve compiled a list just for you.

    So, without further ado, here are 4 alternatives to a traditional root cellar.


    Metal Can Root Cellar

    What you’ll need:

    • A Metal Trash Can and lid
    • Waterproof tarp or other covers
    • Straw
    • Shovel

    How to Do It:

    This couldn’t be simpler.  Dig a hole deep and wide enough to fit the can into with 3-4 inches left above the ground level.  Set the can into the hole and backfill the dirt around the can.  Fill the can with your root produce and put on the lid.  Pile several inches of straw on top of the lid and cover with the tarp to keep out rain and hold the straw in place.


    5 Gallon Root Cellar

    What you’ll need:

    • 5-gallon bucket with lid
    • Drill
    • Shovel
    • Straw (optional)

    How to Do It:

    Similarly, to the metal can version, dig a hole to fit all but the top 3-4 inches of the bucket. Drill several holes in the bottom of the bucket to provide drainage for any moisture that may get in.

    Fill the bucket with the veggies, place the lid, cover with straw.

    Upcycle a Fridge or Freezer

    What you’ll need:

    • Old Chest freezer/fridge
    • 15-20’ of 3-4” diameter PVC pipe
    • 2 PVC elbow connectors
    • 2 PVC T connectors
    • Tarp
    • Shovel

    How to Do It:

    Remove all the working parts.  If your unit still has Freon, you’ll need to have a pro remove and dispose of it properly.

    Once everything not needed is gone, cut two holes centered vertically on each side the diameter of your PVC pipe.  Measure and cut your PVC pipe to fit into the connectors when they are attached to the holes you cut into each side.  Attach the piping combos to the holes cut into the sides.  These provide air circulation to avoid mold and mildew from developing and spoiling what’s being stored.

    Once the “plumbing” is in place, bury the unit up to the bottom of the lid.

    Suggested Article: “5 Simple Methods to Preserve Food”


    The Zeer Pot

    What you’ll need:

    • One small unglazed clay pot with a lid
    • One large unglazed clay pot
    • Sand
    • Duct Tape

    How to Do It:

    This idea is based on an ancient way of keeping water cool in the desert or other hot regions.  The general mechanics involve taking advantage of the cooling process that takes place when an object sweats.

    Like our bodies also do when we sweat, a vessel made of porous material, like terracotta clay, will cool as the small amount of moisture that seeps through the pores evaporates.  This evaporation creates a cool enough environment inside the vessel that would rival any crisper drawer GE or Maytag can develop.

    Depending on the size of the pots you are using, you will probably want to put together your Zeer pot in the location you are going to keep it. Otherwise, you may be stuck with lugging a very heavy contraption across your patio. You’ll want to keep it in a shaded location that provides good air circulation around the pot.

    Begin by using the duct tape to seal the premade hole at the bottom of each pot. Next, add an even layer of sand to the bottom of the larger pot, just deep enough so that when you place the smaller pot on top of it, the rims of both pots are even with each other.

    How to Store Food All Winter Long…

    While keeping the smaller pot centered inside the big pot, fill the area in between with the sand and pack down. Once you’ve filled that area between the two pots with sand and evened it out on top, start adding water.  Continue to carefully add water until the sand is completely soaked.

    Clean out any sand and water that may have splashed or fallen into the inner pot.

    Cover the inner pot with a lid, then cover the whole Zeer with a damp cloth.  This will expedite the initial cooling process so you can start storing items more quickly. If you weren’t able to find a lid the right size, the damp cloth would work well on its own. Once the inside has had the chance to cool, fill it with your produce and replace the lid.

    [Must Watch Video] Build Your Own Root Cellar in Your Backyard For $400 <<<Watch Here>>>

  • Benefits of Protein in Your Pantry

    Benefits of Protein in Your Pantry


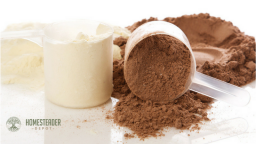
    Protein powder is usually known as the substance that bodybuilders use to bulk up. It’s more than that, however! There are protein powders out there that go into shakes, can be mixed with water and drank on their own, and that serve as meal supplements.

    Having supplemental protein powder can prove very necessary for those bad years when livestock doesn’t produce or you’ve come up empty-handed while hunting.  Your body needs a source of protein and when you can’t get it from meat, a supplemental powder is a great option.  It’s definitely something to consider in your emergency pantry.

    In fact, there are so many different types of protein powder that you might find yourself overwhelmed with options. We’ll help with that here.

    What Exactly Is Protein Powder?

    Protein powder is exactly what it sounds like – it’s a supplemental powder that contains protein and a number of other vitamins and minerals. There are versions with more protein than others (these are what bodybuilders use to bulk up) and some that are very well-rounded. If you’re looking for a good type to keep in your preparedness pantry, choose the well-rounded versions. They’ll serve your needs better and act as a meal replacement.

    Types of Protein Powder

    We’ve already covered one type of protein powder – the one used by bodybuilders. However, the types that serve as meal replacements come in a variety of types and flavors. Some use coconut to provide the protein, while others have some animal by-products in them. Make sure to read the labels carefully if you’re a vegetarian or vegan to avoid ending up with the wrong kind. On top of this, there are a number of different flavors, from strawberry to chocolate. In fact, some types are available in more than one flavor, making the decision even tougher. What it comes down to is finding the meal replacement kind in a flavor that you enjoy.

    How Long Will It Last?

    Protein powder is just that, a powder so that it will have quite a long shelf life. The standard types expire within four to five years, and, like with most canned and jarred items, if they are stored properly, they’ll last even longer than that. As long as the container isn’t opened, you can probably get a few extra years of storage time. However, if it’s opened, make sure to use it up as soon as possible. You don’t want to risk contaminating anything!

    Is Protein Powder Good For Kids?

    The answer here is yes. Protein powder is indeed good for children. There are even kid’s versions available on the market. Compare it to baby formula, only formulated differently and tastier. It contains the same number of nutritious elements as the adult versions; only it is made for children’s needs. In short, if you have kids in your house, you should have some protein powder for them store with your other emergency goods.

    Can I Do Anything Else With Protein Powder?

    While the most popular method of using protein powder is by mixing it with water and drinking it, you can always use it in a smoothie. In fact, if you mix some of your canned fruit in with the protein powder and maybe some powdered milk and water, you have the makings of a quite tasty drink. You’ll need some variety in your diet – you can’t keep eating and drinking the same things all of the time – and this is a great way to expanding things.

    Protein powder is a useful vitamin and mineral supplement that can provide some of the things that your average diet is lacking. Make sure to keep some containers of it in your emergency pantry alongside your other goods. You might want to pull it out when you tire of eating the same old things all of the time. The benefits are worth it, especially if you chose a tasty flavor.

    [Discover] The ONLY battery reconditioning resource that lets you easily bring nearly any type of dead battery back to life…<<<Learn How Here>>>

  • How to Ferment Vegetables

    How to Ferment Vegetables

    Fermenting vegetables grown in your garden accomplishes two things at once. First, it enhances the nutritional value of the vegetables by preserving them at their peak. Second, it preserves the vegetables, so you can enjoy them all winter long.

    The process used for fermenting vegetables is simple. You need the right equipment and the right ingredients – and before you know it, you’ll have a pantry full of delicious, fermented vegetables for your family to eat.

    Fermentation Equipment

    The equipment you need to ferment vegetables is minimal and inexpensive. Here are the basic things you’ll need to have on hand:

    • Jars or containers to put the vegetables and pickling brine in
    • A sharp knife and cutting board for preparing the vegetables
    • Airlock tops (we like ones that are compatible with Mason jars) to keep oxygen out of the jars
    • A pickle packer (usually a wooden stick used to pack the prepared vegetables into the jar)
    • Weights to weigh down the vegetables

    You can buy these items individually or in fermentation packages.  Here is an easy, complete Fermentation Kit from Amazon you can try.

    Fermentation Ingredients

    The ingredients you need to ferment vegetables depend on the method you plan to use. However, there are only a few variations you need to know about. Here’s what you’ll need:

    1. Fresh vegetables from your garden
    2. Salt, whey, or a starter culture
    3. Water

    There are many types of salt, but some are better suited to fermentation than others. Two of our favorites are sea salt and Himalayan pink salt. Both add a nice flavor. You can also buy pickling salt although it’s not the best choice if you want a natural, minimally-processed salt.

    The water you choose for pickling can make a big difference in the final product. If you use tap water, you should boil it or run it through a reverse-osmosis filter for the best results. Well water often has a high mineral content. That can be good for some kinds of fermentation but it’s not particularly good for some fermented products like kombucha.

    How to Prepare the Vegetables

    The method you use to prepare your vegetables for fermentation depends on what you’ll be preserving. Some vegetables, such as cabbage, ferment most effectively when they are shredded. Others, like cherry tomatoes, can be fermented whole.

    It may take some trial and error to arrive at the proper preparation. You may want to start by fermenting just one type of vegetable. Later, you can mix vegetables to create pickled salads that are ready to eat out of the jar.

    The Pickling Process

    The next step is after you have prepared the vegetables is to place them in the jars, cover them with brine, and weight them so they can ferment properly.

    You want to use weights on top of the vegetables, so they stay submerged in the brine. That’s a very important step that some first-time fermenters skip.

    There’s an art to knowing when vegetables are done with fermentation. You’ll have to rely on the specific recipes you use to be sure when they’re done. They need to be kept in an anaerobic environment (air free) while they ferment.

    When they are ready, you’ll be able to remove the weights, seal the jars, and put them in cold storage. Prepared properly, fermented vegetables will keep for months.

    Wondering What to Make?

    If you’re wondering where to start, here are some suggestions for easy fermentation:

    • White or red cabbage (sauerkraut)
    • Kimchi (spicy Korean cabbage)
    • Pickled green beans
    • Pickled tomatoes
    • Fermented carrot sticks or slices

    Do you have a favorite recipe for fermented vegetables? Tell us about it in the comments!

  • Tips to Stockpile Food for the Winter Months

    Tips to Stockpile Food for the Winter Months

    Growing up, one of my favorite things to read were the Laura Ingles Wilder books.  Not only were they entertaining, but she also went into great detail on how their food was grown or raised, butchered or harvested and then processed to keep all winter long.

    Thanks to modern conveniences, most of us don’t really need to take these steps to ensure a comfortable winter, even on a homestead with electricity and appliances.  However, it doesn’t hurt to prepare for a worst-case scenario to ensure you won’t get caught during a bad winter storm or power outage.

    Fortunately, when proper measures are taken, many foods can be kept all winter long.

    Fruits and Veggies

    For fruits and vegetables, storage areas should be cool and dark with moderate humidity and a consistent temperature of 40o.  When planning a homestead or other remote living location, a root cellar is a good addition for long-term storage.  In other homes, a cooler area of a basement or an attached garage can work.

    Stock a cellar as late in the fall as possible. Cure vegetables like potatoes, winter squash, and onions in warmer areas before moving them to the cold storage areas. For other items, chill in the fridge before moving to the cellar areas.

    Many root cellar veggies store better when some dirt is still on them. If you’ve harvested your own or stocked up from a local farmer’s market, shake or rub the excess dirt off instead of washing them.

    Know What Your Food Needs to Last

    Squash should be stored in shallow containers or left on shelves as they are.  Items like garlic and onions are best kept in mesh bags or open boxes so they can breathe. Potatoes must be kept in complete darkness to prevent the skin from going green.

    Avoid piling vegetables together, this generates heat and can lead to them spoiling. Try to spread them out as much as possible and rotate them for even exposure.

    Apples can be stored for months in a box and can be piled more than others.  This will actually assist them by maintaining humidity to keep them crispy.

    Avoid Spoilage

    It’s true that one bad apple can spoil the whole barrel, and that doesn’t just apply to apples.  Handle your fruits and vegetables carefully as even the slightest bump can create an invisible bruise and begin the decomposition process.

    In any storage areas that don’t have built-in climate control, the driest, warmest air will be near the ceiling while more-humid air is nearer the floor and farthest from the door. Keep this in mind as you plan where you will store your produce.

    Inspect your stores regularly and immediately remove any soft or rotten items before they can affect the rest.

    Keeping Meat

    If you are really into the store and save idea, consider smoking and storing your own meats.

    Whether you’ve gone hunting, or gone in with a friend and purchased a whole cow, being able to have a portion of that ready to go without relying on the use of a freezer can be a great idea.

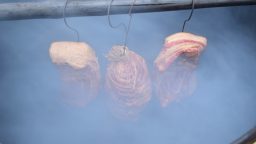
    Used for millennia by some of the oldest civilizations for long-term storage, smoking creates an acidic coating on the meat that prevents bacteria from cultivating. It also dehydrates the meat, making it less hospitable for bacteria to breed.

    So, come late summer and early fall, start planning on what you can stock up on for winter storage.  Not only will this provide you with an emergency supply of food when needed, it is also a great way to keep eating local organic food all year round whether it comes from your own garden or the local farmers market.


  • 7 Steps for Easy Canning

    7 Steps for Easy Canning

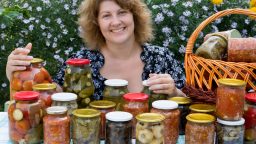
    If you decide to get into the wonderful world of canning, be prepared to experience some of the more flavorful food you’ve ever experienced at a fraction of the cost. Canning allows you to pick or buy produce when it’s at its peak maturity and preserve that flavor year-round. The simplest canning process is Water Bath Canning.

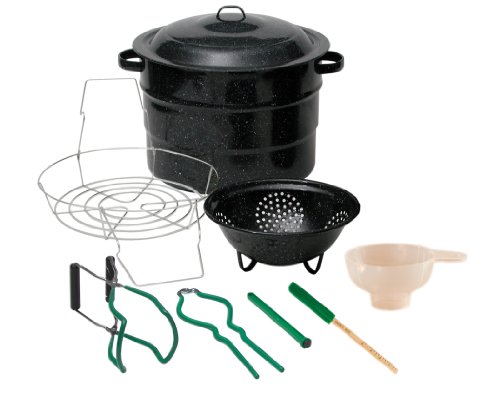
    To get started you’ll need a few inexpensive basics, many of which you may already have, or be able to find at your local thrift store or flea market. The absolute essential musts are:

    • A pot that holds enough water to cover any sized jar.
    • A Jar Lifter or Canning Rack, or at least something to help you remove the jars from boiling hot water.
    • A set of jars with the seals and rings intact.

    I found this inexpensive, complete set on Amazon “9 piece canning set”

    Getting to Work

    Step 1

    Fill your canning pot about one-third full of water and a secondary pot completely full.  Heat water until hot, not boiling.

    Step 2

    Wash your jars seals and lids, then keep warm until ready to be filled.

    Step 3

    Prepare food and fill jars according to the recipe you are using. Remove air bubbles by running a non-metallic utensil around the inside of the jar. Wipe the rim of the jar with a clean, damp dish towel or paper towel.

    Step 4

    Place the seal and ring on the jar and gently finger tighten.

    Canning is a great way to “stockpile food”, check out this “Complete System for Building a Delicious Food Stockpile”

    Step 5

    Place a small board or hand towel in the bottom of your canning pot to keep the jars from making contact with the bottom.  Place jars in your canning pot making sure the water can flow freely around the jars. Add hot water as needed until the jars are covered at least halfway up.

    Step 6

    Cover and bring to a full boil. Start timing according to your recipe.

    Step 7

    When your time is up, turn off the heat, carefully remove the jars and set upright to cool. As the jars cool, the seals pull down into the vacuum that is created and compress with a small pop.

    When They’re Cool

    After jars have cooled, press on the lid to check the seal.  It should be sucked down, not popped up.

    If you find a jar didn’t seal, just put it in the fridge and use the food within 2-3 days like you would leftovers.

    Caps will sometimes rust if left on during storage so it’s a good idea to remove the screw caps then wash the jars.  If one gets stuck, just leave it one and try to use that jar of food first.

    Label the jar with the food type and date and store them in a dark, dry and relatively cool area like a kitchen pantry.  Avoid storing them in direct sunlight, or in utility rooms with where they will be exposed to heat or high humidity.

    A Note on Jelly, Jam, and Preserves – What’s the Difference?

    They may all look the same in their jars, but there are differences, mostly in what form the fruit is in when it’s prepared for canning.

    Preserves

    Once upon a time, preserved fruit was just that. Whole or large chunks of fruit preserved in sugar for use out of season. Not designed to spread on toast, they were more often opened and served as a side dish in the absence of fresh produce.

    Jams

    These still contain pieces of fruit but they have been pulverized into pulp.  Lately, Jams and preserves have become almost interchangeable but at one time there was a considered difference between the two.

    Jelly

    Jellies are made using only the juice of the fruit that is then thickened so it can stand on its own.  Usually with pectin, sometimes with gelatin.

    Tip: How to Properly Store Your Food and Increase its Shelf Life