Tag: garden beds

  • Raised Beds from Pallets

    Raised Beds from Pallets

    If you have purchased lumber to build raised beds then you know how quickly it can get expensive.  And not only the lumber, but the hardware like screws or nails to put it together.  It all adds up and it adds up fast.  But there is no need to spend your money on materials that are available for free.  Follow these tips if you want to make raised beds for next to nothing.


    Find Pallets

    This step isn’t hard, businesses like Longs, Walgreen’s, Dollar General, and more, all receive the items that they sell on pallets.  Some of these pallets are painted red or blue, but some of them are unpainted.  The unpainted ones are the ones that you want, and they are the ones that they give away.  That beings said, always ask, it would be shame to get arrested for stealing something that you could get for free down the street just because you didn’t ask first.

    Dismantle

    If you don’t have a truck then you might have to do this on site.  That will be a lot more inconvenient.  So, if you can get a friend to let you use their truck or drop the pallets at your house for you.  You could use a hammer and a pry bar to dismantle the pallets, but I find that this is a lot of work and often the wood ends up splitting because there are so many nails in a small area.  I just use a circular saw and cut off the ends where they are nailed together on both top and bottom.  This leaves only the middle still nailed together which is easy to separate with a few knocks from a hammer and you only lose an inch and a half on each side.

    Reassemble

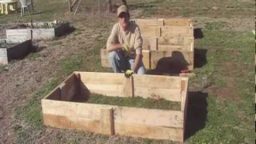
    Now you should have a pile of flat broad boards, and a pile of scrap 2×4’s.  Depending on the size of the boards your pallets had you will probably want to make each side of your bed 3 boards tall.  Take three boards and lay them flat with long end touching long end.  Then cut a scrap 2×4 to place on each end and nail it in place.  If you were careful when you removed the nails you can reuse them.  Do this twice.  This will leave you with two sides of your square bed, these sides will be opposite eachother, simply attach them using another 3 boards on each side.


    This is only the most basic design, it can be altered to make your frames stackable, or rectangular, you can even make a keyhole bed with a little more work.  But with the basic premise here you will be able to make raised bed frames for next to nothing.

    If you liked this, you might also enjoy…

    Natural Healing Techniques Doctors Don’t Want You to Know…

    The Weight-Reducing Magic of Yoga…

    The Ultimate Woodworking Course..


  • Hot Beds

    Hot Beds


    With winter closing in I’ve recently been talking a lot about getting your crops covered up to extend your growing season.  But in some of the colder zones retaining what little heat is in your garden might not be enough, or you might not have the resources available to build a greenhouse or hoop house.  So instead of concentrating on insulating the heat in, you might want to focus on increasing the amount of heat in your soil to begin with.  This is usually referred to as a “hot bed”.  Here are some tips on how to increase heat in your soil and extend your growing season.


    Frames

    Hot beds are just that, beds, not rows, so this isn’t going to work without frames of some sort to contain your material.  So first off, you will need to construct frames for your beds.  These frames will need to deeper than your normal raised bed frames.  Preferably 2 feet or higher.

    Manure

    The key ingredient to any hot bed is manure.  The animal source is not as important as the age of the manure.  Unlike manure that would be added as a top dressing, the manure you want for your hot bed needs to be as fresh as you can get it.  Preferably less than one month old.

    Fill it Up

    You will want to spread out your manure in your hot bed frame.  The depth of the manure is the primary determination of the heat it will give off.  So if you are in a colder zone, or have less insulation you are going to want manure as deep as 18 inches, less if you are in a warmer zone or have multiple layers of cover.  Then press down the manure to get rid of air pockets that will make the heat less evenly distributed.

    Add Soil

    Next, add the soil that you will be growing in.  You want this to be able to accommodate the whole root structure since you don’t want your plants to have to have their roots in manure that is going to be over 100 degrees.

    Soak

    Water your bed thoroughly, add urine if you feel comfortable doing so.  This will help to activate the bacteria that will break down the manure, this is the source of heat.


    All that is left is to plant it out.  Remember, you will still want to select seasonal crops since they are more suited to shorter days.  If your bed is getting too cold, try adding more water, if your bed is dry the bacteria will not be thriving and this is what you need to produce heat.  Don’t let dropping temperatures put an end to your gardening season, fight back with hot beds.

    If you enjoyed this, you might also like….

    Last Resort Home Defense and More…

    Natural Healing Secrets You Need to Know…

    The Healthy Primal Diet Everyone Should Try…