Page 9 of 23
1 7 8 9 10 11 23
gardening – Page 9 – Homesteader Depot

Tag: gardening

  • The Easiest Gardening Method You’ll Ever Try

    The Easiest Gardening Method You’ll Ever Try

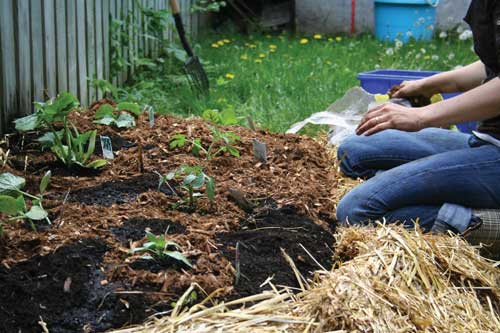
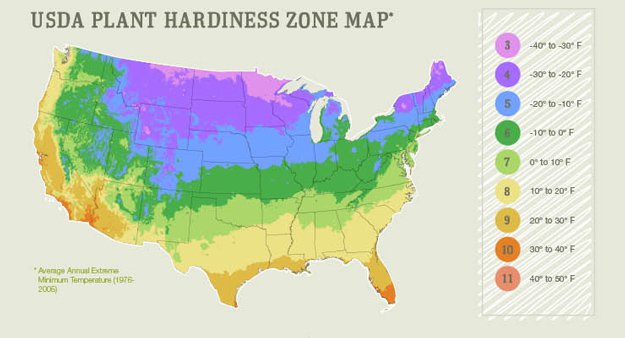
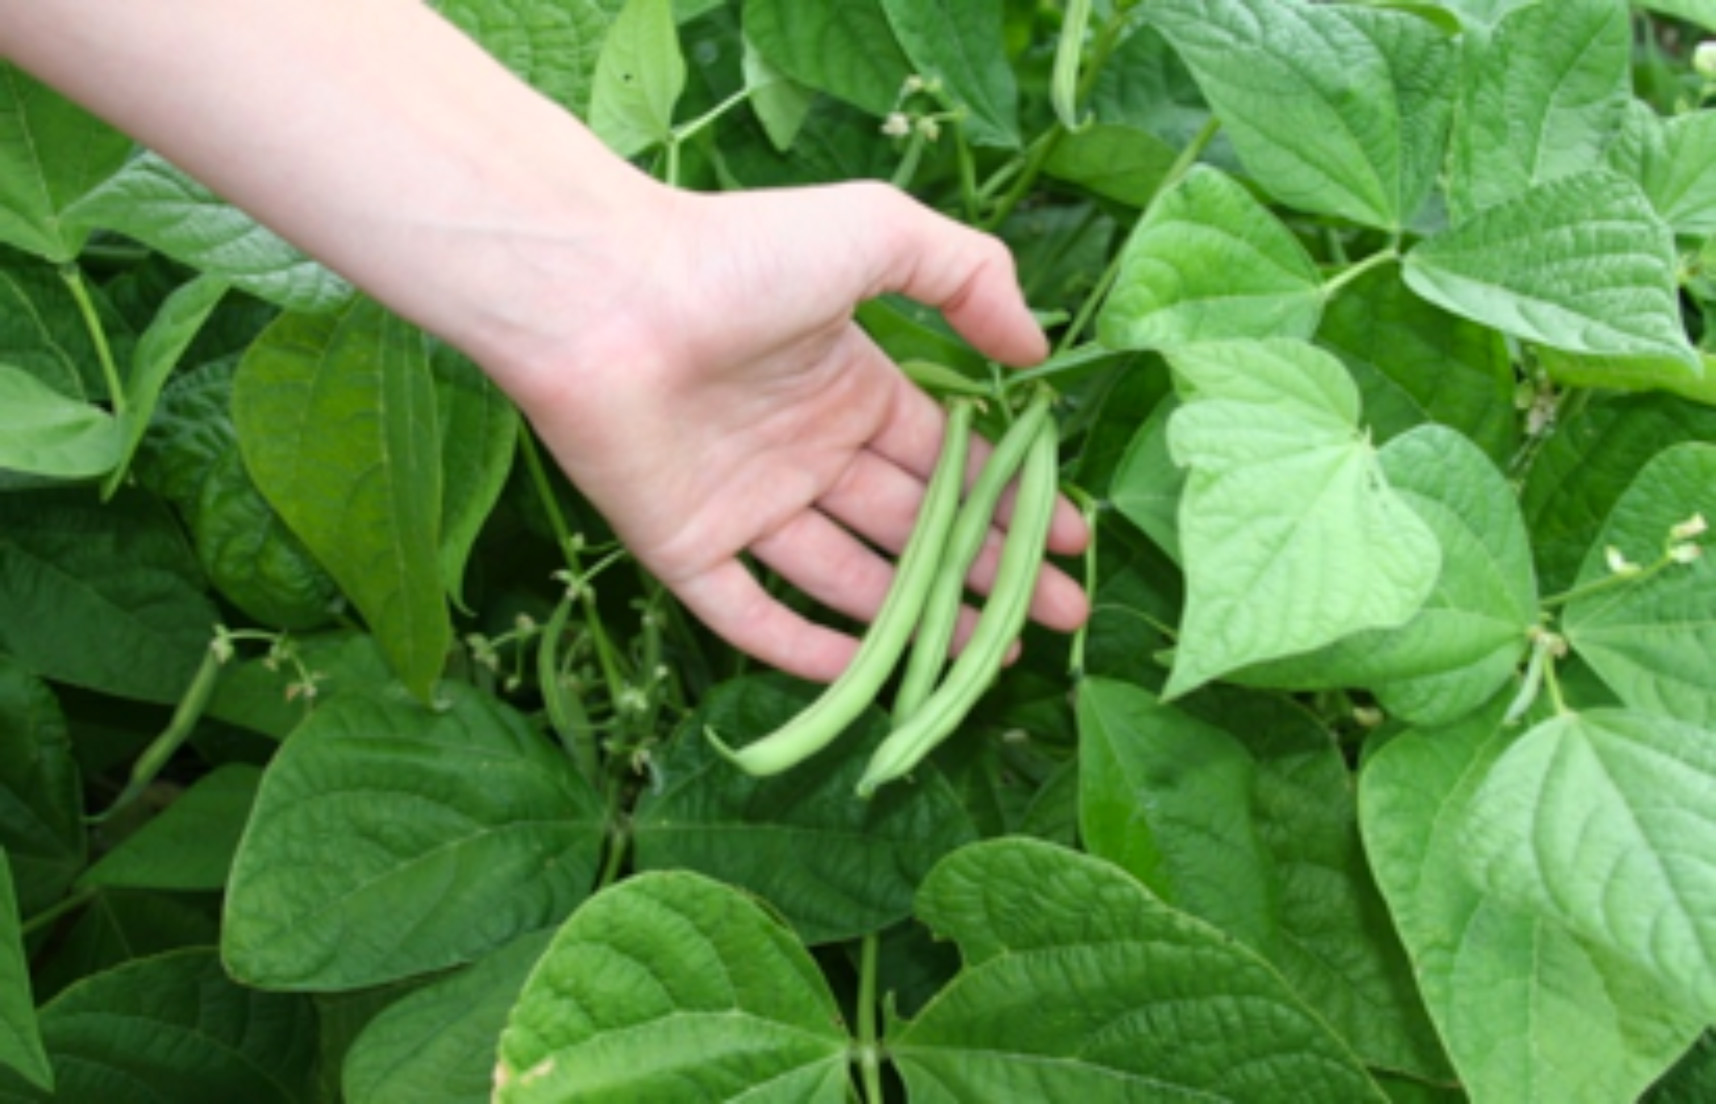
    A thriving garden is the beating heart of the homestead.  For many people, though, keeping a garden can be a challenge. Traditional methods require heavy machinery for soil preparation, questionable chemical fertilizers, all adding up to a prohibitive upfront cost. A great and easy method of gardening that has a very low financial demand is the “lasagna garden”.

    It was given that name because the method involves developing arable soil by composting an existing plot with layers of organic matter. You create the layers in the fall, to be ready for planting in the spring. Here’s a quick guide to get you started:

    • Select your plot: With this method, you don’t need to prepare the soil at all. That’s right, no double-digging, no weeding! Just pick an area where your garden will get the sunshine it needs that isn’t too far from your water source.
    • The first layer: The base layer of your garden will be a single layer of corrugated cardboard that smothers out even the toughest weeds. You can source this from almost anywhere, just be sure to remove packing tape if you’re recycling boxes. To prevent weeds from growing through, be sure to cover up any gaps in the cardboard with more cardboard. If your plot doesn’t have any persistent or tenacious weeds, a minimum of three layers of newspaper will work fine instead. Just before applying the next layer, thoroughly saturate your base layer with water.

      Effective Primal Diet Hacks…

    • The compost layer: This layer will be the powerhouse of your garden. Your garden is literally a compost sheet (rather than a pile or heap). Put anything in this layer you’d put in the compost, including “browns” like fall leaves, shredded paper, pine needles, and “greens” like veggie scraps, grass clippings, garden trimmings, etc. Once you’ve piled on the compostable matter, finish this layer off with three to four inches of finished compost or topsoil to be ready to plant. 
    • The mulch layer: Your lasagna garden will be topped off with the application of a couple of inches of mulch to retain the ideal moisture and temperature for your compost to break down. The best mulch materials are the ones you can source with minimal effort from neighbors, local businesses, or even your town’s Department of Works. Tried and true materials for this layer include wood chips (aged chips are best), straw, grass clippings, leaves, even tree bark! If it’s more convenient for you to purchase mulch, opt for undyed wood chips.

    Once you have your layers prepared, let them sit for a season. It’s common to start in the fall to be ready to plant in the spring, but you could do this in the spring for early fall planting, for example.

    To plant, brush back the mulch layer a bit and plot out the spots you’d like to plant your seeds. Cut holes in the cardboard for the roots to grow once the seeds begin to sprout, plant your seeds in the compost layer, and cover lightly with the mulch (as you would were you using potting soil).

    That’s it! The layers will retain moisture, so only water if the bottom layer is dry. Happy planting!

    Natural Healing Secrets You Need to Know…

  • Understanding Garden Zones (Infographic)

    Understanding Garden Zones (Infographic)

    Understanding garden zones is so important if you want to have a hearty garden. Some plants will thrive in one area and completely fail in others! Also, when you are buying seeds, they will usually come with indications as to what zone they will work in.

    When you get started gardening, figuring out your first zone is the first step you should take. That will dictate the research you do, the kind of seeds you can buy, when your growing season is, when you should start your seeds, and so on. You can find online forums specifically for your zone and consult with gardeners across the globe facing the same environmental factors, weather patterns, seasonal changes, etc. as you are!

    This infographic from Homesteading.com is perfect for quickly discerning what your growing zone is, along with some handy tips for certain vegetables and zones. Very useful!

    If you enjoyed this, you might also like….

    Can You Defend Your Family When SHTF?

    Natural Healing Secrets You Need to Know…

    Effective Primal Diet Hacks…

  • Are Grow Lights Worth it?   

    Are Grow Lights Worth it?  


    For those that have outdoor gardens, the thought of growing food indoors with artificial lights can seem like a ludicrous concept.  Providing your plants with access to the maximum amount of possible sunlight is a basic strategy for increasing growth, and the sun is free.  Purchasing and the operation of grow lights costs money, and gardening should save you money and provide you with resources, not cost money and use resources.  So, are grow lights worth their cost and the cost of their operation?


    Not to try to skirt the question, but it depends.  If you live in an area that has little difference in day length throughout the year and relatively warm winter temperatures that allow you to produce in your outdoor garden year-round, or nearly year-round, then grow lights will not offer you the same benefits they will to someone living in a colder zone, but they will cost the same.

    There are also a variety of products for you to choose from, on the low end you can get a small compact florescent light fixture for around $50.  Compact florescent lights don’t use as much energy as incandescent lights and they provide plenty of light for vegetative plants, that is plants that are growing leaves, but they do not provide the necessary light for plants that are fruiting.  On the higher end of the spectrum you can get LED grow light fixtures that can cost anywhere from $80 to over $600.  Some of these LEDs use less energy than CFL and still are capable of producing all the light necessary to grow plants all the way through their fruiting stages, but at that point you need to start thinking about more than just putting a few pots under a light and the cost begins to rise in proportion to how long you want your plants under the lights.

    If all you want to do is to extend your growing season, that is to start you plants earlier in the year when the sun is not giving enough light and when outdoor temperatures are not high enough yet, and potentially bring in a few perennial greens, then a grow light, even a CFL can be more than worth its cost, especially to those living in cold zones.  Consider that 1 pound of fresh spinach can cost most then $5, and that a $50 light fixture that will last at least a few years can extend your season by more than 8 weeks and cost little to operate and you will begin to see just how worth it a grow light can be for you.

    Even during the warm months, you may want to start seeds indoors to reduce the access pests have to seeds, this will reduce the cost of each crop.


    Not everyone is offered the same amount of benefit from a grow light.  If you have a green house or live in a zone with mild winters, then you won’t stand to gain as much as others.  A little math may be necessary to determine if they are right for you, but no gardener should turn their nose up at the idea using supplementary lights.

    Click Here to Shop Grow Lights on Amazon

    If you liked this, you might also enjoy…

    The Sinister Future of the US…

    Pure, Natural Healing…

    Donald Trump’s Words of Warning…

  • How Does Homesteading Make You Healthier?

    How Does Homesteading Make You Healthier?

    When you have a homestead, no matter the size, you do not have a lot of time to rest if you want it to stay up and running properly. Homesteading can provide you with a sense of accomplishment, but it certainly takes work. However, this work can be very good for your health. This is one of the “hidden” benefits of homesteading that many people do not think about. Let’s look at some of the ways that becoming a homesteader could make you a healthier person.

    Getting Exercise

    You are going to be outside and working quite a bit. Whether you are tending to the livestock, in your garden, making repairs, dealing with snow, fishing, hunting, or hiking, you will be out getting plenty of exercise. This can help you to shed some pounds and keep you in good shape.

    Eating Better

    When you are homesteading, you can eat better, too. You are growing your own food rather than eating unhealthy processed food and fast food. You will be getting more nutrients since you are putting better quality food in your body. Fresh meat, veggies, and fruit are key elements to a healthy life. They are good for the insides, and they can also help you lose weight. In addition, eating healthy tends to be good for your skin, too.

    Improved Psychological Health

    Many find that homesteading can help improve their outlook on life and their psychological health. They feel better when they are doing something to contribute to their survival; other than sitting in a cubicle. They like getting things done on the farm, they like the quiet it can offer and the starry nights.

    As you can see, there are many benefits to living the homestead lifestyle. If you are still on the fence about homesteading, it could be the perfect option for you.

    If you enjoyed this, you might also like….

    Home Defense in the End Times…

    Natural Healing Secrets You Need to Know…

    Eat Like Your Ancestors…


  • Better Beans for Your Garden

    Better Beans for Your Garden

    Gardening is a part of homesteading, and one of the best types of vegetables to grow is beans. They are a healthy choice and you have plenty of options. Green beans, for example, taste great fresh and raw, as well as cooked. It is possible to can them and save them, and you will find that they are a great, healthy side for just about anything you are cooking. Of course, you can’t forget the deliciousness of a green bean casserole, too. However, if you want to have a great yield of healthy beans, you need to know how to grow them the right way. The following are some simple tips you can use.

    No Seedlings or Transplants

    You might be tempted to start the seeds out of the garden, or even to buy beans that have already started. However, you will find that using transplants and seedlings in the garden will not often have the best results. Instead, you will find more luck when you sow the seeds directly into the ground. Before you sow the seeds, though, make sure the soil temperature is at least 60 degrees Fahrenheit.

    Soak the Beans

    On the night before you plant the seeds, soak them in water at room temperature. You should soak them overnight. Doing this can help to make the germination occur faster. However, it is a good idea to check the weather beforehand. If you find that you have some rain in the forecast in the next week, do not soak the seeds. Having too much water could kill them.

    Rotate the Crops

    You know that rotating your crops each year is a good choice. You will find that planting beans is a good option because it can help to put nitrogen in the soil. In addition, when you rotate them, you should plant them in the area where you planted items such as cabbage, cauliflower, and broccoli the year before.

    Prepare Poles for the Beans

    There are two types of beans – pole and bush variety. When you buy the seeds, the packaging will tell you whether you have the pole or bush style. If you have beans that grow on a bush, you will not have to do anything to support the weight of the plant. It supports itself naturally. However, if you have pole beans, you will need to place poles in the soil, so the vine runners can grab onto it and climb. You could use wires or strings connected between poles, a trellis, or doweling rods. You can experiment to find the option that works best for you.

    Beware the Birds

    When your beans first start to sprout, they will be very tempting for birds. They will sometimes pull out the sprouts as soon as they poke through the soil. To combat this problem. You can run a string down the row, placed about two inches over the area where the beans will sprout. Once the bean plants are a couple of inches high, you can remove the string.

    Each year that you grow beans, you will learn new tricks and tips to employ that will work for your land and your beans.

    If you liked this, you might also enjoy…

    What Are the Signs of the End Times?

    Learn Natural Healing Secrets From the Masters

    Preparing for the Bubble to Burst 


  • 5 Things you Should NOT Compost   

    5 Things you Should NOT Compost  


    Since compost is the primary soil amendment (other than mulch since every garden should be mulched) in back yard gardens, it can be tempting to compost everything you can so that you can give the most back to your garden.  While this is true for the most part, there are things that you should not be composting and could have an adverse effect upon your garden or your health.  Here are 5 such items.


    Meat

    It’s a shame to waste food, especially meat which costs much more than other foods, but it’s better to feed meat that has past it’s prime to the dog than to put it in your compost pile.  It will attract flies and scavengers to your pile and could introduce harmful bacteria that can persist in your soil for long periods making it dangerous to consume your vegetables raw.

    Weeds

    Seeds can remain in the soil for decades, usually not the seeds of any plants that you want, but the seeds of weeds most certainly can.  Even a hot compost pile will not kill the seeds of most weeds, which means that you will effectively be spreading weed seeds in amended soil when you apply compost to your garden if you add weeds to your pile.

    Pet Waste

    Manure for the garden should come from animals like chickens, horses, and cows, not dogs and cats.  It would take much longer for these manures to be safe.

    Diseased Plants

    If you remove plants, or portions of plants due to pests or disease, throw them away and do not compost them.  Placing them in your compost could result in spreading the issue throughout your garden.

    Persistent Plants

    Similar to composting weeds, attempting to compost extremely hardy and easily rooting plants such as sweet potato or mint will never end well.  Ultimately you will need to remove every little piece from your pile because they will not die and decompose, they will continue to root and take nutrients from your compost time rather than provide them.


    Composting is about quality, not quantity.  There are plenty of resources that can be had for free, or nearly free for most people that will provide more than enough for any backyard compost pile.


    If you liked this, you might also enjoy…

    What Are the Signs of the End Times?

    Learn Natural Healing Secrets From the Masters

    Preparing for the Bubble to Burst 


  • Seed Saving Tips (Infographic)

    Seed Saving Tips (Infographic)

    Seed saving is one of the most important skills to have for self-reliance. If done properly, one packet of seeds could last for generations. One of the biggest reasons to seed save is that if you choose the seeds from a healthy, productive plant, is that you are choosing the plant with the genes that will thrive in your particular environment, and, over time, it will become perfect for your gardening zone. “Heirloom” seeds are seeds that have been collected and re-planted each year by farmers for generations, and ideally you could create your own!

    Not every seed will be easily saved in the same way, so this handy infographic gives some tips for common fruits and vegetables that have relatively easy-to-save seeds. When you plant a crop of any of these plants next year, remember to choose seeds from the healthiest, most prolific plant, that was undisturbed by pests or disease. This plant will have the strongest genes, and genes ideal for surviving and thriving in your climate. Have you ever tried to save your own seeds? Share below!

    If you liked this, you might also enjoy…

    What Are the Signs of the End Times?

    Learn Natural Healing Secrets From the Masters

    Preparing for the Bubble to Burst 


  • DIY Root Tone   

    DIY Root Tone  


    Propagating plants through cuttings when possible rather than using seeds can save time and produce more predictable results.  However; commercially produced root tone can be expensive, and some products are also unhealthy.  To save money, and stay healthy, you can make your own root tone at home.  Here are two methods that are so simple, healthy, and cheap you will never buy commercial root tone again.

    The first method is to make a solution rich in IBA from willow cuttings.  IBA is a hormone found in high concentration in new growth on willow trees that promotes root growth.

    If you have a willow trees in your area, even if they are dormant because of the cold, simply remove a few of the green tender branches of new growth with a pair of snips.

    Process these branches down to the smallest pieces you can, preferably into a pulp using a food processor or blender if you have one that can handle the job, but cutting them into the smallest pieces you can manage with snips will also work to a lesser extent.

    Soak the pulp in water in a quart jar for 24 hours, shaking it every few hours to help mix it, but otherwise leaving the lid off.

    After it has soaked for a full day, strain off the pulp, close, and store in a dark place, preferably your refrigerator.  Get it out when you are making new starts and dip the cuttings into the solution like you would with other root tone.

    The second method is even simpler, but does cost a little money.

    Simply pour some honey into a small container and dip the cuttings into the honey.  Yeah, that’s it.  I don’t find that it promotes root growth as much as the IBA solution, but it does protect the cuttings and increase the rate of success versus not using a root tone.  It’s also incredibly simple.


    So don’t waste your money or expose yourself to chemical products that have disheartening warning labels on them, make your own root tone and expand your garden cheaply and safely.

    If you enjoyed this, you might also like….

    Home Defense in the End Times…

    Natural Healing Secrets You Need to Know…

    Eat Like Your Ancestors…