Page 2 of 2
1 2
kitchen – Page 2 – Homesteader Depot

Tag: kitchen

  • The 11 Commandments of Cast Iron Care (Graphic)

    The 11 Commandments of Cast Iron Care (Graphic)

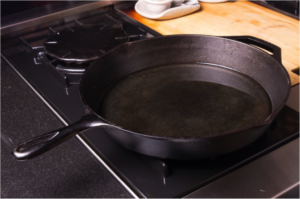
    Most people who own and regularly use cast iron can’t gush enough about it. You might wonder what all the hype is about cast iron, and you also might wonder why people are so legalistic about cleaning it.

    The thing is, they’re really not so difficult to care for, at all, and no matter how much they wear or rust, it’s actually usually pretty easy to get them back in shape again, if you know what you’re doing.

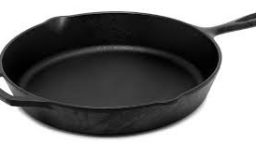
    The great news about cast iron is that if you use them regularly, you really don’t have to do very much at all to keep them conditioned.

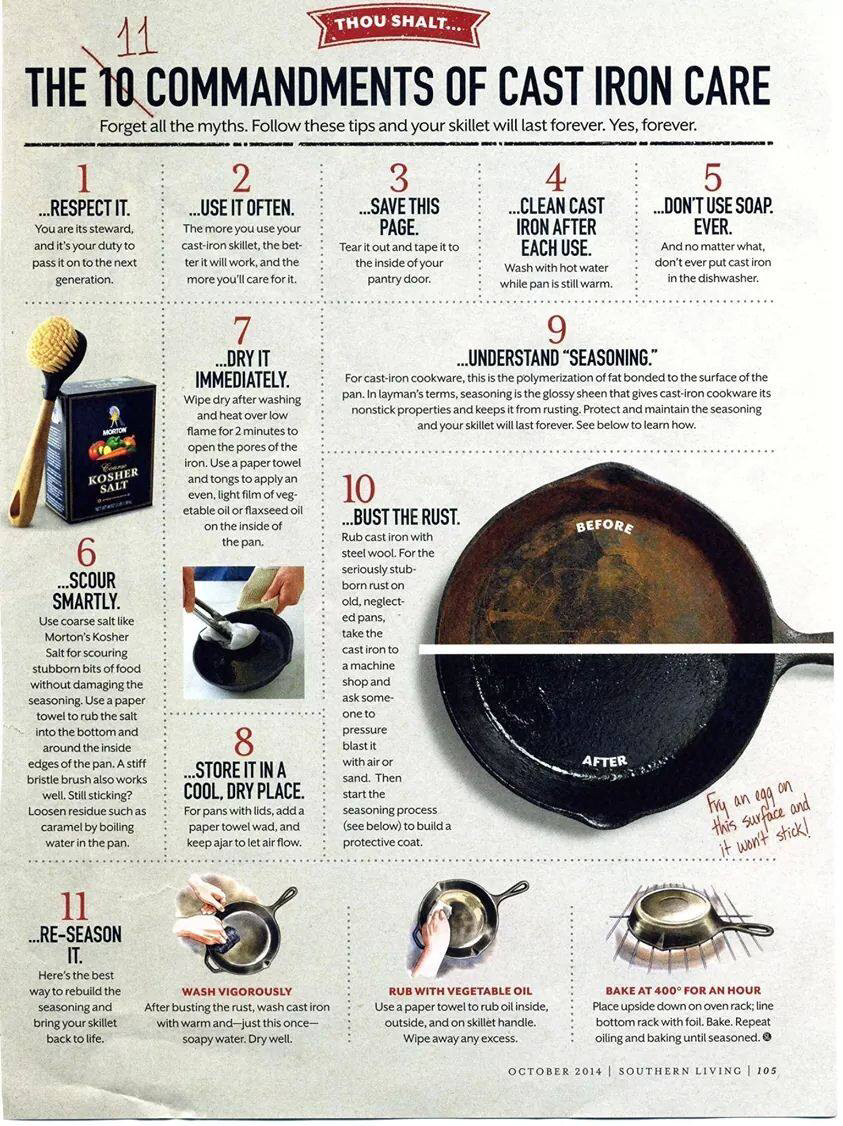
    I found this graphic recently on Pinterest, from Southern Living Magazine, that has the “11 commandments of cast iron”, and I think they’re great suggestions. I thought I’d share it with you guys so you can see that cast iron care is really not so complicated. These basic guidelines are sure to keep your cast iron in great shape, for many, many years. Enjoy:

    If you enjoyed this, you might also like….

    Do You Have What You Need to Hold Down the Fort?

    Natural Healing Secrets You Need to Know…

    Effective Primal Diet Hacks…

  • Five Must-Have Cast Iron Pieces

    Five Must-Have Cast Iron Pieces

    When first making the switch from toxic nonstick cookware to cast iron, you may have a few reservations about the care or cost, especially if you run your homestead on a tight budget. The good news is that cast iron cookware outlasts its nonstick and other counterparts by decades, even centuries; you won’t be replacing cheap pots and pans every few years. This coupled with a good grasp of the simple process of caring for your cookware, leaves no reason not to take the plunge! If you’re ready to start your cast iron collection, check out these essentials first!


    • Dutch oven: A good, high capacity dutch oven is a staple in any cast iron stash. Use this for baking bread, cooking soups, grains, legumes, and hearty casseroles.
    • Skillet: Skillets come in all shapes and sizes for use in almost any type of cooking. Get started with a standard 8- or 10-inch.
    • Grill pan: Ditch the bulky countertop grill and make restaurant-quality burgers and steaks with a grill pan. Great for use during the winter months when you want the perfect steak without cooking out in the cold!
    • Pots: Cast iron pots are a healthier alternative for boiling and steaming. From a multi-gallon stockpot to a cute little teapot, there are plenty of options available.
    • Baking dishes: Whether you’re whipping up a batch of cookies, a pan of cornbread, or a deep-dish pizza, there are myriad different styles and shapes of pans to get the job done. Artisan cast iron makers even offer dishes in novelty shapes such as states or animals.

    There’s no need to break the bank or clutter up the kitchen when becoming a cast iron convert. Yard sales, thrift stores are great places to find vintage pieces. Even big-box retailers are tapping into the growing market and offering affordable cookware selections. It’s easier than ever to start a great collection, but be careful- it can be addictive. But with cast iron, there’s no such thing as too much!

    If you liked this, you might also enjoy…

    Never Buy Another Battery Again!

    Learn Natural Healing Secrets From the Masters

    Preparing for the Bubble to Burst 

  • Benefits to Cooking with Cast Iron

    Benefits to Cooking with Cast Iron

    Cast Iron pans may seem like a relic of the past, but they are still in use today in modern kitchens across the world because these pans have stood the test of time.  So with more options than ever, why should you choose cast iron over alternatives like aluminum, stainless steel, or non-stick cookware?  Here are just a few of the benefits to be had from cooking on cast iron.


    Avoid The “Teflon Flu”

    Non-stick cookware is coated with a synthetic polymer called polytetrafluorethylene, or PTFE.  This coating can degrade in high temperatures (something kinda common in cooking) and release toxic gases.  These gasses can kill pet birds that are in the kitchen while you are cooking, like the canary in the coal mine.  They also cause flu-like symptoms sometimes referred to as the “Teflon flu”, long-term exposure can lead to further health problems.  If the surfaces are scratched they can flake off particles of PTFE into your food that you will eat.  It is said that these particles are inert and won’t harm you, but I’d error on the side of safety on this one.

    Iron Intake

    While aluminum isn’t as toxic as Teflon and stainless steel doesn’t release any harmful fumes, cooking with cast iron could actually improve your health.  Cooking with cast iron can increase your iron intake.  Healthy iron levels can boost your immune system and your energy level.

    The Price is Right

    Cast iron pans of similar size and quality to their stainless steel counterparts save you as much as 60% on initial costs and they wear well over time.

    Versatility

    Cast iron cookware can be used in the oven, and in an emergency can be used over any heat source including an open wood fire.


    Cast iron cookware isn’t still in use today because of a lack of options, but because it is better than other options.  If you haven’t cooked on cast iron yet then you don’t know what you are missing, and you might be making yourself sick while you’re at it.


    If you enjoyed this, you might also like….

    Last Resort Home Defense and More…

    Natural Healing Secrets You Need to Know…

    The Healthy Primal Diet Everyone Should Try…

  • Skills to Build While You Wish You Could Homestead

    Skills to Build While You Wish You Could Homestead

    Whether you’re stuck in a cramped apartment in the city or living in a suburban starter home while you save up to buy land, there’s no reason you can’t start building your homesteader skills now, as you dream of more self-reliant times ahead. You can check out our guide to how to homestead in a city if you can’t wait to free yourself from the grid, and also start developing the following skills to be ready when the time comes to fully escape the plugged in life:


    1. Bake your own bread: We tend to take our packaged, fluffy white supermarket loaves for granted, but there is nothing as delicious or satisfying as freshly baked homemade bread. It’s not too difficult to master, and doesn’t require anything more than what you can buy from said supermarket. And in addition to delicious bread, it will provide you with more of a sense of control over what goes into your food and a whole lot of respect for homesteaders of yore-who grew, milled and baked to get their daily bread.


    1. Pickling and Canning: There’s no reason you need to be growing your own crops to start preserving food. It’s always good to have a nice supply of foods that don’t need to be refrigerated, and really rewarding to make them yourself. Pickling is great because pickled and fermented foods are actually an amazing source of probiotics, and canning your own food is a great way to take advantage of marked-down produce at the supermarket as well as a healthy alternative to most GMO, BPA, toxin-ridden store-bought canned products.
      Check out: 7 Steps for Easy Canning


    1. Render tallow and lard: Mostly a forgotten homesteading art, rendering tallow and lard can be both greatly rewarding and cost-effective. Using often-times free scraps from butcher shops, or, if you’re lucky enough to know a hunter or farmer, the remains of a deer or cow after butchering, tallow and lard can be used in place of conventional oil or store-bought butter and tend to be far more delicious and nutritious.


    1. Make your own soap: The cost-effectiveness of making one’s own soap is probably the best reason to try it-homemade-soap
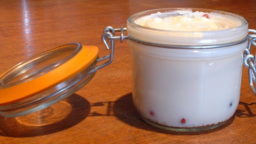
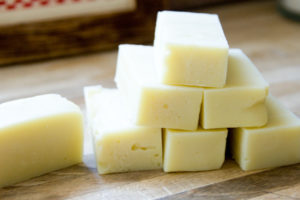
but, like making your own bread or canned products, also gives you a sense of control over what is going in your soap and knowing it’s safe. If you can get over the fear of working with lye, soap-making can be a blast, and odds are you won’t go back after you’ve tried it. Just make sure to follow basic safety precautions and you’ll be making all your family members homemade vanilla-lavender-coconut suds in no time!
      Check out: 5 Step DIY Soap


    1. Butcher a chicken: OK, so odds are, if you live in the city or suburbs, you probably don’t have access to a live chicken, but that doesn’t mean you can’t start practicing butchering now. Most supermarkets and butchers sell whole chicken, and they’re always much cheaper than chicken cuts. It’s a great way to whet your pallet for butchering, and you can use the giblets for gravy and bones for tallow-learning how to use the whole animal will give you a great taste for proper homesteading!


    If you liked that, you might also like:

    Advanced Gardening Course To Accelerate Your Food Production…

    Survival Medicine & Wilderness Survival…

    Survival Techniques From Long Ago, Re-purposed For The Modern Era…

  • DIY Apple Cider Vinegar

    DIY Apple Cider Vinegar

    Apple cider vinegar is one of the most popular and useful natural health food items you can find. It’s incredibly versatile, and can be used internally for a plethora of maladies, as a cosmetic and topical remedy and also to preserve food and sanitize the home.

    But did you know you can make your own right on your countertop? Homemade apple cider vinegar is not only incredibly economical, it is delicious and requires nothing special to make. Odds are if you’re already an experienced homesteader or canner, you have what you need to make delicious apple cider vinegar right at home. A great staple for any homestead.

    Needed Items and Ingredients:

    • 1 sterilized large-mouth quart jar
    • Cheesecloth or paper towel to cover
    • Rubber band
    • 2-3 medium apples, peeled, chopped and cored
    • 3 tbs raw sugar
    • Filtered water

    Instructions:

    1. Take the apples and stuff them into the sterilized jar.
    2. Mix the sugar with about 1 cup filtered water, then pour the mixture over the apples
    3. Pour more water into the jar until the apples are completely covered. You might need a sterile rock or fermenting weight to keep the apples submerged in the liquid
    4. Cover the top of the jar with the cheesecloth, paper towel, or other breathable fabric, and secure tightly with the rubber band
    5. Let sit in a warm, dark place for 2-3 weeks. Often a cupboard or top shelf of a pantry will do just fine
    6. After 2-3 weeks, strain out the apple pieces and return the liquid to the jar. Secure with fresh cheesecloth and a rubber band and return to your dark place
    7. Let sit for another 3-4 weeks, stirring every few days
    8. Once the apple cider vinegar reaches the acidity you like, it’s ready to use! Simply cover with the jar’s original lid or transfer to any container you can seal and enjoy!

    [Free Recipe Book]  You don’t have to choke down your amazing homemade Apple Cider Vinegar…Try these delicious recipes HERE>>>

  • Caring For Cast Iron

    Caring For Cast Iron

    Cast iron sometimes gets a bad reputation as hard to care for. If you’ve never used a cast iron skillet before, rest assured: once you’ve done a few simple first maintenance steps, cast iron is even easier than caring for a special nonstick coated skillet.castiron

    Seasoning

    Before you use your cast iron skillet for the first time, it needs to be seasoned. Seasoning is a process of creating a natural non-stick surface, and it’s very easy. All you have to do is cover the entire skillet (including the handle and the outside) with cooking oil, and bake it for an hour at 350 degrees. It probably won’t emerge with the shiny look that it will develop later, but that’s okay. Simply dry it with a paper towel when it cools, and you’re ready to go.

    As you use your cast iron skillet, you can season it as often as you like. If you notice that food has begun to stick more often, you see rust on your skillet, or your skillet is showing some scratches in the seasoned surface, scrub the old seasoning off with steel wool and follow the same process to re-season.

    Daily Care

    You should not use soap on a cast iron skillet, and it’s not best to set it to “soak”. Instead, it’s best to rinse a cast iron skillet or pot with hot water right after cooking. In most cases, this is all you need. Wipe dry with a paper towel and you’re done. However, if there is some burnt food stuck to the skillet, you may need to use a bit of coarse salt or a non-metal brush to scrub it away.

    Storing your cast iron is very easy. If you want to keep dust off the surface, use a paper towel to cover it; but otherwise, you don’t need anything to protect your skillet from bumps or scratches. The seasoning is durable enough to withstand being stacked.

    If you enjoyed this you might also like:

    Click Here To Get The Best Survival Medical Course…

    Check Out These Mind Blowing Survival Skills…