Page 4 of 6
1 2 3 4 5 6
organic gardening – Page 4 – Homesteader Depot

Tag: organic gardening

  • Demonstration of Proper Tomato Pruning

    Demonstration of Proper Tomato Pruning

    Pruning is a great way to control the growth of your plants.  It can help you increase yield and reduce disease by focusing your plant’s growth.  One crop that pruning is a must for, but often gets neglected is tomatoes.  Tomatoes can be difficult to prune because it is not always visually obvious which portions should be targeted for pruning and which should be left alone.  This video does a great job of show, and explaining just what to remove and why, complete with close ups.


    If you liked this, you might also enjoy…

    Natural Healing Techniques Doctors Don’t Want You to Know…

    The Weight-Reducing Magic of Yoga…

    The Ultimate Woodworking Course..

  • Wood Ash for the Garden

    Wood Ash for the Garden


    Any way that costs can be cut while increasing productivity and health in the garden is a good thing.  One way to do just that is to use wood ash in your garden as a fertilizer.  Not only does wood ash contain calcium and potassium, along with other nutrients, but an easy-to-obtain byproduct of heating your home with a fireplace, wood stove, or a bonfire to get rid of dead branches and yard waste.  All that being said, don’t run out and smother your garden in a layer of ashes, it won’t have the desired result.

    Here are a few thing to keep in mind when using wood ash as a fertilizer:


    Keep it Dry

    Some of the nutrients that you are looking for in wood ash are in water-soluble forms.  This makes them great for adding to the top of soil since the nutrients will be brought down the root zone naturally by watering or the rain.  But, if you leave it out where it can get wet, like in an uncovered fire pit that got rained on, then likely much of what you want in your garden is already gone

    Check the pH

    Since wood ash is alkaline you won’t want to add it to soil that is already alkaline or on acid loving crops like blueberries.  If you chose to add it to your compost pile it should be added little by little and not in a thick layer, that being said it can counteract the acid in material like citrus peels, so if you are composting acidic material you may want to add extra wood ash.

    Dusting

    One of the best ways to use wood ash it to regularly dust your garden soil with it.  Allowing it all to go away naturally before applying more.


    Making use of the material that you already have on hand, and might otherwise through away is a great way to cut garden costs while also increasing health and productivity.

    If you liked this, you might also enjoy…

    Holistic and Natural Healing for Beginners

    The Weight-Reducing Magic of Yoga…

    The Ultimate Woodworking Course...

  • Tips to Help You Improve Your Soil

    Tips to Help You Improve Your Soil

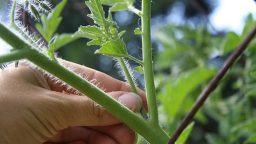
    If you are going to be successful at homesteading, you need to have good soil. There are no two ways around it. However, this doesn’t mean that the soil on your land right now needs to be great. There are some simple things you can do to improve the quality of your soil so you can grow your food, and that’s what we’ll be covering over the course of this post.

    Composting

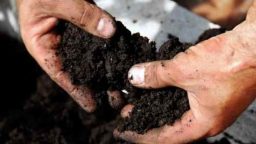
    Take the yard waste and your kitchen waste and create compost. Grass clippings, leaves, vegetable and fruit peels, coffee grounds, eggshells, and the like can make great compost. However, you don’t want to add leftover meat, human waste, or the waste of any animal that eats meat for that matter. Making your own compost pile is easy, and it can make a difference in your soil, as it adds so many nutrients to it.

    Manure

    Another good option to consider is manure, but you need to be careful. It should be added to the compost pile, or you should age the manure by letting it sit. Otherwise, it is going to get too hot. If you were to put this onto plants, it would burn them, which is not something you want to happen. If you have fresh manure, add it in the fall after the harvest. This way, it can sit through the winter.

    Many different types of animals’ waste can be used for your manure. Some of the best options include cow, horse, chicken, sheep, and goat. You can even use rabbit pellets, so if you also happen to raise rabbits, that should be a plentiful and free source of manure for you. One of the other benefits of rabbit pellets is the fact that they are a “cold” manure, so you can add them to plants immediately. You can just place the droppings onto the plants and leave them.

    Mulching

    Another fantastic way that you can start to improve the quality of your soil is through mulching. You can use hay or straw for the mulch, but make sure that it is organic and that it hasn’t been treated with any chemicals. You could also use a variety of other materials. Choose something that you have readily available.

    When you add mulch, you can hold moisture in the soil, which can help protect your plants. It can also ensure the plants stay safer during fluctuating temperatures. For example, it can help save some plants from a frost. Like compost, as it breaks down, it will add some more nutrition to the soil.

    Some simple items that you can use for mulch in addition to hay or straw include grass clippings, bark and wood chips, decaying leaves, peat moss, and some of your compost.

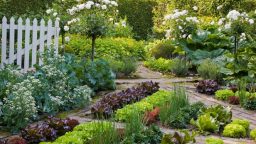
    As you can see, these are some very simple methods you can employ to improve your soil and therefore improve your garden no matter how large or small it might be.

    If you liked this, you might also enjoy…

    Natural Healing Secrets Everyone Needs to Know

    Yoga: There’s a Reason Everyone’s Doing It…

    Woodworking Made Simple...


  • Growing An Edible Garden Landscape

    Growing An Edible Garden Landscape

    Gardening is a hobby that can be enjoyed by everyone. With the numerous types of accessible gardening methods available, physical limitations or mobility concerns should not prohibit you from growing a garden. An online search of photos of accessible gardens that creative individuals have designed will give you some ideas as to how you might want to design your garden. Keep in mind that accessible gardening is just like traditional gardening in that the design you choose and the plants you include can be tailored to your individual preference.

    Raised beds are a popular form of accessible garden. When you choose this method, you can construct the gardens so that they are a convenient height for you. The width of the garden can also be determined in accordance with the range of reach you have. If you have the space available, you can construct numerous raised beds in order to increase the variety and amount of vegetables you grow. Be sure the area between the beds is large enough for a wheelchair, walker or rolling cart if you depend on any of these items. A smooth surface area is essential for easy navigation through your raised beds.

    Garden tables are an ideal method of accessible gardening. They are ideal for anyone using a wheelchair or mobility scooter. Garden tables can be built to fit the space you have available. You can find some helpful information on how to construct a table garden from most cooperative extension offices. Table gardens should allow for at least a 6″ soil depth. Increasing the soil depth will expand the variety of vegetables you can grow in your table garden. A lightweight, organic potting mix is recommended for table gardens. This type of accessible garden will require more frequent watering than a traditional garden or a raised bed garden. When you plan the layout for individual plants, be sure you put plants such as beans, peas, squash, cucumbers and anything other type of vine along the edge of a raised bed or table garden. This will make harvesting the vegetables much easier and prevent them for becoming entwined with the other plants.

    Planter boxes and standing planters are an ideal way to create an accessible garden. You can create an individual garden design using boxes, planters and trellises by looking around the Internet and at local stores.  The shape of the boxes allow for easy reach and easy navigation around the planters. This type of garden is a great choice if your only available space is a patio or deck.

    An accessible garden is quite similar to the very popular container gardens that are increasingly trendy. To assure the greatest success with the plants you include in your garden, you can utilize the list of recommended vegetable varieties for container gardens found at http://www.highmowingseeds.com/Suggested-Varieties-For-organic-non-gmo-Vegetable-Container-Gardening.html. Don’t hesitate to try new vegetables in your garden. Gardening should not simply be a means of providing food for you and your family; it should also be an enjoyable and personally rewarding hobby.


    If you liked this, you might also enjoy…

    Ancient Healing Secrets You Can Learn at Home…

    Yoga and Weight Loss: What You Need to Know

    How to Become a Master Woodworker..

  • Watering Wisely to Conserve Water, Time, and Energy

    Watering Wisely to Conserve Water, Time, and Energy

    Whether you get the water for your garden from rain collection or from the tap, you are going to want to conserve this precious resource as much as possible.  You don’t want to run out, and you don’t want to add unnecessary cost to your garden.  You also don’t want to have to take the time and energy to water your garden inefficiently since you have enough to do already.  Here are a few tips on how to get the most of your water by watering wisely.


    Check First

    Check the soil to see if watering is necessary before you water.  Just because the soil on the surface looks dry doesn’t mean that your plants don’t have access to water underneath.  Poke your pointer finger into the soil, if you can’t feel moisture at this depth then it’s time to soak your soil.

    Soak Don’t Spray

    When you are watering your plants don’t spray them with a blast of water that could disturb soil, damage leaves, and even kill seedlings.  Soak the soil around the plants thoroughly with a gentle mist from a hose, or use a watering can that allows for a slow fine flow instead of a flood.

    Add Organic Material

    Organic material improves soil structure, aids in water retention, and adds food for beneficial organisms.  When your beds or rows are inactive, dig in material like horse manure.  This will feed worms and act like a sponge when watered.  You don’t want to add manure under the soil surface in an active bed.

    Mulch

    Mulching will provide a layer of insulation against evaporation while also adding organic material to the soil surface that worms will feed on and then carry into the soil naturally.  A heavy layer of good mulch like straw or wood chips will greatly increase the amount of time between necessary watering.

    Timing

    Don’t water during the day, especially in the early afternoon.  Evaporation rates are highest during this time.  Watering in the early evening when the air has cooled and the sun is going down will allow the water the greatest amount of time to soak in.


    I hope these tips help you save resources and time in your garden.


    If you liked this, you might also enjoy…

    Natural Healing Secrets Everyone Needs to Know

    Yoga: There’s a Reason Everyone’s Doing It…

    Woodworking Made Simple...

  • Horizontal Pumpkin Trellis

    Horizontal Pumpkin Trellis

    Pumpkins are not the first crop most people think of when they think of trellising, and horizontal is not the orientation most think of when they think of trellising. But having a successful garden on the cheap requires thinking outside the box. Using a trellis to grow crops like pumpkins that would sprawl and crawl all over if left to themselves will save tons of space. Likewise, orientating your trellis horizontally can also save space. That might seem counterintuitive, but if your trellis is vertical it will shade out the area behind it. Depending on your space and garden design that could make a big difference. With this design you can grow a pumpkin vine in an area as small as 4”x4”.

    • First, determine which side of your garden the sun is primarily on. For most of us in the northern hemisphere this will be on the southern side.
    • Next, determine which bed you will plant your pumpkins in. If all of your beds are uniform in dimension this won’t be a big deal.
    • Make a wooden frame that is just large enough to be placed over the bed easily.
    • Attach vertical posts to the frame at the corners. Make the two posts that are on the sunny side shorter than the posts that are on the other side. The shorter post should be about 12” above the level of the bed, and the taller post can be about 12” taller than the short posts. This doesn’t need to be exact. It can be adjusted to accommodate your available material, and if shading out is an issue you can make the taller posts even longer, but the longer they get the closer to vertical the trellis will get and the more shade it will cast.
    • Reinforce the posts with angled braces or attach them to the bed if they are close enough to add strength.
    • Connect the top of the posts with a frame as well.
    • Lay hog wire across the top frame and attach it to the frame with zip ties, or nails driven half way and then bent over. Don’t use wire that has small openings.
    • Attach hemp or cotton lines to the short side, about 6” apart and long enough to touch the soil.
    • Plant the pumpkin seeds or starts where they can climb the lines. Keep only the strongest vine. You may need to use garden tape to keep the vine on the line since pumpkins don’t climb as well as other vines.
    • When it reaches the top, train it back and forth starting at the lowest portion and going up one section at a time only after the lowest section is full.
    • Hang fruit beneath the wire, suspended from the wire with an old t-shirt. If the fruit is large the section of wire it is on may need to be vertically reinforced with a stick or two.
    This design is meant to act like a solar panel. It should maximize the amount of sun available, while taking up the least amount of space. It also helps reduce pests and rot on the fruit by keeping it off the ground.

    If you liked this, you might also enjoy…

    Learn to Heal and Treat Illnesses Naturally…

    An Ancient Secret to Slimmer Waists…

    Learn to be a Master Carpenter at Home...

  • DIY Flow Through Worm Bin

    DIY Flow Through Worm Bin


    Worm castings are a great natural fertilizer that not only add plant-available nutrients, but also increase long-term soil structure and health.  But at over $20 a cubic foot, worm castings can be expensive to add to your garden.  So don’t buy them, make your own flow through worm bin and easily harvest your own worm castings.  This video shows the materials and tools necessary and gives simple-to-follow instructions on how to go about building your own flow through worm bin.  It even shows some examples of bins of different sizes made from different materials to give you an idea of what else you can do to better suit your needs and use what you have available to you to cut cost while still getting great results from your garden.


    If you liked this, you might also enjoy…

    Learn to Heal and Treat Illnesses Naturally…

    An Ancient Secret to Slimmer Waists…

    Learn to be a Master Carpenter at Home...

  • No Thin Method for Planting Carrots

    No Thin Method for Planting Carrots

    Anyone who has grown carrots knows that many of the carrots are lost to thinning.  With seeds as tiny as carrot seeds are, it is difficult to handle them and space them out when planting.  Even if great care is taken not to plant too many in one area, you might wait only to find large spaces in your row with no carrot sprouts at all.  If they do sprout close together they are difficult to thin out without removing and killing more than you need to in order to thin.  But, there is a method to plant carrots that, if done correctly, doesn’t require thinning.


    • Get a container like a clean glass jar for each variety of carrot that you will be planting. Don’t mix varieties since they may germinate at different times.
    • Pour some seeds into each container, you don’t need to pour in the whole packet, one of the points of this method is to conserve seeds.
    • Add enough water to thoroughly soak the seeds, but not enough so much that they are floating around in inches of water.
    • Cover with the lid on loosely and place in a warm area that doesn’t get direct sunlight. Check the containers daily, opening them and allowing them to vent.  In just a few days you should see a root begin to sprout out.  Look closely because they will be small and you want to get them when they have just started to appear.
    • When the seeds have sprouted you will need to make a planting gel for them, the purpose of the gel is to keep space between the seeds. To make the gel simply heat cornstarch in water until it takes on a gelatinous consistency, then allow it to cool down so that it does not kill the seeds.
    • Once it has cooled, add a little water to the sprouted seeds so that you can swirl it around, collecting all the seeds, and then pour it into the gel.
    • Being very careful so that you do not damage the sprouted root (this is also why it is important to catch them before they grow too long) mix the seeds throughout the gel.
    • Pour the gel with the sprouts into a plastic bag and cut one bottom corner off. This will allow you to use the bag like a pastry chef and spread out the gel in a shallow trench (1/2 inch or less).
    • Cover the gel containing the sprouts lightly with soil and water carefully with a fine light spray or mist.


    I hope this method helps to save you money on seeds and delivers a great harvest for you.

    If you liked this, you might also enjoy…

    Learn to Heal and Treat Illnesses Naturally…

    An Ancient Secret to Slimmer Waists…

    Learn to be a Master Carpenter at Home...