Tag: recipe

  • [DIY] Simple Venison Jerky Recipe

    [DIY] Simple Venison Jerky Recipe

    When you’re stockpiling for an emergency, some foods are easier to preserve than others. Vegetables and fruits can be canned or dried.

    But what do you do to preserve meat? Freezing is effective for regular use, but it won’t help you if there’s no power. One of the best and most effective ways to preserve meat is by making jerky.

    Jerky is easy to make, healthy to eat and has a long shelf life. Making it can extend the life of venison and provide you with a healthy, protein-packed snack to get you through hard times.


    Preparing to Make Jerky

    Let’s talk first about what you need to make deer jerky. There are a few basic non-food requirements that you need to have in place.

    1. A freezer to freeze the meat before slicing it
    2. A food dehydrator or an oven with a low setting (150 degrees Fahrenheit)
    3. A very sharp chef’s knife or a meat slicer

    That’s it. Some people like to smoke their jerky, so if you have a smoker, you may want to consider that since it can add a nice depth of flavor to the finished product. However, you don’t need to smoke it. Our recipe, as you’ll see, includes a dash of liquid smoke to add a smoky finish.


    Our Favorite Deer Jerky Recipe

    Now we’re ready to share our favorite deer jerky recipe with you. We’ll walk you through it. Once you’ve made your first batch, you won’t want to go back to store-bought jerky.

    Here’s what you’ll need:

    • 1 pound of venison with the fat and skin removed
    • ½ c. soy sauce or tamari
    • 1 tablespoon Worcestershire sauce
    • 1 tablespoon steak sauce
    • 1 teaspoon liquid smoke
    • ½ teaspoon garlic powder
    • ½ teaspoon onion powder
    • ½ teaspoon sea salt
    • ½ teaspoon ground white or black pepper

    Here are the steps to follow to make the jerky.

    1. Put the venison in the freezer. Partially frozen meat is easier to slice thin than raw meat.
    2. When the venison is ready, use a very sharp knife or meat slicer to cut it into ¼-inch thick slices.
    3. In a large bowl, put the soy sauce, Worcestershire sauce, steak sauce, liquid smoke, and spices, and whisk to combine.
    4. Add the venison slices and stir to make sure all slices are coated with the marinade.
    5. Place the bowl in the refrigerator and allow it to marinate a minimum of four hours. You can leave it overnight for a stronger flavor.

    When the slices have finished marinating, it’s time to cook them. The method and time will vary depending on whether you’re using a dehydrator or your oven.

    If you’re using a dehydrator, fill the trays making sure to lay the meat down in a single layer with no overlap. The usual setting is about 155 degrees, and it should take four or five hours.

    To make jerky in an oven, lay the venison in a single layer on cookie sheets. Preheat the oven to 150 degrees Fahrenheit and put the jerky in. It will take eight to ten hours.

    In either case, you’ll know that the jerky is done when you can pick up a slice of meat and bend it without breaking it. Store the jerky in plastic bags or jars at room temperature or in the refrigerator to extend its shelf life.


    Flavor Variations

    Once you’ve made your first batch, you can experiment with new flavor combinations. Adding some fresh ginger to the marinade will give your jerky a spicy kick. If you want a little sweetness, try adding some brown sugar. Venison and apples are a classic combination, so you can try substituting ¼ cup of organic apple cider vinegar for the soy sauce.

    Store-bought jerky simply can’t compare to homemade. We hope this recipe inspires you to give it a try.

    Do you have a favorite jerky recipe or ingredient? Tell us in the comments!


    With over 1000 easy-to-prepare Paleo recipes and 10 week meal plan, you can stop stressing about your food, and start enjoying the healthy energetic body, weight loss, mental sharpness, and positive attitude you gain from eating only wholesome, natural ingredients that truly nourish.  <<<Check out the Recipes HERE>>>

  • Simplest Bulletproof Coffee Recipe

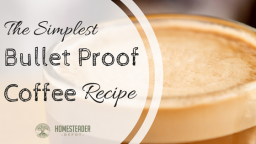
    Simplest Bulletproof Coffee Recipe

    You may have heard of bulletproof coffee, which is gaining massive popularity among foodies everywhere. It is an aspect of the bulletproof diet, a book and diet plan designed by a man named Dave Asprey, that focuses on lots of good fat, moderate protein, and low carbohydrates.

    Healthy fats are making a huge comeback, after decades of “low-fat”  being considered healthy, nutritionists have changed their tune on saturated fats, which they now say make up an important part of a healthy diet.

    And bulletproof coffee is a great way to make sure you’re getting healthy fats, and make your morning coffee smooth and delicious without unhealthy creamers.

    It’s very simple to make, and you’re sure to get hooked!

    The purist version requires a special kind of coffee, and a special kind of oil called MCT oil, but any coconut oil will do, as they count as MCT oil. Organic coffee is always much better for you than non-organic, since conventional coffee crops are usually heavily sprayed with pesticides. Organic coconut oil is preferable as well. And, you will definitely want to use butter from grass fed cows. Pasteurized dairy is a much healthier source of fat, as grass is what cows are meant to eat. It also ensures they are much healthier, meaning higher-quality butter.

    And now, without further ado, here’s the recipe:

    Ingredients: 

    • Organic coffee of choice
    • Grass-fed butter
    • Coconut oil or other MCT oil

    Directions: 

    1. Brew your coffee as you normally would.
    2. When you have a fresh cup of coffee, when it is still very hot, add 1/2 tbs each of coconut oil and butter.
    3. Put the coffee with oil and butter in your blender, and blend on high for a few minutes, until it is nicely frothy.
    4. Pour back into your mug, and enjoy!

    Now, keep in mind, this will have about 400 calories in a single cup, which is a lot, so if you’re counting calories, make sure to keep track of that. I usually find that with a few hard boiled eggs, this makes a very satisfying breakfast that gives me energy throughout the day!

    If you enjoyed this, you might also like….

    Do You Have What You Need to Hold Down the Fort?

    Natural Healing Secrets You Need to Know…

    Effective Primal Diet Hacks…

  • Genius Ways to Use Lard

    Genius Ways to Use Lard

    Lard is something many of us have considered unhealthy for years, but it’s making a comeback as nutritionists reveal the healthy, complex fats in  lard are actually pretty good for you! It’s way better for you than vegetable or seed oils, and definitely better than margarine or imitation butter.

    If you fry bacon at all, you definitely want to collect the fat that builds up in the pan and keep it for cooking! I keep a small jar in my fridge and use it as I would oil or butter all the time.

    But did you know you can render it on your stove just like you would tallow? It can be used in so many different ways and, if you’re lucky enough to find a butcher that will give pork fat away, you can do it entirely for free!

    Here are just a few examples of the many ways in which you can use lard:

    Seasoning cast iron skillet

    This is my personal favorite. Nothing seasons my cast iron like lard, and it makes them truly non-stick. I don’t even have to use water to clean them out when they’re regularly seasoned with lard! Simply rub on the warm, dry pan after washing and the next time you use it, you’ll probably just have to wipe them out with a cloth and a little  more lard!

    Cooking

    Use lard as a base to fry in, as you would any other cooking oil. With enough lard, you can deep fry, and nothing is quite as crisp or perfectly fried as when it’s fried in lard, trust me.

    Baking

    Lard makes a great fat for things like biscuits, breads, or tortillas. Simply use in the place of butter or oil for a smooth, buttery texture that is to die for!

    Candle making

    Lard actually makes a great base for candles! There are many different recipes out there, and while they definitely don’t have a fatty smell like you’d expect, you can still scent them however you want using essential oils. These make a great gift or emergency candle stockpile.

    Soap making

    If you’ve seen ‘Fight Club’, you’ll remember that animal fat is used as a base for soap, and lard makes a great one. It’s wonderfully moisturizing, and again, if you can get your pork fat for free and render your own lard, it serves as a very frugal base for soaps.

    If you enjoyed this, you might also like….

    Can You Defend Your Family When SHTF?

    Natural Healing Secrets You Need to Know…

    Effective Primal Diet Hacks…


  • Slow Cooker Coq Au Vin (How to Cook a Rooster)

    Slow Cooker Coq Au Vin (How to Cook a Rooster)

    When it comes time to butcher some roosters to reduce their numbers in your flock, you might find them quite tough and difficult to butcher. Roosters make for particularly tough meat, and need to be cooked properly in order to enjoy them, but when you do, they can provide a delicious and rich flavor that will make you glad you ever had roosters.

    This recipe is loosely based on Julia Child’s Coq au Vin recipe, which you can check out and follow more closely if you like, but of course most Coq au Vin recipes you will find use store-bought chicken parts, as the majority of city dwellers don’t have access to country roosters!

    You can easily adjust and adapt this as you like, but the trick is the slow cooking process and the wine, which will soften and bring out the best flavor of the rooster.

    Ingredients: 

    1-2 roosters, plucked and butchered

    1-2 bottles of red wine

    3-4 cups chicken stock or broth

    1-2 onions or shallots

    thyme

    Recipe: 

    1. As soon as your rooster is slaughtered and butchered, place the pieces in a bowl or tupperware, pour half the wine over it, enough to thoroughly soak the rooster (and ideally immerse it, but of course wine is expensive). Let soak overnight, up to 24 hours.
    2. Once you are ready to cook, caramelize your onions or shallots in a skillet and place in your slow cooker. Set aside .
    3. In the same skillet, using more butter or oil, gently brown your rooster pieces on all sides.
    4. Place the rooster pieces in the slow cooker on top of the onions and sprinkle with thyme, salt and pepper
    5. Cover the rooster pieces with the remaining wine and chicken stock.
    6. Cook on low for 6-8 hours, checking regularly to see how tender the rooster meat has become. Once it is tender to your liking, it’s done.

    This is a great way to prepare several roosters at once, if you’ve got small roosters and would like to use the meat in other dishes, but it can be served as is as well, with a side of roasted potatoes and a simple salad perhaps. Enjoy!

    If you liked this, you might also enjoy…

    Natural Healing Techniques Doctors Don’t Want You to Know…

    The Weight-Reducing Magic of Yoga…

    The Ultimate Woodworking Course..

  • DIY Pumpkin Spice-From Your Own Garden!

    DIY Pumpkin Spice-From Your Own Garden!

    Everyone goes nuts this time of year for Starbucks’ famous pumpkin spice lattes, and pumpkin spice products in general are very popular.

    If you’re a homesteader, however, you’re probably more preoccupied with what to do with all your pumpkin! Pumpkin vines can be very productive and you end up with more pumpkin than you know what to do with.

    One great way to use up spare pumpkin is by making your own pumpkin spice syrup, which is the base for pumpkin spice lattes and other yummy pumpkin spice goodies (here’s the recipe for the latte itself if you’re interested)

    What you need:

    • Raw pumpkin, cut in half
    • 1 tbs pumpkin pie spice (how to make your own)
    • 2/3 cup brown sugar
    • 1/2 tsp vanilla extract

    Recipe:

    1. Scrape the seeds out of the halved pumpkin and put on a cookie sheet in a preheated 350 degree oven for 30 minutes.
    2. Remove from the oven, let cool slightly, and scrape the pumpkin out of the skin and into a blender. Puree.
    3. Set aside all but 1/3 cup pumpkin puree for other pumpkin recipes. You can let cool completely and refrigerate or freeze for soups, pie, muffins, etc.
    4. Put the 1/3 cup of puree in a medium saucepan with the sugar, water and spices. Bring to a boil, stirring occasionally, and reduce heat to medium low and simmer for 3 minutes until slightly thickened. Remove from heat, let cool.
    5. Keep in a sealed, refrigerated container for up to a week.

    You can use this syrup as you would regular syrup, over pancakes, in muffins or cookies, or raw vegan deserts. And of course, you can use as the base for your own pumpkin spice latte. You can even play around and make a pumpkin spice tea latte or iced pumpkin spice latte!

    Have fun and happy fall!

    If you like this, you might also like:

    Advanced Gardening Course To Accelerate Your Food Production…

    Survival Medicine & Wilderness Survival…

    Survival Techniques From Long Ago, Re-purposed For The Modern Era…

  • Homemade Apple Cider

    Homemade Apple Cider

    Fall is right around the corner! And while pumpkin spice has gotten very popular in recent years, a timeless fall classic is apple cider. Hot apple cider has long been a staple of fall and the delicious combination of apples and warm spices couldn’t be more classic for the season.

    And it’s very easy to make at home for yourself! Not only is it a very simple process, but the smell of apple cider mulling on the stove will fill your house with the delightful aroma of fall. It’s great to prepare a big batch for a gathering or holiday dinner, there’s nothing quite as classic as a warm pot of apple cider to warm your guests up after their journey.

    What you need:

    • 10-12 apples, washed and quartered
    • 2 oranges, washed and quartered
    • 4 cinnamon sticks
    • 2 tsp ground nutmeg
    • 1 tbs whole cloves or 1 tsp ground cloves
    • 1 gallon of filtered water
    • 1/2 cup sugar, brown sugar, or sweetener of choice

    Instructions: 

    1. Put all the ingredients in a large stock pot, stir to get the spices evenly distributed, and bring to a simmer, stirring occasionally.
    2. Reduce the heat to low, cover, and let simmer for 2 hours
    3. Once the apples have started to soften, gently break apart with a fork and mash gently
    4. After three hours, remove from heat and allow to cool slightly. Then strain through cheesecloth or a fine-mesh strainer into the container you would like to serve from. This can be another pot, a punch bowl, or a pitcher. To get the most flavor out of the fruit, you can try to squeeze the apples and oranges in the strainer or cheesecloth.
    5. Once strained, stir in your sweetener until combined, to taste.
    6. Serve hot and enjoy!

    If you like this, you might also like:

    Advanced Gardening Course To Accelerate Your Food Production…

    Survival Medicine & Wilderness Survival…

    Survival Techniques From Long Ago, Re-purposed For The Modern Era…