Page 2 of 4
1 2 3 4
recipes – Page 2 – Homesteader Depot

Tag: recipes

  • How To Make Caramelized Onions in a Slow Cooker

    How To Make Caramelized Onions in a Slow Cooker

    I don’t know about you, but I love caramelized onions. What I don’t love is spending half an hour in front of my stove, stirring the onions and waiting for them to get to just the right degree of caramelized.

    Caramelized onions are a delicious addition to a wide variety of dishes, from soups to salads to pork chops and beyond. They can make a very simple, dressed-down seem like it’s straight out of a fancy French restaurant. Of course, the fancy part of it is probably due to the careful process of making caramelized onions, which many home cooks won’t feel they have the time for.

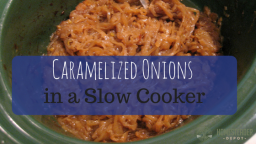
    This is why I was very thrilled recently to find this hack for making caramelized onions in a slow cook cooker.

    Not only does is this process a simple, hands-off way to make caramelized onions that doesn’t require constant stirring at the stove, but it can help you make a large batch of caramelized onions to keep in your fridge or freezer for many dishes to come. Not only can you add a lovely bit of gourmet class to each meal, you can do it with very little effort on your part!

    This is a great option for processing onions you find on sale, or a large harvest if you’re lucky enough to grow onions on your homestead.

    Here’s how:

    Ingredients

    1 large bag onions

    1/4 cup butter (1/2 stick typically)

    2 tsb salt

    4 tbs brown sugar

    Directions

    1. Slice your onions into thin rings, as best you can. They don’t have to be perfect.
    2. Place them in the slow cooker and cut the butter up into a few cubes, scattering them around the onions. Throw in the salt and brown sugar and give a good stir.
    3. Put your slow cooker on low.
    4. In about an hour, stir the onions again.
    5. Check the onions every now and then for about 8 hours, stirring when you can.
    6. Once they are brown and golden, you’ve got yourself easy caramelized onions! Let cool to room temperature and pack into bags and jars to refrigerate or freeze.

    How easy was that? I’m getting hungry just thinking of the delicious smell this will fill your kitchen with. Enjoy!

    If you enjoyed this, you might also like….

    Do You Have What You Need to Hold Down the Fort?

    Natural Healing Secrets You Need to Know…

    Effective Primal Diet Hacks…

  • The Easiest Way to Consume More Liver

    The Easiest Way to Consume More Liver

    We have been covering the health benefits of liver recently, including a very delicious way to prepare it that makes it quite enjoyable to incorporate into  your diet. This way to prepare it is liver pate, which is made out of mostly liver and butter. While I certainly find this recipe to be quite delicious and enjoyable, it’s also pretty caloric and rich, and not necessarily what you want to eat on a regular basis.

    There are also many who simply do not find liver pate to be enjoyable, in fact, they find it to be just about as repulsive as plain old liver and onions.

    This is definitely understandable! Liver certainly has a bit of an odd, acquired taste, that is sort of earthy and strong. And sometimes, no amount of butter, bourbon, or seasonings is going to mask this if you already have an aversion to liver itself.

    So, if you really want the amazing health benefits of liver, but don’t feel like having to eat it, there is one simple solution that might be more palatable to you or at least, might make the process of consuming liver a little less unpleasant.

    This is to make your own liver pills. That’s right, you can literally make pills out of liver that you can swallow, which helps you to literally hold your nose and quickly toss some awesome nutrients down the hatch without having to think too long about what you’re actually consuming.

    Here’s how:

    Ingredients

    1 package high-quality, organic, grass-fed chicken or beef liver (and thawed if bought frozen)

    Directions

    1. Read through all the directions first, so you’re sure you have room in your freezer for the liver “pills” and a sharp enough knife to make them.
    2. Rinse your liver in cold water and pat dry.
    3. With a sharp paring knife, slice up your liver into pill-sized pieces. This might take awhile.
    4. Place the liver pieces on a cookie sheet lined with parchment.
    5. Leave in the freezer until frozen solid.
    6. Transfer the frozen “pills” into an airtight container and leave in the freezer for at least 14 days.

    These two weeks of additional freezing will ensure that any pathogens in the liver have been killed, making it safe to consume the “pills” raw. After two weeks, simply swallow one or two with every meal.

    If you enjoyed this, you might also like….

    Can You Defend Your Family When SHTF?

    Natural Healing Secrets You Need to Know…

    Effective Primal Diet Hacks…

  • Soaking and Sprouting Times for Seeds (Infographic)

    Soaking and Sprouting Times for Seeds (Infographic)

    I shared an article last week on sprouting alfalfa, and I did mention that you can use many other kinds of seeds and beans as well, using this method.

    It is definitely true that the basic principle of soaking, draining, and sprouting applies to many seeds and beans, they vary, sometimes quite drastically, in ideal soaking time and the amount of days it takes for them to sprout.

    Here is a great resource from nourishsystem.com for any aspiring sprouters out there. This is a chart that lists many of the popular sprouting seeds, grains, nuts, and beans, and all the information you’ll need to sprout them.

    What is particularly helpful about this chart, that I haven’t seen in other similar infographics, is that it includes the dry amount of seeds you’ll need, and what that will yield in sprouted greens. This is a great resource, so you can measure out exactly what you’d like to use and anticipate how long it will last you once sprouted. I’m definitely keeping this up on my fridge for future sprouting.

    If you enjoyed this, you might also like….

    Can You Defend Your Family When SHTF?

    Natural Healing Secrets You Need to Know…

    Effective Primal Diet Hacks…

  • Delicious Beef Liver Pate Recipe

    Delicious Beef Liver Pate Recipe

    I recently shared a post on the health benefits of liver, and I did promise I’d post a liver pate recipe.

    Liver pate is a great way to eat liver, it’s super delicious and actually very good for you, at least in moderation, as while it includes lots of healthy fats, it’s still pretty caloric.

    It is a classic example of fattening-but-healthy French food, and liver pate from France has gained a worldwide reputation for its decadent flavor.

    And it’s really not too hard to make at home! I chose a very basic recipe that calls for ingredients you already have, nothing too fancy. It calls for beef liver, but you can use chicken if you like, just skip soaking it in meat. While many recipes you may come across call for cognac, this calls for a simple American bourbon, which I figured most people probably already have at home, but you can of course use the classic cognac as well.

    So, get your wine and crackers ready, and let’s get started!

    Ingredients: 

    • 2 lbs beef liver
    • 3 cups whole milk
    • 2 tablespoons olive oil
    • 3/4 cup butter
    • 1 onion, minced
    • 1 tbs thyme
    • 1/2 cup bourbon
    • 1/2 cup heavy cream
    • 1/2 cup coconut oil
    • salt & pepper

    Directions: 

    1. The night before you’d like to prepare the pate, (which should be two nights before you’d like to eat the pate, as after initial preparation it will have to set overnight in the fridge) soak the beef liver in the milk in the fridge, covered in milk.
    2. In the morning, drain the milk and discard.
    3. Rinse the liver with cool liver, and gently dry with paper towels.
    4. Preheat a skillet or grill, and then rub the liver with oil and sprinkle with salt and pepper.
    5. Place the liver on the grill or in the hot skillet, and cook for about five minutes or so on each side, until it is nice and charred but still slightly pink on the inside.
    6. In a saucepan, melt the butter over low heat.
    7. When melted, add the onions and thyme, and cook until softened.
    8. When softened, add the bourbon carefully. It might ignite for a moment, so proceed onto this step at your own risk! It will most likely die down in a moment.
    9. Cook for a few minutes after reducing the heat slightly.
    10. Roughly chop the cooked liver, then add to a food processor with the butter mixture, as well as the rest of the ingredients.
    11. Puree until smooth.
    12. Pack the pate into jars and cover. Let sit in the fridge overnight.

    The pate will keep for up to four days in the fridge, so I usually just put most of it in the freezer in small ramekins and take one out at a time to enjoy in small portions.

    If you enjoyed this, you might also like….

    Do You Have What You Need to Hold Down the Fort?

    Natural Healing Secrets You Need to Know…

    Effective Primal Diet Hacks…

  • The Simplest Way to Peel Garlic. Period. (Video)

    The Simplest Way to Peel Garlic. Period. (Video)

    Garlic is a homestead kitchen staple, but let’s face it; it’s more than a little tedious to fidget with the papery skin of each individual clove.

    Sure, you could smash your garlic with a knife or a mallet and make a big mess. If you have half an hour or more to spare, you could soften the skins in hot water. If you need to peel enough garlic to season food for an army, or make a hefty portion of a natural remedy like honey-infused garlic, you can shake them into oblivion between two bowls, but that’s more trouble than you really need to go through. And let’s not even get started with the weird, artificial flavor of pre-processed garlic available in the store.

    So what’s the homestead cook to do? I shared a video about the bowl method last year, but this video shows an even easier, ridiculously simple kitchen hack for the home chef in a hurry who won’t settle for less than fresh, pungent garlic. It’s as easy as tossing the head of garlic into a jar, closing it, and shaking the living daylights out of it for less than half a minute. After 20 seconds, tip the jar to pour out your fresh peeled garlic cloves.

    Wasn’t that easy?


    If you enjoyed this, you might also like….

    Are We In The End Times?

    Complete Health Transformation Without Drugs or Surgery…

    Having Trouble Sticking With Paleo?

  • How to Grow Alfalfa Sprouts

    How to Grow Alfalfa Sprouts

    Spring will soon be upon us, and you might be eager to get your garden started. If you’re impatient to have fresh greens again, you might want to try sprouting as you wait for the seeds in your garden to germinate.

    Sprouting seeds is a great way to get quick, delicious nutrients you can throw in sandwiches and salads, and they only take a few days to grow right on your countertop. This is also a great option for folks who don’t have room to garden!

    Fresh sprouts are not only delicious and easy, they’re actually really good for you too. They contain a bunch of wonderful nutrients, vitamins, and minerals, including:

    protein and dietary fiber, as well as vitamin K, folate, pantothenic acid, niacin, thiamin, vitamin C, vitamin A, and riboflavin. In terms of minerals, sprouts contain manganese, copper, zinc, magnesium, iron, and calcium.

    • protein
    • dietary fiber
    • vitamin K, C, and A
    • folate
    • pantothenic acid
    • niacin
    • thiamin
    • riboflavin
    • manganese
    • copper
    • zinc
    • magnesium
    • iron
    • calcium

    These are a great way to get fresh, live, essential nutrients that’s both affordable, fresh, and fun to do. Here’s how:

    What you need: 

    1. Organic alfalfa seeds, meant for sprouting
    2. Mason jar
    3. Clean, plastic or wire mesh
    4. Mason jar lid
    5. Sturdy bowl

    Directions: 

    1. First, rinse 2 tbs of your seeds thoroughly under clean, cold water. (Save the rest of them for the next time you want to sprout seeds!)
    2. Put the seeds in your mason jar, and cover with a few cups of water.
    3. Leave overnight.
    4. Drain the seeds in the morning, cover with the mesh and lid, shake the jar thoroughly, and tip over into your bowl, so that excess moisture can drain out.
    5. Do this daily until you have sprouts that are your desired size. This will typically be a few days. There’s no exact size that is perfect, although if they get too big they will start to mold or rot, but you can “harvest” and eat them pretty much from when they sprout little green shoots on.
    6. Once they are sprouted to your liking, cover with the mason jar lid, and keep in the refrigerator.

    Pictured above is seeds that have been sprouted three days; this is a pretty good example of a desirable “length” of the sprouts.

    Once they’re in the fridge, eat them within 3-5 days, and enjoy!

    If you enjoyed this, you might also like….

    Do You Have What You Need to Hold Down the Fort?

    Natural Healing Secrets You Need to Know…

    Effective Primal Diet Hacks…

  • How to Can Butter (Yes, Really!)

    How to Can Butter (Yes, Really!)

    Lately, butter has come raging back as nutritionists reveal it’s actually quite healthy for you. For a few decades, butter was demonized as too fattening and unhealthy, but as vegetable-oil based alternatives were introduced, we saw obesity rates skyrocket. Not sure why no one ever noticed the correlation, but it turns out that in fact, the saturated fats that come from butter are not only better for you, they can ultimately help lose weight when coupled with a balanced diet full of “good” fats, and free of processed foods and sugars.

    I personally love butter, and was really excited to discover that you could, in fact, can it. How cool is that? Not only do you get to enjoy all the deliciously fatty butter you want, (goodbye, margarine!) you can also preserve it at room temperature for your survival or homestead pantry! I’m sold.

    So, here’s how you do it.

    First, you will need: 

    • Butter (you will need roughly 3 jars for each lb of butter)
    • 8-oz canning jars
    • Lids
    • Water bath canning kit
    • Ladle 
    • Canning funnel 

    Directions: 

    1. First, heat your jars up in a 250 degree oven for 20 minutes.
    2. Next, melt your butter in a saucepan over low heat. If you’re using a lot of butter, you might want to do this in batches.
    3. Stir gently to prevent burning, and let the butter melt and simmer a bit until there is a white foam at the top.
    4. As you’re doing this, place your lids in another pot over the stove, cover with water, and bring to a boil. Turn the heat to low to keep them warm while you work.
    5. Once the butter is melted and has a foam lip, ladle it into your jars, using your canning funnel. Leave 3/4″ head space at the top.
    6. Once the butter is poured into the jars, prepared your water bath.
    7. Wipe the jars off with a clean, damp rag to remove any butter that may have spilled on them. They won’t seal if they’re greasy!
    8. Place the lids and rings on the jar, and tighten loosely.
    9. Once the water in your water bath is warm, put the jars in. They need to be in at least 1″ of water.
    10. Once the water boils, set a timer for 10 minutes. When 10 minutes is up, let cool for another 10 minutes.
    11. Now, remove from the bath and place on a towel to dry. As you clean up, try to remember to shake the jars every few minutes, so the butter will remain a uniform consistency.
    12. Once it is cool, it’s ready to store! Keep in a cool, dark place, and enjoy!

    If you enjoyed this, you might also like….

    Are We In The End Times?

    Complete Health Transformation Without Drugs or Surgery…

    Having Trouble Sticking With Paleo?

  • Fermented Probiotic Soda Recipe

    Fermented Probiotic Soda Recipe

    You’ve probably heard of or even made your own probiotic kombucha drink, which has been all the rage among foodies and health-minded folks over the last few years. You can easily find it bottled in many grocery stores and restaurants these days, and you can also pretty easily brew it at home, as an easy, super-healthy, homemade probiotic.

    A lesser-known homemade probiotic drink is those that can be made using a ginger bug, which is a culture grown with ginger and sugar and used as the base for healthy, delicious sodas.

    Back in the day, this is how drinks like ginger ale, cream soda, and root beer were made, and you can make your own at home very easily using this simple recipe.

    How it works is that the ginger and sugar culture together and create a multitude of beneficial, living bacteria that can further ferment the ingredients in whatever soda you choose to make with it. While both the ginger bug and the sodas you can make with it require sugar to be made, the bacteria essentially “eats” the sugar, converting it to beneficial probiotics. So, this is not only a great alternative to the sugar and chemical-packed commercial sodas because it is probiotic, it also has significantly less sugar.

    Note: this is the recipe for the ginger bug, which is similar to the SCOBY of kombucha brewing or sourdough culture to sourdough baking. For the actual sodas, it is a different recipe that simply uses the product of this one. We’ll follow up with some delicious homemade soda recipes using a ginger bug so you can give yours a whirl! 

    How to make a ginger bug: 

    Ingredients:

    • 1-2 fresh ginger roots
    • 1/2 white sugar
    • 2 cups filtered water
    • mason jar
    • paper towel
    • rubber band

    Directions:

    1. Grate or finely chop part of your ginger root until you have about 2-3 tablespoons. Save the rest of the ginger root for upcoming steps.
    2. Put the ginger in your mason jar with an equal amount of sugar (note: using white sugar is crucial).
    3. Cover with 2 cups filtered water.
    4. Stir with a non-metal utensil, and cover with the paper towel and rubber band.
    5. This is where the culturing begins. Let your mixture sit overnight, stirring once or twice, and then the next day, add 1 more tbs of ginger and 1 more tbs of sugar.
    6. The culture is active when bubbles appear on the surface and you hear a distinct “fizz” when you stir it. This might happen the first day and it might happen on the fifth; but once it is ready, use in your soda recipe right away.

    We’ll bring you a recipe for how to use the ginger bug in the next few days, so you can make your own healthy, nutritious, delicious homemade soda.


    If you enjoyed this, you might also like….

    Can You Defend Your Family When SHTF?

    Natural Healing Secrets You Need to Know…

    Effective Primal Diet Hacks…