Tag: seed saving

  • Seed Saving Tips (Infographic)

    Seed Saving Tips (Infographic)

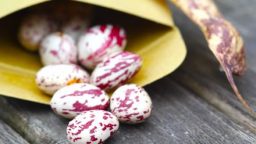
    Seed saving is one of the most important skills to have for self-reliance. If done properly, one packet of seeds could last for generations. One of the biggest reasons to seed save is that if you choose the seeds from a healthy, productive plant, is that you are choosing the plant with the genes that will thrive in your particular environment, and, over time, it will become perfect for your gardening zone. “Heirloom” seeds are seeds that have been collected and re-planted each year by farmers for generations, and ideally you could create your own!

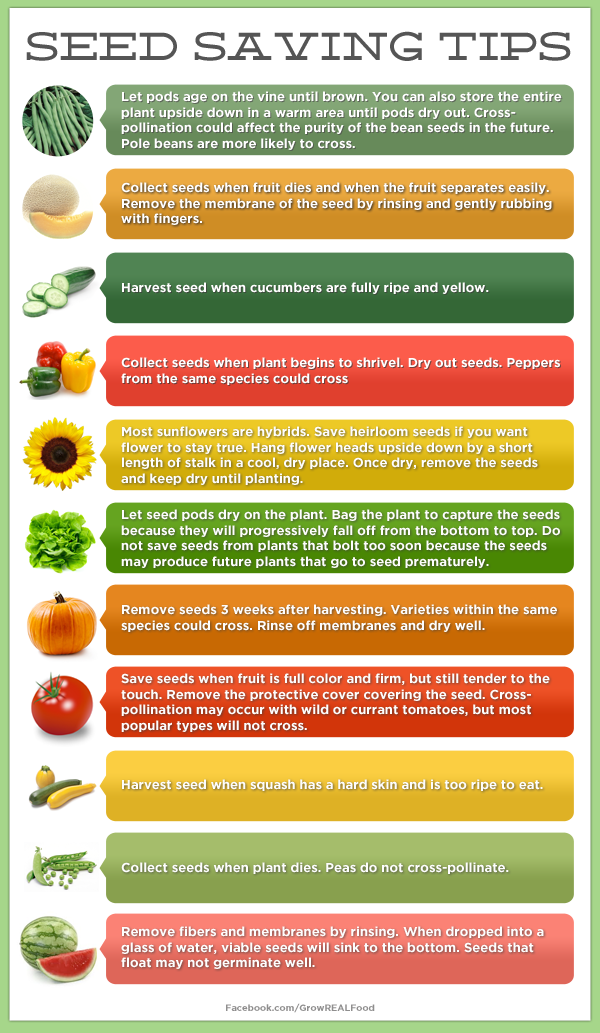
    Not every seed will be easily saved in the same way, so this handy infographic gives some tips for common fruits and vegetables that have relatively easy-to-save seeds. When you plant a crop of any of these plants next year, remember to choose seeds from the healthiest, most prolific plant, that was undisturbed by pests or disease. This plant will have the strongest genes, and genes ideal for surviving and thriving in your climate. Have you ever tried to save your own seeds? Share below!

    If you liked this, you might also enjoy…

    What Are the Signs of the End Times?

    Learn Natural Healing Secrets From the Masters

    Preparing for the Bubble to Burst 


  • Seed Saving Tips

    Seed Saving Tips

    It’s getting to the point that fruiting vegetables will no longer be producing this year, and time to starting thinking about next year’s crop.  Purchasing seeds every year will quickly add up, and many of the crops that are commonly grown produce seeds that can be collected and saved for next year.  Here are some tips for saving money on next year’s garden by collecting seeds this year.


    Bolting Vegetables

    Allow some of your greens to bolt this time of year so that you can get their seeds.  Don’t harvest the seeds to early, wait for the leaves to start to die back.  If the seeds are fluffy, like lettuce seeds, and you see some begin to fall gather the seeds still on the plant in a paper bag and dry them inside for several days before sealing them up.

    Large Hard Seeds

    Crops that produce large, hard seeds like beans or okra should be allowed to dry out on the plant.  The fruit or the pod should turn completely brown and hard like cardboard.  If you flick the fruit or pod and you hear the seeds rattle inside, they are dried and ready to collect.

    Small Flat Seeds

    Crops that produce small, flat seeds in fruit like eggplant and tomatoes should be allowed to ripen fully on the plant and then picked.  The seeds will be difficult to remove by hand and are harder than they look.  You can place the fruit in a blender or food processor and blend it unit it is able to be separated with water.  The seeds that float in the water are no good and can be poured off.  The seeds that sink can be strained out and dried for several days before sealing up for next year.


    At $3 or more per packet, each plant that you can collect seeds from well help you save money that you can invest elsewhere in your garden.  Plants will also become specialized to your area over the years, making them more productive and more resistant to diseases and pests than the plants grown from newly purchased seeds.

    If you liked this, you might also enjoy…

    Natural Healing Techniques Doctors Don’t Want You to Know…

    The Weight-Reducing Magic of Yoga…

    The Ultimate Woodworking Course..


  • Tips for Saving Seeds

    Seed storage seems like it should be simple, but it’s actually more involved than you might think. After all, you don’t want your seeds to germinate while they’re in storage. With proper storage, though, a good collection of heirloom seeds could help you grow a full garden, complete with all of the fruits and vegetables for your cooking needs.

    Put Them in the Fridge and Leave Them There

    First of all, seeds do best when they’re stored in cooler temperatures. 40 degrees – the temperature of most refrigerators – is perfect for keeping seeds fresh and avoiding early germination, mold, and other problems. After you put your seeds in the fridge, though, don’t take them out and move them around a lot. Fluctuating temperatures are bad for seeds, as are freezing temperatures, so keep them away from the freezer.

    Keep Them in the Dark

    Whether or not you choose to keep your seeds in the refrigerator, you should never store them in a fully lit room. Seeds respond to light, so keep them in opaque bags or containers, and store them in a cool, dark place.

    Keep Them Dry

    Moisture can lead to mold and/or germination, so you want to make sure that they stay dry. Keeping them in a mason jar is a good idea, and Mylar bags work really well for this, as well. You can then place these in a paper bag or other opaque container to keep light out. You may even want to store them with some kind of desiccant or oxygen absorber to further dry them out.

    And, if you’re using your seeds in your garden each year, go ahead and rotate them, using the oldest ones first. This is a good way to ensure that you get better crops and that none of your seeds spoil while you’re storing them.

    Sources:
    http://www.backdoorsurvival.com/8-tips-for-storing-seeds-for-the-long-term/
    http://www.rodalesorganiclife.com/garden/10-tips-storing-your-saved-seeds

    If you like this, you might also like:

    Advanced Gardening Course To Accelerate Your Food Production…

    Survival Medicine & Wilderness Survival…

    Survival Techniques From Long Ago, Re-purposed For The Modern Era…