Tag: seeds

  • 13 Useful Ways to Reuse Eggshells

    13 Useful Ways to Reuse Eggshells

    If you raise chickens or simply eat a lot of eggs, you probably produce a lot of egg shells! And simply throwing them in the trash is a huge waste. Egg shells are loaded with beneficial nutrients and properties, and there are lots of ways to reuse them and make the most out of your chickens or grocery budget!

    First off, you need to make sure you store them properly. You might be able to get away with tossing them all in a 5-gallon bucket on your back porch, or, if that attracts pests or mold, you might want to take more precaution. Depending on how you reuse them, you also might want to sanitize them before storing.

    The easiest way to sanitize the egg shells is to rinse them off, the spread them out on a cookie sheet and bake at 350 degrees for about 15 minutes. This will kill any harmful bacteria that might otherwise fester in your eggshell stash.

    Then, simply store in any container of choice, and use as needed!

    Here are some of the many ways you can reuse eggshells around the house:

    Compost

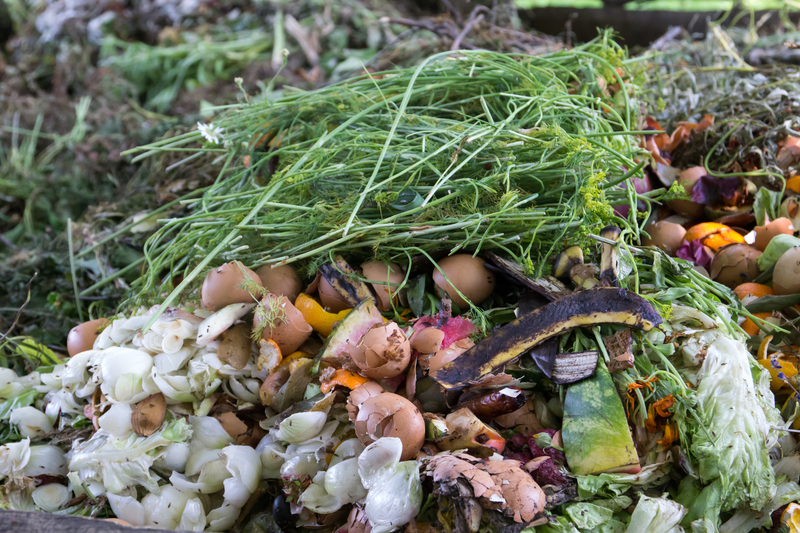
    The easiest way to put your egg shells to good use is to add them to your compost pile! They’re a great addition to any compost operation, and one of the most highly recommended organic materials to start a pile. You can save up a lot to get your pile started, and just toss freshly used shells on your pile as time goes on. If you’ve got a compost pile, you’ve always got something to do with leftover egg shells!

    Garden Fertilizer

    Eggshells are a fantastic garden fertilizer, as they contain up to 97% calcium carbonite, as well as phosphoric acid, nitrogen, and calcium. You can grind them up in a food processor and sprinkle around your plants, or work into the soil of a new garden bed.

    Pest Control

    Eggshells also work as an excellent pest control! Use ground eggshells and sprinkle in a circle around any plants that have been attracting slugs or snails. The sharp fragments of eggshells will be very uninviting to these little pests, and have the added bonus of fertilizing your plants too!

    You can also deter cats (of all things) from using your garden as their own personal litter box by spreading roughly broken up egg shells around the edges. They won’t want to step on those with their delicate paws, trust me!

    Dietary Supplement

    You’ll want to make sure to use properly sanitized egg shells for this, and grind them up very finely. You can use a powerful food processor or a coffee grinder, and then add to gel caps or simply mix into food. This is an excellent source of calcium and other nutrients, and about as whole as it gets.

    Chicken Dietary Supplement

    Your chickens can benefit from those healthy nutrients too! Simply add to their feed for an added calcium boost. Their eggs will be very healthy, because they’ll be supplemented by, well, the exact nutrients they need for healthy shells!
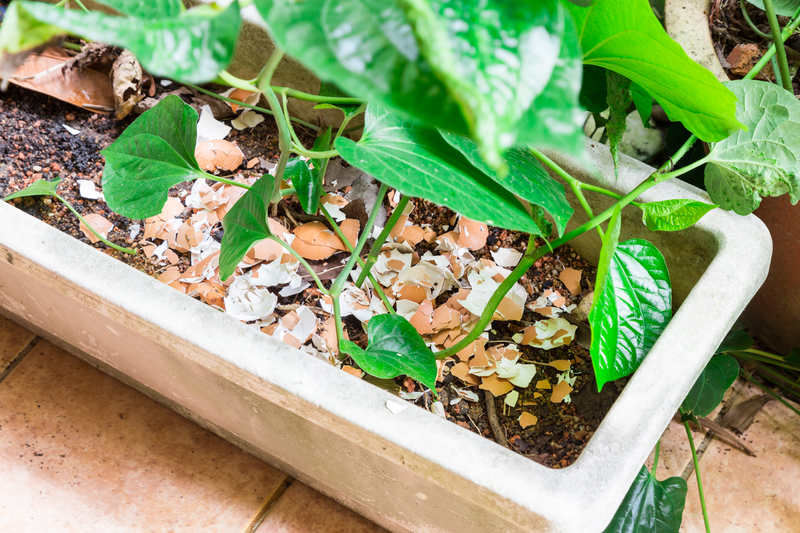
    Seed Starts

    A very fun and clever way to use egg shells is to start seeds in them! Simply fill the shells with potting soil and plant seeds. Once they’re sprouted, all you’ll need to do is to gently crush the egg shell and plant directly in the ground! It will slowly break down as the plant grows, and fertilize the soil as it goes!

    Bird Seed

    Chickens aren’t the only birds who will enjoy your egg shells! If you crush them up and sprinkle them on the ground, you just might attract a few wild birds who will enjoy the nutritious treat.

    Household abrasive

    You can actually use finely ground eggshells as a handy, and totally natural, household abrasive. Add 1 cup finely ground egg shells to baking soda and use as you would Bon Ami for stubborn stains or grime. It’s excellent for cooked on grease and grime.

    Smoother Coffee

    You can actually add egg shells directly to your coffee to help reduce the acidity. Since egg shells are basic, they counteract the otherwise highly acidic coffee. Add a few egg shells in the machine with the ground coffee, or simply toss into your freshly brewed cup (although the former is probably preferable, I’m sure gritty coffee isn’t too appetizing to many people!)

    Natural Remedy

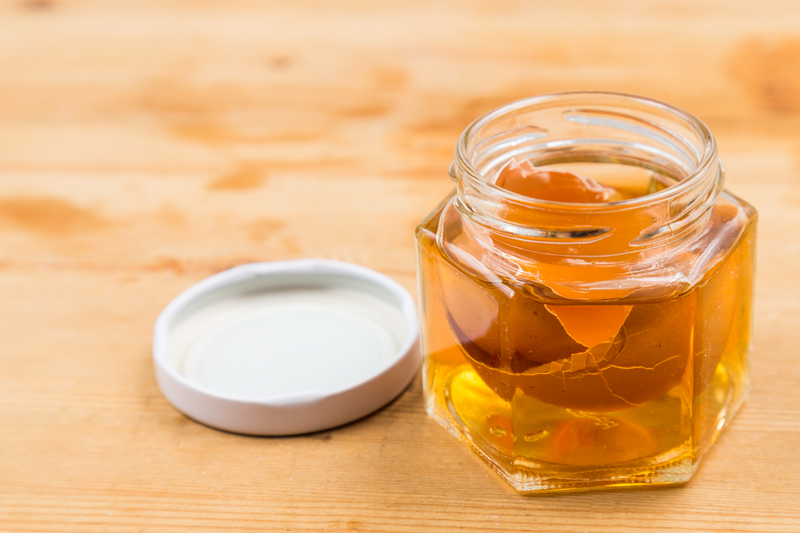
    Ground up eggshells can actually make a wonderful natural remedy for skin irritants. Let soak in some apple cider vinegar for a few days, and apply to minor rashes, hives, or bug bites.

    Face Mask

    You can even use eggshells in an all-natural, skin-firming face mask! Wisk up finely ground eggshells with 1 egg white, and spread on your face. Let dry, and rinse, following with toner and moisturizer.

    Suggested Article: “Apple Cider Vinegar for Beautiful Skin”

    Laundry Whitener

    This might be in the realm of old wives’ tale, but some say that if you toss some egg shells in with your whites, they’ll come out brighter!

    Candle Craft

    You can make adorable votive candles by pouring wax into an eggshell. Get creative with egg dying or colored wax! Very fun and frugal gift.

    Eggs are a fantastic food, and their shells are almost as versatile! Have you tried any of these eggshell hacks before? Let us know in the comments below.

    If you enjoyed this, you might also like….

    Long-Term Survival for Homesteaders…

    Natural Healing Secrets You Need to Know…

    Effective Primal Diet Hacks…


  • How to Harvest Sunflower Seeds (Video)

    How to Harvest Sunflower Seeds (Video)

    As you’re considering what to plant in your garden this year, you might have thought about sunflowers. Sunflowers are a wonderful and fun plant to grow; they are gorgeous in the garden, easy to plant and propagate, and their seeds are also an amazing source of fat, protein and nutrients.

    Growing the same amount of calories and nutrients from other sources isn’t always so simple, so sunflowers are a great option for the beginner food garden. If you’re trying to get your kids more involved in gardening, sunflower is a really fun way to do that. They can easily plant and tend to the sunflowers themselves, and they’ll love to help with the harvesting–and eating–of the nutritious, delicious seeds.

    This video shows how to harvest and process the sunflower seeds. When you’re choosing what to plant, it’s always a good idea to think about the whole process of growing, not just planting and caring for the crop, but harvesting, processing, and storing as well. So if you’re considering growing sunflowers, this is a great video to watch beforehand to see if it’s something that would work for your garden. Enjoy:

    If you liked this, you might also enjoy…

    The Secret to Sustainable Homestead Energy…

    The BEST Diet Hacks for a Primal Lifestyle…

    Defeat Body Pain at Any Age…

  • How to Make Your Own Seed Tape

    How to Make Your Own Seed Tape

    Continuing in the theme of spring from our last few posts, let’s talk about seed tape today, and how easy it is to make your own!

    Seed tape is a great way to easily plant your first spring crops, because you can guarantee proper placement and spreading of the seeds, as well as greatly reduce your time spent planting.

    Not to mention, the tape itself helps germination, by keeping the seeds protected and moist.

    Here is a very simple tutorial for how to make your own seed tape, that will certainly save you time and money. It only takes a few basic supplies, that are usually easy to find at any grocery store. Let’s get started so you can get planting!

    What you need: 

    • White party streamers
    • Measuring tape
    • Thin-tipped marker
    • Seeds you plan on planting
    • 1 tbs cornstarch
    • 1 cup water
    • 1 small paintbrush

    Directions

    1. In a small saucepan, combine the cornstarch with one cup of water, and mix well.
    2. Cook mixture over medium heat, stirring constantly, until it becomes thick and gel-like.
    3. Once it has a gel-like consistency, remove from heat and let cool to room temperature.
    4. As your cornstarch “glue” is cooling, cut your streamers into the length you’d like your rows to be.
    5. Using your marker and ruler, and referring to the seed packets, mark the points on the streamer you’d like to put your seeds. So, for example, if you are planting kale seeds that need to be 2″ apart from each other, make a hash mark on every 2″ on your streamer.
    6. One the glue is cooled, using your paintbrush, dab some on the streamer at each hashmark, and stick the seed to this, completing with another dab of glue if needed. Repeat until you’ve completed the whole length of the streamer.
    7. When you’re finished, paint a thin strip of glue along one side of the streamer, so you can roll it in on itself, making a long tube to plant.
    8. Once the glue has dried completely, it’s ready to be rolled up and stored or planted.

    That’s it! Happy planting 🙂

    If you enjoyed this, you might also like….

    Do You Have What You Need to Hold Down the Fort?

    Natural Healing Secrets You Need to Know…

    Effective Primal Diet Hacks…

  • Soaking and Sprouting Times for Seeds (Infographic)

    Soaking and Sprouting Times for Seeds (Infographic)

    I shared an article last week on sprouting alfalfa, and I did mention that you can use many other kinds of seeds and beans as well, using this method.

    It is definitely true that the basic principle of soaking, draining, and sprouting applies to many seeds and beans, they vary, sometimes quite drastically, in ideal soaking time and the amount of days it takes for them to sprout.

    Here is a great resource from nourishsystem.com for any aspiring sprouters out there. This is a chart that lists many of the popular sprouting seeds, grains, nuts, and beans, and all the information you’ll need to sprout them.

    What is particularly helpful about this chart, that I haven’t seen in other similar infographics, is that it includes the dry amount of seeds you’ll need, and what that will yield in sprouted greens. This is a great resource, so you can measure out exactly what you’d like to use and anticipate how long it will last you once sprouted. I’m definitely keeping this up on my fridge for future sprouting.

    If you enjoyed this, you might also like….

    Can You Defend Your Family When SHTF?

    Natural Healing Secrets You Need to Know…

    Effective Primal Diet Hacks…

  • Tips and Tricks for Starting Seeds

    Tips and Tricks for Starting Seeds

    Winter is on its last legs and it’s time to get ready for this year’s garden! If you’re in a zone with a shorter growing season or just want to stagger your crops for a richer harvest, check out these easy seed starting tricks. We already mentioned the first two in a post on frugal ways to start seeds, so check that post out for a more detailed description of how to do them:

    • Cut and fold paper tubes to use as a biodegradable seedling planter. Use the tubes from toilet paper, paper towels, or wrapping paper.
    • Start your seeds in compostable food waste such as egg shells or citrus rinds. Keep in mind the acidity of the soil when choosing one of these no-waste methods.
    • Save on seeds and grow new plants from cuttings. This works with basil, celery, onions, beets, and many more.
    • Place coffee filters in your seed trays and planters before filling with soil. This helps to keep soil from falling through holes in the vessel and makes removing the root ball for transplanting a breeze!
    • Test the germination rate and viability of saved seeds by sprouting them on a wet paper towel. Larger seeds can be soaked overnight, rinsed, and drained. Plant those that sprout immediately!
    • Save popsicle sticks to label seedlings. Unless you want a mystery garden, use these handy little markers!
    • Use spices as a natural antifungal to prevent damping off disease.  Cinnamon, turmeric, clove, and mustard applied at sowing and after every other watering will help your seedlings survive!
    • Give your seedlings a nitrogen boost with old coffee or tea. For acid-loving plants, you can water your plants almost every time with leftover coffee or tea. For other plants, just give them a drink once a month.
    • Thin your seedlings! So many people neglect to do this because it seems counterproductive to kill extra seedlings. Still, plant spacing is extremely important and your plants will be healthier with less competition from crowded neighbors. If you hate waste, simply rinse thinned seedlings and add them to a salad!


    Most of us still have several more weeks before we can get in our gardens for a dirt therapy session. Start seeds indoors to get your gardening fix and get a head start on the season!

  • Tips for Saving Money When Purchasing Seeds

    Tips for Saving Money When Purchasing Seeds

    Seeds are an unavoidable cost of starting a garden.  But that doesn’t mean that you shouldn’t show some care when going about getting your seeds.  Purchasing seeds for your garden without using some discretion can cost you.  Here are a few tips on how to save money when purchasing seeds so that you have more money to invest elsewhere in your garden.


    Don’t Buy Package “Deals”

    If you are looking at a seed catalog you are likely to find package “deals” advertised.  Sometimes these are salad greens, medicinal herbs, culinary herbs, or starter packages for new gardeners.  The premise to these “deals” is that it is cheaper to buy them as a package instead of purchasing all the seeds separately.  This is true, but, it’s likely that you don’t want all of the seeds in the first place, that’s why they are included along with the seeds that you do want in order to get them off of their shelves.

    Avoid Novelty Crops

    Don’t buy seeds that are not likely to easily produce useful food or medicine.  Exotic crops are often exotic because they are highly demanding to grow.

    Perennials

    Perennial greens or long lasting fruiting vegetables like eggplant will provide you with much more food per seed or cutting than annuals.  This will cut costs and increase production.

    Avoid Spring Time “Deals”

    Seed companies often promote their products in the early spring.  These seeds are from last season, but they are sold for a premium price.  Buying them earlier and saving them yourself will save you money.  Likewise waiting until later in the year to purchase late season crops will usually save you money.

    Save Your Own

    You should always save seeds from your own crops.  If you have friends that garden as well, ask them what seeds they have and what seeds that would like to get, trade them extra seeds instead of both of you purchasing far more than you need of the same seeds.


    Saving money on seeds will mean that you will have more money to spend elsewhere in your garden, or elsewhere in your life.  Gardens should save you money in long run, but if you aren’t being frugal, then gardening can quickly become expensive.


    If you liked this, you might also enjoy…

    Become A Master Healer With This Revolutionary Course…

    Traditional Hindu Yoga for Weight Loss

    Improve Your Carpentry Skills Quickly and Easily…