Tag: soil quality

  • How to Correct Nitrogen Deficiency in Your Soil

    How to Correct Nitrogen Deficiency in Your Soil

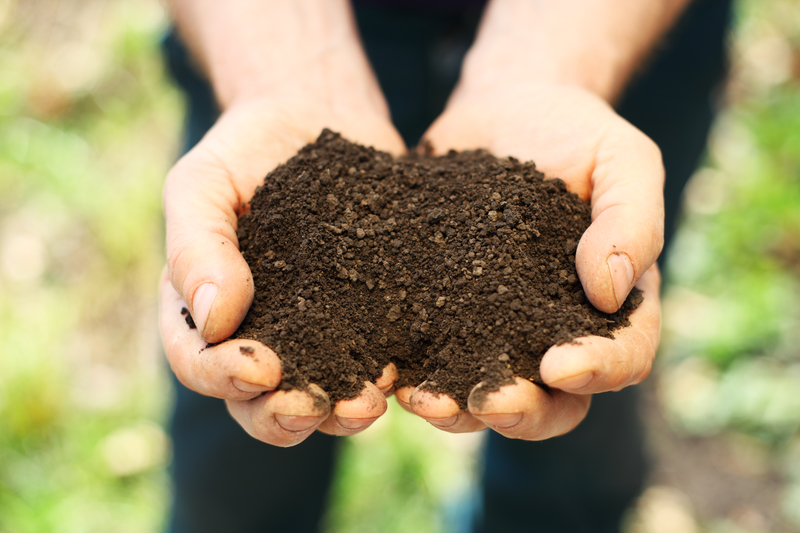
    Did you know that your plants need nitrogen? Obviously, they need four other things as well: soil, air, sunlight, and water, but they also need plenty of nitrogen. This element is found in the air, as well as the soil. The nitrogen in the air doesn’t really help plants at all. In order for them to absorb it, the element must be in their soil. It occurs there naturally, but over time, especially if you use containers or grow bags for your plants, the nitrogen will begin to get used up. The end results are plants that don’t really thrive. They’ll begin to turn yellow and wilt. Thankfully, you can correct this deficiency.

    Know The Signs

    When your plants need more nitrogen, they’ll let you know. They’ll stop growing. Their leaves will begin to wilt and turn yellow. They just won’t look healthy anymore. Although all of those could be signs of other problems, such as not watering, overwatering, or keeping them in containers that are too small, if the plant is otherwise healthy and being taken care of properly, then the main problem is a lack of nitrogen. The sooner you add this element to the soil, the faster your plant will spring back to health.

    Test Your Soil

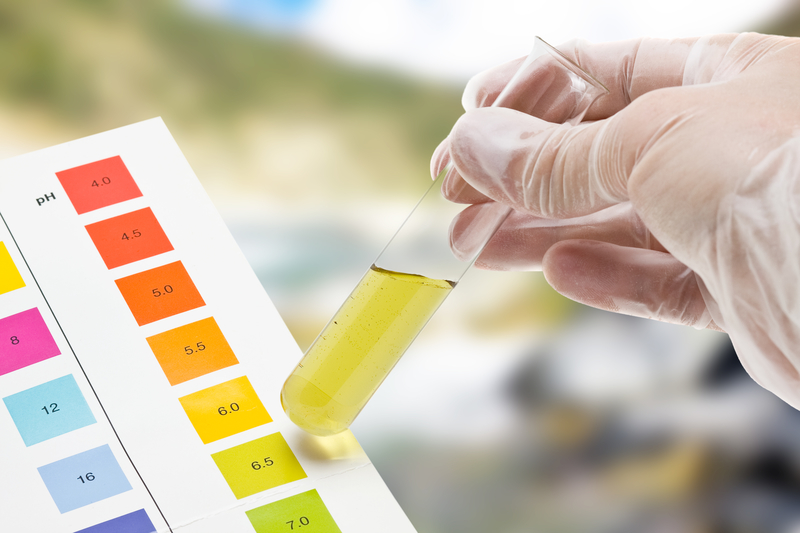
    Another thing that you can – and should – do is test your soil. There are soil testing kits that are commercially available. Some just involve scooping some soil into a tester and following the instructions. They’ll tell you the results right away. However, if you want something a bit a more accurate, you can purchase a kit, scoop up some soil from around your plants, and then send it out to be tested. There’s usually a self-addressed stamped envelope in those kits. It will take a few weeks, but you’ll get the results either emailed to mailed to you. These types of tests are best done early in the growing season. If you wait until your plants are in danger to do them, then it might be too late by the time the results come in.

    This Backyard Miracle Farm Will Change Our World Forever>>>

    Add More Nitrogen Naturally

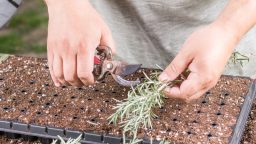
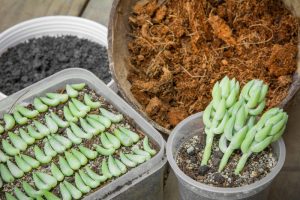
    There are several ways to add nitrogen to your soil without having to resort to the use of chemical fertilizers. For example, you could add some old coffee grounds to the soil. They contain plenty of nitrogen. Although it will take some time for them to produce as much nitrogen as your plants need, it will work. You just have to be patient. In some cases, these slow-release methods are preferred to the quick ones.

    Adding compost to the soil is another option. Compost contains plenty of nitrogen. Like coffee grounds, its effects take time, but it does work, especially if it contains manure. (Yes, it’s a bit smelly, but your plants will really like it.) In addition to those two methods, you can also plant crops like peas and beans that will add nitrogen to the soil. They just naturally provide this element as they grow.

    Use Fertilizer

    Standard (read: chemical) fertilizers tend to have some sort of nitrogen in them. Look for initials NPK on the package, and pay close attention to that first number. It’s the one that tells you just how much nitrogen is present. Balanced fertilizers will help the health of your plants, but those with a large amount of nitrogen in them will provide the right kind of benefits much faster. With that said, the nitrogen will leach away quickly and you’ll end up having to use more sooner rather than later. No matter what, your plants will improve.

  • 4 More Simple Ways to Improve Soil Quality

    4 More Simple Ways to Improve Soil Quality

    Growing your own fruits and vegetables is much easier when you have great soil. If yours is filled with too much clay, is infiltrated by tree and shrub roots, or has nutritional deficiencies, then you won’t be able to produce as many of them as you’d like. Or, you could end up with great quantities of fruits and vegetables, but they won’t be very large. Either way, your plants will struggle. The best thing that you can do in order to reverse this is by improving the overall quality of your soil. There are several useful (and fairly simple) methods to do this. Here they are.

    Use a Cover Crop That Adds Nutrients

    Some crops are called “cover crops” because they add nutrients to the soil when they are allowed to break down and cover it. (After they’re grown in that same soil, of course.) These cover crops, including buckwheat and clover, can be planted during the off seasons. They’ll stay alive through winter and early spring, and then, when you’re ready to till your garden, just plow the plants into it. Not only will they act as mulch, but they’ll help enrich your soil.

    Turn Your Perennials Into Mulch

    Adding mulch to your soil does much more than keep it warm, ensure that it stays moist, and prevent weeds from taking root. It also adds some nutrients to the soil. What you can do in order to make your own mulch (or at least, enhance the type that you buy) is chop up any trimmings from your perennials and add them to it. Things like shrub trimmings, bits of perennial plants, and even small branches pruned from your trees all can be added to your mulch. As they break down, they’ll help your soil’s nutritional content.

    Allow It to Dry Out Before Tilling

    Sure, it’s good to plant your crops after rain, because the soil is nice and moist. This doesn’t mean that you should till it at this point though. Instead, wait until your soil has dried out, and then till it up. Otherwise, you risk taking all of the oxygen out of the soil and damaging its overall structure. You won’t be able to grow as much in this damaged soil. It’s best to test your soil by grabbing some of it with your hand and squeezing before you bring out the rototiller. If it crumbles into dust in your hand, then it’s time.

    Related Article: 4 Critical Methods to Improve Your Garden Soil

    Test Your Soil and Then Add To It

    One of the best ways to improve your soil quality is by testing it, and then adding in what it appears to be missing. There are test kits on the market that can tell you what your soil is lacking. They are easy to use, as most involve placing a scoop of soil in a test tube and then adding some chemicals to it. If you want results that are more detailed than that, you can purchase the type of test kit that you need to send out to a lab. You’ll get your results in a few weeks.

    Suggested Article: How to Test Your Soil Using Only a Mason Jar

    After you find out what your soil is lacking, you can add that exact compound to it. For example, if it lacks nitrogen, just add some organic fertilizer that contains nitrogen to it. The test results might also include some suggestions for improvement, and give you the names of a few products that you can use. However, this depends on the exact test. No matter what, you’ll know exactly how to improve your soil in order to grow the best crops possible. That’s what every homesteader wants.

    Here are some other food options for your “Survival Farm”

  • DIY Plant Propagating

    DIY Plant Propagating

    Plant propagating is a common process among homesteaders where new plants are created using various sources. Seeds, bulbs, cuttings, and other plant parts are put together to regenerate a garden. This branch of horticulture deals with the production of new plants using what is referred to as “starter materials”. Some people look at it as a form of recycling while others place the seedlings in small containers for décor and display uses.

    How Does Plant Propagating Work?

    Plant Propagating uses totipotency, which allows the cells to regenerate all the missing parts which leads to creating an entire new organism. Totipotency in plants means that any live part separated from the main plant, when composed of live cells, can produce missing organs to create an intact plant, including roots. This means all plant organs that contain live cells such as seedlings and cuttings, may be used as propagules, or for plant propagating.

    The Diverse Types of Cuttings

    There are many types of cuttings that you can use with plant propagating. They are Softwood, Greenwood, Semi-Ripe, and Hardwood cuttings.

    Softwood cuttings come from fresh, new growth plants, usually in the spring or summer. Softwood includes plants such as butterfly bushes or dogwood trees. They tend to root really well.

    Greenwood cuttings come from young stems that are just beginning to mature. They are from the first year of the plant and cut either early to mid-summer. Greenwood plants include boxwood and gardenias.

    Semi-ripe cuttings are more mature and tougher. They are often taken midsummer to fall. The best semi-ripe plants for propagating include honeysuckle and camellia.

    Hardwood cuttings are from woody stems that have become dormant during the late fall or winter. They come from trees and shrubs such as viburnum or mock orange.

    How to Plant Propagating

    First, you will need to gather supplies such as a sharp knife, pruning shears, containers for potting, sand, perlite, vermiculite or potting mix, and rooting hormone. Then you will be ready to begin.

    The first step is to cut off a small section of a stem. You should choose a healthy plant that’s at least 3 to 6 inches in length. Make a sharp cut and try not to mash together the stems as this will make it difficult for new roots to produce

    Next, you will need to remove the lower leaves on the stem by clipping them, so that you are left with a bare stem to place into your potting mix. After that, you can dip the end of your stem in the rooting hormone. This can help your cuttings to root faster.

    Suggested Article:  “Is Your Soil Quality Good?”

    The last step is to pot up your cuttings as quickly as possible by placing it in moist potting mix. You can also use perlite, sand, or vermiculite. Keep the cuttings humid by loosely applying clear plastic or keeping it under a cloche.

    Keep in mind that there are some plants that will root faster than others. You will have to have plenty of patience with plant propagating. It usually takes around one to two months for cuttings to take root and establish well enough so they may be planted.

    Improve Root Growth: Heat Mat Warms Seeds for Improved Root Growth

    When Should I Retrieve Cuttings?

    It is best to gather cuttings early in the morning because the plant has the most moisture during this time. Keep your cuttings cool and moist until you are ready to place them in their pot. Avoid exposure to direct sunlight until then. However, there are some cuttings that will take root faster if they are kept warm and humid, therefore misting the cuttings frequently may help them grow.

    There are some cuttings that are very easy to grow, so, if this is your first plant propagating project, you may want to start with them. These plants include Geraniums, Impatiens, and Coleus.


  • Is Your Soil Good Quality?

    Is Your Soil Good Quality?

    If you are interested in homesteading, urban homesteading, or natural health, you probably care about what goes into your body. You try to buy organic and eat whole, healthy foods that are the best sources for the macronutrients, micronutrients, and minerals that our bodies need to thrive.

    But do you take so much care of the plants you grow? Plants need food as well, and not just bland, synthetic versions of the food they thrive on, but natural, pure, varied nutrients. The way plants get their “food” is through the soil. This is one reason it is so important to always make sure your plants are properly hydrated (just like your body!) because that is the best way for plants to absorb the nutrients in the soil.

    So, how do you determine if you have good quality soil? It can be a bit confusing at first, so we’ve got a handy guide for how to determine if you’ve got good quality soil, or if it might need some improvements.

    What is soil quality? 

    OK, so we know we need to have good, nutritious soil for our plants to thrive, but what exactly does this mean? Soil quality cannot be measured simply by the yield in a single bed, the quality of the water you use to water your garden, or by any other isolated outcome. There is also no one factor that will indicate you have good soil quality.

    Instead, there are a few key factors to look at. For instance, how well our plants are doing is certainly an indication. There are also different properties of the soil or plants that we can test for that can give some insight into how healthy the soil is.

    Here are some characteristics of useful indicators of quality:

    • they’re easy to measure
    • they’re accessible
    • they measure chemical, biological, or physical properties
    • they are sensitive to variations in climate

    Soil tests are one concrete example of a good indicator to test for. Once you collect several different soil quality indicators, you can put what you’ve learned together and look for patterns or compare results to measurements taken at a different time.

    Here are some examples of reliable soil quality indicators:

    Soil Organic Matter

    This is a familiar one to any seasoned organic farmers or gardeners. There are many ways to tell if your soil is rich in organic matter. Earthworms and earthworm castings are a good indicator, as is the rich color and texture of hummus. Also, soil with a healthy amount of organic matter won’t erode easily and will drain water properly. Also, if all your plants seem to have the right nutrients, i.e. no yellowing leaves, no wilting, healthy green color, few pest issues, and reasonable yields are all signs that you have a desirable amount of organic matter in your soil.

    Suggested Article: “Tips to Help You Improve Your Soil”

    If you suspect you do not have the right amount of organic matter in your soil, there are many ways to combat this (and if this is the case, you’re not alone! The great majority of the work involved in organic farming surrounds enriching soil naturally). Making sure to add lots of compost and organic materials to your soil such as coffee grounds, egg shells, comfrey, compost tea, etc. are all examples of easy and beneficial ways to add organic matter to your soil.

    Chemical Indications 

    Simple soil and pH tests are the most common way to measure these factors. Quality soil will have a properly balanced pH factor. If you are unsure what this is, pH testing strips are easy to find at gardening supply stores, as well as very easy to perform. If you have improper pH balance, there are a number of ways to combat either too high or too low pH using certain fertilizers, amendments, etc.

    Suggested Article: “Making Your Own Potting Soil”

    Soil tests can also give you a lot of information into the nutrients available in your plants. Again, if you find yourself lacking in any of these areas, there are different organic, natural treatments, depending on which nutrients you are lacking. Some example os nutrients you might need to amend for are calcium, magnesium, phosphorous, potassium, and sulfur; the macronutrients of a healthy plant diet.

    Biological Indications 

    Biological indications include microbial biomass, mineralizable nitrogen, and soil respiration. Nitrogen is essential to healthy soil and plant growth, and quality soil will be a good repository for nitrogen as well as the other basic nutrients that plants require. While soil tests might indicate the presence of these nutrients, the retention of these nutrients will be measured over time. If the soil is not of good quality, certain essential nutrients might deplete over time, so this is an example of some biological indicators that can be measured.

    Another biological indicator would be high soil productivity. Soil is a living being, and quality soil is thriving with organic material and microbacterial life.

    You need quality soil for a healthy, happy garden. It is important to take a look at these various factors to determine if you do have quality soil. However, just because your soil might be lacking in one area doesn’t mean all is lost, most soil will need to be amended and looked after to develop into a healthy habitat for your plants.