Tag: spring planting

  • Tips for Successfully Transplanting Seedlings

    Tips for Successfully Transplanting Seedlings

    We’ve posted a few helpful articles this spring on how to start your seeds indoors. But what happens after that?

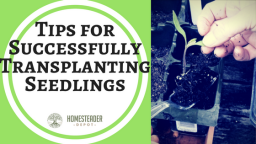
    Here is a simple guide for how to successfully transplant seedlings in the garden.

    Think Ahead 

    First of all, you’ll want to make sure before you even start your seeds that what you are planting is transplant-friendly. Not everything does well when transplanted, so direct seed sow whenever recommended.

    Also, for the seedlings you do plan on transplanting, designate room in the garden for them beforehand, taking into account the expected size of both the seedling and the adult plant.

    Timing is Everything

    There are two key factors to finding the right time to transplant. First of all, you need to take advantage of the window in which your seedlings are healthy and established enough to transplant because they can get very unhealthy and even die completely if you wait too long. Again, this will take some planning ahead.

    Secondly, make sure to do it at the right time of day. When seedlings are transplanted, it can be hard on them, so transplanting in the middle of the day will add unnecessary stress on them as they sit in the hot sun. Opt for early morning or, even better, early evening, so that have all night to recover and retain moisture.

    Water, water, water

    The most important aspect of transplanting is to give your fresh transplants enough water, and frequently as well. Again, they’ll be taxed after being taken out of their cozy little pots, and they’ll need lots of water to absorb the nutrients in the soil and strengthen their roots to properly establish themselves in their new home.

    Water well right after transplanting, and keep the soil around them damp constantly for the next few days at least. You’ll notice the difference if they don’t; while they might naturally appear a little wilted at first either way, they’ll perk up within 12-24 hours if they’re taking well to the garden bed. If they still appear wilted, they might not be getting enough water. Of course, use your own judgment here, because you won’t want to overwater either.


    There’s nothing as rewarding as filling a new garden bed full of healthy, fresh seedlings! Follow these basic tips to make your transplants healthy and happy.

    If you enjoyed this, you might also like….

    Long-Term Survival for Homesteaders…

    Natural Healing Secrets You Need to Know…

    Effective Primal Diet Hacks…

  • Seed Starter Chart By Temperature (Infographic)

    Seed Starter Chart By Temperature (Infographic)

    It’s been officially spring for a few weeks now, but depending on where you live in the country, you could be already wearing your summer clothes, or still shoveling your driveway.

    Temperature is a far better indication of official spring weather than the calendar, and I thought these handy infographics from Cultivatorcorner.com were a great resource to determine what you can plant and when. If you’re already ordering seeds and planning out your garden, this is a great quick-glance guide for when you can get them started.

    Enjoy, and happy planting!

    If you enjoyed this, you might also like….

    How to Lock Down Your Homestead…

    The Ultimate Guide to Natural Health…

    Effective Primal Diet Hacks…

  • Why Start Seeds Indoors?

    Why Start Seeds Indoors?

    We’ve posted a bit about tips for starting seeds indoors as spring has been approaching, but I wanted to talk a bit today about why to start seeds indoors. 

    You want to have a beautiful garden, and you want it to provide you and your family with plenty of food when it comes time to harvest. This means you need to start the seeds at the right time. You want to make sure they are strong enough to survive and thrive in the garden, and one of the best things you can do is start your seeds indoors, getting ready to plant after the last freeze of the season. There are some great benefits to starting your own seeds and doing this indoors.

    Save Money

    When you start your own seeds, you do not have to buy plants that are already started, which naturally cost more. Buying seeds when you are starting, and then saving and processing seeds from the food that you grow is a fantastic way to save some money. In addition, you do not have to worry about starting seeds outdoors only to find that they die before they can grow. When you start them indoors, you have much more control.

    Control the Pesticides

    You do not want your family to be subjected to pesticides, but much of the food bought through the grocery stores is laced with this stuff. When you start your seedlings right, and in a safe environment where they can thrive, you will not need to use chemical pesticides. You can also find organic options that will help to keep your plants safe from pests, as well as safe for you.

    More Self-Sufficiency

    By learning to start your seeds indoors, you are learning more about the homesteading life and you are learning to become more self-sufficient. It is a fantastic skill to have, and one that will serve you well for the rest of your life. Start your seeds in the garage or basement now to get ready for the planting season.

    If you enjoyed this, you might also like….

    How to Lock Down Your Homestead…

    The Ultimate Guide to Natural Health…

    Effective Primal Diet Hacks…

  • Tips and Tricks for Starting Seeds

    Tips and Tricks for Starting Seeds

    Winter is on its last legs and it’s time to get ready for this year’s garden! If you’re in a zone with a shorter growing season or just want to stagger your crops for a richer harvest, check out these easy seed starting tricks. We already mentioned the first two in a post on frugal ways to start seeds, so check that post out for a more detailed description of how to do them:

    • Cut and fold paper tubes to use as a biodegradable seedling planter. Use the tubes from toilet paper, paper towels, or wrapping paper.
    • Start your seeds in compostable food waste such as egg shells or citrus rinds. Keep in mind the acidity of the soil when choosing one of these no-waste methods.
    • Save on seeds and grow new plants from cuttings. This works with basil, celery, onions, beets, and many more.
    • Place coffee filters in your seed trays and planters before filling with soil. This helps to keep soil from falling through holes in the vessel and makes removing the root ball for transplanting a breeze!
    • Test the germination rate and viability of saved seeds by sprouting them on a wet paper towel. Larger seeds can be soaked overnight, rinsed, and drained. Plant those that sprout immediately!
    • Save popsicle sticks to label seedlings. Unless you want a mystery garden, use these handy little markers!
    • Use spices as a natural antifungal to prevent damping off disease.  Cinnamon, turmeric, clove, and mustard applied at sowing and after every other watering will help your seedlings survive!
    • Give your seedlings a nitrogen boost with old coffee or tea. For acid-loving plants, you can water your plants almost every time with leftover coffee or tea. For other plants, just give them a drink once a month.
    • Thin your seedlings! So many people neglect to do this because it seems counterproductive to kill extra seedlings. Still, plant spacing is extremely important and your plants will be healthier with less competition from crowded neighbors. If you hate waste, simply rinse thinned seedlings and add them to a salad!


    Most of us still have several more weeks before we can get in our gardens for a dirt therapy session. Start seeds indoors to get your gardening fix and get a head start on the season!