Page 2 of 3
1 2 3
vegetables – Page 2 – Homesteader Depot

Tag: vegetables

  • Plastic Sheeting Gardening Hack

    Plastic Sheeting Gardening Hack


    Many gardeners count down the days until the winter ends because they’re just dying (not literally, of course) to get their crops in the ground. Rather than wait until the earth warms up and the last frost is far from over, start your season early by using plastic sheeting in to create a greenhouse-like effect. Plus, if you leave the sheeting up once the weather than changed for the better, you’ll have fewer weeds to deal with. Your garden will be magnificent thanks to this quick and easy garden hack.


    It All Starts in the Autumn

    Once you harvest your crops in the fall, you can start getting things in place for your plastic sheet garden. Clear out your garden, removing the remnants of your crops. Only the soil should be left. Turn it over very well in order to remove any lingering roots or bits of plants. Get out your tiller if you need to. Then, set up your soil for next spring. This involves making seedbeds, also known as soil ridges. These ridges should be one foot wide by around six inches high. They need to run to the east and west in your yard, parallel to each other. You can arrange them so that they’re as close together or as far apart as necessary. This is up to you.


    After The Last Frost (Ideally)

    Depending on where you live in the country, these next steps should be completed after the last frost or after what you perceive to be the last frost. (Sometimes the weather can be weird.) Purchase a roll of transparent plastic sheeting. Find one that’s 4-mil, and large enough to cover your desired area. You need it to be able to cover your entire planting area. Lay it directly on top of those soil ridges that you made in the fall. Don’t forget to anchor it down on the edges with wooden boards, stakes, or bricks. You don’t want it to fly away in a windstorm.


    Wait Until the Soil Is Warm

    Rather than waiting for the soil to warm up naturally (that is, without plastic sheeting) to plant your crops, you just have to wait until the plastic has done its job. It shouldn’t take more than a few days for the earth to warm up under the plastic. Once it has, you can start planting your crops in between the ridges. Peel back the sheet and place your seeds in the ground, following the usual planting instructions as far as how deep and how far apart to plant them. Then, place the plastic back on top of them. At this point, you may want to use wooden stakes instead of boards and bricks, as they’ll allow the plastic to move slightly as the plants grow.


    Why the Ridges Are Important

    The soil ridges are designed to hold up the plastic, giving the plants some space to grow. They also control the moisture content of the soil and trap sunlight, making the area under the plastic quite warm. It creates a greenhouse effect. This is why you can start planting much earlier than usual.


    The Rest of the Process

    As your plants begin to grow, you’ll need to check on the moisture content of the soil. If it seems like things are too damp under there, peel back the plastic for a while and let everything dry out a little. Replace the plastic once the moisture levels have gone down. Once the traditional spring-like weather has officially returned to your area, or the plants have grown too big to remain contained under the plastic, roll up the sheet and let mother nature do the rest.

    How and Why would you bury a shipping container in your backyard?  Find out the secret here>>>

  • 5 Things to Consider When Building an Aquaponic System

    5 Things to Consider When Building an Aquaponic System


    Setting up an aquaponic system, although quite an easy task, requires some basic knowledge of aquaponics. If you have decided to install such a system in your house, then you probably know what this is and how it could help you. However, there may still be things which can interest or help you. Below you will find 5 essential things which you should know in order to obtain spectacular results.

    1. Location
    The place where you put your aquaponic system is highly important for the way in which the plants and the fish will develop. In order to obtain great results, you should make sure that the temperature from the room is not too high, nor too low, that there is enough light for the plants to prepare their food and that no wind or extreme weather conditions will reach them. Also, make sure that no harming chemical substances can get inside the water as this means death for both your fish and your plants.

    2. Oxygenizing the water
    The happier your fish are, the better your system will work! This is why you need to oxygenize the water on a daily basis and make sure your fish have all the “comfort” they need.

    Related Article: “Advantages of Aquaponic Farming”

    3. Choosing your fish accordingly
    The aquaponic system works well with almost all types of fish. Yet, there are states in which you are not allowed to grow whatever type of fish you want, so you will want to see what types of fish you are allowed to have before starting your aquaponic system as you do not want any problems with the law.

    4. Placing the pots
    In order to make the harvest much easier, you should place the pots or the entire system at your waist level. This way you will not have to bend over, making the daily care routine a much easier activity.

    5. Adding additives
    There are cases in which your fish may not provide all the nutrients needed for your plants. If the quantity is lower than what the plants need, then you will have to supply them with the respective substances. In most cases, you will need to add iron, calcium carbonate or potassium carbonate.

    Aquaponics is an easy activity which will provide you with the necessary vegetables and fish in a short amount of time. Just follow the tips mentioned above and you will have great success in your attempt to grow organic food in your home. 

  • Advantages of Aquaponic Farming

    Advantages of Aquaponic Farming

    Aquaponics is a new way of approaching farming. Unlike traditional agriculture where you needed plants to grow vegetables, with aquaponics you need water and fish in order to have healthy food on your table each and every day. Basically, aquaponics relies on the interdependence between fish and plants: the fish produces bio-nutrients for the plants, while the plants clean the water, creating a perfect environment for the fish to grow and develop. It is a blend of aquaculture and hydroponics that has plenty of advantages. If you need some reasons to get your own aquaponic system started, then here are some of the advantages you will get once you assemble it.

    First of all, you will have fresh organic food on your table each and every day, regardless of the hour when you decide to cook your meals. You simply take your tomato, cucumber of your basil from the aquaponic “field” and use it for your meals. It is as easy as it sounds.

    The second best thing about it is that you not only grow vegetables, but you also have plenty of fish. Whether you want them for cooking tasty meals or simply for your décor, they are a great addition to your home! They also have a practical purpose, as you will never have to use chemical fertilizers on your plants, thus obtaining real organic food.

    If you ask how difficult is this system to put in practice, the answer is extremely simple. Not only will you be able to assemble it all by yourself, without the help of your family or neighbors, but you can also put it wherever you want. If you move from one house to another, then you simply disassemble the system and take it with you! What can be easier than that?

    Another great advantage of the hydroponic farming is that it offers you financial independence and control over your money. You know exactly how much you need to spend on your food and you will no longer depend on the market for your veggies’ supplies.

    Related Article: “5 Things to Consider When Building an Aquaponic System”

    Last, but not least, it involves no dirty hands and clothes, no bending and digging, no land and little maintenance time, so it will be like your veggies and fish grow all by themselves! Quite an easy to put in practice system, suitable for all types of people, even for busy and impatient ones!

    There are plenty advantages that the aquaponic system can offer you! Your health and your comfort will be improved, while your savings will considerably grow with the constant use of the aquaponic type of farming! If this is what you want, then why not give it a try? 

    [Boost Your Plants Growth] Step by Step how to build your own Aquaponics System <<<Access Here>>>

  • Easy Checklist to Winterize Your Garden

    Easy Checklist to Winterize Your Garden

    As a homesteader, you may be wondering where you’re going to get the energy for preparing your garden for winter after all the hard work of harvesting the vegetables from your garden.  Remember how happy you were when you realized that you wouldn’t need to buy any vegetables all winter long? Keep that in mind along with the fact that it will now be cooler to work outside.

    You can print out the below list to check off items as you complete them and before long you’ll be done so you can take a break for a few days. Those gardeners in warmer southern areas can ignore the items not applicable.


    Before Winter Check List

    • Harvest any remaining root plants such as potatoes and carrots after their foliage has withered and died
    • If you didn’t harvest all crops of specific vegetation such as winter squash, eggplant or cucumbers so you could collect their seeds, now is the time to pick before any frost
    • Remove and discard all dead vegetation and rotten vegetables or fruit to keep away any pests that may cling to them for the winter
    • Rake to remove small debris and to turn the soil
    • Now is the best time to do a soil test for PH levels and minerals; adding a fertilizer such as fish and seaweed is excellent for adding minerals
    • Be sure to have some covering handy for signs of the first frost and cover annuals as soon as there is a hint of frost on the way
    • Cut back dead leaves on perennials that can survive winter and rose bushes, cover with about 3 inches of mulch; fragile rose bushes need protective covering if in colder climate
    • Water shrubs and evergreens before a freeze and mulch after freeze
    • Root crops such as parsnips, arugula, or sprouting broccoli can be stored in the ground for the winter (overwintered) and depending on your USDA zone, will need the protection of heavy mulch, a thick layer of straw, tarp or row cover
    • After the first frost, cut back and dig up perennial bulbs such as gladiolus that can’t survive colder climates, dust off and store in breathable container like a cardboard box in a cool, dry place; cover beds with evergreen boughs
    • Repair raised box beds and make more boxes if needed
    • Pruning of shrubs that bloom in the summer should be done after all leaves are gone and while dormant or in early spring; however, hydrangea types such as mopheads should be pruned in June


    More Garden Tips

    • If you haven’t started a garden notebook yet, this is an excellent time to make notes on how each plant did, what problems it may have had, and if any areas didn’t grow as well as others.
    • To tell when to harvest potatoes, rub the skin and if it doesn’t scrub off quickly, it’s ready.
    • To save time and wear on your back when pruning plants, use a pole pruner to remove stems down to the base of the plant.


    Conclusion

    Winterizing your garden is the best way to ensure it will come back next spring looking as good or better than it did this year.  How much time preparing your garden for winter will take depends on how big your garden is, what type of plants you have, and if applicable, when the first frost usually comes and how cold it usually gets where you live.

    No matter where you live or what type of garden you have, we want to wish you a Happy Homestead Winterizing!

    [Food Storage] – How to build a small root cellar in your backyard <<<Watch Short Video Here>>>

  • How to Ferment Vegetables

    How to Ferment Vegetables

    Fermenting vegetables grown in your garden accomplishes two things at once. First, it enhances the nutritional value of the vegetables by preserving them at their peak. Second, it preserves the vegetables, so you can enjoy them all winter long.

    The process used for fermenting vegetables is simple. You need the right equipment and the right ingredients – and before you know it, you’ll have a pantry full of delicious, fermented vegetables for your family to eat.

    Fermentation Equipment

    The equipment you need to ferment vegetables is minimal and inexpensive. Here are the basic things you’ll need to have on hand:

    • Jars or containers to put the vegetables and pickling brine in
    • A sharp knife and cutting board for preparing the vegetables
    • Airlock tops (we like ones that are compatible with Mason jars) to keep oxygen out of the jars
    • A pickle packer (usually a wooden stick used to pack the prepared vegetables into the jar)
    • Weights to weigh down the vegetables

    You can buy these items individually or in fermentation packages.  Here is an easy, complete Fermentation Kit from Amazon you can try.

    Fermentation Ingredients

    The ingredients you need to ferment vegetables depend on the method you plan to use. However, there are only a few variations you need to know about. Here’s what you’ll need:

    1. Fresh vegetables from your garden
    2. Salt, whey, or a starter culture
    3. Water

    There are many types of salt, but some are better suited to fermentation than others. Two of our favorites are sea salt and Himalayan pink salt. Both add a nice flavor. You can also buy pickling salt although it’s not the best choice if you want a natural, minimally-processed salt.

    The water you choose for pickling can make a big difference in the final product. If you use tap water, you should boil it or run it through a reverse-osmosis filter for the best results. Well water often has a high mineral content. That can be good for some kinds of fermentation but it’s not particularly good for some fermented products like kombucha.

    How to Prepare the Vegetables

    The method you use to prepare your vegetables for fermentation depends on what you’ll be preserving. Some vegetables, such as cabbage, ferment most effectively when they are shredded. Others, like cherry tomatoes, can be fermented whole.

    It may take some trial and error to arrive at the proper preparation. You may want to start by fermenting just one type of vegetable. Later, you can mix vegetables to create pickled salads that are ready to eat out of the jar.

    The Pickling Process

    The next step is after you have prepared the vegetables is to place them in the jars, cover them with brine, and weight them so they can ferment properly.

    You want to use weights on top of the vegetables, so they stay submerged in the brine. That’s a very important step that some first-time fermenters skip.

    There’s an art to knowing when vegetables are done with fermentation. You’ll have to rely on the specific recipes you use to be sure when they’re done. They need to be kept in an anaerobic environment (air free) while they ferment.

    When they are ready, you’ll be able to remove the weights, seal the jars, and put them in cold storage. Prepared properly, fermented vegetables will keep for months.

    Wondering What to Make?

    If you’re wondering where to start, here are some suggestions for easy fermentation:

    • White or red cabbage (sauerkraut)
    • Kimchi (spicy Korean cabbage)
    • Pickled green beans
    • Pickled tomatoes
    • Fermented carrot sticks or slices

    Do you have a favorite recipe for fermented vegetables? Tell us about it in the comments!

  • Where and How to Find Wild Asparagus (Video)

    Where and How to Find Wild Asparagus (Video)

    Wild asparagus is one of the great finds of the foraging world, and it’s season is just beginning in North America!

    This Michigan man shares this video from his favorite spots, and has some very valuable tips for how and where to find the wild delicacy. There is nothing more rewarding than foraging for, cooking and eating, such a nutritious and tasty veggie. If it grows in your region, I highly recommend following these tips and seeing what you can find!

    Enjoy:


    If you enjoyed this, you might also like….

    Long-Term Survival for Homesteaders…

    Natural Healing Secrets You Need to Know…

    Effective Primal Diet Hacks…

  • Companion Planting Visual Guide (Infographic)

    Companion Planting Visual Guide (Infographic)

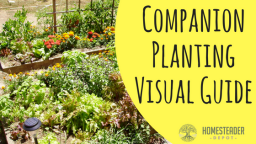
    Companion planting is a gardening practice that involves strategically planting certain vegetables next to one another for their mutual benefit. It can lend itself to great success in the garden, but it can be a bit confusing and overwhelming to plan out.

    This infographic from MomWithAPrep.com is a fantastic cheat sheet for figuring out the best “companions” for each garden vegetable. It also includes potentially bad companions, so you can rule those out too.

    Why not give companion planting a try this spring? Grab this infographic and refer to it as you plan out your garden this year. Enjoy!


    If you enjoyed this, you might also like….

    Long-Term Survival for Homesteaders…

    Natural Healing Secrets You Need to Know…

    Effective Primal Diet Hacks…

  • Most Decorative Edibles for Your Yard

    Most Decorative Edibles for Your Yard

    Maybe you’ve only got a small yard or a patio, and would like to combine your vegetable garden with your landscaping. Or perhaps you can’t have a garden where you live and you’d like to grow some veggies under the guise of decorative plants. Perhaps you’re just the visual, artistic type and would like to produce food and have a stunning, attractive, decorative garden.

    Either way, there are lots of beautiful options for you to grow vegetables that are both decorative and edible! Here are some of the best:

    Basil

    Basil is a cinch to grow and just so happens to be very pretty to look at and will blend in nicely with most decorative foliage. Not to mention, it’s naturally bug repellent and smells wonderfully as well!

    Eggplant

    There’s actually eggplant you can grow that is purely decorative, but the edible kinds of eggplant are gorgeous too! There are lots of varieties available that have different colors of fruit, but they all have very stunning foliage and fruit.

    Mint

    Mint is a great ground cover crop, one that you can tuck away in virtually any corner of any garden, or grow in a pot for some very easy, pretty patio decoration. It also has many medicinal benefits and culinary uses, making it a wonderful all-purpose plant to grow.

    Swiss or Rainbow Chard 

    Both Swiss and rainbow chard have very beautiful, visually-striking stalks and gorgeous green leaves that look like deliberately planted decorative foliage. A great advantage to chard as well, is that you can pick leaves off of it regularly and it will just keep growing, so it’s a perfect plant to grow for a regular supply of nutritious, delicious, and attractive leaves.

    Beets

    Beets have very lovely little green and red leaves that are great to grow between decorative plants. You can eat the leaves themselves or wait for the root to come to fruition, either way, it’s a very pretty plant that is perfect for any decorative garden.

    If you enjoyed this, you might also like….

    Do You Have What You Need to Hold Down the Fort?

    Natural Healing Secrets You Need to Know…

    Effective Primal Diet Hacks…