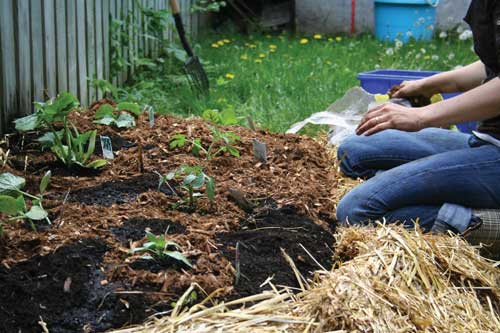
A thriving garden is the beating heart of the homestead. For many people, though, keeping a garden can be a challenge. Traditional methods require heavy machinery for soil preparation, questionable chemical fertilizers, all adding up to a prohibitive upfront cost. A great and easy method of gardening that has a very low financial demand is the “lasagna garden”.
It was given that name because the method involves developing arable soil by composting an existing plot with layers of organic matter. You create the layers in the fall, to be ready for planting in the spring. Here’s a quick guide to get you started:
- Select your plot: With this method, you don’t need to prepare the soil at all. That’s right, no double-digging, no weeding! Just pick an area where your garden will get the sunshine it needs that isn’t too far from your water source.
- The first layer: The base layer of your garden will be a single layer of corrugated cardboard that smothers out even the toughest weeds. You can source this from almost anywhere, just be sure to remove packing tape if you’re recycling boxes. To prevent weeds from growing through, be sure to cover up any gaps in the cardboard with more cardboard. If your plot doesn’t have any persistent or tenacious weeds, a minimum of three layers of newspaper will work fine instead. Just before applying the next layer, thoroughly saturate your base layer with water.
Effective Primal Diet Hacks…
- The compost layer: This layer will be the powerhouse of your garden. Your garden is literally a compost sheet (rather than a pile or heap). Put anything in this layer you’d put in the compost, including “browns” like fall leaves, shredded paper, pine needles, and “greens” like veggie scraps, grass clippings, garden trimmings, etc. Once you’ve piled on the compostable matter, finish this layer off with three to four inches of finished compost or topsoil to be ready to plant.
- The mulch layer: Your lasagna garden will be topped off with the application of a couple of inches of mulch to retain the ideal moisture and temperature for your compost to break down. The best mulch materials are the ones you can source with minimal effort from neighbors, local businesses, or even your town’s Department of Works. Tried and true materials for this layer include wood chips (aged chips are best), straw, grass clippings, leaves, even tree bark! If it’s more convenient for you to purchase mulch, opt for undyed wood chips.
Once you have your layers prepared, let them sit for a season. It’s common to start in the fall to be ready to plant in the spring, but you could do this in the spring for early fall planting, for example.
To plant, brush back the mulch layer a bit and plot out the spots you’d like to plant your seeds. Cut holes in the cardboard for the roots to grow once the seeds begin to sprout, plant your seeds in the compost layer, and cover lightly with the mulch (as you would were you using potting soil).
That’s it! The layers will retain moisture, so only water if the bottom layer is dry. Happy planting!


