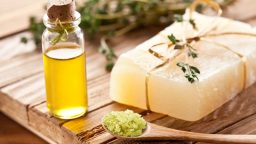
Making your own soap can be a fun and creative experience. You have the advantage to create a product that is safer than those available in stores and something that is free of perfumes or chemicals. You can also save money over time by making your own soap when compared to products in stores that contain the same natural ingredients. Need another good reason? You can sell it and make a reasonable profit to help you buy the things you need.
If you are creative with making soap, you can use molds to make natural skin care products into tiny works of art. Or you can make basic soap that is just as nourishing for your skin. There are various recipes and methods that you can try for soap-making so that each batch you make can be different and unique.
You can use milk or water to create your homemade soap, but using milk can sometimes be tricky, and the recipes that you may find in books or online may not mention that you can substitute milk for water. If you decide to use milk, keep in mind that it will cause the mixture to heat up faster, so you may want to wait until you are more experience with soap-making before you start using milk. However, once you do, the milk will give your soap a creamier color. Natural goat’s milk is a good source if you want to try it.
Using colors in homemade soap is a fun way to make the process more creative. You can use natural colorants such as spirulina, cocoa, or paprika to create a rainbow of colors. A mixture of Spirulina and nettle creates green soap while paprika crates a nice orange tone. Cocoa can turn out either brown or purple, and annatto creates a bright yellow soap.
How to Make Homemade Natural Soap
The equipment that you will need for soap-making shouldn’t be used for anything else, and it should be very clean. For mixing bowls, you should use glass, stainless steel, tempered glass, or enamel. Do not use copper or aluminum since they can react to the lye. Use styrene plastic or silicone spoons for mixing. You can use silicone baking pans or purchase special molds designed especially for soap-making. You will also need a quart and a pint-sized canning jar, newspaper, stainless steel thermometer, and an old towel.
Additives
There are several additives that you can use when making soap including herbs like lavender and chamomile, essential oils, natural colors, oatmeal, ground coffee, salt, or aloe vera gel.
Ingredients:
- 2/3 cup coconut oil
- 2/3 cup olive oil
- 2/3 cup almond or grapeseed oil
- ¼ cup of lye
- ¾ cup of cool water
Directions
Cover your work area and put on protective gloves. Measure water into a quart jar. Measure lye, making sure you have the exact amount. Slowly pour lye into the water, stirring as you pour. Stand back to avoid any fumes. When the water clears, set aside.
Add all three oils together in the pint jar. Heat up in microwave or place in a pan of water to heat up to 120 degrees. The lye should have come down to around 120 degrees by then. Wait for both to cool to between 105 and 95 degrees. You don’t want it to get any cooler than that or it will ruin the soap.
Related Article: “Homemade Citrus Cleaner”
Once everything is at the right temperature, pour oils into a mixing bowl. Slowly add the lye, stirring until it’s mixed. You need to get the lye in contact with the soap as much as you can. After around 5 minutes of stirring, the soap mixture should lighten in color and thicken. Once it has a pudding texture, it is at “trace”.
Add in herbs, essential oils, and any other additives. Stir thoroughly and pour the mixture into molds. Cover with plastic wrap. Set it in the old towel and wrap up. This will keep the heat inside and start the soap making process
After 24 hours has passed, it’s time to check the soap. If it is still soft, allow it to sit for 12-24 more hours. Once it’s cold, place on parchment paper. Allow the soap to cure for 4 weeks and turn it once a week to expose all sides to air. Once it is fully cured, wrap the soap in wax paper or place in an airtight container.


