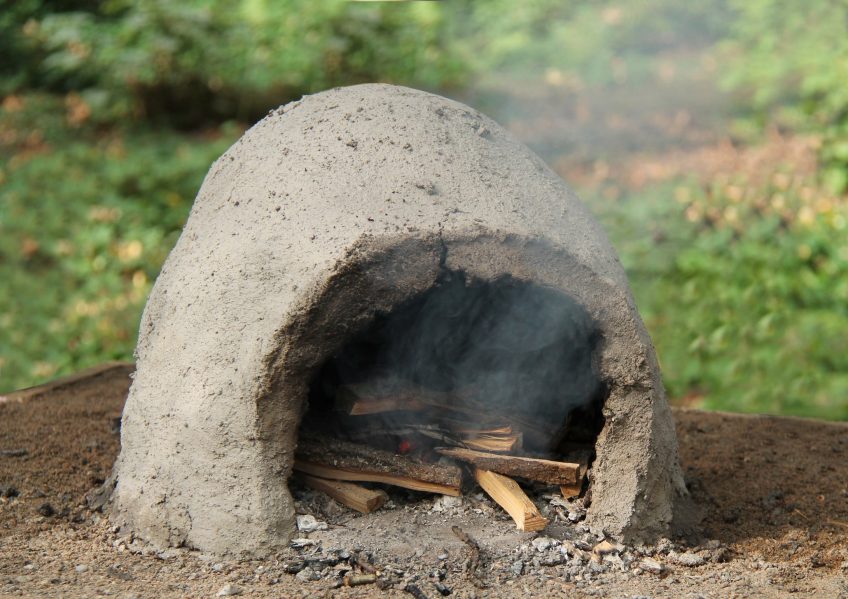

An earthen oven is exactly what it sounds like – an oven made of a combination of dried earth and clay. These ovens tend to cook things better than standard outdoor brick ovens, and are fairly easy to build, as long as you know how.
History of Earth Ovens
A type earth oven, known as a pit hearth, has been used for centuries. Examples of them have been found in Europe that date back to the Bronze Age. In the United States, they were commonly used by Native American tribes to cook large meals. Use of these ovens hasn’t died out. Many cultures, such as the Maori and the people of Papua New Guinea use them today. Since they aren’t difficult to build, you can even make one in your own backyard.
The First Steps
Before you start building your earth oven, you first need to gather your materials and make a space for it. A cleared section in a backyard that has some natural cover makes a great place for such an oven. Even out the land where you intend to build this small structure.
You’ll need a number of things to build your earth oven. These include:
- firebricks (the first layer on the ground)
- building sand
- water
- newspaper
- clay
- either straw, hay, or dried grasses.
Each of these components is essential to the process.
The Building Process
Next, you’ll need to begin construction. Since you already have a cleared space for the oven, you can start by laying down the fire bricks. They’ll become the base for the oven. How many bricks you use depends on how large you want your oven to be. An 18-inch inside is a good basic measurement for this oven, so set yours up accordingly. Once the bricks are laid down, you’ll need to trace out the shape of your oven.
Now it’s time to mix your clay together and start the rest of the building process. Lay a tarp down on the ground and place your clay and sand on it. Mix them together, then add water. This is going to become the inner layer of the oven. Once they’re ready, lay the mixture down on the bricks in the shape of your oven. Remember to build up the middle and leave one of the ends low. The best ratio is about 60% tunnel to the middle dome. After you have the desired shape that you want, place some newspaper on top of it.
After this, begin mixing together the final layers of clay. The first of these top layers need to be about three inches thick when laid on top of the inner oven. This clay mixture shouldn’t contain any of the grass, straw, or hay. The next layer also needs to be three inches thick and needs to have these dry materials mixed into it. This is the absolute final layer of your earth oven.
Let It Dry
Some patience is required before you can use your oven. The entire structure needs to dry out. This can take anywhere from two to six weeks, depending on your local weather and overall environment. You can’t cover your oven with anything while it dries, as that can harm its final composition and even slow the process.
Finally, once your oven is completely dry, the next steps involve digging out that inner layer of sand and clay. The newspapers that you used to cover this layer will burn up when you use your oven, so there’s no need to worry about them.
So, as you can see, an earth oven is a very simple structure that can be used as an alternative to your home oven and other cooking methods you may be using. This is a neat, primitive way to cook and enjoy some food.
[NEW DISCOVERY] Easily produce all of the FREE, RENEWABLE, and GREEN ENERGY you need…Find out how>>>
Below, David shows us a much more advanced earth oven and goes into detail about the composition of his particular, AMAZING earthing oven.


")
")