Page 15 of 16
1 13 14 15 16
Nick A – Page 15 – Homesteader Depot

Author: Nick A

  • Tips to Stockpile Food for the Winter Months

    Tips to Stockpile Food for the Winter Months

    Growing up, one of my favorite things to read were the Laura Ingles Wilder books.  Not only were they entertaining, but she also went into great detail on how their food was grown or raised, butchered or harvested and then processed to keep all winter long.

    Thanks to modern conveniences, most of us don’t really need to take these steps to ensure a comfortable winter, even on a homestead with electricity and appliances.  However, it doesn’t hurt to prepare for a worst-case scenario to ensure you won’t get caught during a bad winter storm or power outage.

    Fortunately, when proper measures are taken, many foods can be kept all winter long.

    Fruits and Veggies

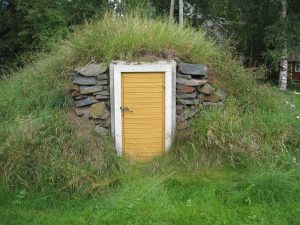
    For fruits and vegetables, storage areas should be cool and dark with moderate humidity and a consistent temperature of 40o.  When planning a homestead or other remote living location, a root cellar is a good addition for long-term storage.  In other homes, a cooler area of a basement or an attached garage can work.

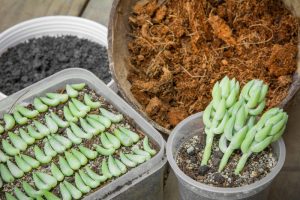
    Stock a cellar as late in the fall as possible. Cure vegetables like potatoes, winter squash, and onions in warmer areas before moving them to the cold storage areas. For other items, chill in the fridge before moving to the cellar areas.

    Many root cellar veggies store better when some dirt is still on them. If you’ve harvested your own or stocked up from a local farmer’s market, shake or rub the excess dirt off instead of washing them.

    Know What Your Food Needs to Last

    Squash should be stored in shallow containers or left on shelves as they are.  Items like garlic and onions are best kept in mesh bags or open boxes so they can breathe. Potatoes must be kept in complete darkness to prevent the skin from going green.

    Avoid piling vegetables together, this generates heat and can lead to them spoiling. Try to spread them out as much as possible and rotate them for even exposure.

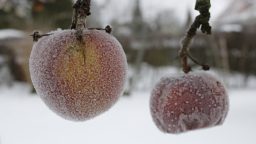
    Apples can be stored for months in a box and can be piled more than others.  This will actually assist them by maintaining humidity to keep them crispy.
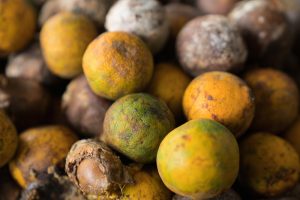
    Avoid Spoilage

    It’s true that one bad apple can spoil the whole barrel, and that doesn’t just apply to apples.  Handle your fruits and vegetables carefully as even the slightest bump can create an invisible bruise and begin the decomposition process.

    In any storage areas that don’t have built-in climate control, the driest, warmest air will be near the ceiling while more-humid air is nearer the floor and farthest from the door. Keep this in mind as you plan where you will store your produce.

    Inspect your stores regularly and immediately remove any soft or rotten items before they can affect the rest.
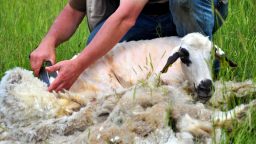
    Keeping Meat

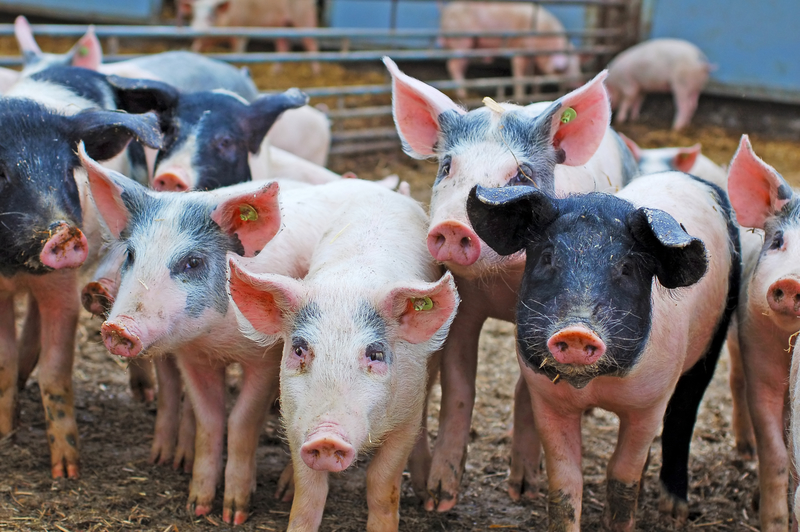
    If you are really into the store and save idea, consider smoking and storing your own meats.

    Whether you’ve gone hunting, or gone in with a friend and purchased a whole cow, being able to have a portion of that ready to go without relying on the use of a freezer can be a great idea.

    Used for millennia by some of the oldest civilizations for long-term storage, smoking creates an acidic coating on the meat that prevents bacteria from cultivating. It also dehydrates the meat, making it less hospitable for bacteria to breed.

    So, come late summer and early fall, start planning on what you can stock up on for winter storage.  Not only will this provide you with an emergency supply of food when needed, it is also a great way to keep eating local organic food all year round whether it comes from your own garden or the local farmers market.


  • 5 Ways Pigs Are Valuable Beyond Just Meat

    5 Ways Pigs Are Valuable Beyond Just Meat


    When you are living off the land, owning animals that can provide you with food can be extremely beneficial. You may grow plenty of crops and fill your pantry with canned vegetables, but if you aren’t getting enough protein, you won’t have the energy to tend to your farm and home.

    While there are some homesteaders who don’t want to commit to raising a large farm or a herd of cattle, there are plenty of other animals such as chickens or turkeys that can ensure you have meat and eggs throughout the year. They are also low-maintenance so that you don’t have to waste a lot of your time caring for them.

    Pigs are another option that will provide you and your family with plenty of meat. While they do require plenty of food, they aren’t as difficult to raise as you may think.

    Here are a few good reasons why you should consider adding pigs to your homestead.

    1. They Will Eat Anything

    Yes, pigs eat a lot, which can be a disadvantage, but they will eat a lot of anything. Many homesteaders make their own dairy products such as cheese or butter. If you have excess whey left over from making cheese, you can feed it to the pigs. They will also eat excess milk from dairy animals, extra eggs from chickens, or any cooked leftovers that you have lying around. That means no more food thrown out the back door and nothing goes to waste.

    1. They are Excellent Tillers

    Pigs will till any area that you place them in. Many people think that the rooting that pigs do naturally is a bad habit and it should be stopped. But it’s only a terrible thing if you have them in an area where you don’t want to disturb the soil. The tilled land where pigs once lived is a suitable place to grow vegetables. That is because along with loosening up the soil, it is also well-fertilized.


    3. They Help Eliminate Parasites 

    Pigs are a dead-end for parasites that often become an issue with other farm animals such as cattle, goats, or sheep. Since pigs have internal parasites that are different from other animals, they help clean up the land when they follow other grazing animals. If you place your pigs in a field with grazing animals such as sheep or goats, the pigs will consume the eggs and larvae of the parasites on those animals. Their bodies are capable of digesting the parasites without harm. Goat parasites will not survive inside of pigs.


    1. You Receive an Abundance of Meat

    The best thing about raising pigs is the amount of meat that you can get from them. You can add more variety to your diet and create a wide range of meals for your family all while homesteading. And the best thing about it is that you know where the meat came from. You raised the pigs humanely and know exactly what type of diet they consumed.

    Suggested Article: “5 Keys to Choosing the Perfect Livestock”

    1. Extra Income

    If you end up with more meat than you need, you can always sell the additional meat for profit. Many people will raise pigs just to sell the meat and not keep it for themselves, while others may raise additional pigs to sell. You can choose to sell the pig itself or the meat after it is butchered. Either way, you end up with a substantial profit that can help with supplies during the winter.

    If you want to have enough pork for your entire family, you should get two to three piglets in the spring. Raise them throughout the summer and then butcher them that fall. Then you can do the same the following year. Raising a pig for that period of time will usually produce around 170 to 200 pounds of meat, which should be more than enough meat to keep any homesteader happy.

  • Felling Trees for Dummies

    Felling Trees for Dummies

    Removing trees from your property is a great way to clear out space for other use, or to gather up firewood for the winter. If you plan to cut a tree down on your own, it’s important that you understand how difficult, and dangerous the task can be. Especially if you have never attempted to cut down a tree in the past.

    Here are a few safety tips that will help you cut down trees without putting yourself in danger.

    1. Use the Right Equipment

    Failure to use the right equipment could result in a serious accident. Be sure that you have the right safety gear on hand to keep yourself from getting badly injured. Safety is something that should be taken seriously when it comes to tree cutting. The essential safety gear you should have on hand includes:

    • A logger’s helmet to protect your head from falling branches
    • Earmuffs and a face screen that will protect your eyes and ears
    • Safety glasses to prevent dust and particles from getting in your eyes
    • Kevlar chaps, these will stop a chainsaw instantly if you accidentally drop the bar against your leg.
    1. Use Felling Wedges

    Felling wedges go inside the cut in the tree to prevent the saw you are using from getting pinched during the cut. You will need a pair of these plastic wedges and they can be purchased at any location that sells chainsaws or similar equipment.

    1. Carefully Estimate the Felling Zone

    It’s difficult to tell how tall a tree is just by looking at it. Therefore, you should estimate how tall it is by using the ax handle trick. Hold your ax handle out straight in front of you. With one eye closed, move until you see the ax top aligned with the tree top, and the bottom aligns with the base. Your feet will be around where the treetop will fall. However, this is still just an estimate. Always allow for extra room when it’s time to cut.

    1. Analyze the Tree

    Look at the tree and don’t cut it down if you notice any dead branches that are broken yet still attached to the tree.  Also, be cautious if the tree is leaning in one direction, or if there are any buildings, fences, or power lines in the felling zone.

    1. Plan & Cut the Notch

    Plan on where you will cut the notch. It will need to be on the “fall” side of the tree. Adjust your saw until it points toward the fall direction. Before you cut, lay out the notch by marking it or scoring the bark using the chainsaw. Make it at a comfortable height so that it’s easier to cut.

    You may also like: “Building a Tiny House”

    When cutting, make the top cut first, then the bottom. If you do well with the top notch, the wedge will drop freely out of the notch. If not, you can extend the cuts from the top or bottom, allowing the wedge to fall out.

    1. Use a Lookout

    When you make your felling cut, it will be much safer if you have a lookout standing several feet behind you. They can watch for falling branches and let you know when the tree begins to fall. They can also alert you when it’s time to vacate the area since you can’t keep your eye on the saw and the tree at the same time. A lookout can also let you know if something is going wrong before the tree is completely cut, such as a branch falling near you.

    Tree cutting is a job that should always be taken seriously.  Many hazards lie between the cutting process and the falling tree, be sure to take all factors into account before dropping a tree.

  • 4 Weird but Effective Ways to Avoid Deadly Bacteria

    4 Weird but Effective Ways to Avoid Deadly Bacteria

    The primary reason we need to stay clean is to maintain control over the harmful bacteria that can manifest itself in all the crevices of our body that make us smell bad and breed disease.

    The easiest way to accomplish this is to focus on the areas with the most potential for bacterial growth and go from there. What areas are those?  Just follow your nose.  It’s no coincidence that the areas that provide our embarrassing body odor are the areas we most need to target.  Just like a clogged kitchen drain or backed up sewer system, if the smell is there, the bacteria is there.

    The most common ways of battling the ongoing war of cleanliness are via large amounts of water in the form of a shower or bath.  But, what if you suffer from skin irritation issues, or you’re in the middle of a drought, are taking a 3-month journey into the wild, or just want to conserve water a little more?

    Not to worry!  Here are some carefully researched and compiled weird but wonderful ways you can clean and sanitize yourself without using excessive amounts of water.

    Smoking.  No, Really!

    Not to be confused with what you shouldn’t be doing with a pack of Camels Lights.  I’m talking about being away on an extended camping trip or living off the land, forget the waterhole, you can smoke yourself and your clothing by the fire. Smoke from firewood has antibacterial properties and should leave you feeling fresher than going without.  Yeah, you’ll smell like smoke, but that smell is better than deadly bacteria that could be on verge of damaging your body.


    Dirt Baths

    Similar to how those fancy mud and clay masks work at the local health spa.  If you have access to very fine and completely dry dirt with no extra additives like fertilizer or animal by-products, it will work wonders to absorb excess oil without over drying your skin.  Simply cover yourself in the dust, allow it to sit for a while, then scrape yourself clean and give yourself a final polish with clean fabric.  Additionally, if your hair is driving you crazy, you can create a mud “shampoo” by adding a little water, working it through your roots then letting it dry.  Afterwards, break up the caked areas and brush it out.  Your scalp will feel refreshed and ready to go.

    Use Baking Soda as A Cleanser and Dry Shampoo

    A great way to tackle the oily buildup in your hair while at the same time giving yourself a waterless body scrub is by using Baking Soda.  Sprinkle the soda onto your head and rub into the scalp.  Continue by sprinkling more soda into your hand or directly onto the other parts of your body for a clean and exfoliation that would put a loofah to shame.

    Related Article: “DIY Soap”

    If plain baking soda feels too abrasive, mix it with baby or talcum powder for a gentler cleanse. Afterwards, wipe off the excess and brush out your hair.

    Use Olive Oil to Avoid Clogged Pores and Stay Moisturized.

    If you have especially sensitive or dry skin, consider taking an olive oil sponge bath.

    Unlike standard cleansers, oils rich in vitamins and antioxidants balance the natural oils of our skin and helps dissolve the excess oil our body and face produce, which contributes to clogged pores.

    For best results, rub a small amount of it into your skin and then wrap yourself in warm, dampened towels or a robe, or a bed sheet covering your face and body for about a minute. Use the towels to wipe away the excess oil and then let yourself air dry.

    If you suffer from oily skin, try castor oil with a few drops of tea tree or peppermint oil to keep your skin from staying greasy.

    And there you have it! Four weird but effective alternatives to getting yourself soaking wet and sudsy.

  • 5 Step DIY Soap

    5 Step DIY Soap

    Making your own soap can be a fun and creative experience. You have the advantage to create a product that is safer than those available in stores and something that is free of perfumes or chemicals. You can also save money over time by making your own soap when compared to products in stores that contain the same natural ingredients. Need another good reason? You can sell it and make a reasonable profit to help you buy the things you need.

    If you are creative with making soap, you can use molds to make natural skin care products into tiny works of art. Or you can make basic soap that is just as nourishing for your skin. There are various recipes and methods that you can try for soap-making so that each batch you make can be different and unique.

    You can use milk or water to create your homemade soap, but using milk can sometimes be tricky, and the recipes that you may find in books or online may not mention that you can substitute milk for water. If you decide to use milk, keep in mind that it will cause the mixture to heat up faster, so you may want to wait until you are more experience with soap-making before you start using milk. However, once you do, the milk will give your soap a creamier color. Natural goat’s milk is a good source if you want to try it.

    Using colors in homemade soap is a fun way to make the process more creative. You can use natural colorants such as spirulina, cocoa, or paprika to create a rainbow of colors. A mixture of Spirulina and nettle creates green soap while paprika crates a nice orange tone. Cocoa can turn out either brown or purple, and annatto creates a bright yellow soap.

    How to Make Homemade Natural Soap

    The equipment that you will need for soap-making shouldn’t be used for anything else, and it should be very clean. For mixing bowls, you should use glass, stainless steel, tempered glass, or enamel. Do not use copper or aluminum since they can react to the lye. Use styrene plastic or silicone spoons for mixing. You can use silicone baking pans or purchase special molds designed especially for soap-making. You will also need a quart and a pint-sized canning jar, newspaper, stainless steel thermometer, and an old towel.

    Additives

    There are several additives that you can use when making soap including herbs like lavender and chamomile, essential oils, natural colors, oatmeal, ground coffee, salt, or aloe vera gel.

    Ingredients:

    • 2/3 cup coconut oil
    • 2/3 cup olive oil
    • 2/3 cup almond or grapeseed oil
    • ¼ cup of lye
    • ¾ cup of cool water

    Directions

    Cover your work area and put on protective gloves. Measure water into a quart jar. Measure lye, making sure you have the exact amount. Slowly pour lye into the water, stirring as you pour. Stand back to avoid any fumes. When the water clears, set aside.

    Add all three oils together in the pint jar. Heat up in microwave or place in a pan of water to heat up to 120 degrees. The lye should have come down to around 120 degrees by then. Wait for both to cool to between 105 and 95 degrees. You don’t want it to get any cooler than that or it will ruin the soap.

    Related Article:  “Homemade Citrus Cleaner”

    Once everything is at the right temperature, pour oils into a mixing bowl. Slowly add the lye, stirring until it’s mixed. You need to get the lye in contact with the soap as much as you can. After around 5 minutes of stirring, the soap mixture should lighten in color and thicken. Once it has a pudding texture, it is at “trace”.

    Add in herbs, essential oils, and any other additives. Stir thoroughly and pour the mixture into molds. Cover with plastic wrap. Set it in the old towel and wrap up. This will keep the heat inside and start the soap making process

    After 24 hours has passed, it’s time to check the soap. If it is still soft, allow it to sit for 12-24 more hours. Once it’s cold, place on parchment paper. Allow the soap to cure for 4 weeks and turn it once a week to expose all sides to air. Once it is fully cured, wrap the soap in wax paper or place in an airtight container.

  • 5 Natural Medicines You Need to Know

    5 Natural Medicines You Need to Know

    More and more people are turning to natural remedies, especially for day-to-day injuries and ailments.  The concept of antibiotics goes back well before the discovery of penicillin.  In fact, some of the natural medications used most have good antibiotic properties.

    Whether you are suffering from a cut or scrape, or a classic cold, flu, earache, or UTI there are remedies that can assist your body in getting rid of it and getting you back on your feet.

    Natural Aspirin

    The most commonly talked about Salicylic Acid, or natural aspirin, is Willow Bark.  Used for thousands of years, modern-day aspirin was originally produced using the herbs Meadowsweet and Willow Bark, then synthesized later. The problem is, when natural ingredients are copied and created in a lab then sold as a drug, they often create side-effects that natural sources won’t.

    But, before you start a collection of Willow Bark or Meadowsweet to use during your next headache, check out this surprising list of foods and other sources that naturally contain this amazing compound:

    Apples

    Avocados

    Blueberries

    Broccoli

    Cauliflower

    Cherries

    Chili peppers

    Cucumbers

    Eggplant

    Grapefruit

    Grapes

    Kiwi

    Licorice, the herb (Not the Twizzler)

    Paprika

    Peaches

    Plums

    Radishes

    Raspberries

    Spinach

    Strawberries

    Turmeric

    Zucchini

    Can I just say, WOW!

    Honey

    Every version of pure honey has natural antibiotics as well as a number of other healing benefits. Honey has also been used for several millennia worldwide to fight infections. We now know it is effective against over 200 strains of bacteria. You can use it internally to fight off many of these or use it topically in the place of store-bought antiseptic for small wounds and skin infections.

    Also, Read This:  “Honey Vinegar Cough Medicine”

    The best source of honey is raw, local honey, like the kind sold at your local farmer’s market.  Local honey will also aid in building up a resistance to local hay fever allergens as well.

    Ginger

    Fresh ginger has antibiotic properties.  It’s especially good against foodborne pathogens like Salmonella and Listeria, used as a tea with lemon and honey, it’s great for fighting again a cold or even the flu. Ginger is also an excellent anti-inflammatory that can aid in the relief of inflammation issues like arthritis and asthma.

    Raw Garlic

    Also a good defender and fighter against colds and the flu, garlic has been used for ages to remedy fungal infections, UTI’s, and intestinal parasites. The Allicin in garlic even has the ability to kill viruses that are prone to becoming immune to prescription antibiotics.

    Unfortunately, cooking garlic will kill Allicin, negating these healing properties, so you’ll have to use it raw.  Whether you choose to peel it and cut it into small pieces to swallow pill style or mash it up with some honey, raw garlic is a great way to stay healthy during cold and flu season.  Just keep some breath mints, or fresh mint, on hand.

    Related Article: Home Remedies Only Mother Nature Could Come Up With

    Turmeric

    Turmeric is not only tasty but it is good medicine. It will strengthen your immune system and destroys bacteria that leads to disease.  This spice is also great for the stomach in a number of ways that will cleanse and balance our systems. Turmeric is another multi-talented herb that is a good antibiotic as well as an antiseptic and anti-inflammatory agent.

    Buy it or Grow it

    Thanks to the rise of urban and suburban organic farms, these items are becoming more and more easily obtained.  If you’re into DIY, try growing some of these options your own in a garden or on your kitchen window sill in decorative pots.  You can even start your own Bee Colony for the “most local” honey possible.  This will almost guarantee you’ll have what you need when you need it.

  • DIY Plant Propagating

    DIY Plant Propagating

    Plant propagating is a common process among homesteaders where new plants are created using various sources. Seeds, bulbs, cuttings, and other plant parts are put together to regenerate a garden. This branch of horticulture deals with the production of new plants using what is referred to as “starter materials”. Some people look at it as a form of recycling while others place the seedlings in small containers for décor and display uses.

    How Does Plant Propagating Work?

    Plant Propagating uses totipotency, which allows the cells to regenerate all the missing parts which leads to creating an entire new organism. Totipotency in plants means that any live part separated from the main plant, when composed of live cells, can produce missing organs to create an intact plant, including roots. This means all plant organs that contain live cells such as seedlings and cuttings, may be used as propagules, or for plant propagating.

    The Diverse Types of Cuttings

    There are many types of cuttings that you can use with plant propagating. They are Softwood, Greenwood, Semi-Ripe, and Hardwood cuttings.

    Softwood cuttings come from fresh, new growth plants, usually in the spring or summer. Softwood includes plants such as butterfly bushes or dogwood trees. They tend to root really well.

    Greenwood cuttings come from young stems that are just beginning to mature. They are from the first year of the plant and cut either early to mid-summer. Greenwood plants include boxwood and gardenias.

    Semi-ripe cuttings are more mature and tougher. They are often taken midsummer to fall. The best semi-ripe plants for propagating include honeysuckle and camellia.

    Hardwood cuttings are from woody stems that have become dormant during the late fall or winter. They come from trees and shrubs such as viburnum or mock orange.

    How to Plant Propagating

    First, you will need to gather supplies such as a sharp knife, pruning shears, containers for potting, sand, perlite, vermiculite or potting mix, and rooting hormone. Then you will be ready to begin.

    The first step is to cut off a small section of a stem. You should choose a healthy plant that’s at least 3 to 6 inches in length. Make a sharp cut and try not to mash together the stems as this will make it difficult for new roots to produce

    Next, you will need to remove the lower leaves on the stem by clipping them, so that you are left with a bare stem to place into your potting mix. After that, you can dip the end of your stem in the rooting hormone. This can help your cuttings to root faster.

    Suggested Article:  “Is Your Soil Quality Good?”

    The last step is to pot up your cuttings as quickly as possible by placing it in moist potting mix. You can also use perlite, sand, or vermiculite. Keep the cuttings humid by loosely applying clear plastic or keeping it under a cloche.

    Keep in mind that there are some plants that will root faster than others. You will have to have plenty of patience with plant propagating. It usually takes around one to two months for cuttings to take root and establish well enough so they may be planted.

    Improve Root Growth: Heat Mat Warms Seeds for Improved Root Growth

    When Should I Retrieve Cuttings?

    It is best to gather cuttings early in the morning because the plant has the most moisture during this time. Keep your cuttings cool and moist until you are ready to place them in their pot. Avoid exposure to direct sunlight until then. However, there are some cuttings that will take root faster if they are kept warm and humid, therefore misting the cuttings frequently may help them grow.

    There are some cuttings that are very easy to grow, so, if this is your first plant propagating project, you may want to start with them. These plants include Geraniums, Impatiens, and Coleus.


  • 3 Effective Sheep Shearing Techniques

    3 Effective Sheep Shearing Techniques

    Despite some claims from animal rights groups, shearing is necessary to maintain the health and comfort of your sheep.

    There are 2 main reasons you need to have your sheep sheared once a year.

    • If the sheep’s thick wooly coats are not removed before the summer months, they can become very uncomfortable. Additionally, the amount of dirt that can amass and become matted to their bodies could develop into a health risk.
    • The wool from certain breeds is a valuable commodity and a good source of annual income. When raised correctly with a proper diet, a single sheep can grow up to 10 pounds of wool.

    Whether or not you are keeping them as a source of income or food, your sheep will need you to get them ready for the summer months to maintain a happy and healthy lifestyle on the farm, ranch, or homestead.

    Note: To make this process go a lot faster, take a look at these awesome shears I found on Amazon at a 65% discount right now <PanelTech Sheep Shears>

    There are a number of techniques out there, and like a person’s handwriting, each individual will develop a style of their own as they practice and get better.  Go get started, here are some basic steps, and tips to follow.

    Starting Position

    Some experts say start by laying the sheep on one side, others recommend starting on their backs with their feet in the air. Depending on the size of the sheep, you can decide what will work best for you.

    Shearing the Brisket

    No matter the technique or starting position you use, most experts say to start shearing on the brisket, or belly area.  If you are planning to sell your wool, the belly area is often too dirty to sell, so starting there will allow you to tackle the worst areas around the belly and crotch areas and get rid of them before you move on to the more valuable areas.

    When you start shearing, make sure your blows (strokes) are long and confident.

    Move down the belly area, around the crotch and the tail.  Separate the wool removed from these areas and discard.

    Start on One Side and Work Toward the Middle

    The removal of the brisket wool will leave a nice starting place to move onto the sides.

    To continue, start on the back leg, shear around it, and then shear up to the shoulder in a long clean blow. Trim the head and neck then work your way back down and around.

    Repeat this on the other side then finish with the back.

    When finished the ultimate goal is to have a single layer of wool that can be rolled or folded up for transport.

    Tips for Maneuvering Your Sheep

    To get your sheep into the positions needed to access each area, you can apply the following techniques.

    To control the head

    Place your thumb in the sheep’s mouth behind the incisor and wrapping your fingers under its chin.

    Take a firm but gentle hold of one of the ears and use to guide the head and body.

    To hold in place while shearing

    Rest the sheep’s body against your legs or between your knees.

    Lay the sheep on its side and straddle with your legs.

    Keep in mind, the calmer and more comfortable the sheep is, the less they will want to wriggle out of your control to get away.  This is especially important for larger sheep breeds to ensure a successful shearing experience.

    Sheep shearing is not an easy task, but the rewards are worth the effort, both for you and your sheep.  Professional shearers make it look easy but remember, they’ve had years and years of experience.  Like most things worth doing, practice makes perfect.

    Bonus: Want to take your identity off the grid?  <<<Click Here and Become INVISIBLE>>>