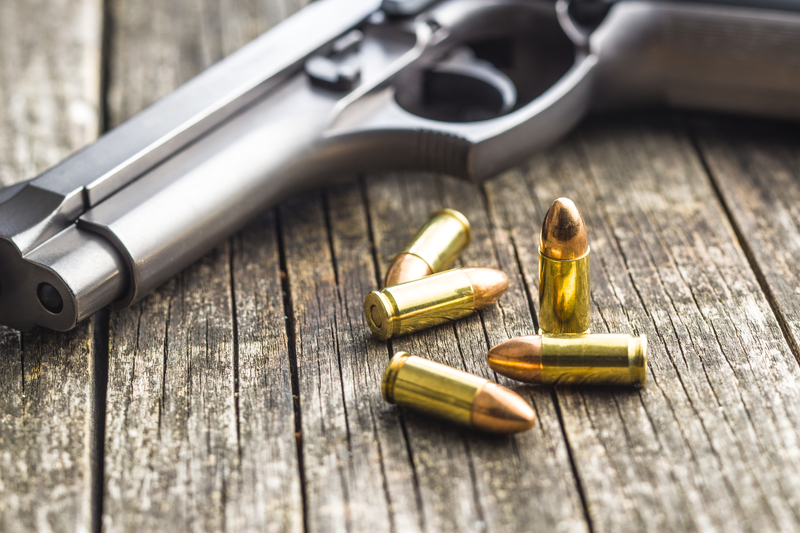
Page 13 of 22
1 11 12 13 14 15 22
DIY – Page 13 – Homesteader Depot

Category: DIY

  • How to Ferment Vegetables

    How to Ferment Vegetables

    Fermenting vegetables grown in your garden accomplishes two things at once. First, it enhances the nutritional value of the vegetables by preserving them at their peak. Second, it preserves the vegetables, so you can enjoy them all winter long.

    The process used for fermenting vegetables is simple. You need the right equipment and the right ingredients – and before you know it, you’ll have a pantry full of delicious, fermented vegetables for your family to eat.

    Fermentation Equipment

    The equipment you need to ferment vegetables is minimal and inexpensive. Here are the basic things you’ll need to have on hand:

    • Jars or containers to put the vegetables and pickling brine in
    • A sharp knife and cutting board for preparing the vegetables
    • Airlock tops (we like ones that are compatible with Mason jars) to keep oxygen out of the jars
    • A pickle packer (usually a wooden stick used to pack the prepared vegetables into the jar)
    • Weights to weigh down the vegetables

    You can buy these items individually or in fermentation packages.  Here is an easy, complete Fermentation Kit from Amazon you can try.

    Fermentation Ingredients

    The ingredients you need to ferment vegetables depend on the method you plan to use. However, there are only a few variations you need to know about. Here’s what you’ll need:

    1. Fresh vegetables from your garden
    2. Salt, whey, or a starter culture
    3. Water

    There are many types of salt, but some are better suited to fermentation than others. Two of our favorites are sea salt and Himalayan pink salt. Both add a nice flavor. You can also buy pickling salt although it’s not the best choice if you want a natural, minimally-processed salt.

    The water you choose for pickling can make a big difference in the final product. If you use tap water, you should boil it or run it through a reverse-osmosis filter for the best results. Well water often has a high mineral content. That can be good for some kinds of fermentation but it’s not particularly good for some fermented products like kombucha.

    How to Prepare the Vegetables

    The method you use to prepare your vegetables for fermentation depends on what you’ll be preserving. Some vegetables, such as cabbage, ferment most effectively when they are shredded. Others, like cherry tomatoes, can be fermented whole.

    It may take some trial and error to arrive at the proper preparation. You may want to start by fermenting just one type of vegetable. Later, you can mix vegetables to create pickled salads that are ready to eat out of the jar.

    The Pickling Process

    The next step is after you have prepared the vegetables is to place them in the jars, cover them with brine, and weight them so they can ferment properly.

    You want to use weights on top of the vegetables, so they stay submerged in the brine. That’s a very important step that some first-time fermenters skip.

    There’s an art to knowing when vegetables are done with fermentation. You’ll have to rely on the specific recipes you use to be sure when they’re done. They need to be kept in an anaerobic environment (air free) while they ferment.

    When they are ready, you’ll be able to remove the weights, seal the jars, and put them in cold storage. Prepared properly, fermented vegetables will keep for months.

    Wondering What to Make?

    If you’re wondering where to start, here are some suggestions for easy fermentation:

    • White or red cabbage (sauerkraut)
    • Kimchi (spicy Korean cabbage)
    • Pickled green beans
    • Pickled tomatoes
    • Fermented carrot sticks or slices

    Do you have a favorite recipe for fermented vegetables? Tell us about it in the comments!

  • 5 Gardening Budget Hacks

    5 Gardening Budget Hacks

    For people who are homesteading, managing expenses is a challenge. You want to be self-sufficient and yet some of the things that you need to do don’t happen overnight. They require an investment of both time and money.

    These things are true of gardening. It’s natural to want your garden to yield enough food for you and your family. However, you must strike a balance between pushing toward self-reliance and not blowing through your gardening budget.

    That’s why we’ve put together this list of 5 cheap gardening tricks to help you achieve self-reliance.

    #1: Pre-sprout Your Seeds

    This first trick is one we like because it saves a lot of guesswork if you have old seeds in storage. (And let’s face it, most avid gardeners do.)

    Instead of buying new seeds or risking a disappointing harvest if the old seeds don’t sprout, try pre-sprouting them in a little water. That way, you can clear out the duds and plant only those seeds that have germinated.

    Larger seeds like peas and beans can be soaked overnight and then left to sprout. Smaller ones will germinate on a damp paper towel.

    #2: Till Coffee Grounds into Your Soil

    Is your soil low in nitrogen? If so, try saving your used coffee grounds and tilling them into the soil to add nitrogen.

    One of the best things about this method is that you don’t need to compost coffee grounds before you use them. Simply collect them and till them into the soil.

    Not a coffee drinker? Go to your local coffee shop and see if they’d be willing to share. Most coffee shops simply throw away used grounds. If yours participates in a green initiative and donates them, find out how to become part of the program.

    Related Article:  The Undeniable Benefits of Coffee Grounds in Your Garden

    #3: Use Mulch

    Mulch serves three purposes in a garden:

    1. It protects the soil, holding in moisture and reducing your water use
    2. It breaks down and enriches the soil
    3. It prevents weeds from growing in your garden

    When you look at it that way, it seems clear that every gardener should use mulch.

    Keep in mind that different types of mulch serve different purposes. Plastic mulch is ideal for heating up cold soil in the Spring. Carbon-based mulches like wood chips cool down the soil and should be reserved for use later in the season.

    #4: Make Compost Tea

    Do you want an inexpensive way to fertilize your plants? Try making compost tea from manure and garden clippings.

    If you keep rabbits or other animals, simply mix some manure in a bucket with weeds from the garden and some comfrey leaves. Fill the bucket about one-third of the way, then top it off with water.

    After two weeks, you’ll have a nutrient-rich “tea” to use in your garden. Because this mixture contains manure, be careful not to get it on the leaves of plants that you’ll be eating. Pour it around the roots and make sure to wash everything thoroughly before you consume it.

    Related Articles: Do-It-Yourself Worm Casting Methods for Compost

    #5: Catch and Kill Slugs without Chemicals

    Slugs will destroy your garden if you let them. One of the best ways to get rid of them involves using metal pie plates and beer.

    Place a disposable pie plate in a depression in the ground of your garden. Pour a small amount of beer into the dish. (You may want to place plates at regular intervals if you have a large garden or a big slug problem.)

    Leave the dishes overnight. When you come out in the morning, you should find a collection of tipsy slugs in the dishes. Remove them and either drown them in soapy water or if you have chickens or ducks, feed them to the birds.

    These five tricks can help you make the most of your garden even if you have a small budget.

    Do you have a cheap gardening trick you’d like to share with us? Tell us in the comments!

    “Break-Through Organic Gardening Secret Grows You Up To 10 Times The Plants, In Half The Time” Find out more here>>>

  • Do-It-Yourself Worm Casting Methods for Compost

    Do-It-Yourself Worm Casting Methods for Compost

    If you’re a homesteader, you probably know all about composting. Composting kitchen scraps are one of the best ways to fertilize your garden without chemicals and pesticides.

    Some of the most effective composters use worms to break down food. If you have a worm composter, then you might not know that worm castings – the black waste that worms produce – is arguably the single best fertilizer known to man.

    The challenge is finding a way to harvest the worm castings – also known as black gold – without disturbing or harming your worms. You also want to make sure to preserve any eggs in the castings since those will hatch and provide you with a steady supply of worms.

    When Is It Time to Harvest?

    The first thing to cover is how to know when it’s time to harvest the castings. The best way to tell is to examine the food bedding in the vermicomposter. When most of it appears to be a rich, black soil, it’s time to harvest.

    The key is to wait until what you’ll be harvesting is mostly castings. That way, you’ll have the richest possible fertilizer to use.

    Method #1: Using Food to Move Worms

    The worms in your composter will migrate to new food sources when you provide them. One of the easiest ways to harvest their castings is to move their food source and wait until they’ve relocated.

    If you have a multi-tray worm composter, simply move the food to the tray above the one you want to harvest. You’ll have to be patient. The worms may take up to a month to relocate. Once they do, you can simply sift through the tray to find any remaining worms. Place them in the tray with the food.

    You’ll also want to be on the lookout for eggs in the soil. Worm eggs are small, round, and a yellowish color. You’ll want to place the eggs in the new food bed. That way, they’ll have a food source when they hatch.

    Method #2: Using Light to Relocate Worms

    Worms are subterranean creatures who prefer dark to light. In fact, they will naturally turn away from light and migrate to a new location when it’s present.

    For that reason, a simple way to move the worms out of the tray you want to harvest is to shine a light at one end of it. They’ll move to the other end and burrow in, leaving you free to sift through the castings, remove remaining worms and eggs, and replace the food bed.

    It’s important to note that exposure to direct light can dry out and even kill worms. An alternative method is to gently move the castings down to one end of the tray, creating a mound. The worms near the top will burrow down the bottom. Then, you can scoop castings from the top and sides.

    These first two methods are both for people who prefer not to handle their worms.

    Method #3: Hand Sorting

    The third and final method is to sort through the castings by hand, removing worms and eggs as you go. Some people don’t like this method. However, if you’re not squeamish, it’s arguably the quickest method because you won’t have to wait for the worms to move on their own.

    There are two methods you can use. The first is to empty the whole tray and sort through it, picking out worms and eggs and replacing them in the tray with a new food bed for the worms. The second is to sift a handful at a time.

    We’ve found that kids love to help with this method. Provided they’re old enough to know not to squeeze the worms, why not let them help?

    How do you harvest worm castings? Let us know in the comments!

  • 5 Simple Methods to Preserve Food

    5 Simple Methods to Preserve Food

    As a homesteader, you know that it’s important to know how to preserve food. Very few of us live in a climate where we can grow food year-round. During the colder months, true self-sufficiency requires a working knowledge of food preservation methods.

    That’s why we’ve put together a list of methods you can use to preserve food. Whether you’re looking for methods to preserve fruits and vegetables from your garden, items you’ve foraged, or animals that you’ve caught while hunting or fishing, we’ve got you covered.

    Method #1: Canning

    Canning is probably the most popular form of preserving food. It’s also one of the more expensive methods, but the initial investment can pay for itself rather quickly.

    To can food, you’ll need a canner. You’ll also need to invest in a collection of glass jars, canning rings, and lids.

    The benefit of canning food is that you can preserve it at its peak. Canning can be used to make jam, jelly, salsa, and other condiments.

    Method #2: Fermentation

    The next preservation method you may want to consider is fermentation. Fermentation involves preparing vegetables, placing them in brine, weighing them down, and allowing them time to ferment in an anaerobic environment.

    The brine may contain salt, whey, or a fermentation starter. Some popular fermented recipes include sauerkraut, kimchi, and pickled vegetables.

    Method #3: Dehydration

    One method we really like is dehydration. It’s a favorite because it can be used to dry fruit, vegetables, meat, and fish – and you don’t need any special equipment to do it.

    Of course, you can invest in a food dehydrator if you want. However, you don’t need to. Most foods can be dehydrated in a low oven. Simply marinate or season the food how you like. Then place it in a 150-degree oven for the specified time. For example, jerky takes eight to ten hours in the oven.

    Drying foods in a food dehydrator may take less time than doing it in an oven. If you think you’ll be doing a lot of dehydration, it may make sense to buy a dehydrator. This is a time-consuming process, but dehydrated foods are shelf-stable – a big plus if you have limited refrigerator and freezer space.

    Dehydrated foods can be stored in airtight bags, jars, or in the refrigerator to extend their shelf life. Some popular dehydrated foods include dried fruit, dried vegetables, and jerky.

    Method #4: Freezing

    Freezing food is a classic method of preserving it, but it has its limitations. If you’ve got a reliable source of power and a big freezer, all you’ll need is some plastic wrap and plastic bags and a permanent marker to label your food.

    There are some downsides to consider. If you lose power for an extended period, you run the risk of losing any food that you have frozen. You shouldn’t have to worry about freezer burn if your food is properly wrapped before you freeze it, but it can be time-consuming to portion out food, wrap it, label it, and freeze it.

    We like freezing for meat and fish. It can also be a great way to preserve delicate herbs from your garden. For example, we’ve made pesto with fresh basil and garlic and then frozen it in ice cube trays. That way, we have fresh pesto even in the middle of winter.

    Method #5: Root Cellaring

    In the days before refrigeration, storing hardy vegetables in a root cellar was the best way to keep them fresh over the winter.

    Not all vegetables are suited to this preservation method. Some that are include potatoes, sweet potatoes, squash, cabbages, and apples.

    If your home already has a cellar, you may be able to use it for storing produce over the winter. If not, consider digging a small cellar to ensure you have food to eat all year round.

    Do you have a favorite food preservation tip that we haven’t mentioned? Share it in the comments!

    >> This lost food has just recently been unearthed by NASA scientists. How to make NASA’s superfood at home.

  • [DIY] Simple Venison Jerky Recipe

    [DIY] Simple Venison Jerky Recipe

    When you’re stockpiling for an emergency, some foods are easier to preserve than others. Vegetables and fruits can be canned or dried.

    But what do you do to preserve meat? Freezing is effective for regular use, but it won’t help you if there’s no power. One of the best and most effective ways to preserve meat is by making jerky.

    Jerky is easy to make, healthy to eat and has a long shelf life. Making it can extend the life of venison and provide you with a healthy, protein-packed snack to get you through hard times.


    Preparing to Make Jerky

    Let’s talk first about what you need to make deer jerky. There are a few basic non-food requirements that you need to have in place.

    1. A freezer to freeze the meat before slicing it
    2. A food dehydrator or an oven with a low setting (150 degrees Fahrenheit)
    3. A very sharp chef’s knife or a meat slicer

    That’s it. Some people like to smoke their jerky, so if you have a smoker, you may want to consider that since it can add a nice depth of flavor to the finished product. However, you don’t need to smoke it. Our recipe, as you’ll see, includes a dash of liquid smoke to add a smoky finish.


    Our Favorite Deer Jerky Recipe

    Now we’re ready to share our favorite deer jerky recipe with you. We’ll walk you through it. Once you’ve made your first batch, you won’t want to go back to store-bought jerky.

    Here’s what you’ll need:

    • 1 pound of venison with the fat and skin removed
    • ½ c. soy sauce or tamari
    • 1 tablespoon Worcestershire sauce
    • 1 tablespoon steak sauce
    • 1 teaspoon liquid smoke
    • ½ teaspoon garlic powder
    • ½ teaspoon onion powder
    • ½ teaspoon sea salt
    • ½ teaspoon ground white or black pepper

    Here are the steps to follow to make the jerky.

    1. Put the venison in the freezer. Partially frozen meat is easier to slice thin than raw meat.
    2. When the venison is ready, use a very sharp knife or meat slicer to cut it into ¼-inch thick slices.
    3. In a large bowl, put the soy sauce, Worcestershire sauce, steak sauce, liquid smoke, and spices, and whisk to combine.
    4. Add the venison slices and stir to make sure all slices are coated with the marinade.
    5. Place the bowl in the refrigerator and allow it to marinate a minimum of four hours. You can leave it overnight for a stronger flavor.

    When the slices have finished marinating, it’s time to cook them. The method and time will vary depending on whether you’re using a dehydrator or your oven.

    If you’re using a dehydrator, fill the trays making sure to lay the meat down in a single layer with no overlap. The usual setting is about 155 degrees, and it should take four or five hours.

    To make jerky in an oven, lay the venison in a single layer on cookie sheets. Preheat the oven to 150 degrees Fahrenheit and put the jerky in. It will take eight to ten hours.

    In either case, you’ll know that the jerky is done when you can pick up a slice of meat and bend it without breaking it. Store the jerky in plastic bags or jars at room temperature or in the refrigerator to extend its shelf life.


    Flavor Variations

    Once you’ve made your first batch, you can experiment with new flavor combinations. Adding some fresh ginger to the marinade will give your jerky a spicy kick. If you want a little sweetness, try adding some brown sugar. Venison and apples are a classic combination, so you can try substituting ¼ cup of organic apple cider vinegar for the soy sauce.

    Store-bought jerky simply can’t compare to homemade. We hope this recipe inspires you to give it a try.

    Do you have a favorite jerky recipe or ingredient? Tell us in the comments!


    With over 1000 easy-to-prepare Paleo recipes and 10 week meal plan, you can stop stressing about your food, and start enjoying the healthy energetic body, weight loss, mental sharpness, and positive attitude you gain from eating only wholesome, natural ingredients that truly nourish.  <<<Check out the Recipes HERE>>>

  • 3 Basics for Starting Your Homestead

    3 Basics for Starting Your Homestead

    In our modern society, many of us dream of finding a way to get back to simpler times. We yearn for the days when people grew and preserved their own food and relied more on themselves and less on technology.

    If that sounds familiar, then you might want to start a homestead. Whether you already own a substantial tract of land out in the country or you’re renting a city apartment, there are things you can do right now to get things underway.


    Starting Small

    Do you live in a city or the suburbs? If so, you might not have the wherewithal to be fully self-sufficient – at least, not yet.

    That doesn’t mean that you can’t get started with homesteading in a small way. Let’s start with what you can do in a city apartment or condominium.

    1. You can install window boxes in sunny windows and grow herbs and vegetables for your kitchen.
    2. If there’s a community garden near you, see if you can rent a plot.
    3. If you have a fireplace, you can switch to wood heat during the cold winter months.
    4. You can preserve food that you grow or buy.

    Each of these things is something you can do without a lot of space. They can give you a taste of homesteading while you work toward your long-term goals.

    If you’re in the suburbs, you have more options.

    1. If your yard space permits it, you can grow a garden or even put in a greenhouse.
    2. You may be able to plant fruit trees.
    3. In some suburbs, you may be able to put in a chicken coop and raise chickens. (Check your city or town ordinances before buying!)
    4. You can install wood-burning stoves for heat.
    5. Just as you can in the city, you can preserve food.

    Growing and preserving food can help you learn essential homesteading skills even if you’re not living in the country.


    Educate Yourself about Homesteading

    There’s no question that there’s a steep learning curve for new homesteaders. That’s especially true if you are heavily reliant on mass-produced items and public services.

    That’s why one of the best things you can do to start homesteading is to learn about it. Go to your local library or bookstore and stock up on books about homesteading.


    Here are some topics to learn about as you work toward your homesteading goals:

    The more you learn about these topics, the better prepared you’ll be when the time comes to move to a homestead. Of course, you can check out our blog posts and resources for information, too!


    Make a Homesteading Plan

    The next thing you’ll need to do is make a homesteading plan. Even if you can’t afford to buy a homestead, you can still take steps to become self-sufficient.

    For example, you might decide that growing food is your top priority. If that’s the case, you can build garden beds, install window boxes, and plant trees.

    As we mentioned above, you may be able to keep chickens – some cities allow it and many suburbs do. There may be restrictions in place concerning proximity to your neighbors, so make sure to check.

    At the same time, you can be saving money or checking out country properties to make the switch to a true homestead.

    How did you get started homesteading? Do you have questions? Tell us in the comments!

    Would you like to see a garden that needs NO WATERING? >>>>SEE IT HERE

  • 5 Questions You Need to Answer When Choosing a Handgun

    5 Questions You Need to Answer When Choosing a Handgun

    Choosing your first handgun can be both exciting and overwhelming.  Just like choosing your first car, there are a number of models, sizes, and budgets available.  Not to mention new versus used, ease of maintenance and the cost of the ammunition required to use with it.

    To make the process of taking this big step a little easier, we’ve compiled a list of questions that will help you determine a course of action when making this important purchase.

    Why Are You Making This Purchase?

    Knowing why you are buying a handgun will help you decide what type.  Do you intend to keep it on hand at home strictly for home defense?  Do you plan to obtain a concealed weapon permit and carry it with you?  Are you a recreational shooter who doesn’t want to rent one at the shooting range anymore?


    [FREE eBook]

    Home Defense Hacks – 49 Ways To Keep Your Family Safe From Intruders.     Get It Here >>


    The answers to these questions will help you determine what size and caliber will work best for your needs.  Larger models can be more intimidating during a home invasion.  So much so that you may not even need it to be loaded.  Smaller models are easier to transport back and forth to the shooting ranges.

    What’s Your Budget?

    Knowing ahead of time what you can afford will have a big impact on the number of handguns are available to you.

    Do You Want a New or Used One?

    Your budget may have some impact on how you answer this question.  If you are interested in a higher price model, a used version may allow you to get just what you want without breaking the bank.

    If you do go with a used handgun, make sure you purchase it from a legitimate vendor.  Then have it checked thoroughly for damage and wear that could affect its firing performance and safety.

    One Simple Gun Shooting Hack That Will Instantly DOUBLE Your Accuracy>>>

    What Caliber and Size?

    When comparing two handguns of similar size and weight, the one designed to shoot a larger caliber will perform with more recoil.  Smaller caliber designs have less recoil.

    If you are just beginning to work on your skill, a smaller caliber will allow you to focus on improving your aim and ability.  As you progress, moving up to a larger caliber will let you continue your progress.

    Did you know:  You can receive your concealed handgun license online. <<<Check it out here>>>

    A note on gun size as it relates to the size of your hands.  In addition to caliber and how easy or difficult it makes handling the weapon, a smaller size will also be more manageable if you have a smaller hand size. Recently a friend went with her husband to the local shooting range to try out his 9mm.  After firing off several clips, she had the opportunity to test a .380.  She was amazed by the ease of use of the smaller caliber and size after fumbling with the larger and more cumbersome model her husband owned.

    If you know you want to use your handgun for personal protection, it’s a good idea to get one that is easy for you to load, fire and reload.

    How Does It Feel?

    While closely related to the size and caliber question, when it comes down to it, this is the most important question you’ll answer.  If a certain model and size feel more comfortable than others, that’s probably the one for you.

    A good way to test different models is to watch for vendor demos at your local shooting range.  Sig Sauer, for example, will often do demos several times a year.  At these events, you can test several models of different sizes and calibers to see what works best for your skill level.

    [VIDEO] 10 Out Of 10 Amateur Gun Owners Make This Simple Shooting Mistake. See It Here >>

  • Solar Energy Options for Homesteaders

    Solar Energy Options for Homesteaders

    You want to live off the grid, but that doesn’t mean you don’t need electrical power to operate your lights and appliances.

    You can use a generator, but generators require gasoline. A generator is a good backup solution for people who are on the grid when they lose power.

    However, if you want to be independent, the best way to do it is to invest in solar energy options for your home and property. It used to be that solar panels were prohibitively expensive. That’s no longer the case.

    In this post, we’ll detail some of the solar energy options for homesteaders. By the time you’ve finished reading, you’ll have the information you need to make the switch to solar power.

    On Grid vs. Off Grid

    The first thing you need to decide is whether you want to live off the grid or on the grid. For some homesteaders, making a switch to solar power is best done incrementally.

    In other words, you might start with a few solar panels and switch to solar for heating your water. Then, over time, you may add additional panels to help you ease into off-grid living.

    If your goal is to get off the grid as soon as possible, you’ll need to evaluate your energy needs and determine how much power you need to collect and store to keep things running the way you want them to.

    Calculating Your Power Needs

    The next step is to determine your power needs. There are many easy online calculators that you can use. Here’s what you’ll need to make the calculation:

    • The number of Kilowatt-Hours (kWh) you use per month
    • The percentage of your energy use you want to offset with solar power
    • The state you live in (determines the average days of sun where you live)

    The calculator uses these three things to calculate a minimum and maximum size for your new solar power system.

    [Must See] Solar Panels Alternative — Portable Solar Energy System: Learn More Here>>>

    Solar Power Options

    Regardless of your power needs, you need a system to collect solar energy, convert it to the proper form, and store it so you can use it to power your home.

    If your goal is to be only partially dependent on the grid, then you have a few options to choose from. For example, you might:

    1. Invest in a solar water heater. You’ll need to place it in an area that gets as much direct sunlight as possible, but you won’t need to add solar panels to your home.
    2. If you have a swimming pool, get a solar pool heater. The same principle applies – you’ll need to place it in direct sunlight for the best results.
    3. You can buy and install just a few solar panels, store the energy in batteries, and use it as needed.

      Related Article:
      “4 Excellent Ways to Generate Your Own Electricity” 

    The other option, of course, is to make the switch and move off the grid. In that case, you’ll need to purchase:

    1. Photovoltaic (PV) panels to collect sufficient power for your needs
    2. A combiner box where you’ll plug in the panels
    3. A charge controller to prevent your panels from storing too much energy
    4. Solar batteries to store excess energy
    5. A DC to AC inverter to make the power you collect usable

    Of course, the expense of buying these things can add up. If you’re an experienced electrician (or you know one who’s willing to work for cheap) then you don’t have to buy a combiner box – you can make one. Keep in mind that it’s important to get the wiring right and to protect your system so it doesn’t fail.

    Making the Switch to Solar

    Switching to solar power can help you save money in the long term. We like it because it gives us a reliable source of power that we can count on even if the grid fails or is compromised.

    Have you made the switch to solar power? Tell us in the comments!