Page 27 of 89
1 25 26 27 28 29 89
Homesteading – Page 27 – Homesteader Depot

Category: Homesteading

  • How to Harvest Sunflower Seeds (Video)

    How to Harvest Sunflower Seeds (Video)

    As you’re considering what to plant in your garden this year, you might have thought about sunflowers. Sunflowers are a wonderful and fun plant to grow; they are gorgeous in the garden, easy to plant and propagate, and their seeds are also an amazing source of fat, protein and nutrients.

    Growing the same amount of calories and nutrients from other sources isn’t always so simple, so sunflowers are a great option for the beginner food garden. If you’re trying to get your kids more involved in gardening, sunflower is a really fun way to do that. They can easily plant and tend to the sunflowers themselves, and they’ll love to help with the harvesting–and eating–of the nutritious, delicious seeds.

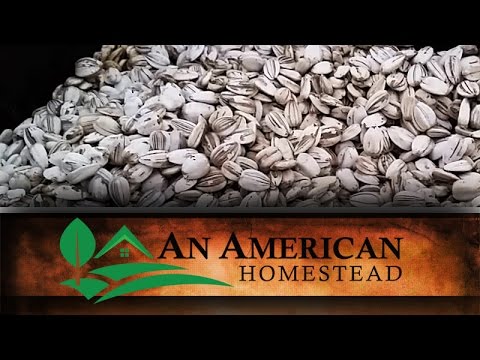
    This video shows how to harvest and process the sunflower seeds. When you’re choosing what to plant, it’s always a good idea to think about the whole process of growing, not just planting and caring for the crop, but harvesting, processing, and storing as well. So if you’re considering growing sunflowers, this is a great video to watch beforehand to see if it’s something that would work for your garden. Enjoy:

    If you liked this, you might also enjoy…

    The Secret to Sustainable Homestead Energy…

    The BEST Diet Hacks for a Primal Lifestyle…

    Defeat Body Pain at Any Age…

  • Simple and Natural Homemade Pest Control Tips

    Simple and Natural Homemade Pest Control Tips

    Most homesteaders have gardens. In fact, they have large gardens and they rely on the food they grow to feed their family throughout the year. If that sounds like you, then you know just how problematic it can be when you have pests that try to take hold and destroy your crops. Fortunately, there are some natural methods you can use to combat those pests. Here are some of the ways to get control of your garden once more so you do not have to worry about bugs and slugs ruining your harvest.

    Slugs can be a real pain, and they often feed on leaves and on seedlings. During the rainy season, they can be a real problem. You can use a range of methods to deal with the slugs, including essential oils. Some of the essential oils that can help to repel slugs include peppermint and cedarwood. Place five to six drops of the oils into about a cup of water, and then spray around the bottom of the plants. It can help to keep them away. If you notice slugs on the plant at the time of spraying, you can remove them by hand.

    A good way to keep other pests away from your plants is to add 12 ounces of water along with about 10 drops of peppermint essential oil, one tablespoons of liquid dish soap, two cloves of minced garlic, and a tablespoon of cayenne into a container. Mix it well and let it sit for about a full day. Strain it and then add it to a spray bottle. Spray this on the plants that are having problems with the pests about two to three times per week, and always after a rain.

    These are just a couple of simple tips to help you deal with pests in the garden. It is a constant battle, but you can have the upper hand.

    If you enjoyed this, you might also like….

    Long-Term Survival for Homesteaders…

    Natural Healing Secrets You Need to Know…

    Effective Primal Diet Hacks…

  • Clipping Chicken’s Wings, The Easy, Painless Way (Video)

    Clipping Chicken’s Wings, The Easy, Painless Way (Video)

    It’s a common myth that chickens can’t fly, in reality, they certainly can. In the wild, chickens are able to fly short distances, enough to get them over fences or up into trees.

    If you’ve got free range chickens or chickens contained by a fence, you probably don’t want them to be practicing their hereditary skill of flying. So how can you keep them grounded, without hurting them or causing you both stress?

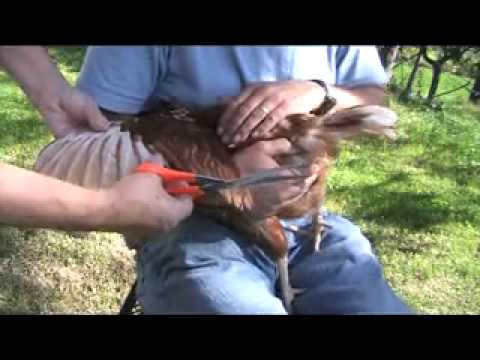
    This video from Raising Happy Chickens shares a simple, painless way to clip chickens wings to keep them around. Enjoy!

    If you enjoyed this, you might also like….

    Do You Have What You Need to Hold Down the Fort?

    Natural Healing Secrets You Need to Know…

    Effective Primal Diet Hacks…

  • How to Make Pickles at Home

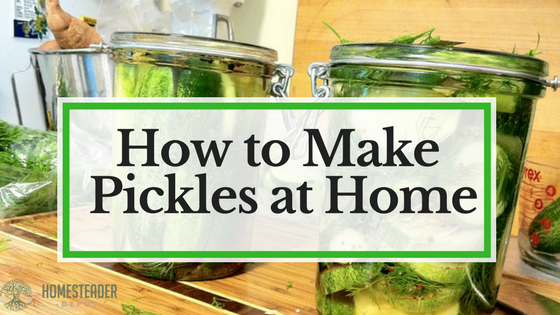
    How to Make Pickles at Home

    Pickles are one of the most classic and widely recognized forms of brine preservation. While the term “pickled” can apply to various forms of preserving various kinds of vegetables, what most of us think of when we think of “pickles” is the classic, brine-preserved cucumber that has become a staple of delis and diners across America. It most famously made its way into the American diet through Jewish delis in New York City, and, like any classic food, it can be made easily at home.

    While the formula is simple, however, there can be a bit of trial and error involved, and anyone who’s successfully made pickles can probably attest to this. There have probably been hoards of gray-haired European grandmothers throughout the ages who have perfected the art of delicious, crunchy, perfectly-pickled cucumbers, but for those who didn’t grow up learning at their Bubbie’s knee, it take a bit of practice.

    Fortunately, we can still learn from the masters, even if they’re not in our own family. Sandor Ellix Katz, author of Wild Fermentation: The Flavor, Nutrition, and Craft of Live-Culture Foods is not only an expert in the field of home fermentation, he also grew up in a Jewish community in Brooklyn, so he knows a good pickle when he, well, makes one.

    One of the most common mistakes made by first-time pickle makers is by only using a brine. This will result in mushy, soft pickles. What Katz discovered the hard way is that by adding fresh grape leaves, you can naturally preserve the crunchiness of the cucumber, as it absorbs the brine and takes on the delicious, salty sweetness that can only be acheived through pickling.

    To find fresh grape leaves is another story, however, and you might have some trouble, depending on where you live. Of course, if you grow grapes, you won’t even be worrying about this, but if you don’t, you can see if any homestead neighbors do. You can also check or ask at Middle Eastern restaurants or markets, or simply order dried ones online, which are a good substitute. You can also use black tea leaves. While grape leaves are the classic, black tea will perform the same function.

    This Odd Therapy Will Revolutionize Your Well-Being…

    The other crucial component is your equipment. We’ve included Katz’ suggestions, but there’s still room for improvisation. The important thing is to have a cyllindrical container and some way of weighing down the pickles so they remain submerged in the brine. See what you can come up with!

    So without further ado, here is Sandor Ellix Katz’ recipe for classic kosher deli pickles!

    Ingredients 

    Yields 1 gallon 

    • Approximately 4 lbs cucumbers, pickling variety preferable
    • 3/4 cup salt (kosher or sea salt is best)
    • Dill, either fresh and flowering, or the dried leaves and/or seeds (whatever you can find)
    • Several cloves of garlic
    • Grape leaves (these help the pickles retain their crunchiness)
    • Black peppercorns

    Equipment

    • Ceramic fermentation crock, or food-grade bucket, both cylindrical
    • Fermenting weight or large plate that fits inside the bucket
    • Either: 1-gallon bottle filled with water OR a large rock that has been boiled
    • Clean cheesecloth or dish towel for covering

    Directions 

    1. Rinse the cucumbers carefully, to avoid bruising. If you are using cucumbers that haven’t been picked fresh that day, soak them for a few hours in chilled water.
    2. Bring half a gallon of water to a boil on the stove, then remove from heat and stir in the salt, making sure it dissolves completely. This creates the 5% brine solution.
    3. Let the brine mixture cool until you can leave your finger in it for at least 10 seconds without it burning.
    4. As you are waiting for the brine to cool, clean your crock or bucket thoroughly using hot water and non-antibacterial soap, as well as your weight or plate.
    5. Peel and crush your garlic cloves, and place those along with the dill, peppercorns, and grape leaves at the bottom of your crock or bucket.
    6. Next, place your cucumbers in the crock or bucket, and then follow with the brine.
    7. Place your weight or plate on top, and weigh that down with the jug filled with water or the boiled rock. If the brine doesn’t cover the plate or weight, add more brine with the ratio of 1 tbs salt to each additional cup of water.
    8. Cover your crock or bucket with the cheesecloth or dish towel. This will keep dust, bugs, and any other small debris out of the pickels.
    9. Store in a cool, dark place.
    10. Check daily. Scum may start to appear on the surface, so remove this.
    11. After a few days, taste your pickles to see if they’re ready. This part is largely up to your own taste, once they taste good to you, they’re done! There’s no rule here; as long as they’re fermenting well and you like the taste, you can remove them when you please.
    12. You can let them continue to sit for one to four weeks, taking some out to enjoy as you go. At some point they will become fully sour, at which point you’ll want to move them to the fridge to slow the fermentation process.
    13. To safely move them to the fridge, transfer to a jar if you don’t have room for your whole crock or bucket in the fridge, but DO NOT COVER for a few days, leaving the cheesecloth, dish towel, or a paper towel secured with a rubber band on the jar. After a few days, you can cover with the jar lid.
    14. These will keep for a long time in the fridge, so you’ll probably eat them all up before they ever go bad! Such is the beauty of fermented foods.

    Enjoy!

    The ONLY Reason You’re Failing the Paleo Diet...

  • Essential Elements Your Homestead Property Needs

    Essential Elements Your Homestead Property Needs

    Those who are considering buying a homestead property are often very excited about starting this new lifestyle. They are looking for the “perfect” piece of property, and this is not always easy to find, as they do not know exactly what it is they should seek in a homestead. This is especially a problem for those who are just getting started with homesteading. The following tips will help you to remember some of the essentials.

    First, you need to have a good source of water on the property. This will typically mean a well and pump. You will want to talk with neighbors and those who are selling the property about what they are using. Reliability is essential. It is also a good idea to have the water tested before you buy, just to make sure it is safe.

    You should also consider how easy or difficult it is to access the property. Many who are homesteading like the idea of being in the “middle of nowhere”. However, you still need to have access to the road throughout the year, so what will you do if there is too much snow, or if the area floods? Know who is responsible for clearing the roads that access your property. If you are responsible for it, be sure you have the equipment needed to take care of any problems that come your way.

    What about power? How close are the power lines if you want to be connected to the grid? Are you going to get a generator, use solar, use wood heating, or have a combination of these methods? Figure out what you need before you buy, and make sure it is convenient for you.

    These are some of the most important things to consider when you and your family are buying a homestead property. Do not forget them.

    If you enjoyed this, you might also like….

    How Safe is Your Family?

    Natural Healing Secrets You Need to Know…

    Effective Primal Diet Hacks…

  • Growing Strawberries In Gutters (Video)

    Growing Strawberries In Gutters (Video)

    Spring is here, and I’ve definitely got gardening on my mind! I’m starting to see fresh, delicious, American-grown strawberries in the grocery store again, but as with anything else, I’d love to grow my own.

    Strawberries can be tricky, depending on where you live, but these clever off-grid gardeners figured out a pretty cool hack: using gutters!

    It’s just the right time to give this a shot if you’ve got the right space and equipment, and I’m definitely considering trying a scaled-down version myself to see if it works out. What could be better than fresh strawberries picked from your own backyard? Check it out:

    If you enjoyed this, you might also like….

    How to Lock Down Your Homestead…

    The Ultimate Guide to Natural Health…

    Effective Primal Diet Hacks…

  • 6 Things You Should Do Before Getting Piglets

    6 Things You Should Do Before Getting Piglets

    I’ve raved quite a  bit in the past about how great pigs are. You can buy them as piglets for a very affordable price, and within a season have a hog big enough to fill your freezer with meat. For the initial start-up cost, space they need, food they eat, and meat they yield, they’re incredibly efficient animals to raise for meat. And, as someone who hates waste, I just love how much you can feed them!

    It’s also relatively easy to feed them virtually for free, which is another big plus. When you buy pork at the supermarket, you have no idea what the animals have been eating, and since pigs virtually retain everything they eat, conventionally-raised pork can be literally quite toxic. But if you raise them yourself, and can control what they consume, there’s no better source of clean, green, delicious pork!

    However, you should definitely know what you’re getting into before you run out and buy a small herd of piglets.

    Here are five things every aspiring pig farmer should know before bringing home piglets:

    1. Find a butcher

    No, seriously. If you live in an area where it’s quite common for local farmers to bring their animals to a butcher after slaughtering, they can be booked up months in advance. If you don’t plan on butchering the animal yourself, which is wise for your first season of pig farming, find yourself someone to butcher it for you before you invest in pigs so you’re sure when the time comes, you’ll be able to bring it in.

    2. Secure housing 

     .

    There are a couple of different options for a secure pigpen, and whatever you choose, make sure it is secure. Pigs are diggers, and many amateur pig farmers can attest to how easily they can plow through improvised fencing. An electric fence is a great option if you can afford it. Do some research into what pig farmers in your area do, as depending on the soil and the amount of rain you get, you might have to bury your fence pretty deep.

    Your pigs will also need adequate shelter to live comfortably, and for both shelter and fencing, you’ll have to bear in mind how big your pigs will get. They’re quite small as piglets, so make sure to think ahead and anticipate how much room they’ll need as they grow.

    The Secret to Sustainable Homestead Energy…

    3. Make a meal plan

    Ok, so it’s not going to be nearly as complicated as making a plan to feed your family, but before you bring piglets home, you’ll want to do some research into what you can feed them and where you’ll get it. You can feed pigs scraps from your kitchen and garden for sure, but they will most likely want more than that–a lot more. I already mentioned the many ways you can feed a pig for free, so check those suggestions out and see what you can find for free in your area before you get piglets so you’ve already got a game plan.

    4. Secure their water 

    Pigs aren’t the most delicate of creatures, and especially for little ones, you’ll want to make sure you can get them regular fresh water in a container they can’t tip over…or play with. You’re probably very familiar with the cliche of pigs rolling in the mud and well, it’s true, pigs love to play in the mud, and if you don’t secure their water trough, they’ll be playing in that as well. A heavy, metal trough that can’t be tipped over or easily accessed by the pigs will be your best bet to keep them hydrated and safe.

    The BEST Diet Hacks for a Primal Lifestyle…

    5. Arrange transportation 

    Another aspect of #1 is to make sure you can get them to the butcher when it time comes! Transporting piglets is easy, but transporting a full-sized hog is a totally different story. If you have a truck and trailer, make sure you have a means of herding the pig into the trailer. But don’t just expect them to saunter on up a ramp and into the back of a trailer, pigs won’t be naturally inclined to do that. If that’s your plan, make sure you start training them to do that right away, by doing practice runs starting at a young age. Kind of morbid to train a pig to virtually walk to his own death, I know, but just comfort yourself with the thought of all that delicious meat that will fill your freezer.

    6. Know your breed

    When you buy the piglets, make sure to ask the farmer who sells them to you all about the breed, and jots down their answers if necessary. You’ll want to know how big these porkers will get, what their personality is like, what cuts are the best on them, how tenacious they are at trying to escape, etc. Not all pigs are the same, and fortunately, if you buy your piglets right from the farmer, you can talk directly to the person who raised their parents so they can give you a good idea of what to expect from your own herd.

    Defeat Body Pain at Any Age…


  • Composting: Good Materials, Bad Materials, and Special Materials (Infographic)

    Composting: Good Materials, Bad Materials, and Special Materials (Infographic)

    Composting. So simple, at yet so complicated. On the one hand, I feel like it’s really easy to just throw together some biodegradable, nutrient-rich material, wet it, and let nature do it’s thing. On the other hand, there are a lot of important considerations to keep in mind when adding to compost piles, and there are items that are not great to have in your compost pile, for many reasons.

    While for the most part, it’s not too complicated to start your own compost pile, there are are few “what not to do” considerations to keep in mind, and I thought this infographic from MarcLanders.com was a great little guide. It’s got some items that are great to add to compost piles, some items to avoid, and some items that you can add, but require special preparation, and the instructions on how to do that.

    If you want to grow your own compost to naturally amend and fertilize your soil, it’s not too tricky to do it right, just follow these simple guidelines and you’re sure to have success. Enjoy!

    If you enjoyed this, you might also like….

    Can You Defend Your Family When SHTF?

    Natural Healing Secrets You Need to Know…

    Effective Primal Diet Hacks…