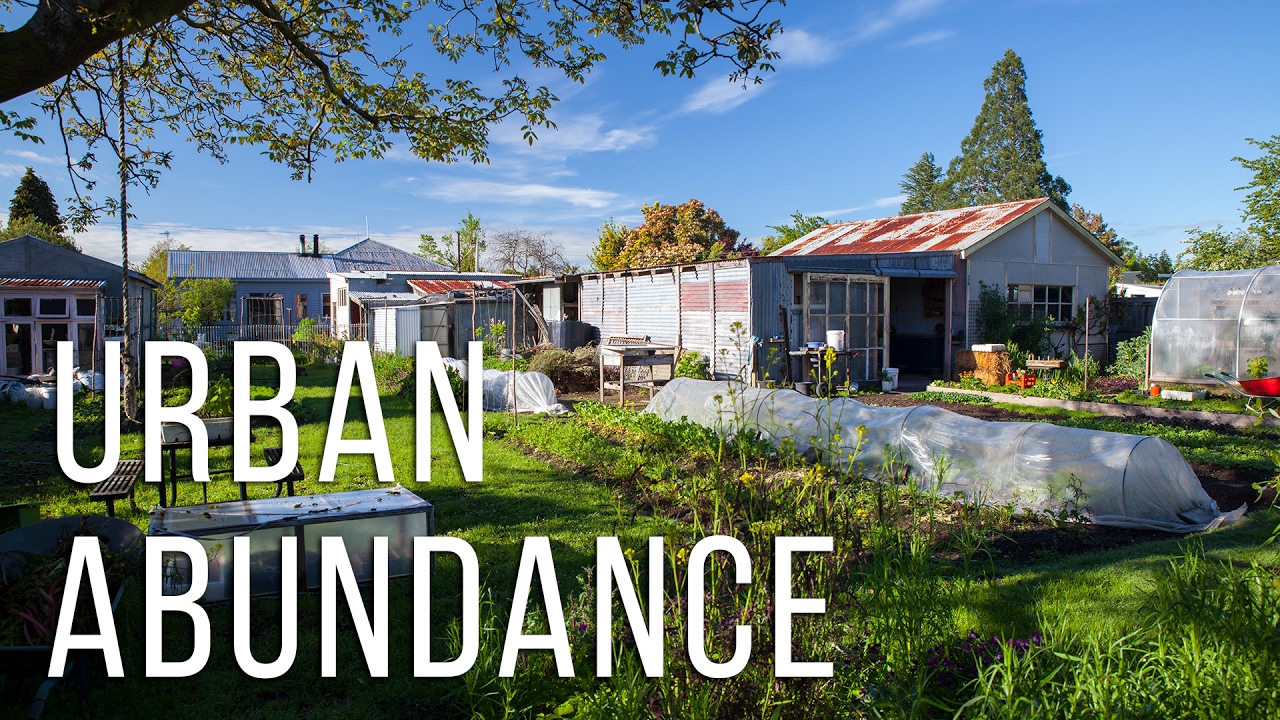
Page 33 of 89
1 31 32 33 34 35 89
Homesteading – Page 33 – Homesteader Depot

Category: Homesteading

  • How to Make Moss Grafitti

    How to Make Moss Grafitti

    Moss Grafitti is a really cool new trend which involves growing moss in certain formations to create words or images. It’s the height of urban-dwelling earth-loving hipster culture, but you can easily do it on your homestead to add some beauty and creativity.

    Maybe you’re looking to give your barn a bit of visual appeal, mark your property line on some trees, or just have fun with a new artistic medium. Painting with moss is a unique and ecologically-sound way to release your inner artist around the homestead.

    Here’s how:

    Choose your spot

    First, choose the appropriate place to grow your grafitti moss. Avoid walls and fences that get more than six hours of direct sun each day. Too much unfiltered sunlight does not make a good environment for moisture-loving moss. Try to choose a spot near a water source. The shallow root system of moss will thrive on almost any surface, but it needs to be porous. Glass, polished stone, and similar surfaces will not work. The best time to create your moss artwork is in the spring or fall.

    Plan and sketch

    Next, use a temporary marker or chalk to sketch your design on your chosen surface. For more intricate designs, plot a guiding grid first.

    Gather your materials

    Next, get together what you need to complete the project:

    • Two handful-size bunches of moss
    • Two cups of buttermilk or yogurt
    • 1/2 teaspoon of sugar
    • 2 cups of water
    • Blender
    • Paintbrush
    • Container for the finished product
    • Corn syrup for thickening the consistency, if needed

    Make Your Paint:

    1. Rinse and remove as much soil from the roots of your moss as possible.
    2. Break it apart into small pieces and add it to the blender.
    3. Add the buttermilk, water, and sugar.
    4. Blend until completely smooth.
    5. Test the consistency with your paintbrush.
    6. If it drips like thin paint, add enough corn syrup to achieve a thicker, viscous consistency.
    7. You want it thin enough to paint with but thick enough not to drip.
    8. Transfer to your container and refrigerate until ready to use.

    Paint! 

    When you are ready to paint your chosen surface, simply paint as you would on a canvas! Use a variety of brushes for broad strokes or fine details. Stencils also work very well. After your “moss-terpiece” takes root and begins to grow, you can trim or remove areas with a knife to shade or lighten the image. You can also spray the moss with lime juice which acts as a natural “Round-Up” on moss.


    Maintain Your Moss

    Remember, your moss medium is a living organism. You want to care for it the way you would a member of your garden. Use a spray bottle to thoroughly mist the moss every other day. In springtime and fall, the moisture in the air should be sufficient and you should only need to mist it once per week.


    Enjoy your new living artwork!

    If you enjoyed this, you might also like….

    Do You Have What You Need to Hold Down the Fort?

    Natural Healing Secrets You Need to Know…

    Effective Primal Diet Hacks…

  • The Simplest Way to Peel Garlic. Period. (Video)

    The Simplest Way to Peel Garlic. Period. (Video)

    Garlic is a homestead kitchen staple, but let’s face it; it’s more than a little tedious to fidget with the papery skin of each individual clove.

    Sure, you could smash your garlic with a knife or a mallet and make a big mess. If you have half an hour or more to spare, you could soften the skins in hot water. If you need to peel enough garlic to season food for an army, or make a hefty portion of a natural remedy like honey-infused garlic, you can shake them into oblivion between two bowls, but that’s more trouble than you really need to go through. And let’s not even get started with the weird, artificial flavor of pre-processed garlic available in the store.

    So what’s the homestead cook to do? I shared a video about the bowl method last year, but this video shows an even easier, ridiculously simple kitchen hack for the home chef in a hurry who won’t settle for less than fresh, pungent garlic. It’s as easy as tossing the head of garlic into a jar, closing it, and shaking the living daylights out of it for less than half a minute. After 20 seconds, tip the jar to pour out your fresh peeled garlic cloves.

    Wasn’t that easy?


    If you enjoyed this, you might also like….

    Are We In The End Times?

    Complete Health Transformation Without Drugs or Surgery…

    Having Trouble Sticking With Paleo?

  • Frugal Ways to Start Seeds

    Frugal Ways to Start Seeds

    It’s almost time for spring planting, are you ready? This is a great time to start your seedlings indoors to transfer to prepped garden beds in a few weeks. However, if you’re not set up with lots of fancy seed trays and want to get started anyway, here are a few frugal hacks for starting seeds indoors.

    Egg shells

    Did you know you can actually start seeds in egg shells? It’s true, and really cool too! All you need to do is save your egg shells, clean them with warm water and soap, and let dry. Collect enough to start some seeds, put some potting soil in each one, and plant 2-3 seeds. Once they’re sprouted, thin back the less hardy seedlings, stick in the ground, and squeeze a bit to break up the egg shell slightly so the roots can poke through. The egg shell with decompose over time, lending great nutrients to the soil as your plant grows!

    Egg cartons

    You can skip the egg shell if you don’t have enough and just plant directly in cardboard egg cartons too! Simply fill each compartment with potting soil, and plant directly in it. Once your seedlings are sprouted, just carefully break apart each compartment and plant right in the soil. The cardboard will decompose quickly.

    Toilet Paper Tubes

    You can also start seeds in discarded toilet paper or paper towel tubes! Simply cut in half (for toilet paper tubes) or in fourths (for paper towel tubes), line up on a tray, or wrap in brown packing paper and secure with some twine to secure the bottom. Fill with potting soil, plant your seeds, and transfer to the garden.


    There’s nothing like saving money in the garden, and using materials that will naturally decompose and lend nutrients to the soil. Try one of these frugal seed starting methods to get your garden started off right this year!

    If you enjoyed this, you might also like….

    Are We In The End Times?

    Complete Health Transformation Without Drugs or Surgery…

    Having Trouble Sticking With Paleo?

  • More Ways to Profit Off Your Land

    More Ways to Profit Off Your Land

    A few weeks ago, we wrote an article on ways to profit off your land as a homesteader, and we promised there’d be more, so here it is!

    This week’s post on how to profit off your land is all about livestock, dairy, and meat. Being able to raise, consume, and sell your own animal byproducts is one of the biggest appeals of homesteading, and, with the right set-up, experience, and a bit of time, you can conceivably pull quite a profit.

    We already covered eggs, which is a really good start and has relatively low overhead. It’s a great small-scale farming operation, that can bring at least some nice pocket change that will more than offset the cost of feeding and housing your chickens. Here are five ideas for ways to profit off your land by raising and selling animals and/or their byproducts.

    1. Sell Milk

    Raw milk from farm-raised cows is all the rage these days, if you are legally allowed to sell it. A lot of farmers all over the country pull a very nice profit selling fresh raw milk, and it doesn’t take a whole lot to get set up to do it. You can milk by hand or get a commercial milker, just make sure you handle it safely. While in many states it is entirely up to the customer’s discretion if they want to take the “risk” of consuming raw milk, you’ll still want to ensure it is safe, healthy, and clean.

    2. Sell Chickens

    If you have a nice-sized flock of chickens, sell your chicks or extra hens for another source of side cash. A lot of people will be eager to buy hens who have already matured to egg-laying age, or large fryers to eat.

    3. Sell pigs

    Pigs are a very efficient way to raise meat, as they are cheap as piglets, don’t require a lot of space to live, and also mature very quickly. Due to these factors, they’re actually far more cost efficient to raise for meat than cows. You can sell piglets when your sow gives birth, but you’ll make far more money selling fully grown hogs for meat. You can get about $250-300 dollars for one mature hog!

    4. Sell goat cheese

    Goat cheese is a coveted artisan food product, and it’s not too complicated to make. Goats are easy to keep and feed, and can be pretty cost-effective. You can make delicious, fresh, homemade cheese to sell at farmer’s markets and charge a very decent price.

    5. Sell cows

    As opposed to piglets, calves can actually be sold at a very high price. Of course, you typically only get one per cow, you can sell them for $70-$150, and, if you want to keep your cow’s milk all to yourself, this might be a desirable option for you once the calf is big enough to leave her mother.


    These are a few more ideas for ways to profit off your homestead land. Let us know if you’ve got ideas and we’ll feature them on an upcoming post.

    If you enjoyed this, you might also like….

    Are We In The End Times?

    Complete Health Transformation Without Drugs or Surgery…

    Having Trouble Sticking With Paleo?

  • 5 Ways to Use Vinegar for Your Chickens

    5 Ways to Use Vinegar for Your Chickens

    Vinegar has so many uses around the home in general, it should be no surprise to you that there are a lot of ways to use it around your chicken coop! Both distilled white vinegar and apple cider vinegar are wonderful to keep your chicken coop clean, your chickens healthy, and keep you happy!

    Here are a few of the many ways you can use vinegar for your chickens:

    1. Added to water

    Chickens are subject to parasites and digestive issues as much as any other creature, and adding a bit of vinegar to their water can help keep them healthy and happy. If you happen to see your chicken has very runny droppings, it’s time to add some vinegar to their water. I would recommend a tablespoon for each gallon of water.

    2. Chicken baths

    Chickens are pretty good about giving themselves dust baths, so you will want to make sure they have a clean place to do this every day. However, it can also help them, especially with mites and parasites, to give them a simple bath in warm soapy water from time to time, and give them a rinse in water with a bit of vinegar. This will both condition their feathers, kill any unwanted critters or fungal growths, and help to gently cleanse off any dead skin on their feet.

    3. Clean eggs

    While seeing bits of dirt or chicken droppings on your eggs are how you know they’re truly farm fresh, no one really wants to bring chicken poop into their kitchen! Giving your eggs a quick dunk in water with a bit of vinegar will clean them and also brighten the egg shells.

    4. Remove tough grime

    We’ve all experienced that bit of chicken poop in the coop that just doesn’t want to budge. A spray bottle with vinegar will not only remove tough stains, it will also help repel critters and fungal growth in your coop, so use this for regular coop cleanings.

    5. Easy peeling for hard-boiled eggs

    I recently discovered this, and, as a big fan of hard-boiled eggs, it’s made my life much easier! You may have heard that adding a dash of baking soda to the water when you hard boil eggs can make them easier to peel, but I’m not really sure why, since it is vinegar that dissolves calcium. Add a dash of vinegar instead and those pesky egg shells will practically peel themselves off.

    If you enjoyed this, you might also like….

    Defend the Homestead When Times Get Tough…

    The Ultimate Guide to Natural Remedies…

    What You Need to Know Before Going Paleo…

  • The $5 Chicken Tractor (Video)

    The $5 Chicken Tractor (Video)

    Popular homesteading vlogger Justin Rhodes has been on a tour of American homesteads this month, and through his travels, he found this impressive $5 chicken tractor made by his friend, Ryan from Wholesome Roots.

    I love seeing great, innovative, and frugal ideas for homesteading in general, but it seems people seem to get particularly innovative when it comes to housing and accommodating chickens! Just this week we shared our frugal chicken nest ideas, and I’ve actually found a few more since posting it.

    This is a very clever little system for moving chickens around the homestead, which is a great way to ensure they’re doing their part, and also getting fresh ground to scratch and fertilize every day. Chickens like grains, but they really thrive on bugs and grass. There are lots of options for tractors, chicken runs, and mobile coops out there, but if you can’t afford a fancy system, you’ll love this clever and simple tractor.

    Check it out, and be sure to follow Rhode’s homestead tour, it has been really fun and cool to see so many homesteads across the country!

    If you enjoyed this, you might also like….

    Are We In The End Times?

    Complete Health Transformation Without Drugs or Surgery…

    Having Trouble Sticking With Paleo?

  • Simplest Bulletproof Coffee Recipe

    Simplest Bulletproof Coffee Recipe

    You may have heard of bulletproof coffee, which is gaining massive popularity among foodies everywhere. It is an aspect of the bulletproof diet, a book and diet plan designed by a man named Dave Asprey, that focuses on lots of good fat, moderate protein, and low carbohydrates.

    Healthy fats are making a huge comeback, after decades of “low-fat”  being considered healthy, nutritionists have changed their tune on saturated fats, which they now say make up an important part of a healthy diet.

    And bulletproof coffee is a great way to make sure you’re getting healthy fats, and make your morning coffee smooth and delicious without unhealthy creamers.

    It’s very simple to make, and you’re sure to get hooked!

    The purist version requires a special kind of coffee, and a special kind of oil called MCT oil, but any coconut oil will do, as they count as MCT oil. Organic coffee is always much better for you than non-organic, since conventional coffee crops are usually heavily sprayed with pesticides. Organic coconut oil is preferable as well. And, you will definitely want to use butter from grass fed cows. Pasteurized dairy is a much healthier source of fat, as grass is what cows are meant to eat. It also ensures they are much healthier, meaning higher-quality butter.

    And now, without further ado, here’s the recipe:

    Ingredients: 

    • Organic coffee of choice
    • Grass-fed butter
    • Coconut oil or other MCT oil

    Directions: 

    1. Brew your coffee as you normally would.
    2. When you have a fresh cup of coffee, when it is still very hot, add 1/2 tbs each of coconut oil and butter.
    3. Put the coffee with oil and butter in your blender, and blend on high for a few minutes, until it is nicely frothy.
    4. Pour back into your mug, and enjoy!

    Now, keep in mind, this will have about 400 calories in a single cup, which is a lot, so if you’re counting calories, make sure to keep track of that. I usually find that with a few hard boiled eggs, this makes a very satisfying breakfast that gives me energy throughout the day!

    If you enjoyed this, you might also like….

    Do You Have What You Need to Hold Down the Fort?

    Natural Healing Secrets You Need to Know…

    Effective Primal Diet Hacks…

  • How to Train Horses (Infographic)

    How to Train Horses (Infographic)

    I came across this infographic from Thoroughbredstallionbestminister.com on Pinterest recently and I thought it was really cool. I’m not a huge horse expert, but my ideal homestead would most definitely include horses. There’s a reason they were such a huge part of Western Civilization for centuries, and why, despite much faster modes of travel we have today, many people still choose to keep them around.

    First of all, they’re always reliable for work and transport. Sure, tractors and cars are much more efficient…or are they? When the grid goes down, how reliable will your fossil-fuel reliant vehicles be? Or maybe you’re going for a greener model on your homestead, and can sacrifice speed for something much more sustainable?

    In the West, we don’t eat horses, the way we do other farm animals, but they still are a great addition to any farm or homestead. Their manure is excellent for the soil, they can be pastured and help you keep grass and weeds down, and of course, you can ride them! They don’t need anything but food and water to be “fueled”.

    Now, I definitely wouldn’t recommend relying on this infographic alone to train a horse, but I found it really interesting and motivating to learn more about horses and what it takes to raise them from birth. Because, naturally, if you want a really sustainable farm animal, you’ve got to breed it right?

    Check it out, and let me know if you’d like to read more about homesteading and horses or other pack animals.

    If you enjoyed this, you might also like….

    Can You Defend Your Family When SHTF?

    Natural Healing Secrets You Need to Know…

    Effective Primal Diet Hacks…