Overnight Oats-5 Different Ways (Video)
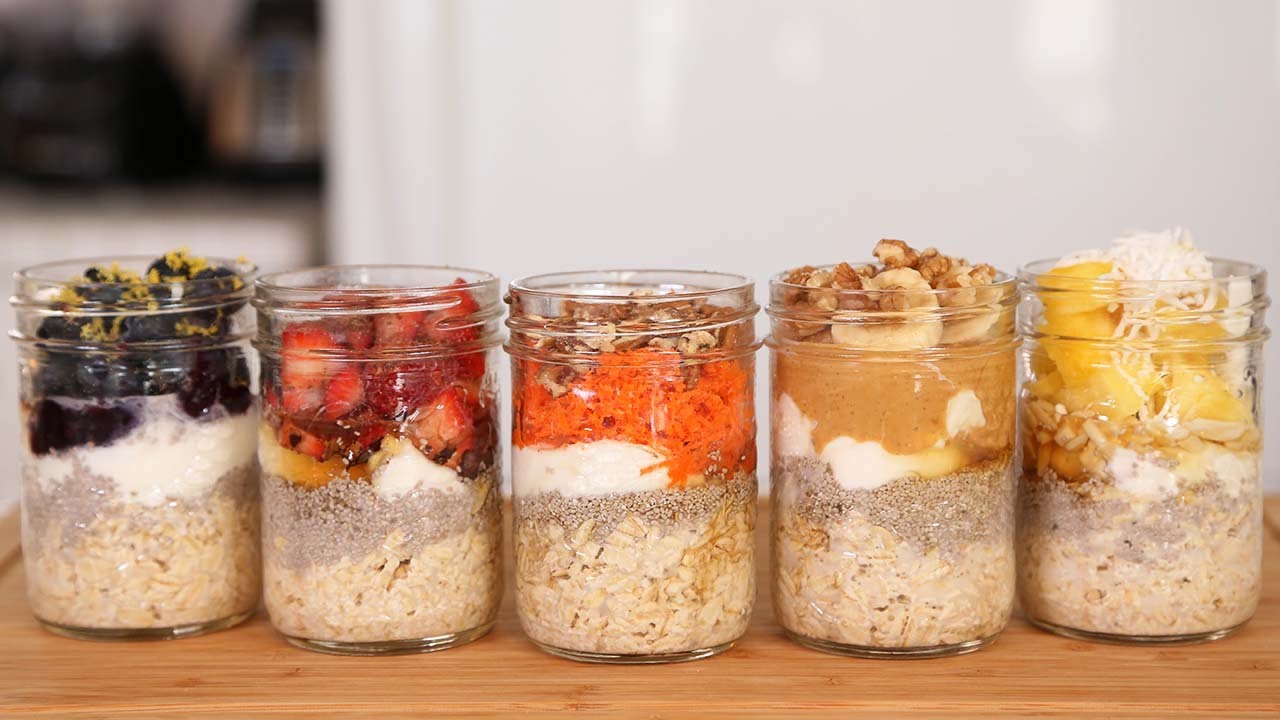
I absolutely love overnight oats. They’re such a great, healthy way to have a quick, easy breakfast waiting for you in the morning. Overnight oats are a staple in Europe, they typically use muesli and let it sit in yogurt and/or milk overnight. Not only does the yogurt really draw out a delicious flavor in … Read more