Page 67 of 89
1 65 66 67 68 69 89
Homesteading – Page 67 – Homesteader Depot

Category: Homesteading

  • How to Build a Potato Tower

    How to Build a Potato Tower


    Potato towers are a way to grow more potatoes in a smaller area by growing vertical.  There are a variety of techniques to build potato towers using different materials but the basic principles are the same.  This article will describe how to build a potato tower using fencing or hardware cloth.


    • You will need some hog wire, no climb fence, or hardware cloth that is 4 feet tall and at least 6 feet long, at least 2 stakes to support the fencing but preferably 4, wire or zip ties to secure the fencing to the stakes, compost, straw, and sprouted seed potatoes.
    • First, drive your stakes into the ground. If you have 4 stakes, put them in a square pattern with dimensions that will allow the fencing to wrap completely around, if you have only 2 stakes you will make a round tower with the stakes on opposite sides.
    • Secure your fencing to the first 3 stakes leaving one end open for you to work in, or both of the stakes with one end open.
    • Add soil or compost in the center and straw around the outside so that the soil will not spill out. Once you have 8 inches of depth plant your seed potatoes and cover them with more soil or compost.
    • Secure the fencing to close up the tower

    Now all you have to do is wait until the potato plants have grown out of the soil to a height of 6 to 8 inches, once they have, add more soil until the plants are only an inch or so out above the surface, and add more straw to the perimeter to contain the soil.  Keep the tower wet, it will drain much more than the ground will and will need to be watered regularly.  To harvest, simply remove the fencing, no need to dig and risk damaging your potatoes.

    If you enjoyed this, you might also like….

    Last Resort Home Defense and More…

    Natural Healing Secrets You Need to Know…

    The Healthy Primal Diet Everyone Should Try…

  • Growing Onions from Onions

    Growing Onions from Onions

    If you are looking through a seed catalogue or a selection at your local gardening store, it is not at all unusual to see onion seeds.  That being said it is a little unusual for most people to be able to grow onions with any real rate of success from seeds.  The germination rate is not very high, thinning them can be difficult because of their shallow roots, and they grow so slow that it is hard to mulch them without smothering them and hard to keep them moist without mulch.  It is much easier to simply grow onions from onions.


    • If you get your onions from a large grocery store your onions might be from another country and not suitable to be grown in your area. Instead get some onions from a local farmer’s market.
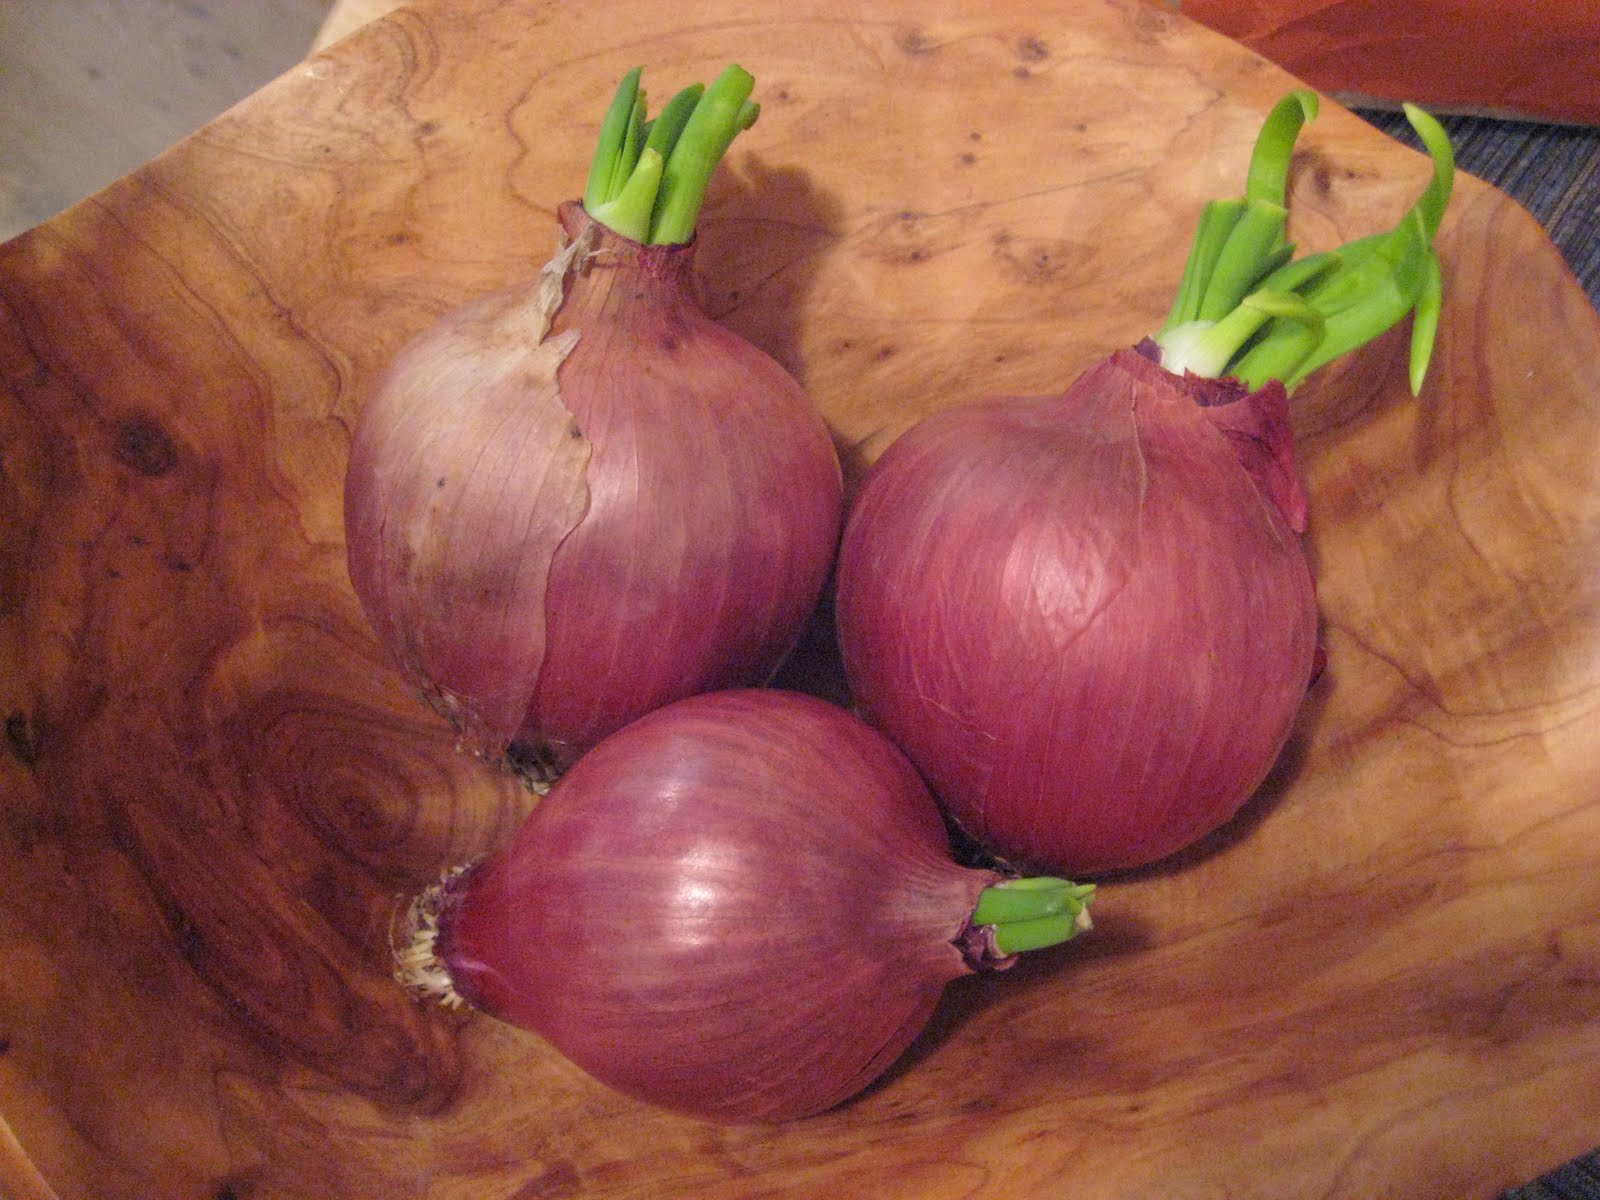
    • Green onions are the easiest to propagate, you just cut the tops and then bury the bottoms just beneath the surface. Bulb onions require a little more but they aren’t difficult either.  Simply allow them to sit in a hanging basket with room between them for air flow so they don’t start to rot.  Wait until you see green starting to sprout out of the top.
    • Carefully peel away layers until you find fresh growing roots. You will likely have two or three sections of new growth within your old onion so carefully separate them without injuring their roots.  Don’t worry about the old dead roots on the outside.
    • Place the onions on the surface of the soil, burying only the roots and leaving the bulbs exposed.
    • With so much mass above the surface and small fresh roots they will be susceptible to falling over. Don’t support the bulb, as this is likely to cause rot, instead try providing support to the green growth.


    Using this technique you can easily grow twice as many onions than you purchased.  Don’t waste money on seeds and time waiting only to be disappointed, grow your onions from onions.

    Natural Healing Techniques Doctors Don’t Want You to Know…

    The Weight-Reducing Magic of Yoga…

    The Ultimate Woodworking Course..

  • Learn to Milk a Goat

    Learn to Milk a Goat

    Most homesteaders are told that they need to add some livestock to their property, and that goats are a great addition. After all, goats can provide milk and they take up far less space than a cow. Of course, those who are new to homesteading probably don’t have a clue as to how they can milk a goat. When you start raising goats, you want to learn everything possible about them; the bucks, the does, raising the kids, and certainly how to milk them. The following are a couple of milking tips to help you get started.

    You should milk the goat at regular intervals. Ideally, this will be 12 hours apart. So, if you get up early and milk the goats at 6am, you will want to milk them again at 6pm.  You should find a schedule that will work the best for you. If you can’t milk at both sessions, have someone else in the household do it.

    You need to have certain tools when you are milking. You will need a milking pail, a stand for the goats, so the teats are at eye level when you are doing the milking as it is more comfortable for you this way. You can make a stand of your own, or you can buy one. Make sure the seat you have is at the right height as well. You will also need a strip cup and a milk filter, and teat dip, which is often iodine. It stops bacteria from getting into the animal.

    There are different basic methods to milking, and you will want to experiment with them to find the one that works best for you. If you know someone who has raised goats before, have them teach you how to milk properly.

    If you liked this, you might also enjoy…

    Learn to Heal and Treat Illnesses Naturally…

    An Ancient Secret to Slimmer Waists…

    Learn to be a Master Carpenter at Home...


  • Keeping Toxins Out of the Garden

    Keeping Toxins Out of the Garden


    Having a garden and growing your own vegetables and herbs can be a great way to stay healthy.  It will undoubtedly increase the amount of fresh greens in your diet, provide you with safe alternative to treat illness, and for most it will give them more time out in the fresh air.  But if your garden is full of toxins, then the plants will inevitably contain toxins, and ultimately you will consume these toxins and be in a worse state then if you hadn’t had spent all that time and energy growing unhealthy foods.  Here are a few tips to keep toxins out of your garden, improving the health of the soil, plants, and you.


    Pest Treatment

    One of the primary sources for harmful toxins in the garden is pesticides that are intentionally applied.  Sometimes people want to grow an organic garden, but then when they have a hard time controlling pests they start to compromise, telling themselves that they will just do it this once, or even giving up on it all together thinking that organic gardening is just for people with greener thumbs than themselves.  But pests can be controlled without the use of toxic pesticides, and even with limited use of organic pesticides by planting a variety of crops, planning heirloom seeds for your area, and maintaining soil health.

    Avoiding Wood Treatment

    I have seen over and over again people build raised beds with treated lumber.  While modern wood treatments are less toxic than before and don’t use arsenic that is easily absorbed into the body, they still use chemicals that are potential harmful with long term exposure.  Worse yet is that people who use treated lumber will more than likely use exterior paint as well.  Just read the warning label on a can of paint, it’s not reassuring.

    Plastics

    Plastics are great, they make much of our modern life easier if not possible.  But they can break down over time, especially when exposed to the sun, and leach out harmful chemicals.  Don’t use more plastics in your garden than you need to, and replace sun damaged plastic before it breaks down into tiny difficult to remove shards that will contaminate your soil.  Some of the common offenders are plastic braided twine for treles that crumbles over time and is impossible to get out of the soil, black weed cloth which is horrible and offers none of the benefits that can be had with cardboard and woodchips, and plastic beverage bottles that people poke holes in and use as slow watering devices.


    Your garden can’t keep you healthy if don’t keep it healthy, and an unhealthy garden still requires your work and time.  So take simple precautions and strategies to remove harmful toxins from your garden and start eating to your health.


    If you liked this, you might also enjoy…

    Natural Healing Techniques Doctors Don’t Want You to Know…

    The Weight-Reducing Magic of Yoga…

    The Ultimate Woodworking Course..

  • Great Depression Era Dandelion Salad (Video)

    Great Depression Era Dandelion Salad (Video)

    I found this awesome YouTube channel recently called “Great Depression Cooking”, which features a 94-year-old woman, Clara, going through common recipes used during the Great Depression.

    I thought this particular video on dandelion salad was great for homesteaders to know, or anyone really, because it’s simple, nutritious, and almost everyone has dandelion growing in their yard or nearby their house. I think my favorite part of this video, however, is watching Clara carefully pick and clean the dandelion, explaining that it’s free, and all it takes is patience. It made  me think about how much more work people used to put into getting and processing food, and of course, that’s what homesteading is all about! Putting in the extra effort to get free, natural, sustainable food that you grew and harvested yourself. If you aren’t homesteading yet, regularly harvesting and processing dandelion greens would be a great habit to get into to develop the patience! Enjoy.

    If you enjoyed this, you might also like….

    Last Resort Home Defense and More…

    Natural Healing Secrets You Need to Know…

    The Healthy Primal Diet Everyone Should Try…

  • Companion Planting Overview

    Gardeners are often described as an optimistic group of people. No doubt, with each seed or plant that gardeners put into the soil, they hope to have something to harvest later in the season. A variety of factors go into growing a successful garden that yields a bountiful harvest. Some variables, such as the weather, are beyond a gardener’s control. On the other hand, there are numerous growing tips and techniques that can help your garden produce a bumper crop of vegetables. Companion planting is one of those techniques.

    Native Americans planted what is referred to as “three sisters” gardens. Although the term “companion planting” may not have been used when those early three sisters’ gardens were planted, the concept is the same. Corn, beans and squash were the trio of plants that made up the three sisters garden. That same collection of plants is often used by gardeners today who recognize the beneficial impact these plants can have on each other. The success of companion planting could well be the reason it remains a popular gardening technique among today’s rural and urban gardeners.

    Companion planting is a simple concept. It involves pairing plants together to increase productivity, assist with pollination, repel pests and attract beneficial insects. In addition to those benefits, with appropriate pairings, your companion plants can provide shade for some of the vegetables in your garden. Companion planting helps plants grow and produce vegetables to their maximum potential by improving the condition of the soil. For example, beans help trap nitrogen in the soil and therefore are ideal companion plants for vegetables that need nitrogen-rich soil.

    Anyone concerned with natural forms of pest control should include insect repelling plants in their garden. Companion planting is considered to be an effective means of pest control. Once again, using beans as an example, when planted as a companion to corn, they can serve as attractors for beneficial insects that prey on pests that would be detrimental to corn. The bean vine winding itself around the corn-stalk can function as a deterrent for raccoons. There is also another benefit to planting beans as a companion plant to corn. As the vines wind around the corn-stalk, they strengthen it and help increase its resistance to potentially damaging winds.

    If you have a small amount of space available for planting a garden, companion planting is ideal for a compact garden area. Companion planting is also an excellent way to design a raised bed garden. There are charts available online and in magazines to assist you in finding the proper plant pairings. There are also books that are devoted solely to the topic of companion planting. Not all plants are cordial or complementary to each other. In fact, there are some plants that should never be planted too close together. If you use companion planting charts and group the appropriate plants together, your garden may yield an abundance of vegetables that exceeds what you originally hoped for.


    If you liked this, you might also enjoy…

    Learn to Heal and Treat Illnesses Naturally…

    An Ancient Secret to Slimmer Waists…

    Learn to be a Master Carpenter at Home...

  • Questions About Woodchips

    Questions About Woodchips

    After writing several articles in which I proclaimed the various, near-miraculous benefits of wood chips a handful of people commented with questions.  These questions are common judging by online comments and video or article titles that are about wood chips.  I’ll try to answer those questions here with what I have found in my research and personal experience.


    What Woodchips are Best?

    People often wonder what wood chips offer the most benefits to their garden.  In my opinion, it’s the ones that are free.  If you have an unlimited budget to go out and pay for your preference of chips then you could just as easily pay for soil and save some time and energy.  Any extra benefits that could be had by one particular tree over another can be obtained by other ingredients in your compost or simply by adding more “lesser grade” woodchips that you can get for free.

    What Woodchips are Bad?

    While all wood chips are good for soil building, not all woodchips are good to add directly to your garden.  Some trees have allelopathic properties that mean their woodchips will suppress the growth of some plants, especially seedlings and new transplants, nightshades are particularly susceptible.  For this reason, you want to know what chips you are getting so you know how to best use them.  Pine, maple, birch, black walnut, and eucalyptus chips should be composted before used as mulch around seedlings or nightshades.

    Nitrogen Draw?

    Nitrogen draw is when soil nitrogen is drawn out to assist in the decomposition of organic material.  Many people refrain from applying wood chips because they are concerned that it will remove the nitrogen from the soil.  This might occur if the chips are mixed into the soil, but it should not be an issue if used as a mulch, and especially not if the chips have aged.  If you are still worried about it, let your chips set until they aren’t heating up before applying them, but realize that any nitrogen draw that occurs will be minimal compared with long-term benefits and nitrogen is one of the easiest nutrients to come by from free sources like grass clippings and coffee grounds.


    I hope this helps and encourages you to take advantage of this awesome soil building resource that is often available for free.  I just got a dump truck full of chips dropped off in my yard for nothing, all I did was call my local electric company and ask for it.

    If you liked this, you might also enjoy…

    Learn to Heal and Treat Illnesses Naturally…

    An Ancient Secret to Slimmer Waists…

    Learn to be a Master Carpenter at Home...

  • Banana Peels in the Garden

    Banana Peels in the Garden

    Bananas are an awesome food.  They taste great, help with muscular recovery, and come packaged in fertilizer.  That peel that your banana comes in is itself food, for your garden.  If you have a compost pile you are probably already adding your kitchen waste, but if you are like most people you slack on taking it out if it’s cold, or wet, or late, and so forth.  But after looking at some of the benefits banana peels provide to your garden you might be a little more willing to make an effort to be strict in your peel collection for your compost and garden.


    Potassium

    Topping the list of nutrient benefits found in banana peels is potassium.  Potassium in one of the “big three” nutrients plants need most.  It is necessary for good root health and strong cell walls.  Having healthy potassium levels in your soil will allow your plants to become more resistant to drought, disease, and pests.

    Phosphorus

    Next on the list of nutrients banana peels offer is another one of the “big three”, phosphorus.  Phosphorus is one of the nutrients your plants need for production of your food.  Plants use phosphorus in growing new shoots, fruit, and seeds.  Like potassium, it also contributes to root health and therefore overall plant health.

    Calcium

    Banana peels also contain calcium.  Calcium is necessary for plants to transfer other nutrients throughout the plant body.  If your soil is deficient in calcium your plants will not even be able to benefit from the nutrients that your soil does have.

    Magnesium

     Last, but certainly not least, is magnesium.  Magnesium is used by plants in the production of chlorophyll which makes photosynthesis possible.  Without magnesium plants would not be able to get their energy from the sun, effectively starving them.


    Few foods come packaged in such beneficial fertilizer.  Don’t let any of it go to waste, whether you apply your peels directly to the garden or put them in your compost, make sure your plants aren’t missing out on all of these beneficial nutrients.

    If you liked this, you might also enjoy…

    Natural Healing Techniques Doctors Don’t Want You to Know…

    The Weight-Reducing Magic of Yoga…

    The Ultimate Woodworking Course..