Page 21 of 28
1 19 20 21 22 23 28
Self Reliance – Page 21 – Homesteader Depot

Category: Self Reliance

  • Dehydrating Food: A Beginner’s Guide

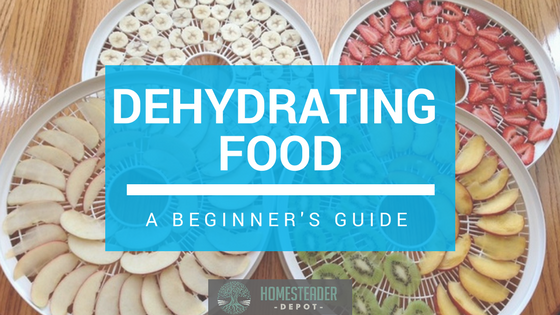
    Dehydrating Food: A Beginner’s Guide

    Dehydrating is a great option for preserving food for the long term, especially for gardeners or homesteaders. But even if you’re just an urban homesteader, it might be an excellent way to get started with food preservation. If you like to shop sales, frequent farmer’s markets, or grow veggies or herbs in your own little urban homestead, dehydrating is a great way to maximize your finds and easily store food for the long term.

    Here are some of the benefits to dehydrating vs. other food preservation methods:

    • it preserves the nutritional content of food
    • it condenses food and also makes it very lightweight, which is great for storage
    • it requires very little work to do
    • you can preserve a wide variety of foods with the same process

    Getting started 

    To get started, you will most likely want to purchase a dehydrator, but you can also dehydrate food using your oven. You simply put your oven on its lowest setting, crack the door, and let your food dehydrate for 6-24 hours, depending on what you are dehydrating.

    Effective Primal Diet Hacks…

    There are many dehydrators on the market, that range in size and efficiency. You will want to consider how much food you want to dehydrate at once, the storage space you have for it in your kitchen, how well-reviewed the model you’re looking at is, etc.

    What to dehydrate

    Once you have purchased a dehydrator, the sky is the limit on what you can dehydrate! You’d be surprised how much you can do with a dehydrator, from making jerky and pemmican to quickly rising dough and, of course, drying fruits, vegetables, and herbs. While there are many foods you can dry, here are some of the most popular and efficient foods to store by dehydration.

    • Apples
    • Oranges
    • Bananas
    • Berries
    • Fruit leather
    • Tomato sauce
    • Herbs
    • Peppers
    • Meat (for jerky)
    • Eggs (for powdered eggs)

    Most dehydrators will have a guide for what temperature to set for which type of food product you are drying, but you might need to adjust accordingly since not every food product will have the same level of moisture. Typically, you will dry stuff for a long period of time, from 6-24 and maybe even 48 hours.

    This long drying time doesn’t require much at all, all you need to do is process what you’re drying and lay it out in an even, thin layer on the trays of your dehydrator. You’ll want to check occasionally to see what kind of progress is being made. Most commonly, people will set their dehydrator up in the evening and dry overnight.

    Dehydrating is an age-old method of drying food that you might find becomes a staple method of food production and food preservation in your home. Just give it a try and see how you like it!

    Natural Healing Secrets You Need to Know…

  • Top Five Reasons to Homestead (Wherever You Are)

    Top Five Reasons to Homestead (Wherever You Are)

    “Homesteading” typically means living on a homestead, raising animals and growing your own food, and being independent and self-sufficient. As the global economy seems to teter on the brink of total collapse, modern life becomes more and more reliant on large-scale grids subject to fail, and urban environments are becoming increasingly dangerous, more and more people are becoming drawn to the idea of homesteading.

    Now, as we’ve often discussed, you don’t need to own your own land to homestead. There are many ways you can homestead right where you are. And here are the top five reasons why you should be doing it:

    1. Stability 

    The more you learn to do yourself, the more you can rely on. You never know when our grid might be shut down by a terrorist attack or natural disaster, so as you learn to find ways to be more independent and self-reliant, you’ll have more factors in your life that you can control.

    2. Health

    Buying local, growing your own, avoiding pesticides and GMO, are all ways you can be  more energy independent and move away from reliance on large agribusiness corporations, but they’re also all way healthier for you.

    3. Spirituality 

    Whatever your belief system, learning to do things yourself is incredibly rewarding spiritually and philosophically. Taking the time to slow down, take inventory of everything material in your life, and radically change your relationship with it, is great for mental peace and clarity.

    4. Security 

    A big way in which you can secure your homestead lifestyle is to be more secure as well. Owning your own weapons and learning to use them, both to hunt and to defend your loved ones, is, in essence, a prime example of self-sufficient. Why outsource the protection of your loved ones to the police?

    5. Freedom

    With great power comes great responsibility, but taking responsibility for yourself and your resources also comes with great power. The more independent and self-reliant you are able to become, the more free you will become. Freedom is what makes our country great, and as long as we have the power to live in peace and make our own way in the world, we should make a point to work hard towards independence and self-reliance.


    Homesteading is not just a lifestyle, it is a statement you make in a changing world to stick to what works, to rely on yourself more than anyone else, and to make your own rules for how you will live your life.

    If you liked this, you might also enjoy…

    Holistic Medicine Basics

    Ever Considered Taking Yoga? Read this

    The Ultimate Woodworking Course..

  • DIY Home Energy Independence

    DIY Home Energy Independence

    One of the biggest draws towards homesteading is trying to achieve energy independence.

    It sure is rough out there today. Electricity costs are soaring and you probably know the feeling of dread that comes over you each time you open up an energy bill.

    Well, it actually is possible to be completely energy-independent, and never pay an electric bill again. I’m not even kidding. This incredible video explains how, and really blew my mind!

    If you’re sick of being beholden to big energy corporations that fleece you monthly, and tired of shivering through winter and sweating through summer just to try to lower your energy bill, only to find it barely makes a dent, you totally have to watch this too. 

    This man has figured out the secret to green, renewable, energy independence, and I highly recommend you hear him out.

    Click here to view the video “DIY Home Energy” now! 

  • How to Test Your Soil Using Only a Mason Jar

    How to Test Your Soil Using Only a Mason Jar


    When starting a garden, it’s crucial to know what kind of soil you’re working with. It will help you determine what to plant and how to amend your soil. All soil is comprised of three basic components: sand, silt, and clay, and varying combinations of these three components determine what type of soil you have.

    Loamy soil is ideal, and it is typically more or less an even mix of sand, silt, and clay. It is slightly spongy and moist, but still light enough that it doesn’t get packed down too easily. In essence, it’s just right. To achieve this ideal soil, you would want to add whatever component your soil is lacking.

    To test your soil, all you need is a mason jar, some water, and a little bit of time.

    How to perform a mason jar soil test

    1. First, you need your soil sample. Don’t just grab a handful off the top though, dig a bit into some well-tilled soil, “stir” around a bit with your trowel, and get a good scoop from below the surface of your garden bed or the ground you are testing.
    2. Once you have a nice sized scoop of dirt, fill your mason jar about halfway with the dirt.
    3. Fill the rest of the way up to the lip of the mason jar with water, leaving about 1″ of air.
    4. Attach the lid to the jar securely, then shake vigorously. This will cause the dirt to settle once you’ve put the jar back down, as well as break up any sizable clumps of dirt.
    5. Set the jar back down and leave overnight. In the morning, you’ll have your results!

    On the bottom will be sand, then silt, and then clay. Here’s a quick and easy guide to how to read your results and what they mean for your soil type:

    If you enjoyed this, you might also like….

    Gardening…NO SOIL NEEDED…

    Bury a Shipping Container…WHY?

    4 Critical Methods to Improve Your Garden Soil


  • DIY Tooth Whitening Recipe

    DIY Tooth Whitening Recipe

    We’ve shared a lot of DIY health and personal hygiene products on this blog, and for good reason. There are so many products out there that are full of chemicals and toxins, that can be easily made at home for a fraction of the cost. This whitening tooth powder is packed with beneficial ingredients you’ll want to try.


    Ingredients:

    • 4 tablespoons bentonite clay. This is a natural, mineral-rich powder that gently cleans your teeth. It also detoxifies your mouth to freshen breath and fight gum disease
    • 2 teaspoons baking soda. Baking soda is a very mild abrasive that polishes the teeth and removes stains.
    • 1½ teaspoons finely ground sea salt. This ingredient is loaded with trace minerals that help to strengthen and rebuild your teeth. Salt is also a natural antiseptic which keeps the bacteria in your mouth in check.
    • 1 ½ teaspoons unrefined stevia powder. For anyone nervous about ditching conventional toothpaste, or just picky children, stevia helps to sweeten the powder.
    • Up to 3 teaspoons flavoring of your choice. Ground cloves, cinnamon, or mint are excellent choices that also act as astringents for gum health.
    • 1 teaspoon activated charcoal. Ironically, this jet black special ingredient is what really does the work in whitening your teeth. Activated charcoal (carbon) particles bind to the tannins from coffee, tea, wine, and certain foods to lift stains away. Charcoal also helps to balance the mouth’s pH levels which aids in remineralization.


    Add all ingredients to a clean glass jar with a tight-fitting lid. Attach the lid and shake thoroughly to evenly mix.

    To use, simply wet your toothbrush, dip it in the powder, and brush and rinse as you would with toothpaste. 

    This recipe is incredibly easy to make and use in place of conventional toothpaste made with questionable chemicals. Whip up a batch today to complete your DIY health and wellness toolkit.

    If you liked this, you might also enjoy…

    What Are the Signs of the End Times?

    Learn Natural Healing Secrets From the Masters

    Preparing for the Bubble to Burst 

  • Mother of Four Builds House From YouTube Video Instructions

    Mother of Four Builds House From YouTube Video Instructions

    These days, we all rely on the internet for literally everything. I personally believe that YouTube instruction videos are one of the greatest inventions of all time (seriously!). It is such an incredible thing to be able to search for a video to help you out with a confusing or intimidating project, and homesteaders know this better than anyone! Whether you want to learn how to build cold frames, shear a sheep, or birth a baby cow, YouTube has videos for pretty much everything.

    Still, it might surprise you to learn what this incredibly ambitious mother of four did, using YouTube videos. A few years ago, single mother Cara Brookins was trying to rebuild her life for her and her four children after escaping an abusive marriage. She didn’t have enough money to buy them a house, but she could afford a small plot of land.

    Determined to provide her family with a home, she and her children got to work. Using YouTube videos as a reference, they mixed their own cement, lay the foundation, raised the walls, and built their own house, all by hand.

    Such an incredible story! Now Brookins and her four children have their own home, and are the picture of independence.

    Check it out!

    https://www.youtube.com/watch?v=CyP28vNviKk

    If you enjoyed this, you might also like….

    Can You Defend Your Family When SHTF?

    Natural Healing Secrets You Need to Know…

    Effective Primal Diet Hacks…

  • Ways to Recycle Sawdust

    Ways to Recycle Sawdust


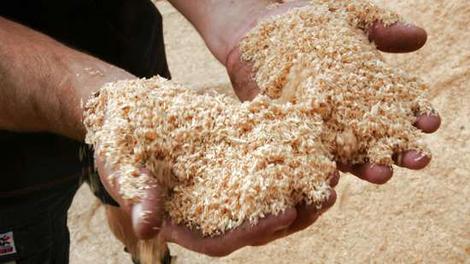
    Woodworking projects and home repairs top the to-do lists of many homesteaders, but they generate a copious amount of a largely unwanted byproduct: sawdust. Before dumping your next shovelful of sawdust into the trash, take a look at this list of creative ways to make good use of it:

    • Use for traction when you’re stuck in the snow. Sawdust is traditionally used by logging truck drivers to prevent slipping and getting stuck in harsh winter road conditions. Keep a sealed bag or two of it in your trunk to spread around your tires for extra traction if you get stuck.
    • Keep on hand as a spill kit must-have. Sawdust is a very absorbent material and can quickly contain any spills such as oil or paint. Once the spill is soaked up, the sawdust sweeps up easily and with minimal dust.
    • Decorate with fake snow. Mix with white paint (acrylic or whatever is on hand) and glue to use for seasonal arts and crafts.
    • DIY firestarter bricks. Melt candle wax in a nonstick pot, add sawdust to achieve a thick consistency, pour into an ice cube tray or egg carton, and cool, and store with your camping gear or fireplace items. Use just like storebought firestarters.

      Power Efficiency Guide Will Change Our World Forever>>>

    • Keep weeds under control. Walnut sawdust has natural weed-killing properties. Sweep into the cracks of your driveway or walkway to prevent weed growth.
    • Use as a cement additive. Sawdust mixed into mortar aids in bonding building materials together. It also makes for a good recipe for casting moisture-loving planters.
    • Create a decorative garden path. Spread and tamp sawdust into a dirt walkway to curb erosion and create a soft, fragrant path through your garden or wooded lot.
    • Compost and fertilizer. Mix a little bit of sawdust with manure or a nitrogen source like blood meal. This both fertilizes plants and aids in water retention.
    • Mix with wood glue to fill cracks and holes. Mixed into a putty consistency with wood glue, very fine sawdust is often used by flooring professionals as a cheap, stainable wood filler.
    • Clean concrete floors. Lightly wet a small pile of sawdust with water and use a push broom to spread it around the concrete floor of any workspace. The wet sawdust will bind and absorb grime and hazardous fine dust.

        Check out THESE Effective Primal Diet Hacks…

  • The Easiest Gardening Method You’ll Ever Try

    The Easiest Gardening Method You’ll Ever Try

    A thriving garden is the beating heart of the homestead.  For many people, though, keeping a garden can be a challenge. Traditional methods require heavy machinery for soil preparation, questionable chemical fertilizers, all adding up to a prohibitive upfront cost. A great and easy method of gardening that has a very low financial demand is the “lasagna garden”.

    It was given that name because the method involves developing arable soil by composting an existing plot with layers of organic matter. You create the layers in the fall, to be ready for planting in the spring. Here’s a quick guide to get you started:

    • Select your plot: With this method, you don’t need to prepare the soil at all. That’s right, no double-digging, no weeding! Just pick an area where your garden will get the sunshine it needs that isn’t too far from your water source.
    • The first layer: The base layer of your garden will be a single layer of corrugated cardboard that smothers out even the toughest weeds. You can source this from almost anywhere, just be sure to remove packing tape if you’re recycling boxes. To prevent weeds from growing through, be sure to cover up any gaps in the cardboard with more cardboard. If your plot doesn’t have any persistent or tenacious weeds, a minimum of three layers of newspaper will work fine instead. Just before applying the next layer, thoroughly saturate your base layer with water.

      Effective Primal Diet Hacks…

    • The compost layer: This layer will be the powerhouse of your garden. Your garden is literally a compost sheet (rather than a pile or heap). Put anything in this layer you’d put in the compost, including “browns” like fall leaves, shredded paper, pine needles, and “greens” like veggie scraps, grass clippings, garden trimmings, etc. Once you’ve piled on the compostable matter, finish this layer off with three to four inches of finished compost or topsoil to be ready to plant. 
    • The mulch layer: Your lasagna garden will be topped off with the application of a couple of inches of mulch to retain the ideal moisture and temperature for your compost to break down. The best mulch materials are the ones you can source with minimal effort from neighbors, local businesses, or even your town’s Department of Works. Tried and true materials for this layer include wood chips (aged chips are best), straw, grass clippings, leaves, even tree bark! If it’s more convenient for you to purchase mulch, opt for undyed wood chips.

    Once you have your layers prepared, let them sit for a season. It’s common to start in the fall to be ready to plant in the spring, but you could do this in the spring for early fall planting, for example.

    To plant, brush back the mulch layer a bit and plot out the spots you’d like to plant your seeds. Cut holes in the cardboard for the roots to grow once the seeds begin to sprout, plant your seeds in the compost layer, and cover lightly with the mulch (as you would were you using potting soil).

    That’s it! The layers will retain moisture, so only water if the bottom layer is dry. Happy planting!

    Natural Healing Secrets You Need to Know…