Page 2 of 9
1 2 3 4 9
Survival – Page 2 – Homesteader Depot

Category: Survival

  • Identifying and Understanding Poison Ivy

    Identifying and Understanding Poison Ivy

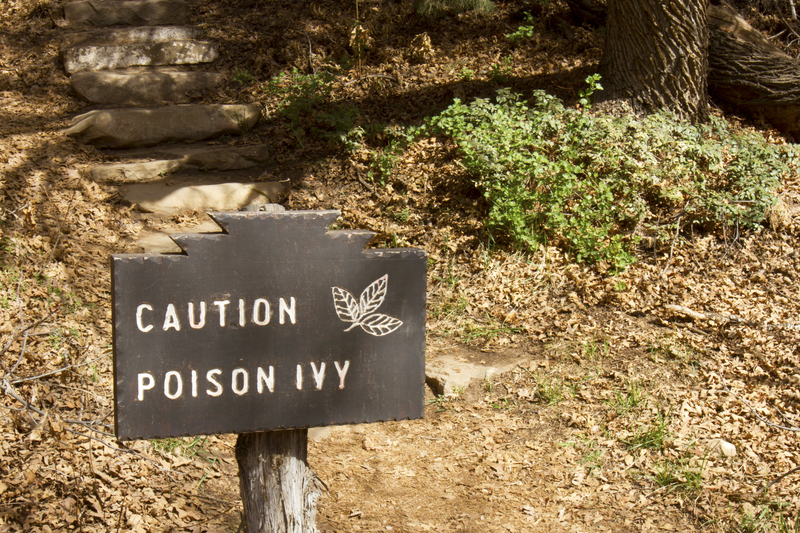
    The bane of every campers’ weekend getaway, poison ivy, interestingly enough is not actually in the ivy family.  It’s a relative of the almond family.  Who knew?

    Most of the time, you only have to worry about avoiding it when you are in the great outdoors and away from urban areas.  However, occasionally it will pop up in your yard.  If this happens, you’ll want to make sure you wear protective clothing and accessories like gloves and even a mask to avoid the worst itching you can ever imagine.

    Also, you’ll want to be very cautious about how you dispose of it, so no one else accidentally comes in contact with it either.  And, whatever you do, do NOT burn it!

    The smoke produced by burning poison ivy takes all of its poison airborne.


    Identifying Poison Ivy

    If you grew up in a more rural community, you might already know some of the rhymes used to recognize the plant and its different features.  If you didn’t learn any of these, take note, they could come in handy someday.


    1. If Butterflies Land There, Don’t Put Your Hand There

    Butterflies can safely land on poison ivy.  They do it to protect themselves from predators.

    1. Berries White – Run in Fright or Danger in Sight

    Describes the light gray to white colored berries seen in the fall.

    1. Hairy Vine – No Friend of Mine. Ragged Rope – Don’t be a Dope

    Refers to the shaggy appearance its vine exhibits.

    1. Leaves of Three Let It Be
    2. Longer Middle Stem – Stay Away from Them

    The middle leaf of a cluster of three is typically longer than the side leaves.

    1. Red Leaflets in the Spring, it’s a Dangerous Thing

    The leaf color changes with the seasons.  Red in spring, Green in summer, Reddish-orange in fall.

    1. Side Leaves like Mittens Will Itch Like the Dickens

    A few varieties have side leaves that resemble a mitten with a thumb sticking out.

    What to do if You are Exposed to Poison Ivy

    If you discover you’ve been exposed, there are actions you can take to reduce the severity.

    • First, carefully remove your clothing and put them directly into the washer so they can’t spread the oil to other surfaces.
    • If it has been less than 10 minutes since exposure, wash your hands with soap and water and any other areas that have come in contact with the plant.
    • If it has been over 10 minutes, you still want to wash up, but you’ll also be needing a remedy for the rash that is headed your way.


    Poison Ivy Remedies

    There are several effective over the counter treatments for Poison Ivy.  There are also a few home remedies that work.


    Apple Cider Vinegar

    ACV gets rid of the itch almost immediately and helps neutralize the poison.  Apply with cotton balls or with a spray bottle several times a day to relieve itching and help the skin start to heal.

    Just be prepared to smell like a salad for a while.


    Baking Soda and Oatmeal Paste

    1. You’ll have to do a little cooking for this one, but it’s worth it. This “recipe” can be made in bulk and stored to apply several times over the course of your recovery.
    2. Start by bringing 1 part rolled oats to 2 parts water to a boil.  Remove from the heat and cover until all the water is absorbed by the oats.
    3. Stir in 1 Tbsp Baking Soda for every ¼ Cup oats and mix well.
    4. If the paste is still very hot, you can add some cold water or an ice cube to bring it down to warm.
    5. Apply the paste thoroughly to the affected areas.  Relax while you let it dry out, then carefully brush off the dried paste.
    6. Repeat 2 times a day as needed.
    7. For an all over treatment, mix the paste into a lukewarm back and soak for a while.

    Conclusion

    If possible, just stay away from poison ivy.

  • Don’t Make These Common EDC Mistakes

    Don’t Make These Common EDC Mistakes

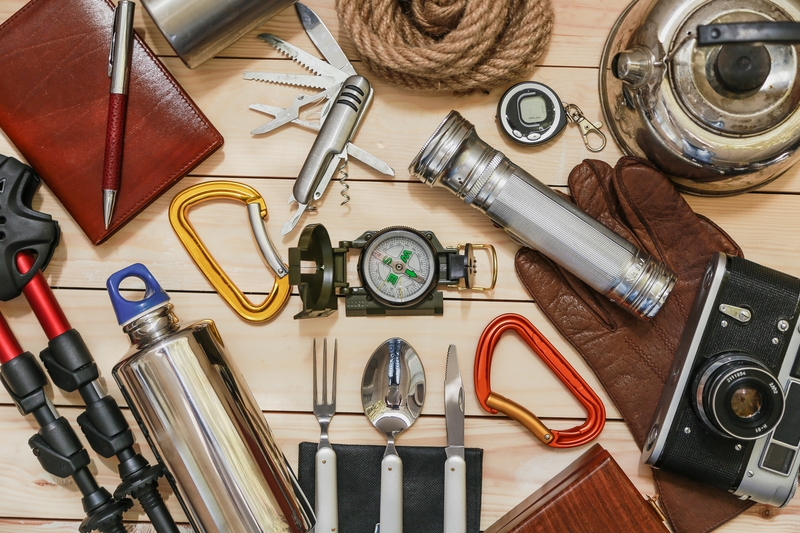
    When putting together an EDC kit, it can sometimes be difficult to tell the difference between selecting an item because it could really be useful, and selecting an item because it’s really, really cool.

    To start, ask yourself some questions as you contemplate each possible item.


    Will this tool be helpful in the region I live in?

    Example, an ice pick is probably going to be of less use in a tropical or desert region.


    How many functions are included with this tool?

    Double check to see how many different uses you can get from a single item.


    Is the tool tried and tested?

    Check on an item’s return policy, this way you’ll be able to test a tool out and determine if its durable enough.  Preferably you’ll want to do this before you find yourself in a survival situation.


    How does the cost compare to the quality?

    Most of the time you get what you pay for.  But it is also possible to find a good deal on a quality item.  Do your research and compare reviews for differently priced items to see how they stack up to cheaper versions.  Then, wait for a sale or other promotion to get the best possible item for your budget.


    Is there anything comparable that would be lighter or easier to carry?

    Remember, when it comes to EDC set-ups, smaller and lighter is the goal, not bigger and bulkier.  Shop around and compare sizes versus weight.


    Will the tools included give me a better chance of survival?

    While it may be convenient in day to day like to have a set of nail clippers, a bottle opener, and a spoon handle, when you are stuck in the middle of nowhere and need to cut some vines for cordage or drive a stake in for shelter support, these aren’t going to be as handy.

    The Most Common Everyday Carry Build Mistakes

    To help ensure you don’t make some of the common mistakes a novice EDC builder often does, here are some things you need to avoid doing to yourself.


    Taking on Too Much

    You would think at this point it would be obvious to avoid weighing yourself down with extras but, like a kid packing his toys for a vacation trip, it all may seem like something you can’t live without, but most of it probably it.


    Being a Cheapskate

    A good deal in the store may end up being a deal breaker in an emergency situation.  Invest in quality products that you know you can count on.


    Relying Completely on Battery Operated Items

    Yes, a cell phone, flashlight, and GPS can be handy, but what if they stop working?  Or, what if they don’t work at all because you forgot to check the batteries before you left and didn’t grab spares?

    Good substitutes for these are an emergency whistle, a compass, and a hand-crankable light.


    Forgetting to Take Care of Your Supplies

    Good knives and other items need consistent care to keep them usable.  Over time, some items, especially metal ones, can corrode from air exposure.  Additionally, batteries can get old and wear out so bring your stuff out regularly to make sure its still in tip-top shape.


    Not Knowing How to Use a Tool

    This particular subject reminds me of the book Wild that was later made into a movie.  I haven’t actually seen the movie but I have read the book.  During the advent of her hike, she runs into problems such as not realizing the type of fuel her stove takes and having no real idea how to use an ice ax.

    She was fortunate enough to be in a situation where she could seek help and information as she progressed.

    In a true survival emergency, you are not going to have that luxury.

    For some tools, especially ones that have a specific purpose, the technique to successfully use them may be more complicated than you realize.

    Make sure you take the time to learn exactly how everything works before you find yourself needing to.

    [Don’t Miss This]  Tripple your accuracy with this simple shooting tip…ex sniper used it to increase his precision shooting.

  • 10 Amazing Uses for Lemons

    10 Amazing Uses for Lemons

    Lemons, good for making lemonade, adding to your tea with honey, squeezing over fish, the list could go on and on.

    It even goes on to some amazing home remedies!  Who knew?  Someone apparently because we’ve been able to put together a list of 12 you can try in the comfort of your own home.

    Break up Congestion in Your Sinuses and Chest

    Getting that familiar sore throat or wheezing sound?  No problem.  Heat 4-6 oz of water and mix in 2 Tbsp lemon juice, 2 Tbsp apple cider vinegar, and 2 Tsp of honey.

    The honey will soothe your throat while the lemon will help break up the mucus and provide Vitamin C to boost your immune system.

    Why Are Allergies Worse in the Fall?

    Sooth Menstrual Cramps

    First thing in the morning mix the juice from one lemon with 1 Tbsp honey into warm water.  The combination has an alkalizing effect on a women’s body that helps keep you hydrated.

    Ease Headaches

    You have two choices for this one.  1. Add a few wedges to water or tea and drink.  2. Rub a wedge or slice against the temples and forehead.

    Or, get crazy and do both.

    Fever Reducer

    To help keep a fever from getting too high, mix 1.5 Tsp Cream of Tartar, 1/2 Tsp Lemon Juice, 2.5 Cups Warm Water, and 1/2 Tsp Honey. Sip slowly.

    To Help Treat and Avoid Kidney Stones – Make Lemonade

    Yep, you read that right.  According to an article on WebMD, doctors prescribe potassium citrate for patients prone to this painful ailment.  However, it’s now known that lemon juice is packed full of natural citrate.  And, while it doesn’t work as well as the medication, if you are trying to avoid adding another prescription to your routine, this “treatment” may be an option.

    The article gives a recipe of ½ Cup Concentrated Lemon Juice mixed with 7 cups of water.  To avoid excess sugar intake, use as little as possible, or a substitute like honey or stevia.

    If you would prefer to use fresh lemon juice, 2 Tbsp of concentrate equals one whole lemon.  Don’t worry; I’ve done the hard math for you.  Use 4 lemons for this recipe.

    Can Apple Cider Vinegar Boost Gut Health?

    Helps You with Your Weight Loss Goals

    Lemon juice helps detox your body, curbs your appetite and aids in better digestion.

    Help your weight loss along by drinking lemon water.  Need a little sweetness?  Add a touch of honey.

    Consider making this in large batches and keeping it in your fridge for easy access.

    4 Reasons Apple Cider Vinegar Works For Natural Weight Loss
    (Will Open In A New Window)

    Treat Acne

    Losing your battle with acne? Here is a completely natural way to go about it.  First, wash your face with mild cleanser and rinse.  Rub a slice of lemon over affected areas or dab fresh lemon juice on with a cotton ball. DO NOT RINSE.  Leave overnight.  Rinse first thing in the morning and moisturize.  Repeat every night.

    If you discover your skin is sensitive to lemon juice, dilute it with water before applying.  For more ways to use lemons for fight acne, check out this post at HomeRemediesForLife.com.

    Take the Itch Out of Insect Bites

    Insect bites are annoying at the least and can lead to infection at the worst if scratched into an actual wound.  To ease these irritations naturally, simply apply a lemon slice over the area and let it soak for a few minutes.  Alternatively, soak a cotton ball in fresh juice and apply liberally to the bite area.

    Related Article: Home Remedies Only Mother Nature Could Come Up With

    Get Rid of Pesky Blackheads

    This remedy only takes 5 minutes and doesn’t require ripping an adhesive strip off your nose at the end. This will be the quickest solution you can find for your blackhead problems. Take half of a lemon and pour approximately 1 Tsp honey onto the cut surface.  Rub the lemon all over your face but pay extra attention to the areas you are prone to blackheads.  Leave this mixture on for 5 minutes and then rinse with cold water.

    Turn Yellow Nails White

    Nail polish looks great after a manicure, but it’s also notorious for turning your nails yellow.  If you aren’t the type that keeps their nails polished 24/7 all year round, here is your solution.

    Mix approximately 1 Tbsp Baking Soda, ½ Tsp Olive Oil, and 1 Tbsp Fresh Lemon Juice into a paste.  Enjoy the volcano effect fizzle of the lemon and soda combining.  Apply the paste to your nails and let sit for 5 minutes then rinse and moisturize.

    So, now you know, when life gives you lemons…use them!

    A Revolutionary, Double Patented-Technology That Allows You To Wash Your Clothes WITHOUT Using A Single Drop Of TOXIC Chemical Detergent

  • 11 More Natural Mosquito Repellents

    11 More Natural Mosquito Repellents


    From the early 90’s encephalitis scares to today’s news of Zika and West Nile virus, people are looking for as many options for mosquito repellent as possible.  And, thanks to the chemical scares that occurred long before, effective organic options are highly desired.

    Fortunately, there are a number of options to make spring and summer night much more comfortable and much less life-threatening.

    From Lemongrass to Citronella Oil

    One of the most well-known mosquito repellent plants is lemongrass. Lemongrass is the plant citronella oil is extracted from. Use as a natural spray, burn in candles or put in oil burners to create a “safe area” outdoors.

    Basil

    Yep, the same stuff you use to cook with and make pesto.  Adding this to your outdoor garden or in pots on your patio will do more than keep you cooking with fresh herbs.  The fantastic smell it gives off will also ward off several types of insects including mosquitos.

    Catnip

    Not just for making your cat go gaga, Catnip is also known as one of the powerful natural insect repellents. It is actually 10 times stronger than DEET.  Whether you use it fresh by planting it in your garden or buying an essential oil version, the aroma will repel mosquitos (and your cats will LOVE you).

    Lavender

    Lavender’s aroma is popular for its calming effect on us, but did you know its also a great mosquito repellent?  Fortunately, because of its popularity as a stress reliever, it’s very easy to find.  From candles and incense to essential oil to wear or disperse through a burner, you can de-stress and be bug-free all at the same time.

    Marigolds

    Another option to add to your garden, Marigolds are not just colorful, they are a natural mosquito repellent.

    Cedar

    This natural option works on more than just moths. Used to make some repellent sprays on the market, you can make your own with essential oils.  The smell is not only repellent to mosquitos but destructive for them as well.

    Chamomile

    Keep that used tea bag instead of tossing it.  Since most tea bags can be used more than once, just make one cup for you and one cup to cool and add to a spray bottle for a fresh smelling repellent spray.

    Chrysanthemums

    These beauties are known for their insecticide compounds.  Chrysanthemums contain Pyrethrum. This compound actually attacks the nervous system and disrupts female mosquitoes. They are also a great air purifier so feel free to plant them inside and out to get their full benefits.

    Horsemint

    Several members of the mint family are known to be effective repellents.  In the case of horsemint (aka bee balm) simply crush them to release the essential oils and rub onto your skin.

    When planted outdoors, it will also attract bees and hummingbirds to your garden.

    Related Article:  “Natural Relief for Insect Bites”

    White Sage

    This particular plant will keep blooming all summer making consistent repellent for mosquitos and several other animals, including deer.  Just keep an eye on them, they can be invasive if left alone.

    Lemon Verbena

    As the name suggests, this herb has a very lemony aroma that is ever stronger when crushed.

    You Don’t Have to be Afraid to go Outdoors

    Creating a mosquito barrier around your home can go a long way to making your backyard activities much more comfortable and safer to your health.  Thanks to the options we’ve discussed above, you have a number of ways to accomplish building a barrier without having to rely on harsh chemicals that can pollute the environment.

    [Bonus] 3000-Year-Old Experiment Promotes Natural Healing – Pain Relief, Heart Health and Optimal Blood Pressure without drugs or surgery.

  • Game Meat: From Field to Freezer

    Game Meat: From Field to Freezer

    You’ve chosen your weapon, you’ve stalked your prey, you’ve made your shot, you’ve downed your first kill…Now What?


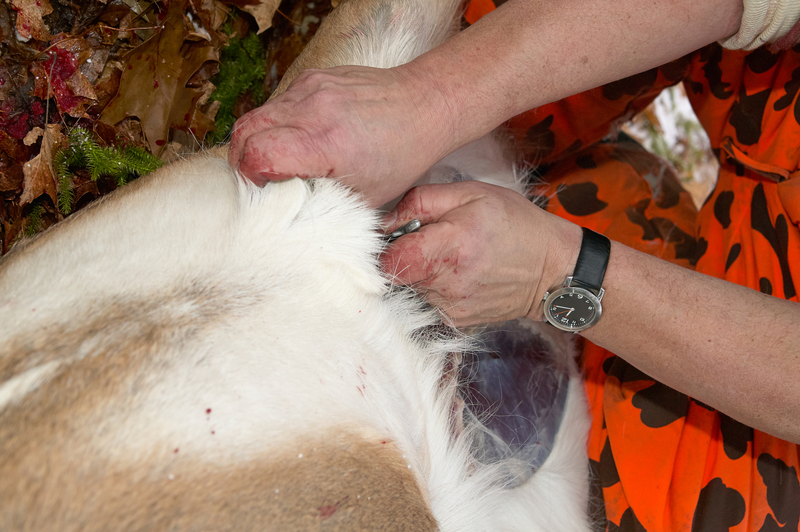
    First – Get Those Guts Out

    The faster you can remove the entrails, the better off you’ll be.  But what is fast?  Most experts will tell you if you can get it accomplished in less than 4 hours after the kill, you’ll probably be OK.


    Next – Skin the Hide

    You’ll need to remove the skin shortly after the guts so the meat can begin to cool.

    As you go, avoid puncturing the meat or cutting through the hide to let fur onto the meat as both ways can let harmful bacteria in.

    When you do get fur on the meat, you can pick it off with your fingers or burn it off with a torch to kill any bacterial contamination.

    Once the animal has been relieved of its skin, cover it with a cloth game back or clean fabric.  This cover will absorb any oozing blood and guard it against contamination.


    Cool It

    While gutting and skinning gets the cooling process started, you’ll need to continue and speed up this process to ensure the meat doesn’t spoil.

    If you are dressing your kill before you leave the area, keep a portable cooler in your vehicle so you can expedite the cooling process. If you only have ice available, try to keep it in sealed containers.  Exposure to water (ice) can compromise the texture of your meat and affect its flavor.  If you have the means, consider a clean ice alternative like ice packs or frozen water bottles.

    Have your cooler cooled and ready to go so there will be no delay in getting your meat down to optimal temps.

    Get Slicing

    Using a sharp set of tools, butcher your meat for optimal storage and to make easy use of it later.

    This process also is the time to rid the meat of unwanted items like silverskin, tendons, or large vessels that sometimes appear in the muscle tissue.  Basically, if you know you don’t want to eat it, cut it out now.


    Keep it Stored – Correctly

    If you are dealing with a big game kill, like a deer, you probably aren’t going to be able to consume all your fresh meat before it spoils.  Freezing the surplus will give you access to protein months later, but you need to make sure you are using the proper storage supplies.  Containers and storage bags specifically designed for “Freezer” use are what you want.  Anything else isn’t going to be made of a thick enough barrier to prevent freezer burn.  Ziplock and Glad both make excellent products for long-term deep freeze storage, or you can go old school with freezer paper and masking tape.  This option also makes labeling what’s inside, a breeze.

    Suggested Article:  “Your Guide For Need to Know Bullet Information”

    Ideally, you’ll want to portion your meat according to how much you and your family will eat in one sitting.  This eliminates thawing out more than you need since it’s dangerous to re-freeze meat after it’s been thawed unless you cook it first.


    Keeping it Cheap

    If you have the ability to hunt for food, you could save hundreds on grocery bills.  Whether you live in a rural area or take the time to spend a long weekend stocking up before going back to the urban jungle, being able to dress it, butcher it and store it in a timely manner will is a wonderful skill. These skills will also allow you to provide for yourself in an emergency survival situation.


    [Bonus] Simple shooting system that will double or even triple your shooting accuracy.  Watch Video>>>

  • Benefits of Protein in Your Pantry

    Benefits of Protein in Your Pantry


    Protein powder is usually known as the substance that bodybuilders use to bulk up. It’s more than that, however! There are protein powders out there that go into shakes, can be mixed with water and drank on their own, and that serve as meal supplements.

    Having supplemental protein powder can prove very necessary for those bad years when livestock doesn’t produce or you’ve come up empty-handed while hunting.  Your body needs a source of protein and when you can’t get it from meat, a supplemental powder is a great option.  It’s definitely something to consider in your emergency pantry.

    In fact, there are so many different types of protein powder that you might find yourself overwhelmed with options. We’ll help with that here.

    What Exactly Is Protein Powder?

    Protein powder is exactly what it sounds like – it’s a supplemental powder that contains protein and a number of other vitamins and minerals. There are versions with more protein than others (these are what bodybuilders use to bulk up) and some that are very well-rounded. If you’re looking for a good type to keep in your preparedness pantry, choose the well-rounded versions. They’ll serve your needs better and act as a meal replacement.

    Types of Protein Powder

    We’ve already covered one type of protein powder – the one used by bodybuilders. However, the types that serve as meal replacements come in a variety of types and flavors. Some use coconut to provide the protein, while others have some animal by-products in them. Make sure to read the labels carefully if you’re a vegetarian or vegan to avoid ending up with the wrong kind. On top of this, there are a number of different flavors, from strawberry to chocolate. In fact, some types are available in more than one flavor, making the decision even tougher. What it comes down to is finding the meal replacement kind in a flavor that you enjoy.

    How Long Will It Last?

    Protein powder is just that, a powder so that it will have quite a long shelf life. The standard types expire within four to five years, and, like with most canned and jarred items, if they are stored properly, they’ll last even longer than that. As long as the container isn’t opened, you can probably get a few extra years of storage time. However, if it’s opened, make sure to use it up as soon as possible. You don’t want to risk contaminating anything!

    Is Protein Powder Good For Kids?

    The answer here is yes. Protein powder is indeed good for children. There are even kid’s versions available on the market. Compare it to baby formula, only formulated differently and tastier. It contains the same number of nutritious elements as the adult versions; only it is made for children’s needs. In short, if you have kids in your house, you should have some protein powder for them store with your other emergency goods.

    Can I Do Anything Else With Protein Powder?

    While the most popular method of using protein powder is by mixing it with water and drinking it, you can always use it in a smoothie. In fact, if you mix some of your canned fruit in with the protein powder and maybe some powdered milk and water, you have the makings of a quite tasty drink. You’ll need some variety in your diet – you can’t keep eating and drinking the same things all of the time – and this is a great way to expanding things.

    Protein powder is a useful vitamin and mineral supplement that can provide some of the things that your average diet is lacking. Make sure to keep some containers of it in your emergency pantry alongside your other goods. You might want to pull it out when you tire of eating the same old things all of the time. The benefits are worth it, especially if you chose a tasty flavor.

    [Discover] The ONLY battery reconditioning resource that lets you easily bring nearly any type of dead battery back to life…<<<Learn How Here>>>

  • Easy Checklist to Winterize Your Garden

    Easy Checklist to Winterize Your Garden

    As a homesteader, you may be wondering where you’re going to get the energy for preparing your garden for winter after all the hard work of harvesting the vegetables from your garden.  Remember how happy you were when you realized that you wouldn’t need to buy any vegetables all winter long? Keep that in mind along with the fact that it will now be cooler to work outside.

    You can print out the below list to check off items as you complete them and before long you’ll be done so you can take a break for a few days. Those gardeners in warmer southern areas can ignore the items not applicable.


    Before Winter Check List

    • Harvest any remaining root plants such as potatoes and carrots after their foliage has withered and died
    • If you didn’t harvest all crops of specific vegetation such as winter squash, eggplant or cucumbers so you could collect their seeds, now is the time to pick before any frost
    • Remove and discard all dead vegetation and rotten vegetables or fruit to keep away any pests that may cling to them for the winter
    • Rake to remove small debris and to turn the soil
    • Now is the best time to do a soil test for PH levels and minerals; adding a fertilizer such as fish and seaweed is excellent for adding minerals
    • Be sure to have some covering handy for signs of the first frost and cover annuals as soon as there is a hint of frost on the way
    • Cut back dead leaves on perennials that can survive winter and rose bushes, cover with about 3 inches of mulch; fragile rose bushes need protective covering if in colder climate
    • Water shrubs and evergreens before a freeze and mulch after freeze
    • Root crops such as parsnips, arugula, or sprouting broccoli can be stored in the ground for the winter (overwintered) and depending on your USDA zone, will need the protection of heavy mulch, a thick layer of straw, tarp or row cover
    • After the first frost, cut back and dig up perennial bulbs such as gladiolus that can’t survive colder climates, dust off and store in breathable container like a cardboard box in a cool, dry place; cover beds with evergreen boughs
    • Repair raised box beds and make more boxes if needed
    • Pruning of shrubs that bloom in the summer should be done after all leaves are gone and while dormant or in early spring; however, hydrangea types such as mopheads should be pruned in June


    More Garden Tips

    • If you haven’t started a garden notebook yet, this is an excellent time to make notes on how each plant did, what problems it may have had, and if any areas didn’t grow as well as others.
    • To tell when to harvest potatoes, rub the skin and if it doesn’t scrub off quickly, it’s ready.
    • To save time and wear on your back when pruning plants, use a pole pruner to remove stems down to the base of the plant.


    Conclusion

    Winterizing your garden is the best way to ensure it will come back next spring looking as good or better than it did this year.  How much time preparing your garden for winter will take depends on how big your garden is, what type of plants you have, and if applicable, when the first frost usually comes and how cold it usually gets where you live.

    No matter where you live or what type of garden you have, we want to wish you a Happy Homestead Winterizing!

    [Food Storage] – How to build a small root cellar in your backyard <<<Watch Short Video Here>>>

  • Your Guide For Need to Know Bullet Information

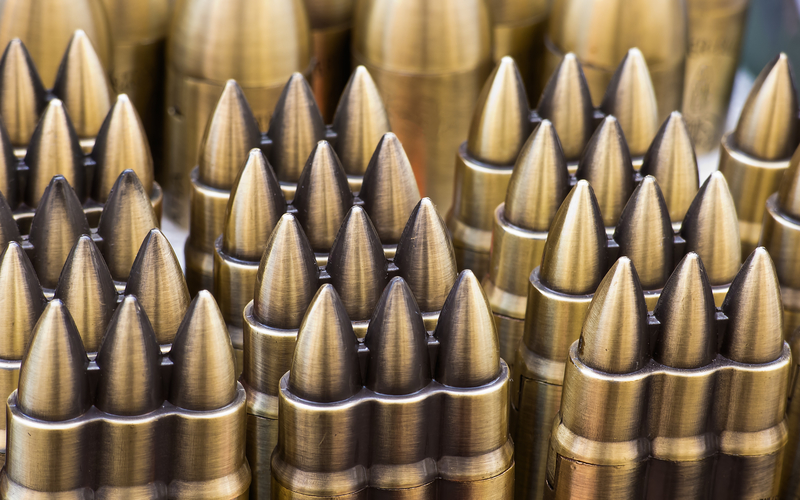
    Your Guide For Need to Know Bullet Information

    When it comes to bullets, there is a LOT of information out there.  Basic knowledge can be very useful when determining what type of firearm you may want to try out or eventually purchase.

    Ammunition itself can be extremely intimidating to the novice.  Selecting the right ammo for personal defense or hunting is a very important decision that can affect performance and safety. In this article, we’ll discuss some basic terms and then go into more detail on common ammo types.

    First, let’s take a quick look at the most common types of weapons used by civilians for sport, home or personal defense.

    Revolver – Named for its revolving cylinder that is usually made up of 6 chambers designed to hold one cartridge each.  For the newbie, these are the types used in classic westerns.  Think “6-shooter.”

    Pistol – This is the most common handgun used today by pros and amateurs alike.  It’s a hand-operated weapon like the revolver but distinguishes itself primarily by using “clips” of ammo that can be changed out during use to expedite firing.

    Rifle – The general term for any shoulder firearm that discharges its ammo through a barrel at least 16 inches in length or more.

    Basic Terms You’ve Probably Heard

    Full Metal Jacket (FMJ) – The most common type of bullet.  Made up of a softcore metal encased by a harder metal.

    Hollow Point (HP) – Designed to expand on impact.

    Open Tip (OTM) – Similar appearance to hollow points but the openings are too small to expand in the same manner.

    Ballistic Tip – A hollow point covered with plastic to copy the profile of a Full Metal Jacket.

    Bird Shot and Buck Shot – Shotgun rounds that consist of small pellets within in each shell.


    Bullet Size & Caliber

    For firearms, “caliber” refers to the diameter of the inside of the barrel (also the diameter of the bullet used). Some common bullets include:

    .22LR – The most common caliber in terms of units sold.

    .25 ACP – Slightly larger than the .22 and slightly more powerful.

    .380 ACP – One of the more popular caliber, the .380 has a low recoil making it easier to handle if you are just starting out.

    9mm – Probably the most popular, it’s the same size as the bullet used in the .380 and the .38 Special. The difference lies in the amount of gunpowder used in each.

    .38 Special – Most often used in revolvers. More recoil than the .380, especially when used in lighter weight revolvers.

    7.62x39mm – A Soviet rifle round used in the AK-47. Moderate recoil.

    .223 / 5.56x45mm – These 2 (.223 and the 5.56 Remington) are almost equal in dimensions.

    5.56 has higher pressures.  The .223 rounds can be fired in a 5.56 rifle, but the 5.56 rounds cannot be used in a .223 rifle.  Each cartridge has light recoil.

    .308 / 7.62x51mm – these both also have almost the same dimension but are not able to swap rifle use.  Popular for hunting.

    12 Gauge – The most popular shotgun round, recoil varies based on the round.  Shotgun ammunition is the most versatile with birdshot and buckshot.

    Some Final Notes on Selecting Your Ammo

    When you get to the point where you are ready to select ammunition for whatever purpose you’ve obtained a firearm, it’s important to find out:

    • The ballistics of the cartridge you’ve chosen
    • Whether or not it’s appropriate for the job you need it to do (e., hunting, personal defense, target practice)
    • How prone it is to going through objects or living tissue

    That last one especially is crucial for safety and liability reason.