Page 3 of 9
1 2 3 4 5 9
Survival – Page 3 – Homesteader Depot

Category: Survival

  • Treating Your Homestead Wounds the EASY Way

    Treating Your Homestead Wounds the EASY Way

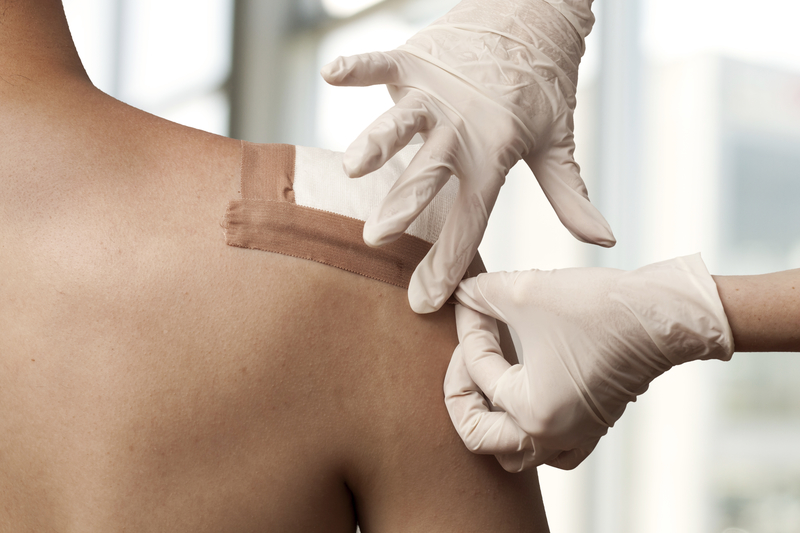
    As the name suggests, an open wound is an injury that has resulted in an opening in the skin. Minor versions are commonplace and can be treated at home with over the counter first aid products. Fundamental wound care is a useful skill to have in any situation.  Keeping a First Aid Kit handy can go a long way to ensuring they don’t develop complications.

    In this post, we’re going to take a quick look at the different types of open wounds that can happen as well as basic instructions on how to care for them.

    TYPES

    There are four different types of open wounds.  Knowing their classification can be very helpful in an emergency situation.  Often when calling 911, the operator will ask you the nature of the injury.  The ability to accurately describe the different types of open wounds will help EMT’s prepare for what they will be dealing with on arrival.

    Abrasion

    Probably the most common, an abrasion is essentially a scrape.  Most of us probably had scraped knees (and elbows, and ankles, etc.) more than once growing up. If you were one of us, you probably remember there isn’t a lot of bleeding.

    Avulsion

    This type is probably the least common since they usually happen as a result of violent incidents such as explosions, gunshots, or severe traffic accidents.  Avulsions involve a partial or complete tearing away of the skin as well as the tissue underneath. They bleed heavily. These injuries should definitely be treated by a professional.

    Laceration

    Deep cuts or tearing of the skin are referred to as lacerations.  They usually involve sharp tools, knives or broken glass.  Shallow versions will have mild to moderate bleeding, while deep cuts can bleed much more quickly and at a faster rate, especially if an artery is severe in the process.

    Puncture

    Just like in a tire, punctures are small holes through the skin into the underlying tissue.  They can be a result of nails, needles, or any other thin sharp objects.

    Punctures may not bleed excessively.  You should determine if the wound is deep enough to damage any internal tissue or organs.  If it is, or you’re not sure, seek medical help immediately.

    TREATMENT

    For minor wounds, such as shallow scrapes, cuts, and tiny punctures, home treatment is usually standard. The primary concern is generally to make sure its cleaned thoroughly to get rid of all dirt and other debris.

    To control bleeding, just apply light pressure until it stops. Smaller scrapes can be covered with an antibiotic ointment and finished with an adhesive bandage.  If the area of the scrape is more extensive, an antibiotic ointment can still be used.  After application, a sterile dressing created from gauze, and medical tape can protect the whole area.

    Any pain management can be accomplished by taking over the counter non-aspirin products like acetaminophen or ibuprofen.

    Just avoid aspirin since it is also a blood thinner that can make bleeding more challenging to keep under control.

    If bruising or swelling also occurs, treat with an ice pack.

    When to see a doctor (If Possible)

    If any of the following can be answered with a “Yes” about the wound in question, seek medical care instead of trying to address it yourself.

    • Is the open wound deeper than 1/2 inch?
    • Does the bleeding continue despite applying direct pressure?
    • Has the bleeding lasted longer than 20 minutes?
    • Is the bleeding a result of a severe accident?

    If any of the above applies to your situation, or if you aren’t sure, its best to let a professional assess and treat the injuries to help avoid any complications in the future.

  • 5 Simple Methods to Preserve Food

    5 Simple Methods to Preserve Food

    As a homesteader, you know that it’s important to know how to preserve food. Very few of us live in a climate where we can grow food year-round. During the colder months, true self-sufficiency requires a working knowledge of food preservation methods.

    That’s why we’ve put together a list of methods you can use to preserve food. Whether you’re looking for methods to preserve fruits and vegetables from your garden, items you’ve foraged, or animals that you’ve caught while hunting or fishing, we’ve got you covered.

    Method #1: Canning

    Canning is probably the most popular form of preserving food. It’s also one of the more expensive methods, but the initial investment can pay for itself rather quickly.

    To can food, you’ll need a canner. You’ll also need to invest in a collection of glass jars, canning rings, and lids.

    The benefit of canning food is that you can preserve it at its peak. Canning can be used to make jam, jelly, salsa, and other condiments.

    Method #2: Fermentation

    The next preservation method you may want to consider is fermentation. Fermentation involves preparing vegetables, placing them in brine, weighing them down, and allowing them time to ferment in an anaerobic environment.

    The brine may contain salt, whey, or a fermentation starter. Some popular fermented recipes include sauerkraut, kimchi, and pickled vegetables.

    Method #3: Dehydration

    One method we really like is dehydration. It’s a favorite because it can be used to dry fruit, vegetables, meat, and fish – and you don’t need any special equipment to do it.

    Of course, you can invest in a food dehydrator if you want. However, you don’t need to. Most foods can be dehydrated in a low oven. Simply marinate or season the food how you like. Then place it in a 150-degree oven for the specified time. For example, jerky takes eight to ten hours in the oven.

    Drying foods in a food dehydrator may take less time than doing it in an oven. If you think you’ll be doing a lot of dehydration, it may make sense to buy a dehydrator. This is a time-consuming process, but dehydrated foods are shelf-stable – a big plus if you have limited refrigerator and freezer space.

    Dehydrated foods can be stored in airtight bags, jars, or in the refrigerator to extend their shelf life. Some popular dehydrated foods include dried fruit, dried vegetables, and jerky.

    Method #4: Freezing

    Freezing food is a classic method of preserving it, but it has its limitations. If you’ve got a reliable source of power and a big freezer, all you’ll need is some plastic wrap and plastic bags and a permanent marker to label your food.

    There are some downsides to consider. If you lose power for an extended period, you run the risk of losing any food that you have frozen. You shouldn’t have to worry about freezer burn if your food is properly wrapped before you freeze it, but it can be time-consuming to portion out food, wrap it, label it, and freeze it.

    We like freezing for meat and fish. It can also be a great way to preserve delicate herbs from your garden. For example, we’ve made pesto with fresh basil and garlic and then frozen it in ice cube trays. That way, we have fresh pesto even in the middle of winter.

    Method #5: Root Cellaring

    In the days before refrigeration, storing hardy vegetables in a root cellar was the best way to keep them fresh over the winter.

    Not all vegetables are suited to this preservation method. Some that are include potatoes, sweet potatoes, squash, cabbages, and apples.

    If your home already has a cellar, you may be able to use it for storing produce over the winter. If not, consider digging a small cellar to ensure you have food to eat all year round.

    Do you have a favorite food preservation tip that we haven’t mentioned? Share it in the comments!

    >> This lost food has just recently been unearthed by NASA scientists. How to make NASA’s superfood at home.

  • 3 Basics for Starting Your Homestead

    3 Basics for Starting Your Homestead

    In our modern society, many of us dream of finding a way to get back to simpler times. We yearn for the days when people grew and preserved their own food and relied more on themselves and less on technology.

    If that sounds familiar, then you might want to start a homestead. Whether you already own a substantial tract of land out in the country or you’re renting a city apartment, there are things you can do right now to get things underway.


    Starting Small

    Do you live in a city or the suburbs? If so, you might not have the wherewithal to be fully self-sufficient – at least, not yet.

    That doesn’t mean that you can’t get started with homesteading in a small way. Let’s start with what you can do in a city apartment or condominium.

    1. You can install window boxes in sunny windows and grow herbs and vegetables for your kitchen.
    2. If there’s a community garden near you, see if you can rent a plot.
    3. If you have a fireplace, you can switch to wood heat during the cold winter months.
    4. You can preserve food that you grow or buy.

    Each of these things is something you can do without a lot of space. They can give you a taste of homesteading while you work toward your long-term goals.

    If you’re in the suburbs, you have more options.

    1. If your yard space permits it, you can grow a garden or even put in a greenhouse.
    2. You may be able to plant fruit trees.
    3. In some suburbs, you may be able to put in a chicken coop and raise chickens. (Check your city or town ordinances before buying!)
    4. You can install wood-burning stoves for heat.
    5. Just as you can in the city, you can preserve food.

    Growing and preserving food can help you learn essential homesteading skills even if you’re not living in the country.


    Educate Yourself about Homesteading

    There’s no question that there’s a steep learning curve for new homesteaders. That’s especially true if you are heavily reliant on mass-produced items and public services.

    That’s why one of the best things you can do to start homesteading is to learn about it. Go to your local library or bookstore and stock up on books about homesteading.


    Here are some topics to learn about as you work toward your homesteading goals:

    The more you learn about these topics, the better prepared you’ll be when the time comes to move to a homestead. Of course, you can check out our blog posts and resources for information, too!


    Make a Homesteading Plan

    The next thing you’ll need to do is make a homesteading plan. Even if you can’t afford to buy a homestead, you can still take steps to become self-sufficient.

    For example, you might decide that growing food is your top priority. If that’s the case, you can build garden beds, install window boxes, and plant trees.

    As we mentioned above, you may be able to keep chickens – some cities allow it and many suburbs do. There may be restrictions in place concerning proximity to your neighbors, so make sure to check.

    At the same time, you can be saving money or checking out country properties to make the switch to a true homestead.

    How did you get started homesteading? Do you have questions? Tell us in the comments!

    Would you like to see a garden that needs NO WATERING? >>>>SEE IT HERE

  • 5 Questions You Need to Answer When Choosing a Handgun

    5 Questions You Need to Answer When Choosing a Handgun

    Choosing your first handgun can be both exciting and overwhelming.  Just like choosing your first car, there are a number of models, sizes, and budgets available.  Not to mention new versus used, ease of maintenance and the cost of the ammunition required to use with it.

    To make the process of taking this big step a little easier, we’ve compiled a list of questions that will help you determine a course of action when making this important purchase.

    Why Are You Making This Purchase?

    Knowing why you are buying a handgun will help you decide what type.  Do you intend to keep it on hand at home strictly for home defense?  Do you plan to obtain a concealed weapon permit and carry it with you?  Are you a recreational shooter who doesn’t want to rent one at the shooting range anymore?


    [FREE eBook]

    Home Defense Hacks – 49 Ways To Keep Your Family Safe From Intruders.     Get It Here >>


    The answers to these questions will help you determine what size and caliber will work best for your needs.  Larger models can be more intimidating during a home invasion.  So much so that you may not even need it to be loaded.  Smaller models are easier to transport back and forth to the shooting ranges.

    What’s Your Budget?

    Knowing ahead of time what you can afford will have a big impact on the number of handguns are available to you.

    Do You Want a New or Used One?

    Your budget may have some impact on how you answer this question.  If you are interested in a higher price model, a used version may allow you to get just what you want without breaking the bank.

    If you do go with a used handgun, make sure you purchase it from a legitimate vendor.  Then have it checked thoroughly for damage and wear that could affect its firing performance and safety.

    One Simple Gun Shooting Hack That Will Instantly DOUBLE Your Accuracy>>>

    What Caliber and Size?

    When comparing two handguns of similar size and weight, the one designed to shoot a larger caliber will perform with more recoil.  Smaller caliber designs have less recoil.

    If you are just beginning to work on your skill, a smaller caliber will allow you to focus on improving your aim and ability.  As you progress, moving up to a larger caliber will let you continue your progress.

    Did you know:  You can receive your concealed handgun license online. <<<Check it out here>>>

    A note on gun size as it relates to the size of your hands.  In addition to caliber and how easy or difficult it makes handling the weapon, a smaller size will also be more manageable if you have a smaller hand size. Recently a friend went with her husband to the local shooting range to try out his 9mm.  After firing off several clips, she had the opportunity to test a .380.  She was amazed by the ease of use of the smaller caliber and size after fumbling with the larger and more cumbersome model her husband owned.

    If you know you want to use your handgun for personal protection, it’s a good idea to get one that is easy for you to load, fire and reload.

    How Does It Feel?

    While closely related to the size and caliber question, when it comes down to it, this is the most important question you’ll answer.  If a certain model and size feel more comfortable than others, that’s probably the one for you.

    A good way to test different models is to watch for vendor demos at your local shooting range.  Sig Sauer, for example, will often do demos several times a year.  At these events, you can test several models of different sizes and calibers to see what works best for your skill level.

    [VIDEO] 10 Out Of 10 Amateur Gun Owners Make This Simple Shooting Mistake. See It Here >>

  • Solar Energy Options for Homesteaders

    Solar Energy Options for Homesteaders

    You want to live off the grid, but that doesn’t mean you don’t need electrical power to operate your lights and appliances.

    You can use a generator, but generators require gasoline. A generator is a good backup solution for people who are on the grid when they lose power.

    However, if you want to be independent, the best way to do it is to invest in solar energy options for your home and property. It used to be that solar panels were prohibitively expensive. That’s no longer the case.

    In this post, we’ll detail some of the solar energy options for homesteaders. By the time you’ve finished reading, you’ll have the information you need to make the switch to solar power.

    On Grid vs. Off Grid

    The first thing you need to decide is whether you want to live off the grid or on the grid. For some homesteaders, making a switch to solar power is best done incrementally.

    In other words, you might start with a few solar panels and switch to solar for heating your water. Then, over time, you may add additional panels to help you ease into off-grid living.

    If your goal is to get off the grid as soon as possible, you’ll need to evaluate your energy needs and determine how much power you need to collect and store to keep things running the way you want them to.

    Calculating Your Power Needs

    The next step is to determine your power needs. There are many easy online calculators that you can use. Here’s what you’ll need to make the calculation:

    • The number of Kilowatt-Hours (kWh) you use per month
    • The percentage of your energy use you want to offset with solar power
    • The state you live in (determines the average days of sun where you live)

    The calculator uses these three things to calculate a minimum and maximum size for your new solar power system.

    [Must See] Solar Panels Alternative — Portable Solar Energy System: Learn More Here>>>

    Solar Power Options

    Regardless of your power needs, you need a system to collect solar energy, convert it to the proper form, and store it so you can use it to power your home.

    If your goal is to be only partially dependent on the grid, then you have a few options to choose from. For example, you might:

    1. Invest in a solar water heater. You’ll need to place it in an area that gets as much direct sunlight as possible, but you won’t need to add solar panels to your home.
    2. If you have a swimming pool, get a solar pool heater. The same principle applies – you’ll need to place it in direct sunlight for the best results.
    3. You can buy and install just a few solar panels, store the energy in batteries, and use it as needed.

      Related Article:
      “4 Excellent Ways to Generate Your Own Electricity” 

    The other option, of course, is to make the switch and move off the grid. In that case, you’ll need to purchase:

    1. Photovoltaic (PV) panels to collect sufficient power for your needs
    2. A combiner box where you’ll plug in the panels
    3. A charge controller to prevent your panels from storing too much energy
    4. Solar batteries to store excess energy
    5. A DC to AC inverter to make the power you collect usable

    Of course, the expense of buying these things can add up. If you’re an experienced electrician (or you know one who’s willing to work for cheap) then you don’t have to buy a combiner box – you can make one. Keep in mind that it’s important to get the wiring right and to protect your system so it doesn’t fail.

    Making the Switch to Solar

    Switching to solar power can help you save money in the long term. We like it because it gives us a reliable source of power that we can count on even if the grid fails or is compromised.

    Have you made the switch to solar power? Tell us in the comments!


  • 4 Excellent Ways to Generate Your Own Electricity

    4 Excellent Ways to Generate Your Own Electricity

    Your goal as a homesteader is to become self-reliant. You want to grow your own food and preserve it for future use. You want to know that you and your family can survive even if disaster strikes.

    One of the most persistent challenges faced by a homesteader like you is generating electricity to power your home. Most people rely on public power sources – more commonly known as the grid – for the electricity they need.

    Homesteaders tend to live in rural areas where the grid may be less reliable. For them, finding alternatives is desirable and cost-effective.

    With that in mind, let’s talk about some of the methods you can use to generate your own electricity off the grid.

    Solar Energy

    One of the most popular ways to generate electricity off the grid is to install solar panels on or around your home. Photovoltaic (PV) panels collect energy from the sun.

    In addition to panels, you’ll need a solar system to transport energy from the panels. It should include a combiner box, a charge controller, solar batteries, and a DC-to-AC inverter to put the energy in a usable form.

    Photovoltaic panels can be expensive, but they also pay for themselves quickly. They’re a good option if you want to generate enough power for all your electricity needs.

    Wind Power

    Another electricity option that’s popular with homesteaders is wind energy. To harness the power of the wind, you’ll need at least one – but possibly several – wind turbines.

    To make effective use of wind turbines, you’ll need an open space that gets reasonably steady wind. Homesteaders who live in heavily wooded areas will need turbines that reach above the treetops to get good results.

    Keep in mind that turbines can be noisy. If you can set them up at a distance from the house, you can reduce the noise. As you would with solar panels, you’ll need batteries to store the energy you collect.

    Hydroelectric Power

    If you have the right type of moving water on your property, hydroelectric power can be a cost-effective way to generate the electricity you need.

    A simple moving stream won’t generate much power, although you could use it as a supplement to other power sources such as solar and wind.

    However, if you have a waterfall or a downhill river or stream, you can generate a significant amount of power.

    Power Generators

    It’s common for homesteaders to begin their experimentation with moving off the grid with a generator. There are two types to consider:

    1. Portable generators are small and usually run on gasoline. When your power goes out, you’ll have to connect appliances to the generator manually to get them to work.
    2. Standby generators are larger than portable generators. They run on propane or natural gas, and they come on automatically when there’s a power outage.

    As you might expect, portable generators are less expensive than standby generators. If you decide to try a portable generator, consider buying a model with wheels so you can move it from one place to another without a hassle.

    Combining Multiple Methods

    Many homesteaders don’t rely on one method of generating power for their homes. It’s common to combine two or more methods.

    For example, you might have solar panels on your roof and wind turbines set up in a nearby field. You might also keep a portable generator to use in emergencies. The key to choosing the best combination is to evaluate your home power needs and budget and choose accordingly.

    Have you tried any of these power generation methods at home? Tell us in the comments!

  • Super Simple DIY Fishing Net

    Super Simple DIY Fishing Net

    Time is always scarce on a homestead so spending days on end catching 1 fish at a time is not the best use of your limited time.  How can you catch crazy amounts of fish in a short amount of time so you can get back to doing other necessary things on your homestead?

    If you use fishing and fish as a regular food source, a net is basically a mandatory piece of equipment. If you find you need a larger net than you want to spend your hard-earned cash on, you can DIY it for a fraction of the cost using some twine and nails.


    What you will need:


    • Nails
    • Hammer
    • Netting or other sturdy Twine
    • Scissors
    • Area large enough to work


    To start, decide how wide you want your net to be.  Then place two nails into a wall or beam high enough to accommodate the length of the net you want to end up with.


    Stretch a piece of your twine between the 2 nails and secure it so that the length is tightly strung with no dipping.


    Cut additional pieces of twine, each one double the length you want the final net to be.


    For example.  If you want an approximately 6’ x 6’ net, your nails will be 6’ apart and the cross piece of twine will stretch across that length.  Each subsequent piece will be cut to 12’ lengths.


    Next, attach the double lengths at even spaces across your cross string. To do this, fold the length in half, hold the center loop behind the cross string and feed the ends of the length around the cross string and through the loop, then tighten, creating 2 vertical strings hanging down the length of the net.


    Do this for each double length, spacing them evenly as you go and adjust as needed.


    The space between each tied length will determine how big the holes of the net will be.  If you want a tighter net to hold smaller fish, place them closer together.  This will also be what determines how many double lengths you need to make.


    As stated above, each double length creates 2 vertically hanging strings, or one set, when tied to the cross string. We are going to refer to each of the hanging sets as 1, 2, 3, 4 etc. and each set has a left string and a right string, so there will be 1 left, 1 right, 2 left, 2 right, etc.

    Start by taking string 1 right and 2 left and holding them together.  Make a loop around your finger with the two pieces being held together as one and feed the end through to create a knot, joining the 2 pieces below the cross piece.  Adjust as needed to balance the knot evenly between the vertical lengths to create an upside-down triangle between the knotted pieces and the cross piece.


    Continue this process with 2 left and 3 right, then 3 left and 4 right, making a line of knots across the width of your workspace until you have your first row completed.  At this point, strings 1 left and your last set’s right string will be hanging free on either end of the area and all the set will be joined to their neighbor by a knot.


    Start the second row by taking 1 left and 1 right and knotting them, then 2 left and 2 right, 3 left and 3 right, and so on.


    Continue this pattern until you get to the bottom of your twine, tie off the ends and presto!  Your very own fishing net.


    This technique can be used for any size net you may need.


    Alternatively, if you tie your double lengths to a pre-existing circular frame, you can use the same process to create a dip net, just make sure to keep alternating knot rows and tie off the bottom when you reach the depth you want.


    Happy Fishing!


    More interested in sport fishing?  Get the insider, professional fly-fishing tricks, tips, and techniques HERE.


  • Tips to Stockpile Food for the Winter Months

    Tips to Stockpile Food for the Winter Months

    Growing up, one of my favorite things to read were the Laura Ingles Wilder books.  Not only were they entertaining, but she also went into great detail on how their food was grown or raised, butchered or harvested and then processed to keep all winter long.

    Thanks to modern conveniences, most of us don’t really need to take these steps to ensure a comfortable winter, even on a homestead with electricity and appliances.  However, it doesn’t hurt to prepare for a worst-case scenario to ensure you won’t get caught during a bad winter storm or power outage.

    Fortunately, when proper measures are taken, many foods can be kept all winter long.

    Fruits and Veggies

    For fruits and vegetables, storage areas should be cool and dark with moderate humidity and a consistent temperature of 40o.  When planning a homestead or other remote living location, a root cellar is a good addition for long-term storage.  In other homes, a cooler area of a basement or an attached garage can work.

    Stock a cellar as late in the fall as possible. Cure vegetables like potatoes, winter squash, and onions in warmer areas before moving them to the cold storage areas. For other items, chill in the fridge before moving to the cellar areas.

    Many root cellar veggies store better when some dirt is still on them. If you’ve harvested your own or stocked up from a local farmer’s market, shake or rub the excess dirt off instead of washing them.

    Know What Your Food Needs to Last

    Squash should be stored in shallow containers or left on shelves as they are.  Items like garlic and onions are best kept in mesh bags or open boxes so they can breathe. Potatoes must be kept in complete darkness to prevent the skin from going green.

    Avoid piling vegetables together, this generates heat and can lead to them spoiling. Try to spread them out as much as possible and rotate them for even exposure.

    Apples can be stored for months in a box and can be piled more than others.  This will actually assist them by maintaining humidity to keep them crispy.

    Avoid Spoilage

    It’s true that one bad apple can spoil the whole barrel, and that doesn’t just apply to apples.  Handle your fruits and vegetables carefully as even the slightest bump can create an invisible bruise and begin the decomposition process.

    In any storage areas that don’t have built-in climate control, the driest, warmest air will be near the ceiling while more-humid air is nearer the floor and farthest from the door. Keep this in mind as you plan where you will store your produce.

    Inspect your stores regularly and immediately remove any soft or rotten items before they can affect the rest.

    Keeping Meat

    If you are really into the store and save idea, consider smoking and storing your own meats.

    Whether you’ve gone hunting, or gone in with a friend and purchased a whole cow, being able to have a portion of that ready to go without relying on the use of a freezer can be a great idea.

    Used for millennia by some of the oldest civilizations for long-term storage, smoking creates an acidic coating on the meat that prevents bacteria from cultivating. It also dehydrates the meat, making it less hospitable for bacteria to breed.

    So, come late summer and early fall, start planning on what you can stock up on for winter storage.  Not only will this provide you with an emergency supply of food when needed, it is also a great way to keep eating local organic food all year round whether it comes from your own garden or the local farmers market.