Blog

  • Crops that can Earn you Money on your Homestead   

    Crops that can Earn you Money on your Homestead  


    When most people think of growing crops to earn money on their homestead, they think of growing extra vegetables to sell to their friends, neighbors, or at local farmer’s markets.  While there are plenty of people who do make extra money through this, it can be difficult to produce enough fruit and vegetables for you and your family let alone enough that you have extra to sell.  These are just a few plants that I have personally seen grown easily in small, backyard operations that earned money.


    Herbs

    Vegetables, especially fruiting vegetables can be difficult to produce in mass on a small scale.  However, herbs like basil, mint, rosemary, and lemongrass can easily be produced and propagated.  They can be sold to local health-food stores, at farmer’s markets as fresh herbs, or even as starts so people can grow their own.

    Citrus

    While it will take time for citrus trees to mature and produce large amounts of fruit, in the meantime you can enjoy the smaller harvests for yourself.  And when they do produce large amounts, it is easier to harvest and get to market than other fruit that spoils or bruises easily.  Their think skin also makes them less susceptible to pest damage.

    Ornamentals

    Ornamentals are not without their practical benefits.  They can draw pollinators, some repel pests, and they offer some biodiversity in the garden which also decreases pests.  They can also be sold, and many can be propagated and grown easily.  If you are thinking of growing ornamental flowers for profit, I would suggest looking into what grows best in your area that can be propagated through bulbs or cuttings, as this is nearly effortless and you will suffer less loss of product than with plants that produce through seed.  If you can become regular enough in your production, local stores may want a steady supply of starts which can be a great source of income in the growing season.


    These are by no means the only ways that you can make money through produce on your homestead, they are just the ways that I have seen used most successfully with the least amount of overhead.

    If you enjoyed this, you might also like….

    Home Defense in the End Times…

    Natural Healing Secrets You Need to Know…

    Eat Like Your Ancestors…


  • How (And Why) To Cure Potatoes Before Storing Them

    How (And Why) To Cure Potatoes Before Storing Them

    Potatoes are such a great garden crop, if you can manage to grow them. They can keep for months throughout the winter, and are a great source of nutrients and calories. While they keep well in a dark, cool area like a root cellar or even a garage, there is a very important step you must take before storage: curing. 

    What is curing? 

    Curing potatoes is essentially letting them dry out before storing away. There are several advantages to curing:

    • All wet spots dry out that might otherwise contribute to rot
    • The skins will harden, allowing the potatoes to keep for much longer
    • Damaged spots of the potatoes can heal
    • You get a chance to inspect all of your potatoes and sort out the bad ones
    • You can sort by size and type, if desired

    How to cure potatoes

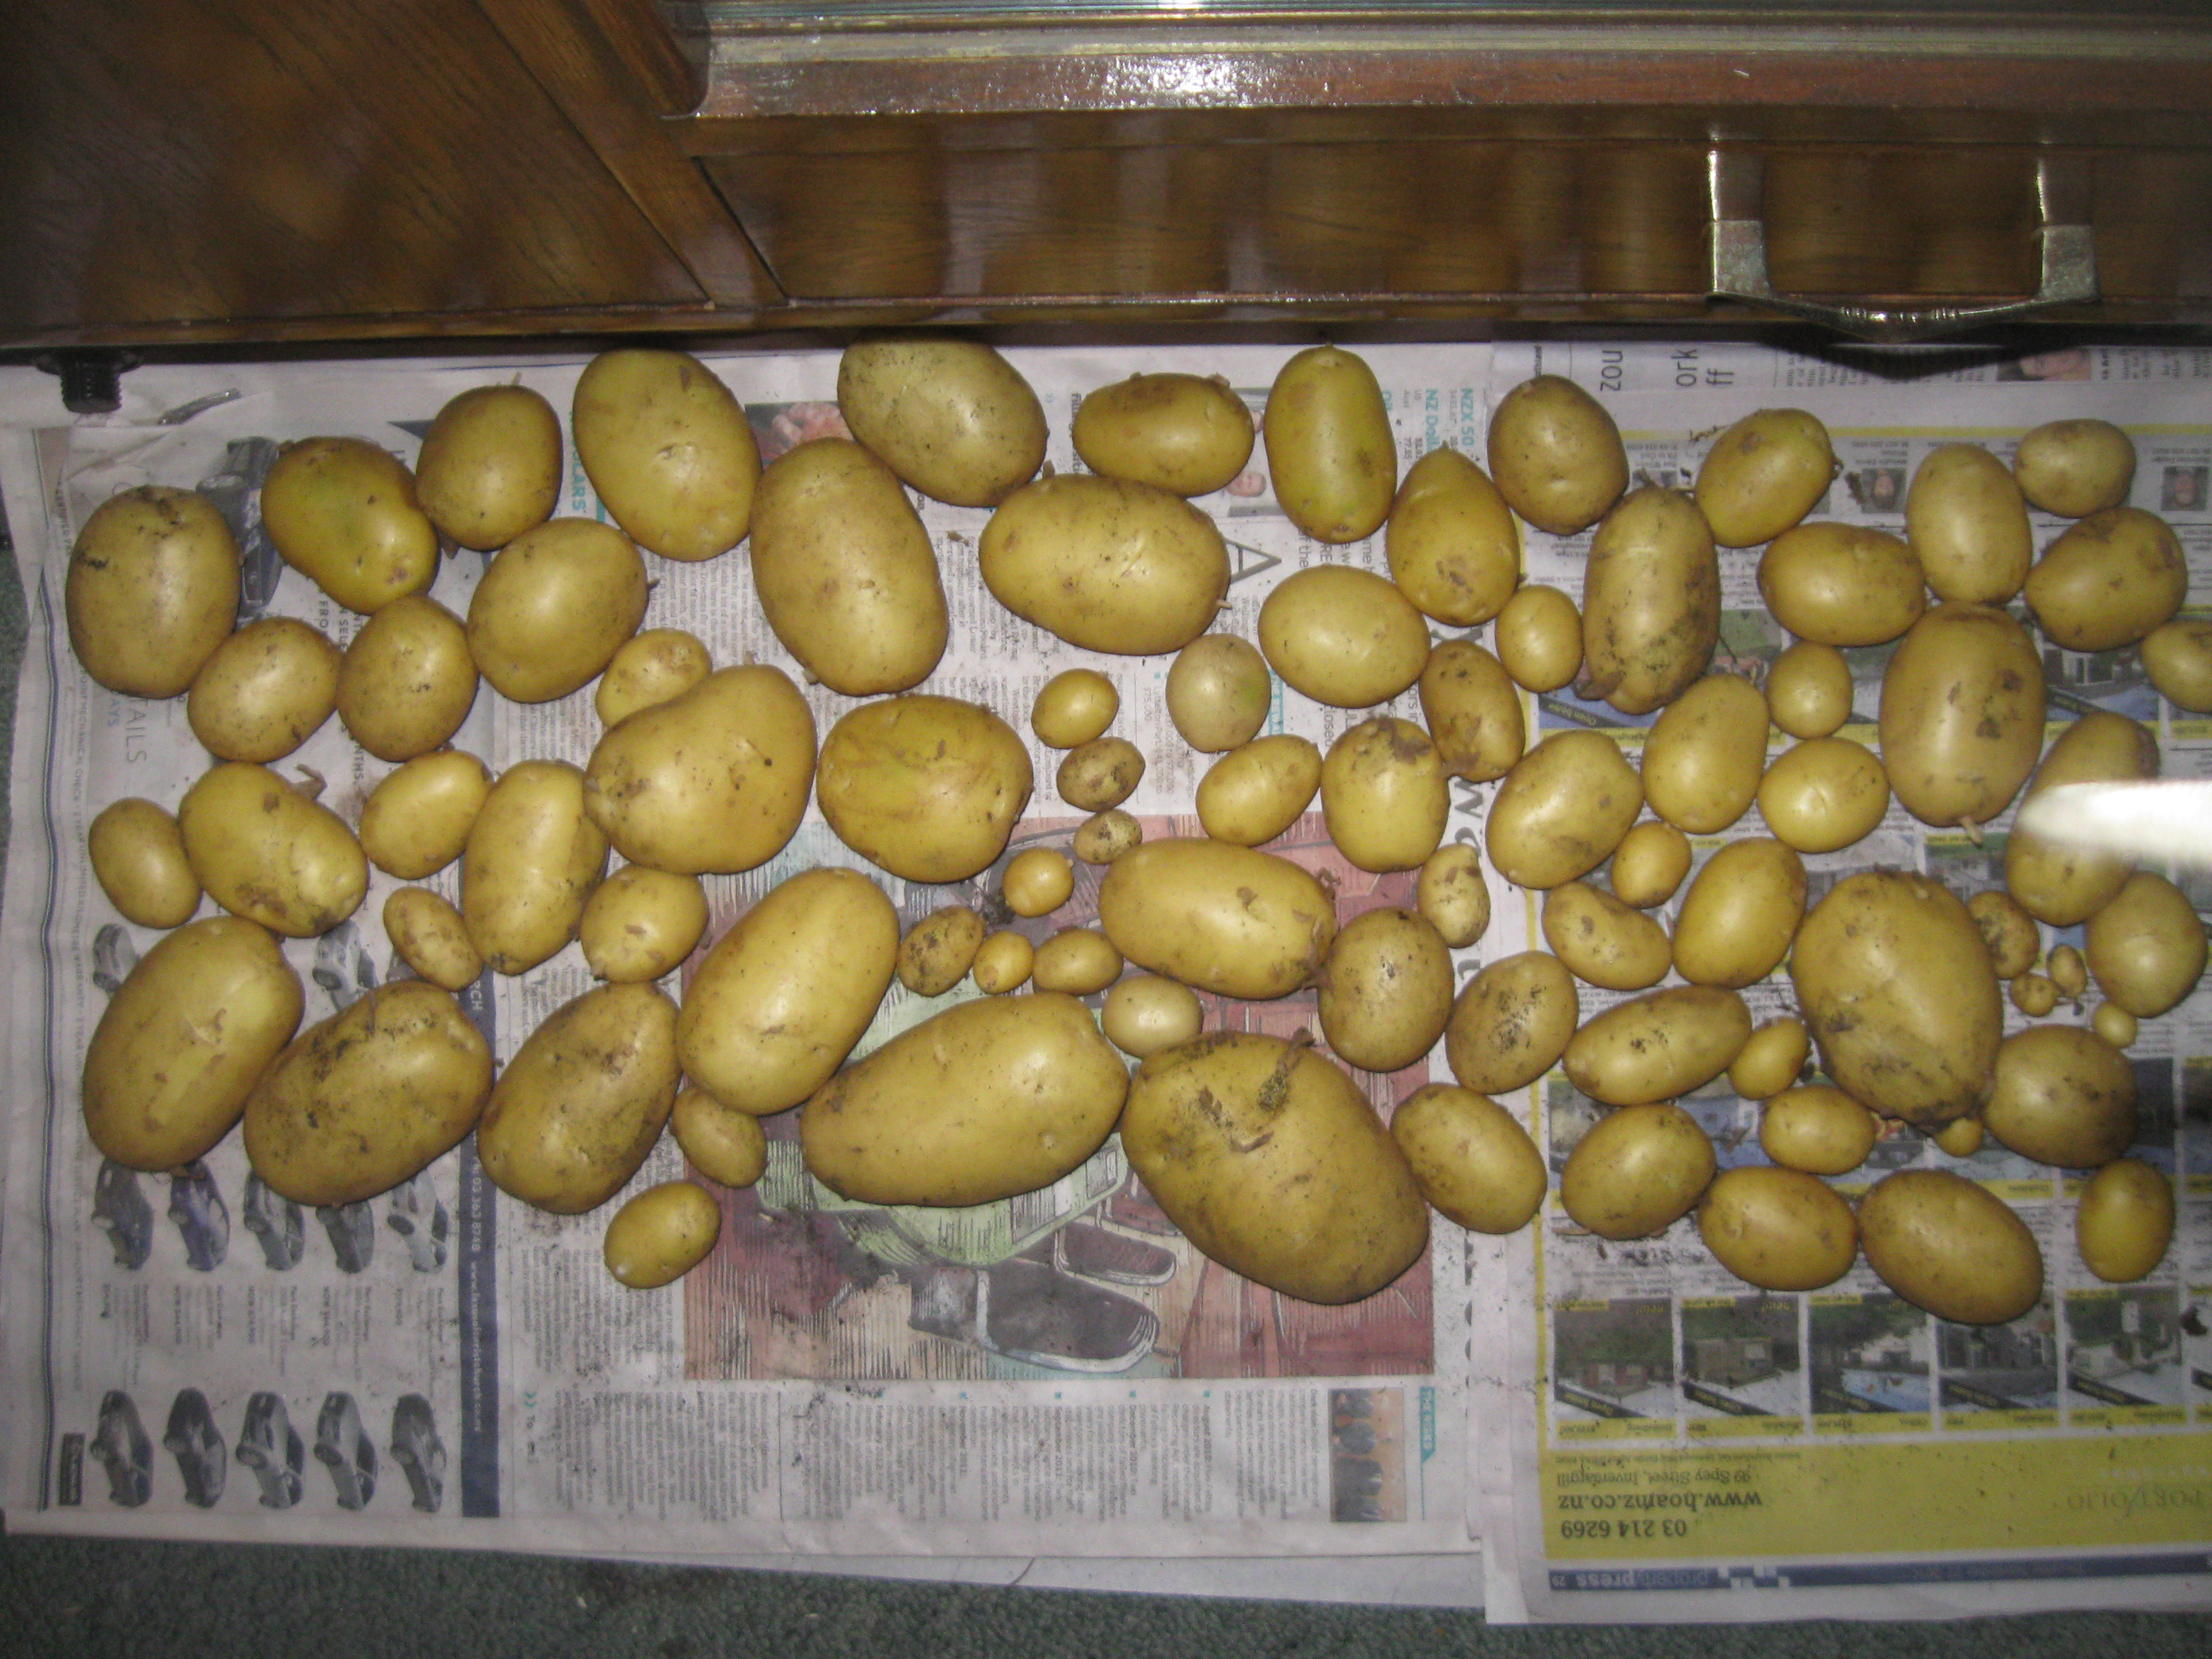
    It’s really very simple to cure potatoes, if you follow a few easy guidelines. The process is pretty simple, to start, you want to spread all your potatoes out on a surface, ideally covered with newspaper or torn up paper bags, and let sit for about 10 days or so.

    Air flow is the number one factor when choosing where and how to cure your potatoes. You want the potatoes to get plenty of air flow between each of them so spread them out, and you also want to be doing this in a well-ventilated area. In a well-ventilated garage or basement with a small fan, for example, might be ideal, but of course, since this might take up a lot of room you might have to improvise.

    Keep it dark: the darker this area, the better. You will of course have to turn on the light to check your potatoes from time to time and this won’t hurt, but don’t set up in an area that has a lot of windows and regular, 12-hour daylight. Light will ruin your potatoes.

    Keep it cold, as cooler temperatures, below 60 degrees, will keep the potatoes fresh and move along the curing process.

    Once your potatoes are all dried out, and this might involve inspecting them pretty carefully, they’re ready to store! There are multiple ways to store potatoes (which we might have to cover at some point in the future!) but the same rules for curing apply: somewhere dark, cool, and with decent airflow. If your curing was successful, they’ll keep for months!

    If you enjoyed this, you might also like….

    Home Defense in the End Times…

    Natural Healing Secrets You Need to Know…

    Eat Like Your Ancestors…

  • Super Simple DIY Body Wash

    Super Simple DIY Body Wash

    I thought I’d seen all the DIY replacements for ordinary personal hygiene items out there, but this one was new to me, and I knew I had to try it right away.

    Bodywash is kind of a modern, Western thing, for plenty of people a simple bar of soap is sufficient to get clean in the shower. But for whatever reason, some people greatly prefer body wash, especially if you like to use a washcloth or loofah.

    The thing about body wash, however, is that as effective and luxurious it is in the shower, it’s definitely not cheap. However, you can make it very cheaply, and it’s insanely easy and cheap. Dove brand body wash is very popular and highly moisturizing, so I’ve seen this recipe often made with dove. However, you can make it with whatever kind of bar soap you prefer. If you choose a bar soap that is very moisturizing, you’re more likely to get the desired effect. Choose something like a shea or cocoa butter soap for something really smooth and moisturizing.

    Typically, a 24-oz bottle of body wash can cost about $7, while you can usually buy a 6-pack of soap bars for about this much money. That means that you can replace your pricey body wash with a simple homemade version for a little more than $1 a bottle! I love savings like that, especially when the cheaper alternative is so simple.

    Check it out!

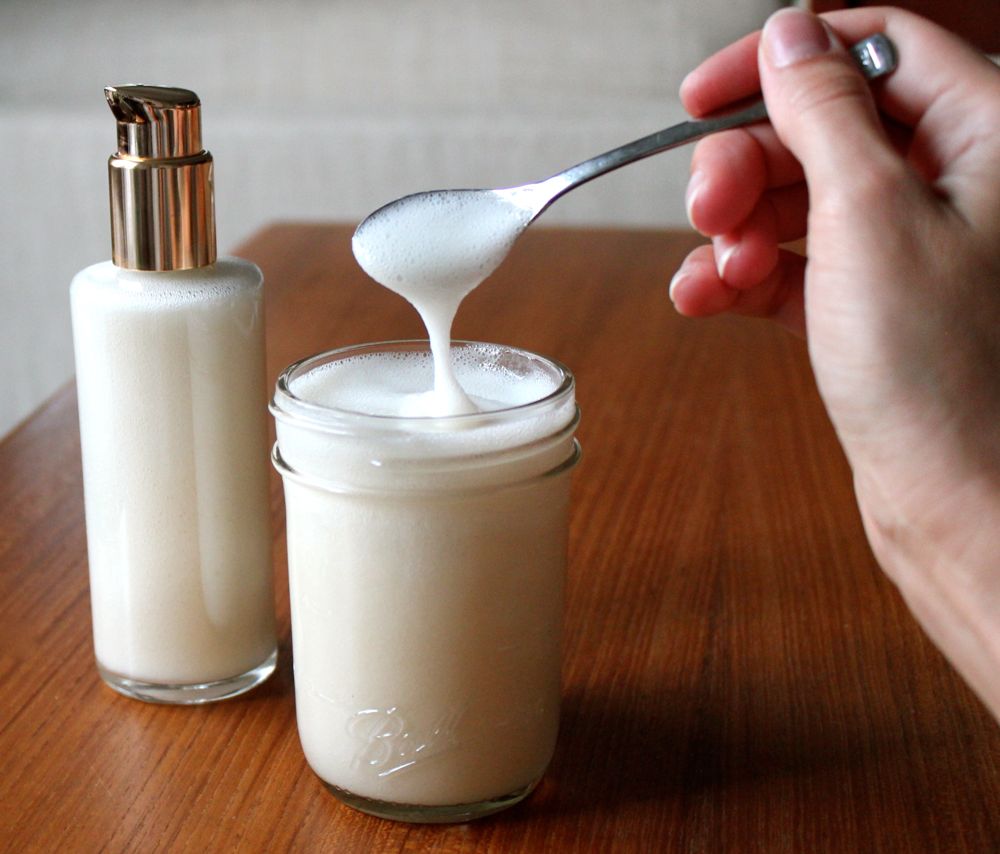
    Homemade Body Wash

    6 cups distilled water

    3 cups soap of choice, grated

    Essential oil of choice (optional, for scent, if you have chosen soap that already has scent in it you probably don’t need to add this)

    Dispenser of choice (something with a soap pump is ideal, or of course an old body wash bottle)

    1. Put the soap and the water into a medium saucepan over low heat
    2. Stir until combined
    3. Transfer to a glass bowl to cool. It will thicken as it cools
    4. Once fully cooled, pour into your bottle of choice.

    That’s it! I love frugal, DIY alternatives to expensive value-added products like body wash. Be sure to let us know if this worked for you!

    If you liked this, you might also enjoy…

    Holistic Medicine Basics

    Ever Considered Taking Yoga? Read this

    The Ultimate Woodworking Course..


  • 3 Ways to Get Rid of Moles Without Killing Them   

    3 Ways to Get Rid of Moles Without Killing Them  


    Moles can be a destructive force in your garden.  They burrow through the root zone of plants, and eat earthworms you depend on for healthy soil.  But they are cute little things too, so if you can keep them out of your garden without having to kill them, it’s worth a shot.  Here are 3 ways to get rid of moles that don’t involve killing them.


    Vibrations

    Moles are incredibly sensitive to the vibrations made by insects and worms in the ground.  This is how they find their food.  This sensitivity can be used against them.  There are a variety of manufactured devices on the market that send vibrations into the ground that irritate the mole and make it difficult for them to sense the vibrations that are looking for.  Some are battery operated, solar, or wind operated, but they all function about the same way.

    DIY Repellent

    Chemical irritants can also be used to drive away moles.  A DIY repellent can be made from mixing 1 tablespoon dish soap, 4 tablespoons castor oil, and 4 tablespoons of cayenne pepper and spraying them on the mole hills you have found after filling them, and on any area you see trails.  This treatment can negatively affect plants, so be careful not to get it on the leaves of any plant you are concerned about, including grass in a growing stage.

    Plant Repellent

    Planting crops like onions and garlic, or plants like chocolate lilies can also be used as a constant repellent, and one that offers the benefits of food production of ornamental flowers instead of dead grass and vibration devices sticking out of the ground.


    Not all moles are as easily deterred as others.  You may have to use more than one of these methods, or even take more drastic measures, but if you do, at least you will know that you tried to things the nice way first.

    If you enjoyed this, you might also like….

    Home Defense in the End Times…

    Natural Healing Secrets You Need to Know…

    Eat Like Your Ancestors…

  • Overnight Oats-5 Different Ways (Video)

    Overnight Oats-5 Different Ways (Video)

    I absolutely love overnight oats. They’re such a great, healthy way to have a quick, easy breakfast waiting for you in the morning.

    Overnight oats are a staple in Europe, they typically use muesli and let it sit in yogurt and/or milk overnight. Not only does the yogurt really draw out a delicious flavor in the oats, because it is acidic, it also breaks down the “antinutrients” in the grains, making them easier to digest.

    Grains are not inherently bad for you, they just typically need to have these antinutrients broken down using methods such as soaking, sprouting, or souring. Before modern industrial forms of harvesting and processing grains, one of these three steps was usually a normal part of the pre-industrial processing, so this might be one reason we have so much gluten intolerance and autoimmune disorders today! I personally find that I feel much healthier when I avoid grains for the most part, but since I am such a big fan of grains in general, I love to find healthier ways to eat them that make them easier to digest, like sourdough bread or, of course, overnight oats!

    Oats are already naturally gluten-free, but if you are gluten intolerant, make sure to choose a brand that is labeled gluten free. Oats are commonly processed on the same equipment as wheat so unless otherwise indicated, they can contain trace bits of gluten.

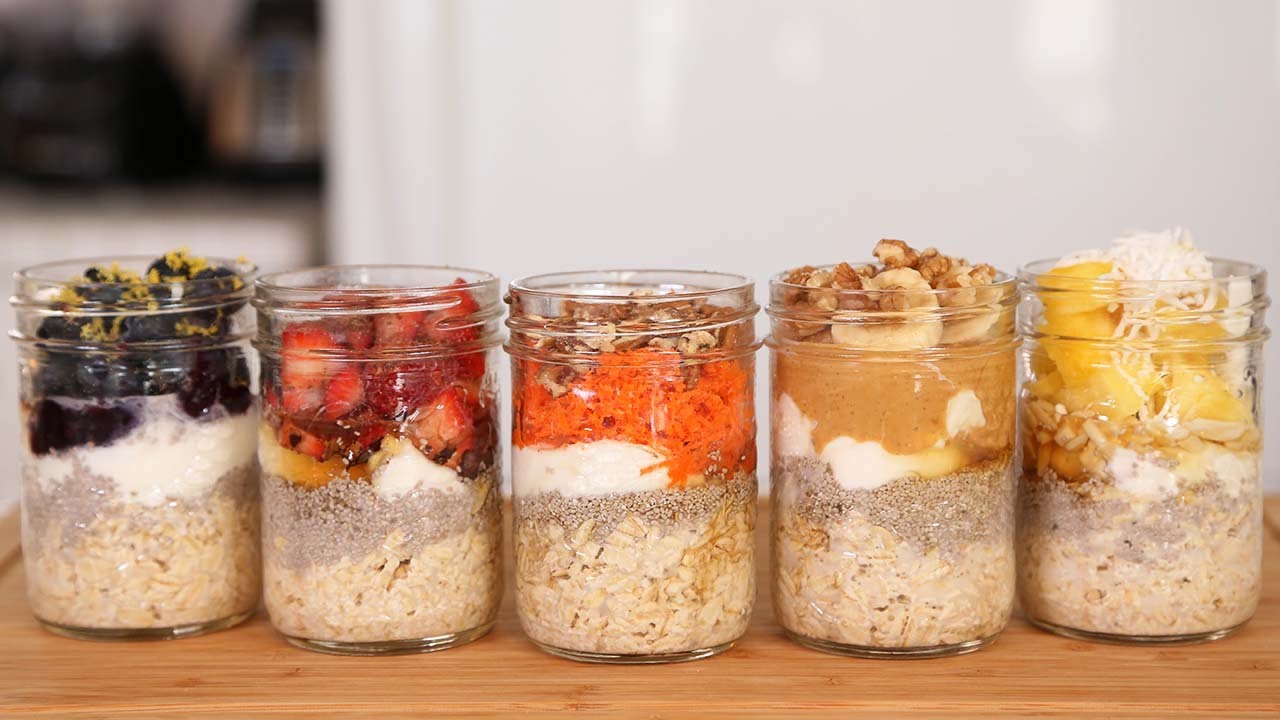
    This video features five delicious and creative ways to prepare overnight oats that seriously made me drool. But it’s also a great demonstration of just how creative you can get! You can use just plain oats and yogurt, or add in any number of the ingredients she recommends. Odds are you have some kind of dried or fresh fruit, nuts, etc. in your fridge or pantry that would be delicious in overnight oats. Enjoy!

    If you liked this, you might also enjoy…

    Holistic Medicine Basics

    Ever Considered Taking Yoga? Read this

    The Ultimate Woodworking Course..

  • DIY $5 Funnel Solar Oven (Video)

    DIY $5 Funnel Solar Oven (Video)

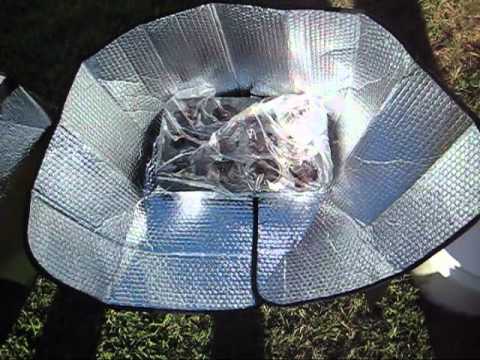
    I love off-grid cooking of all kind, and a solar oven is something I’ve been wanting to make for a long time. I always thought that it was fairly expensive to make, but this guy made one for only $5. It’s amazing how much you can cook in one, and it is the most bare-bones type of off-grid, renewable energy out there.

    The design is super simple and dirt cheap. Using two reflective windshield sun visors, he creates a funnel to concentrate the heat onto the oven. Check it out! I might try this when the days get warmer.

    If you liked this, you might also enjoy…

    What Are the Signs of the End Times?

    Learn Natural Healing Secrets From the Masters

    Preparing for the Bubble to Burst 

  • Tips for Living Without a Fridge

    Tips for Living Without a Fridge

    Refrigerators are one of the great wonders of modern science, and can greatly improve your quality of life. However, we’ve also grown so dependent on them, we don’t even know how to live without them anymore. Many people in the world still live without modern refrigeration, and it’s certainly not impossible.

    There are many reasons you might find yourself living without a refrigerator. If you are a new homesteader, just getting set up, you might be completely off-grid or not have the infrastructure yet on your homestead to power a full-sized refrigerator. You also might find yourself stuck in a long-term power outage, in which case some of the following tips might be useful to know.

    DIY Refrigeration

    There are a few different options for DIY refrigeration. Obviously, this isn’t the same as modern refrigeration, but there are some things you can create that will help keep foods cool. A root cellar is a great option if you can build one; you could even use a basement or simply bury a large cooler or even an old refrigerator or deep freezer. You could also build what’s called a zeer pot, which is essentially a pot inside of another pot, with sand in between and covered with a damp cloth.

    Change Your Thinking

    There are so many foods that we simply assume need to be kept in the refrigerator because that’s how we’ve always done it, but many foods can keep quite well at room temperature. Raw eggs that have never been refrigerated, for instance, can keep for up to a month. Butter can also be kept at room temperature, especially in an earthen or porcelain crock. Many kids of cheese will keep for at least a few days at room temperature, and almost all breads and baked goods will as well.

    Invest in Good Containers 

    The manner of storage will greatly improve the shelf life of your perishable foods. Airtight tins, mason jars, earthen crocks, cheesecloth, linen, are all great options for proper storage. For example, some produce like leafy greens can be stored in a jar with water like a bouquet of flowers, or wrapped in a linen napkin and kept in a cooler or large crock.

    Location, Location, Location

    Where you keep your food is just as important as how. Try to keep your perishables in a cool, dry, and dark place. Know the coolest, driest places in your kitchen or cellar, and organize your food accordingly.

    Preserve Using Other Methods

    Canning, drying, pickling and fermenting, and curing (as in meat) are all age-old methods of preserving food that are still used to this day around the world and are great alternatives to refrigeration.

    If you enjoyed this, you might also like….

    Home Defense in the End Times…

    Natural Healing Secrets You Need to Know…

    Eat Like Your Ancestors…

  • 3 Tips for Healthier Tomatoes   

    3 Tips for Healthier Tomatoes  


    Tomatoes are one of the most commonly grown crops in back yard gardens.  But it isn’t always easy to grow healthy, productive tomatoes.  And it isn’t really worth it to grow tomatoes if they aren’t healthy and producing to their full potential.  If you have had problems with tomatoes in the past, here are 3 tips you might want to try.


    Epson Salt

    Epson salt is made of Magnesium and Sulphur.  Both of which are vital nutrients for growing healthy tomatoes.  If you have had issues with tomatoes in the past try watering them with ½ tablespoon of Epsom salt per gallon to start, and 1 tablespoon per gallon once they are established.  This can also be helpful for peppers and eggplant.

    Aspirin

    A fungal infection in a plant’s leaves will leave the plant unable to feed, and grow, and therefore unable to produce even if it stays alive.  If your tomatoes have suffered from fungal infections they could benefit from some aspirin.  Crush an aspirin pill, a regular 325 mg pill is enough to add to a gallon or so of water, make sure it dissolves prior to watering.  You can pour the water over the plant’s leaves.

    Egg Shells

    Eggs shells are a great source of calcium.  If you have noticed blossom end rot in your tomatoes, peppers, or eggplants, they it is likely that your soil is lacking in calcium.  Grinding or blending your egg shells into powder will decrease the time needed for them to break down and make the calcium plant available, but even this will not be enough to help plants that are already suffering from blossom end rot.  This needs to be done at least 6 weeks prior to planting.


    Don’t get down if your tomatoes have been leaving something to be desired, with these 3 tips, most problems with tomatoes can be a thing of the past.

    If you enjoyed this, you might also like….

    Home Defense in the End Times…

    Natural Healing Secrets You Need to Know…

    Eat Like Your Ancestors…