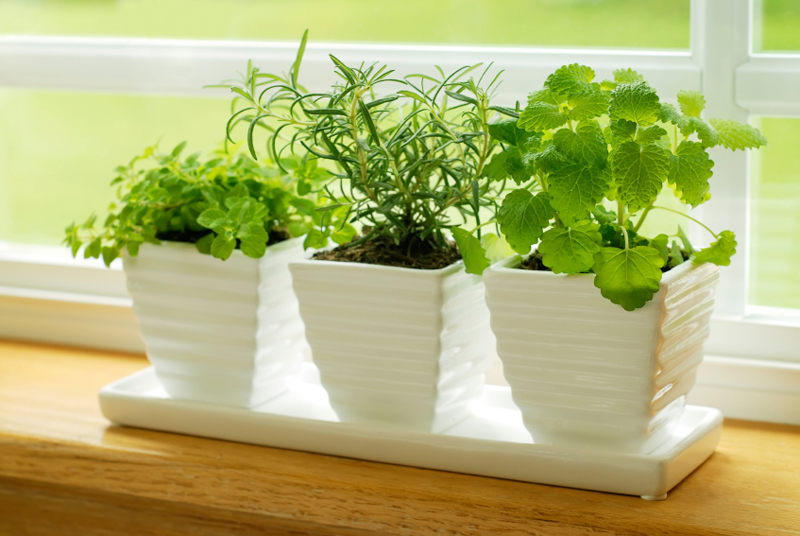
Blog

  • How to Grow Blueberries

    How to Grow Blueberries

    Blueberries are a delicious “superfood”.  They are full in antioxidants like anthocyanin and offer numerous health benefits.  They can get quite costly at the store, especially when they are out of season.  But since blueberries are a perennial shrub, there is no reason for you to be spending money over and over again at the store one these “super” fruits.  Here’s how to get started.


    1. Since blueberries have specific growing requirements, and people often have trouble getting conditions just right for them, they are one of the few crops that I would suggest growing them in containers. They will grow as high as 6 feet tall, so you will need a sizeable pot, and since they will last for years you want to get a nice pot.  A wooden pot, or a frost resistant terracotta pot would be best.  You can always start in a 1-gallon black plastic pot and transplant it later.
    2. The main requirement for blueberries that differs from most other crops in your garden is that they really love acidic soil. When you are starting out, it would probably be best to just purchase one bag of compost or soil that is specifically marketed for acid loving plants like blueberries.  As time goes on, you can always top dress with citrus peels as needed.  Despite what so many people will tell you, pine needles will not affect the pH of your soil.
    3. When your shrub starts to produce plump fruit the birds will likely beat you to it. So you will want to net it before they get a chance.
    4. After a few years you will want to start pruning the old wood back to increase new growth and increase production. Cut back about 1/3 of the old wood each year, alternating sections each time.

    The main thing to remember is the pH, they like a low pH.  Get that right and you will have years of blueberries without spending tons of money at the store.

    If you liked this, you might also enjoy…

    Become A Master Healer With This Revolutionary Course…

    Traditional Hindu Yoga for Weight Loss

    Improve Your Carpentry Skills Quickly and Easily..

  • DIY Starter Containers

    DIY Starter Containers

    Whether or not you grow in containers, it’s nice to start some crops on tables, or even indoors.  But for every plant that you end up transplanting into the ground, you could have started 10 or more that never made the cut.  That means that if you are going to start crops in containers, you are going to need a lot of starter pots, and can add up quickly.  Here are some ways that you can make starter pots from material that you already have and might even be throwing away.


    Egg Cartons

    An egg carton can provide a dozen little starter pots.  The carton should be left intact when starting, with only a small hole poked in the bottom of each depression.  Potting soil can be added until it is level with the outside of the carton.  When you want to transplant, you can cut each section free with scissors and plant the seedling in the ground while still in the carton, the carton will decompose without inhibiting growth.

    Toilet Paper Rolls

    While it may take longer to acquire a dozen toilet paper rolls than it does to go through a dozen eggs, you can still save them and use them to start in.  Toilet paper rolls are great for starting cuttings rather than seeds, for crops like comfrey or cholesterol spinach.  They too can be planted in the ground without removing the plant from the container.

    Soda Cans

    Pop cans for those that don’t say soda, but same thing.  The cans can be cut in two, holes can be made in the sides of what was previously the bottom of the can for drainage since the bottom is pretty thick.  The top doesn’t need this since it has an opening.  Be careful when using these since the sides can be sharp.


    Before going out and spending $30 or more on starter pots, try some of these to save a little money.  Gardening should not be expensive, and it doesn’t have to be if you improvise.

    If you liked this, you might also enjoy…

    Natural Healing Techniques Doctors Don’t Want You to Know…

    The Weight-Reducing Magic of Yoga…

    The Ultimate Woodworking Course..

  • How to Build a Bonfire Pit (Video)

    How to Build a Bonfire Pit (Video)

    If you live somewhere that doesn’t get too cold in the winter, a bonfire pit is a great winter project. You can enjoy some hot cocoa, marshmallows and starry skies at night.

    This is a pretty cool video of a very simple and basic fire pit model you could make using supplies from your local home improvement store. Just make sure to check your local laws on burning a fire outside, and if it’s cool, try it out!

    https://www.youtube.com/watch?v=mBzHX5Sf1fk

    If you liked this, you might also enjoy…

    Become a Master Healer at Home

    Anaerobic Weight Loss Fitness…

    The Ultimate Woodworking Course..

  • Don’t Be Without These Homemade Cough Drops

    Don’t Be Without These Homemade Cough Drops

    I never tire of homemade cold remedies. I got a pretty bad cold this week and really wished I had made some of these delicious homemade cough drops. A nasty cold is particularly awful to have during cold winter months.

    I will definitely be making more of these to have on hand the next time a cold hits. It’s simple, easy, and way better than your average chemical-filled cough drops. Regular store-bought cough drops often have artificial colorings and flavorings in them. They might be able to soothe your cough but they sure won’t help prevent cancer!

    Try this simple and wholesome recipe instead. Let’s get started.

    Ingredients:

    4 TBS coconut oil

    1/2 cup honey

    1 tsp ground ginger

    3/4 cup sugar

    1/2 tsp mint extract

    Directions:

    1. Prepare a loaf pan lined with parchment paper, lightly greased with coconut oil
    2. Over low heat, melt all the ingredients together in a saucepan
    3. Stirring constantly, slowly bring the mixture to a boil, at about 250 degrees. (This is called the “hardball” stage in candy making, the point at which the mixture will harden once it has cooled
    4. Carefully pour the mixture into the parchment-lined loaf pan and let cool until you can safely handle it, about 10 minutes. You won’t want to wait much longer
    5. Cut the hardened mixture up into whatever size pieces you like
    6. Individually wrap each piece in wax paper, aluminum foil or lightly dust with cornstarch to prevent sticking
    7. Store in an airtight container at room temperature. These will keep for about a year.

    Hope this is helpful for you this cold season! Would also make great gifts for any illness-prone relatives. Enjoy!

    Also, check out these — Holistic Medicine Basics

  • Growing Vegetables and Herbs Indoors

    Growing Vegetables and Herbs Indoors

    When the weather gets too cold for you to grow vegetables outdoors, you might want to be adventurous and try growing a few select vegetables and herbs indoors. If you live in an apartment, condominium or townhome without any outdoor space to grow a garden, you can grow some vegetables, herbs and even tropical fruit indoors if you create the proper growing environment.

    Sufficient light, either natural light from a door or windows or a grow light, is essential for an indoor vegetable garden to thrive naturally. There are some LED grow lights available on amazon.com that also make for a cost effective alternative (if you don’t have access to sutable light).

    Other than eight or more hours of light, the only thing you need to grow vegetables and herbs indoors is a good potting soil mix and containers with sufficient drainage. You’ll want to be selective when buying seeds or plants for your indoor garden. Carrots and radishes grow well indoors, but it is the round varieties that you want to plant in your indoor garden. Beans are another good choice for an indoor garden. Varieties such as dwarf French green beans and dwarf runner beans are good choices. Beans do well and look attractive when placed at the window of a sunroom. Cherry peppers and banana peppers can do well in a warm, sunny room. Pepper plants should be planted in a 3 to 5 gallon container. Garlic, green onions and ginger are easy and inexpensive plants to include in your indoor garden. Tomatoes can be grown indoors but they won’t produce as well as plants that are grown outdoors.

    If you have a sunny room, an enclosed heated porch or a sunroom that stays warm throughout the year, you might want to try growing something tropical. A dwarf lemon, orange or lime tree could thrive in this type of environment. Hanging baskets add beauty to your indoor decor. A basket filled with strawberries would be a conversation starter when people visit and a convenient source of fresh fruit.

    Herbs grow well on a sunny windowsill, on a kitchen counter or in any well-lit area. You can find containers designed specifically for creating an herb garden. A collection of individual containers placed around the house or grouped together as a decorative display would be an aromatic and attractive addition to your home. If you plan to plant several herbs in one container, you’ll want to group together herbs that require similar growing conditions. Rosemary, sage, thyme and oregano need a lot of sunlight and prefer relatively dry soil. Basil, cilantro and parsley are examples of herbs that can be grouped together because of their preference for moist soil. If you want to grow mint indoors, it is best to plant it in an elongated planter. Mints need space to spread out in order to thrive.

    Growing vegetables indoors is an interesting hobby to pursue. Don’t be afraid to experiment with different vegetables and herbs. You can start with plants that are almost foolproof such as lettuce, onions, garlic, ginger and basil and expand your indoor garden as your experience and confidence level increases.

    If you want to take your garden to the next level…

    Watch this video on self replishing food production.
    It is a great resource if you are ready to start growing more of your own food.
    Garden smarter, not harder.


    If you liked this, you might also enjoy…
    Learn to Heal and Treat Illnesses Naturally…
    An Ancient Secret to Slimmer Waists…
    Learn to be a Master Carpenter at Home..

  • Getting the Kids Involved with Homesteading

    Getting the Kids Involved with Homesteading

    If you have kids in the modern world, you probably know how quickly and easily they can become attached to electronic devices and the “easy” way of doing things. Of course, you can relate, as you are reading this on the Internet. However, you know how important it is for the kids to strike that balance. They can enjoy modern life, but they also need to learn some important skills that will last them a lifetime.

    The key to getting them interested with homesteading is to make it interesting for them. You can do this in many ways. Make the chores fun. Kids tend to like animals, so have them help with the feeding chores for animals. Parents should be with the small children, even when feeding animals that are docile and safe. Chickens can get feisty and goats can take off fingers, so always stress safety.

    As the kids get older, they can have more complicated chores. These will help them to learn responsibility, and it will help them connect more to the homestead. In addition, make sure you are teaching the kids some of the other valuable skills that they aren’t going to get at school. Teach them to sew and cook for themselves. Teach them first aid and how to milk a goat. Teach them how to clean fish and how to hunt.

    You already know that many of these skills are simply dying out with the newer generations. Many young people today barely have a grasp of where their food comes from, and that’s a shame.

    When the kids are involved with homesteading, you will find that they are more involved with the family as well. Having a family that remains close is a difficult thing today. Homesteading is one of the ways to bring back the family.

    If you liked this, you might also enjoy…

    Holistic Healing Secrets From the Masters…

    The Weight-Reducing Magic of Yoga…

    The Ultimate Woodworking Course..


  • Demonstration of Proper Tomato Pruning

    Demonstration of Proper Tomato Pruning

    Pruning is a great way to control the growth of your plants.  It can help you increase yield and reduce disease by focusing your plant’s growth.  One crop that pruning is a must for, but often gets neglected is tomatoes.  Tomatoes can be difficult to prune because it is not always visually obvious which portions should be targeted for pruning and which should be left alone.  This video does a great job of show, and explaining just what to remove and why, complete with close ups.


    If you liked this, you might also enjoy…

    Natural Healing Techniques Doctors Don’t Want You to Know…

    The Weight-Reducing Magic of Yoga…

    The Ultimate Woodworking Course..

  • Easy Pickled Garlic

    Easy Pickled Garlic

    Pickling garlic is a great way to preserve it for the winter, or if you don’t grow garlic, to ensure that you always have it on hand. You may have seen minced garlic or even whole garlic cloves in the store, but those typically have lots of preservatives in them or take on the flavor of whatever they’re preserved in. This recipe isn’t like them.

    This method will keep your garlic tasting fresh, and just like garlic. Since it is preserved in vinegar, when you’re ready to use it, you can simply rinse off the vinegar and use as you would fresh cloves of garlic.

    Before we dive into the recipe, I wanted to share this awesome video for a super quick and easy way to peel an entire head of garlic that will make this recipe go a lot faster:

    Ingredients: 

    4 head of garlic, peeled using method from video above

    2 half-pint mason jar

    1-2 cups vinegar

    *Note: these are rough estimates, since heads of garlic can vary. The idea is to have enough garlic to fill your jar of choice, and enough vinegar to fully immerse the garlic once in the jar. 

    Directions: 

    1. Once your garlic is all peeled, trim any brown spots off and put in a large bowl with a little soap to get them clean.
    2. Rinse thoroughly in a strainer
    3. Bring your vinegar to a boil on the stove
    4. Dispense your garlic out into the jars
    5. Pour the hot vinegar over the jars, and screw the lid on tight
    6. Let the jars sit out on the counter overnight, until they are room temperature
    7. Once they have fully cooled, transfer to the refrigerator for long-term storage

    This garlic will keep in the fridge for up to a year. Use as you would regular garlic, simply rinsing off the vinegar with cold water if you want to avoid the taste of vinegar in the dish you are preparing. Enjoy!

    If you liked this, you might also enjoy…

    Become a Master Healer at Home

    Anaerobic Weight Loss Fitness…

    The Ultimate Woodworking Course..